Windows 11 File History: How to Add Folder for Backup
Get the best of the Windows 11 backup feature
3 min. read
Updated on
Read our disclosure page to find out how can you help Windows Report sustain the editorial team. Read more
Key notes
- Microsoft Windows 11 includes the File History tool, an important tool for backups.
- You would be able to add folders to this tool as network locations to save and store your backups.
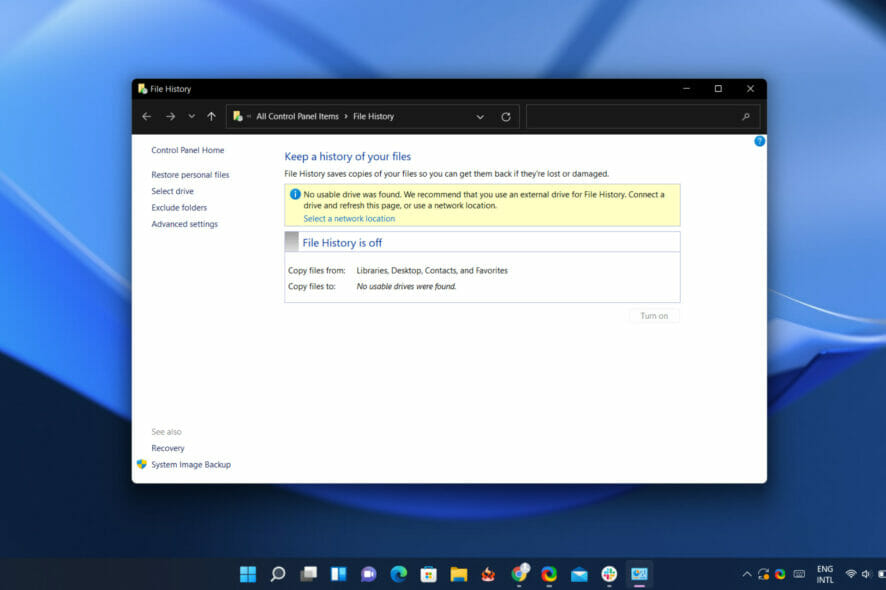
Have you ever heard of the Windows 11 File History add folder function? We will like to explore it in this article and include all the essential elements.
Backing up information is an essential aspect of daily computer use. This is because a lot can get lost or destroyed, and backup is often the best practice to guard against this.
Many valuable elements of the Windows 11 OS guarantee the proper backing up of your files and documents. Specifically, let us look at the Add Folder OS option.
Where are File History settings in Windows 11?
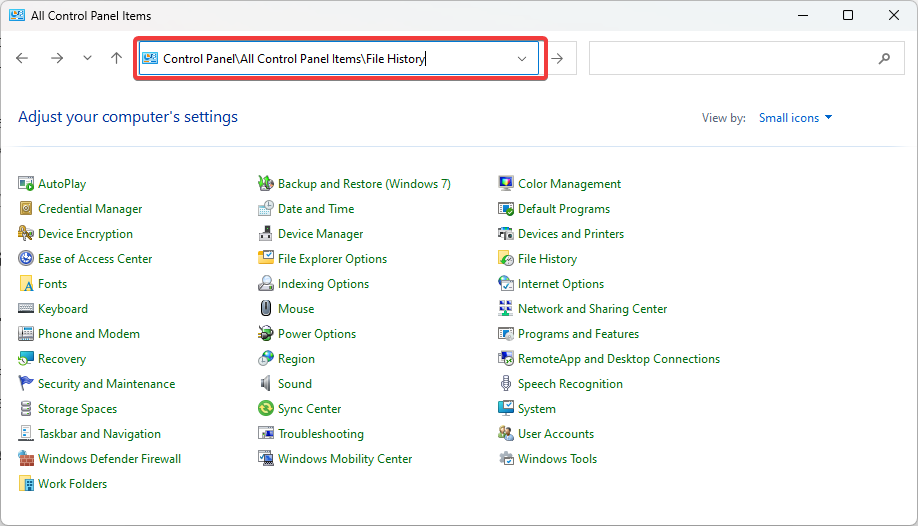
On the new OS, you will be able to find these settings in the Control Panel in the path below:
Control Panel\All Control Panel Items\File History
This function comes in very handy and is vital for the following:
- Auto backups – This saves you the time and energy to perform repetitive tasks on your devices.
- Great for storage conservation – Since these backups could be linked to an external storage unit, you are not tasking your primary computer storage with any additional load.
- Personal files storage – Unlike System Restore, which holds a complete image, the backup allows you to choose personal files that you consider essential.
- Easy file recovery – If you accidentally delete a file or it becomes corrupted, you can quickly restore a previous file version from the backup.
- Versioning – File History keeps multiple versions of your files, so you can return to an earlier version if needed.
- Flexibility – You can choose which folders to include in the backup and where to store the backup files, such as an external hard drive or a network location.
With this out of the way, let us explore adding folders to your File History on Windows 11.
How do I add a folder to File History?
- Press Windows + R to open the Run dialog, type control, and hit Enter.
- Navigate to the path below or simply copy and paste it on the address bar of your Control Panel and hit Enter:
Control Panel\All Control Panel Items\File History - Then, connect your external storage to your PC.
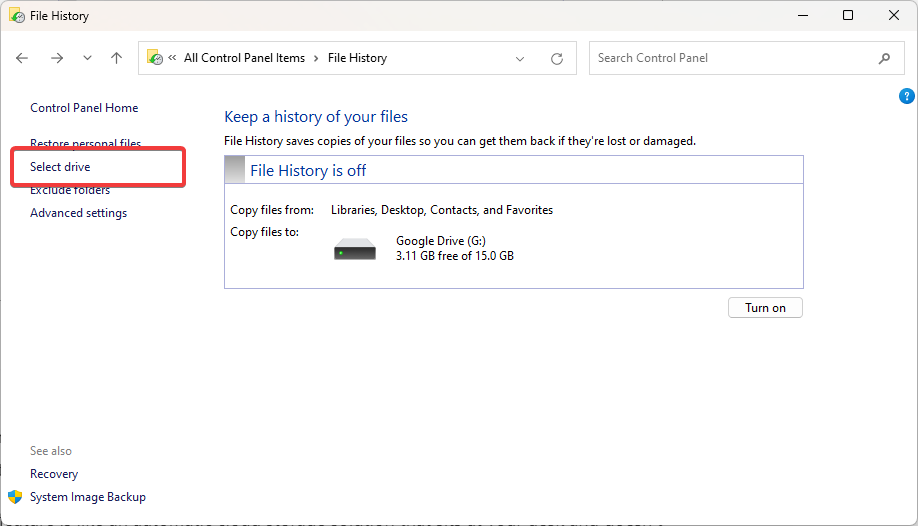
- Alternatively, you may click Select drive on the left pane (this is the correct choice if you would instead use a network location).
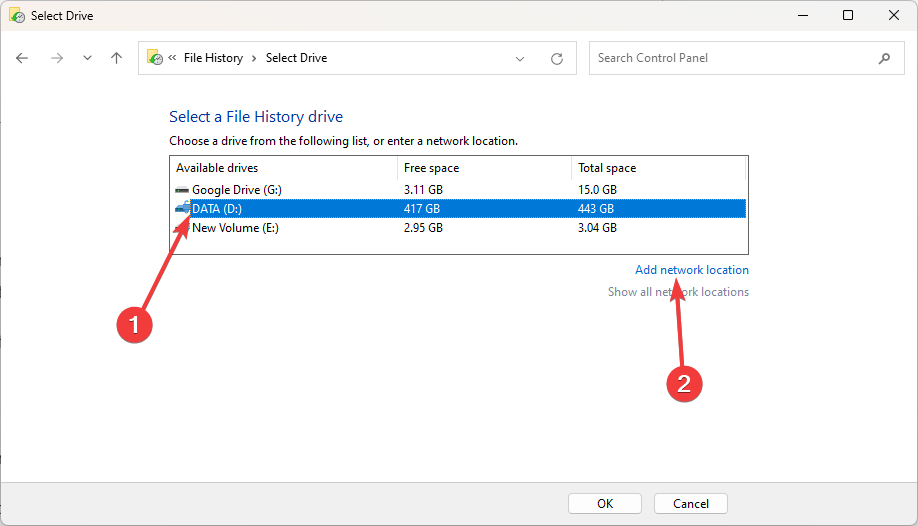
- Select your drive and click Add network location.
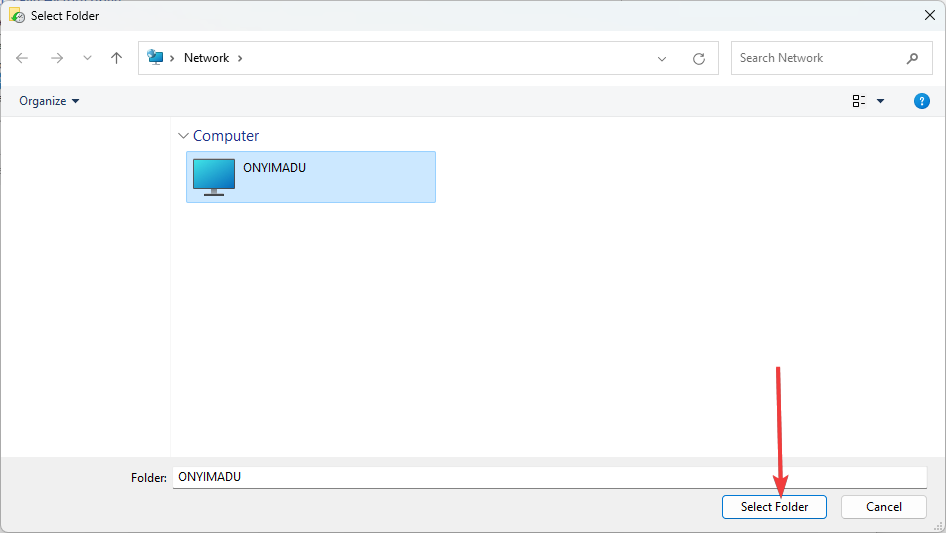
- Select the Network folder to add to File History and click on Select Folder.
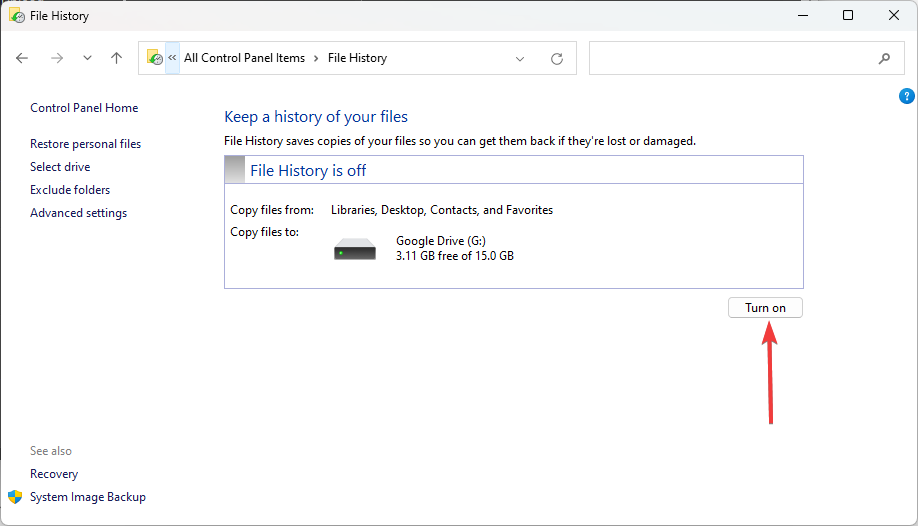
- Click OK, then select the Turn on button.
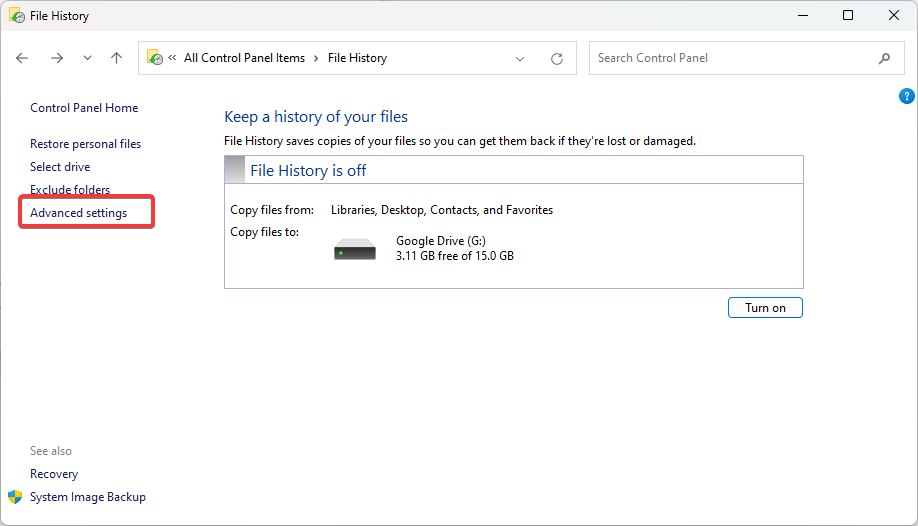
- Optionally, you may click on Advanced settings on the left pane.
- Choose your preferred settings for Save copies of files and Keep saved versions; the defaults may be just fine.
- Finally, click on Save changes.
If you have followed the steps above, you should have successfully been able to add a folder to your Windows 11 File History.
File History is an essential feature in Windows 11 that allows you to automatically back up essential files on your personal computer to an external drive or network location.
By regularly backing up your files, you can ensure that you have a copy of important documents, photos, and other data in case your computer’s hard drive fails or your files become corrupted.
Finally, let us know in the comments if you have any luck with this.



User forum
2 messages