Print Screen Not Working on Windows 11: Ways to Fix Screenshot Problems
Fixing all issues related to Prt Sc key and related screenshot/printscreen issues
6 min. read
Updated on
Read our disclosure page to find out how can you help Windows Report sustain the editorial team. Read more
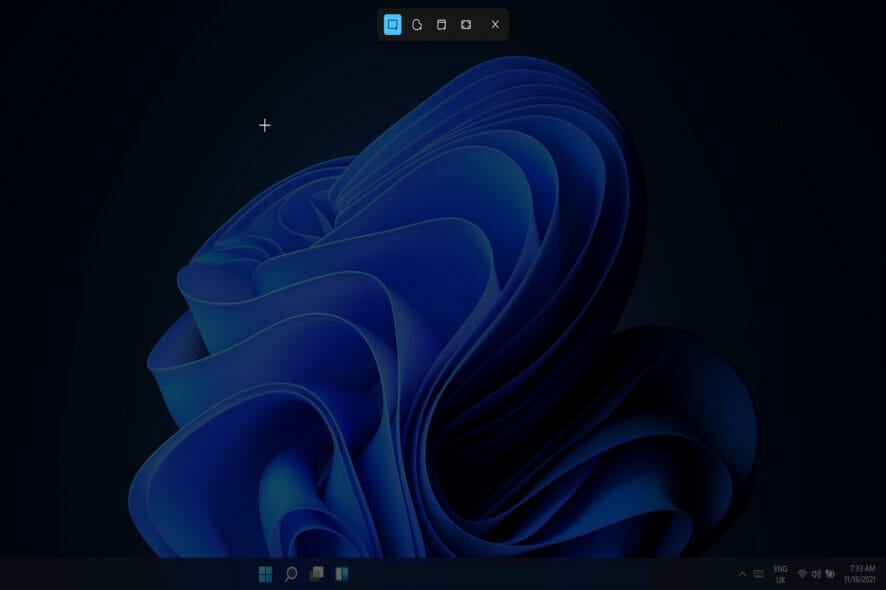
You’ve come to the right place if Print Screen isn’t working on Windows 11. Whether you use Snipping Tool, Cut & Snip, or another app, we’ll help you figure it out.
Why can’t I take screenshots anymore?
It might be because of broken system files. You can fix this by using dedicated software or the built-in Windows repair tool. Outdated keyboard drivers can also cause this error.
Regardless, following the steps below will help you fix it:
How do I fix the screenshot tool not working on Windows 11?
1. Check the date and time set
- Press the Windows key + I to open the Settings app.
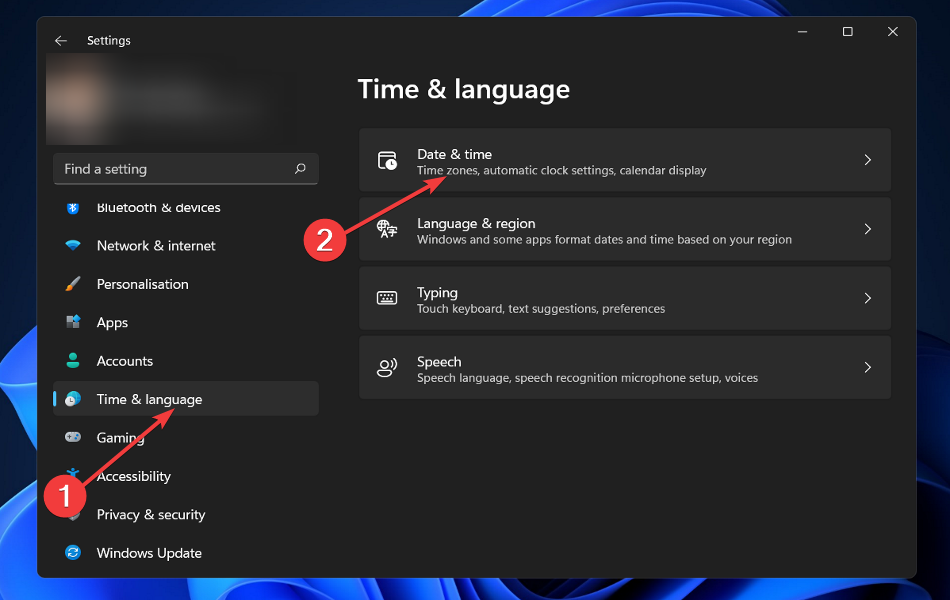
- Select the Time & Language option in the left pane and select Date & Time from the right panel.
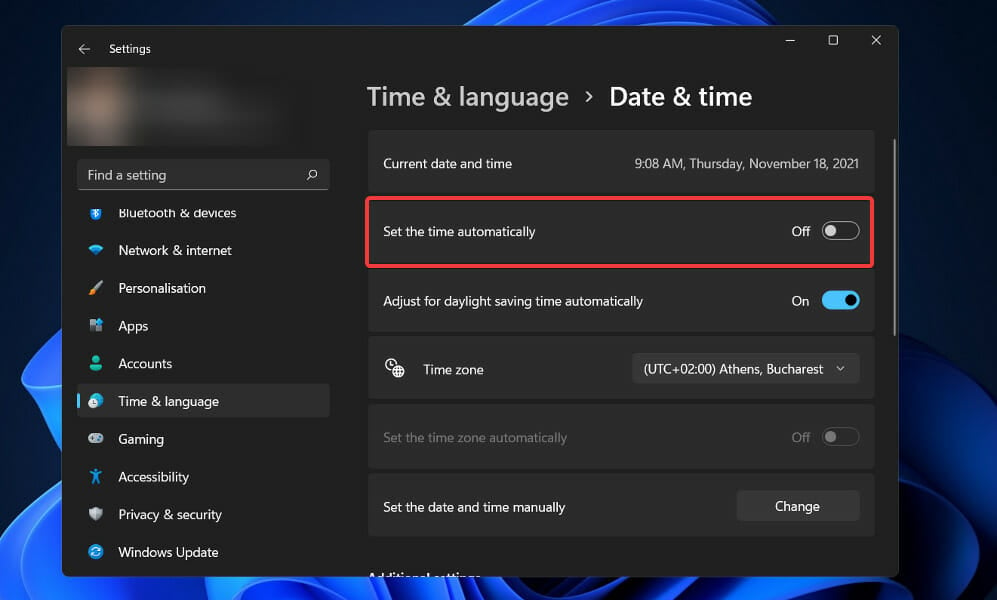
- If the Set time automatically option is switched on, turn it off.
- Select the Change button next to Set date and time manually.
- Change the date to October 31 or before, then set it back to the latest current date.
By manually resetting the time and date, the Snipping Tool reconfigures its settings, therefore correcting any potential problems that may have occurred previously.
2. Restart the app
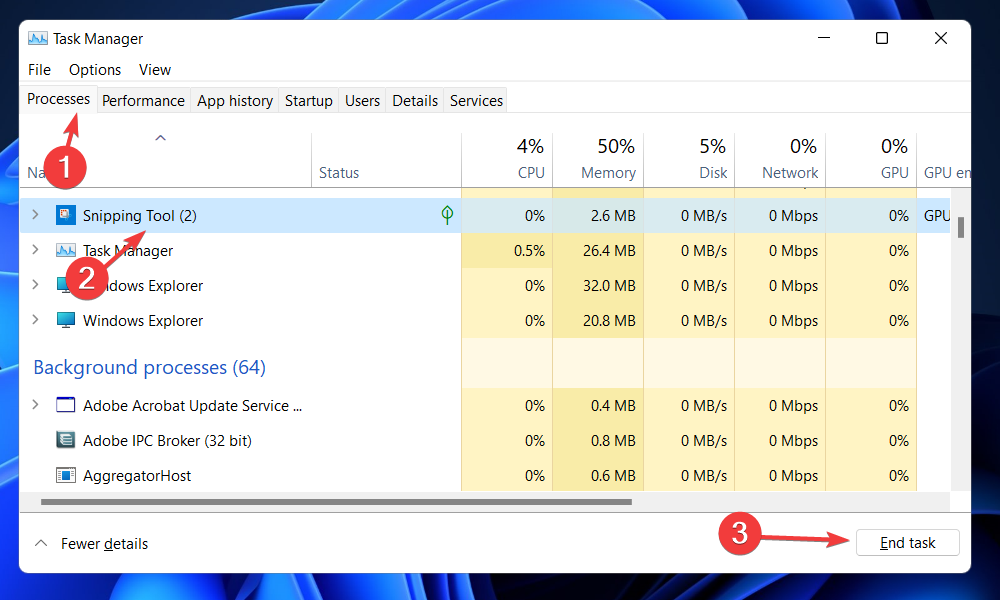
- Press Ctrl + Shift + Esc on your keyboard to launch the Task Manager app.
- Select the Snipping Tool app under the Process tab, and click the End task button at the bottom.
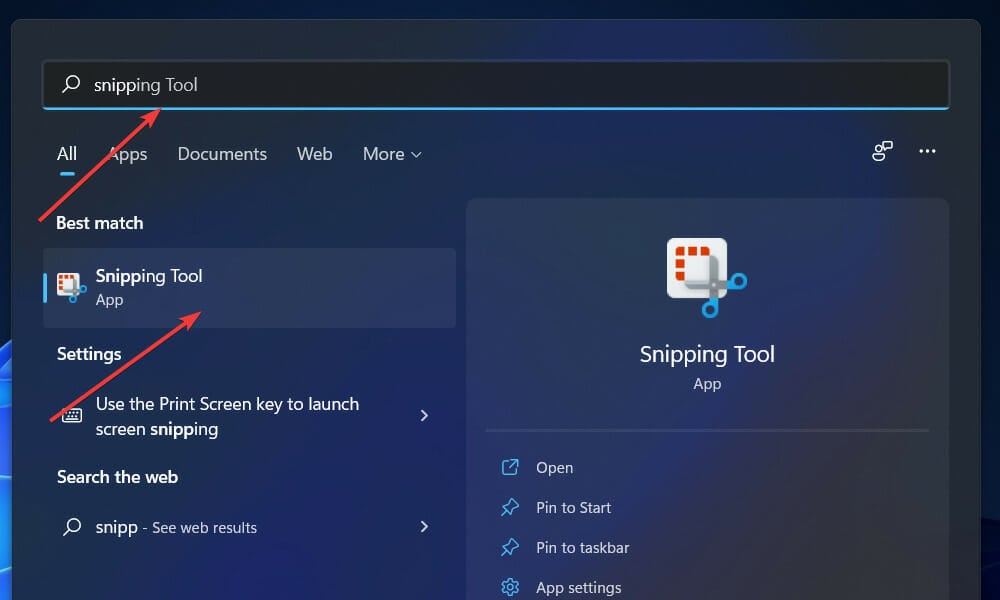
- Now press Windows + S to open the search function and type in snipping tool to re-open it.
Once the program has been relaunched, you have the option of either closing it or leaving it open in the taskbar. To take screenshots with it, hit the Windows + Shift + S keyboard shortcut combination.
3. Update the keyboard driver
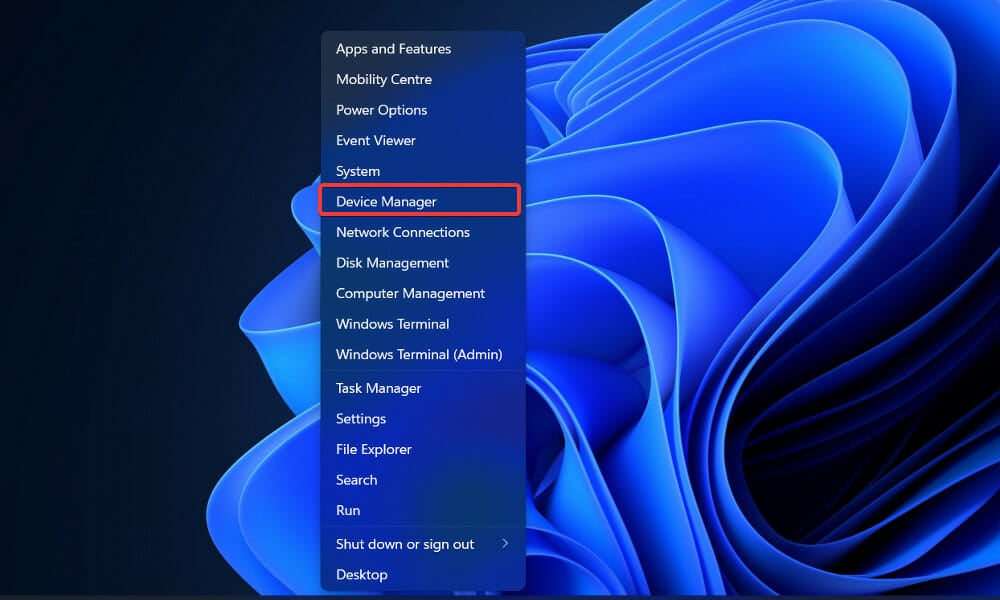
- Press the Windows key + X and choose Device Manager from the shortcut menu.
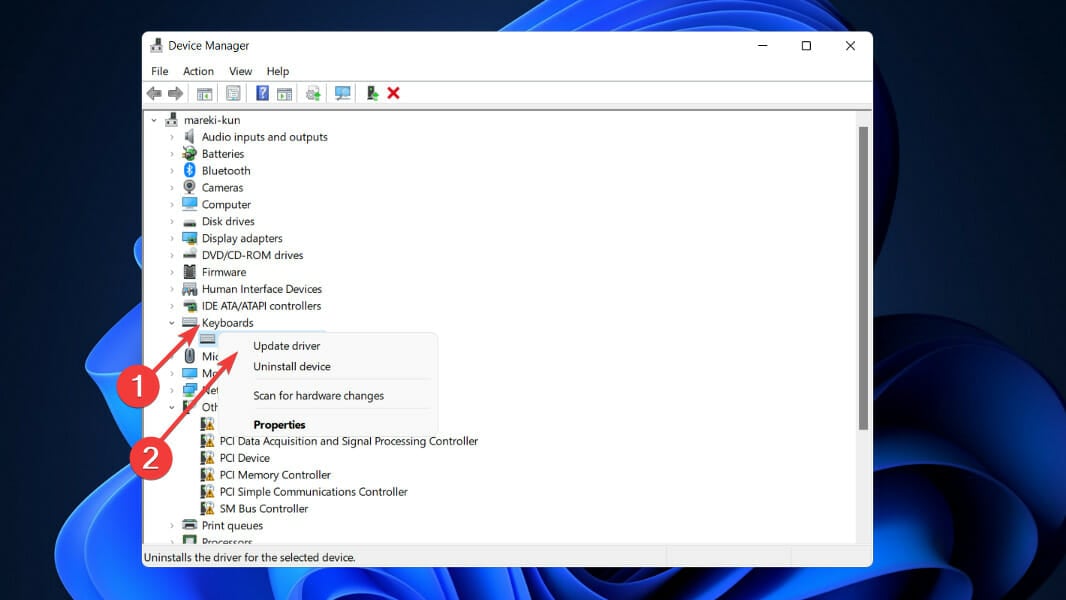
- Expand the Keyboards directory.
- Right-click on Standard PS/2 Keyboard and select Update driver.
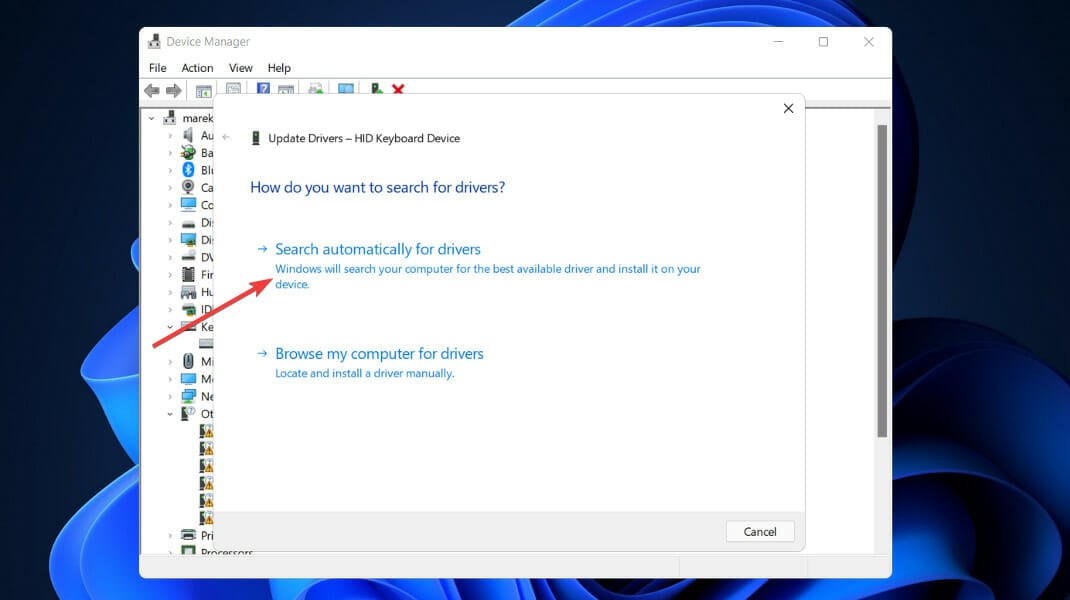
- Select Search automatically for updated driver software and wait for Windows to automatically install the latest driver.
After the update procedure is complete, restart your computer and check to see if the print screen key is now operational.
4. Allow the Snipping Tool to run in the background
- Press the Windows key + I to open the Settings app on your PC.
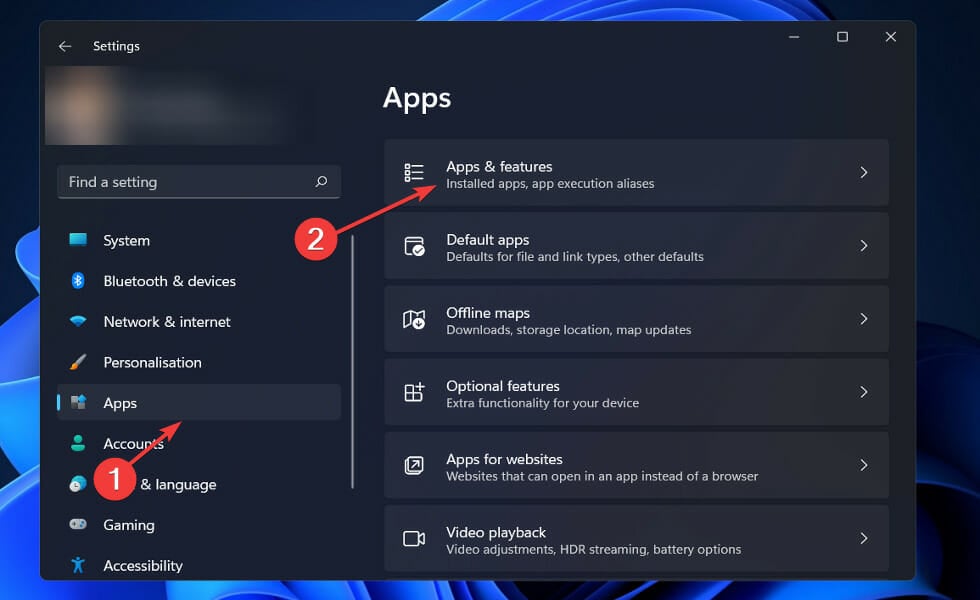
- Select the Apps tab on the left and click on Apps & features from the right panel.
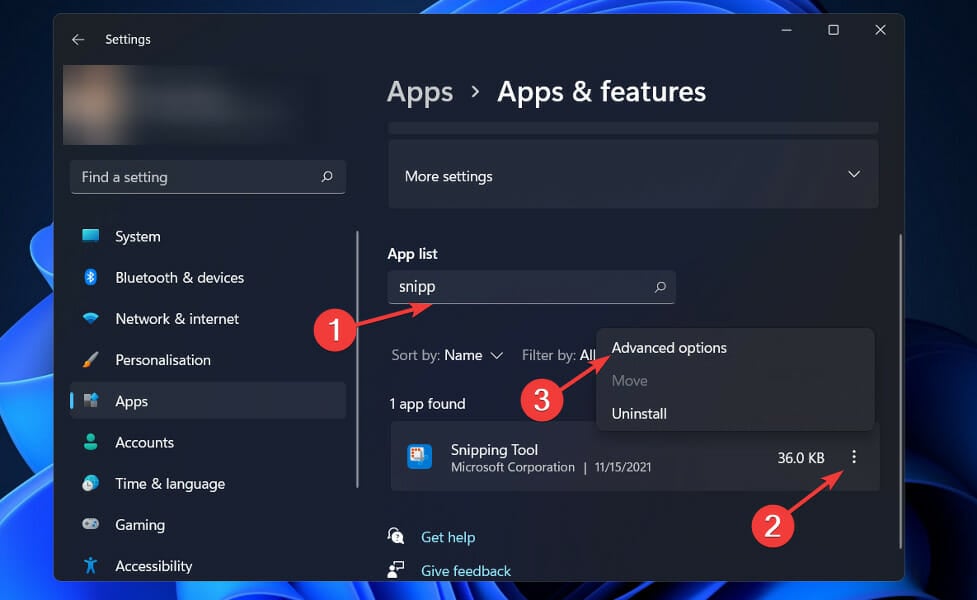
- Use the search box to locate the Snipping Tool app quickly. Now use the three-dot menu on its right side to open Advanced options.
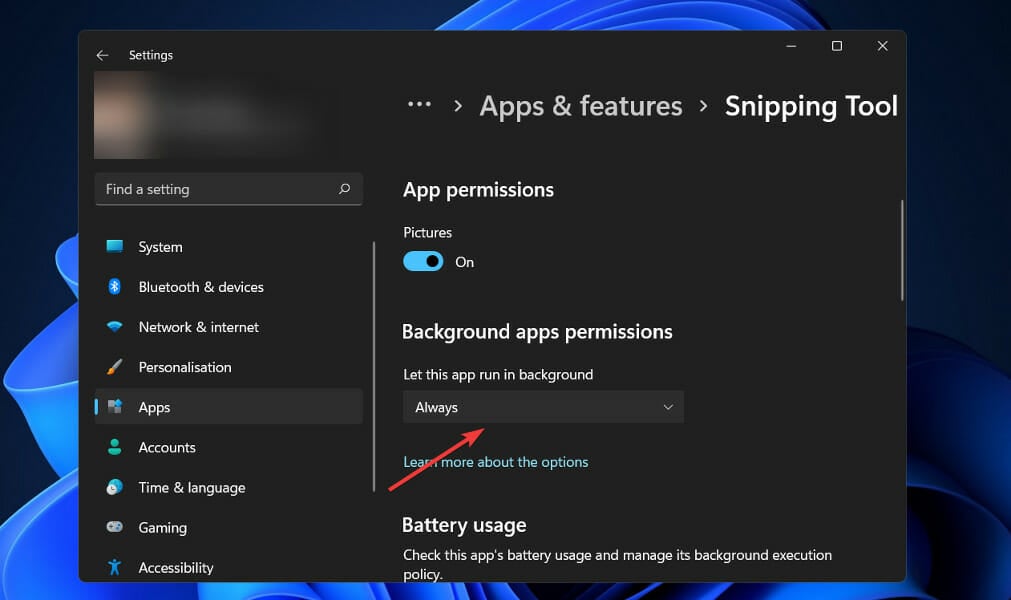
- Under Background apps permission use the dropdown menu to choose Always from the list.
5. Repair the app
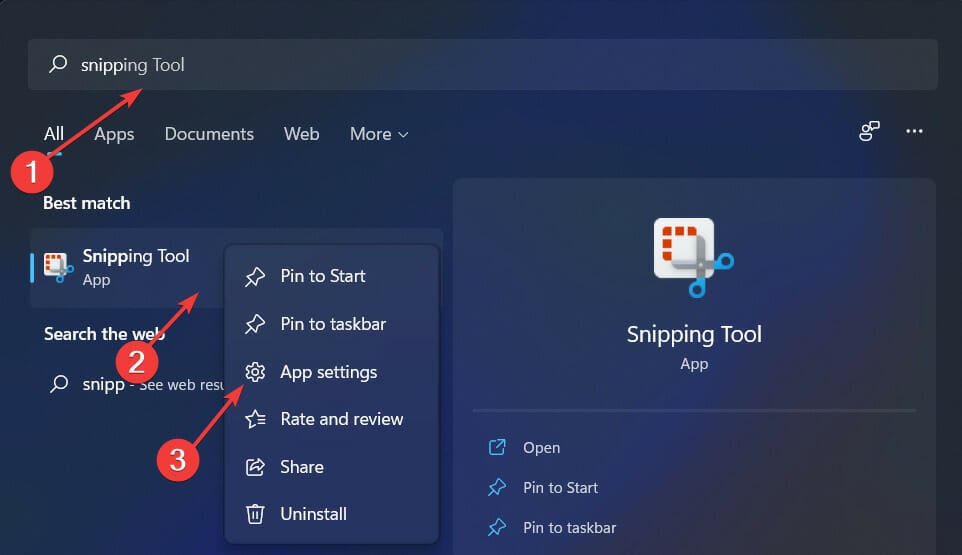
- Tap the Windows key + S to open the search function and type in snipping tool.
- Right-click on the top result, and choose App settings.
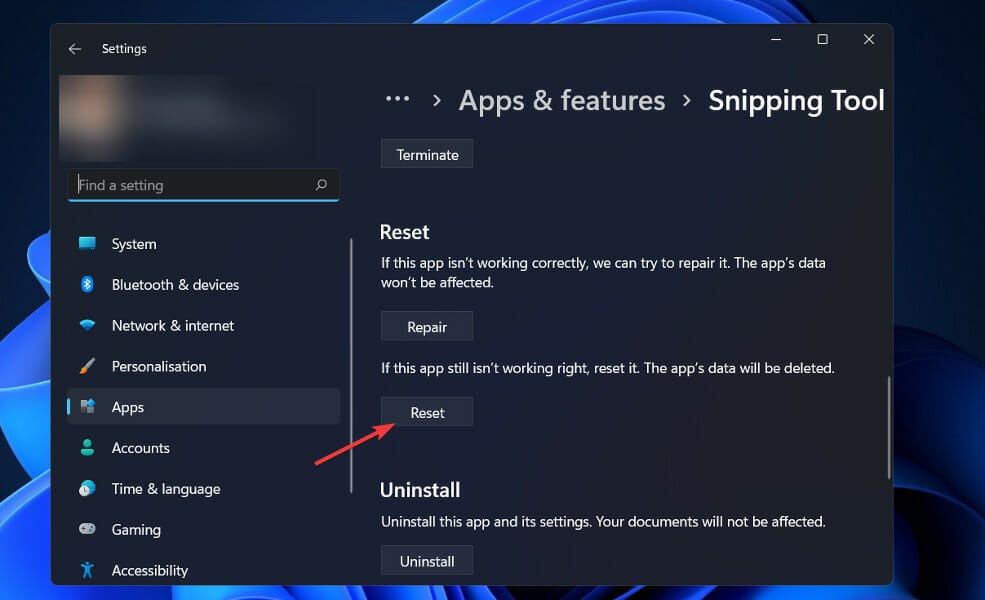
- Next, navigate to the Reset section and click on the Repair option.
If mending the app doesn’t work, you may try resetting it by going to the same section and hitting the Reset button. It’s worth noting that resetting the app would wipe out all of your data.
6. Use other hotkey combinations
If hitting the single PrtSc key does not yield results, you might try the keyboard shortcut buttons listed below:
- With the Alt key + PrtSc, you can capture the currently chosen window and save it using Paint or another image-editing tool of your choosing.
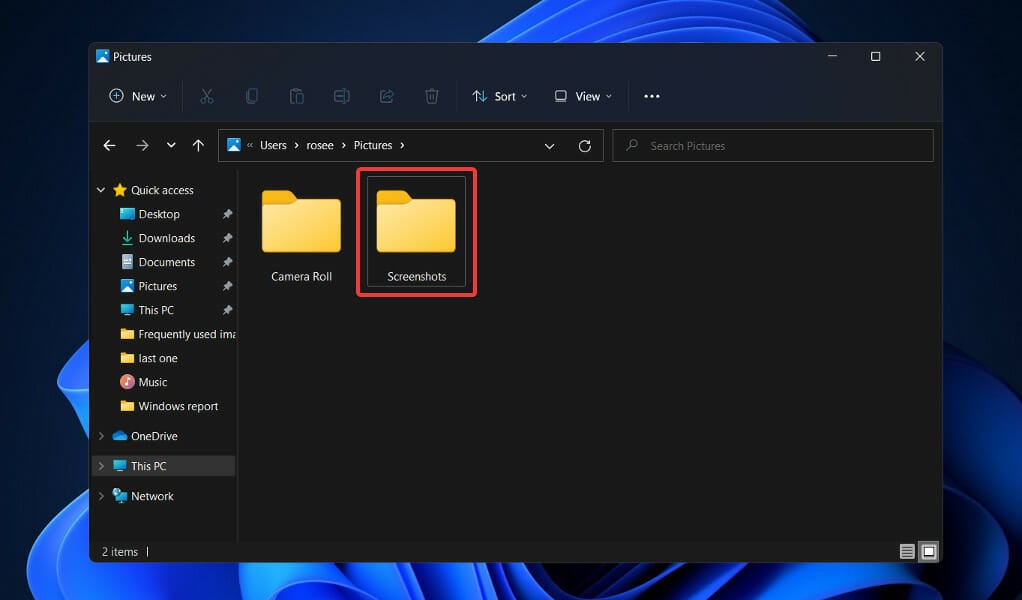
- Likewise, a screenshot will be taken by pressing the Windows + PrtSc hotkeys combination, which will be saved to the Screenshots folder with the name Screenshot (NUMBER).
- This folder can be found in the Pictures folder on your PC. Please keep in mind that on laptops, the combination Fn + Windows + PrtSc should be used.
7. Check the F lock key
Some keyboards contain an F Mode or F Lock key, which can be useful. If they are turned off, the print screen key will not work properly. For the print screen key to function, you must first enable the F Mode or F Lock keys by pressing them.
8. Run the SFC scan
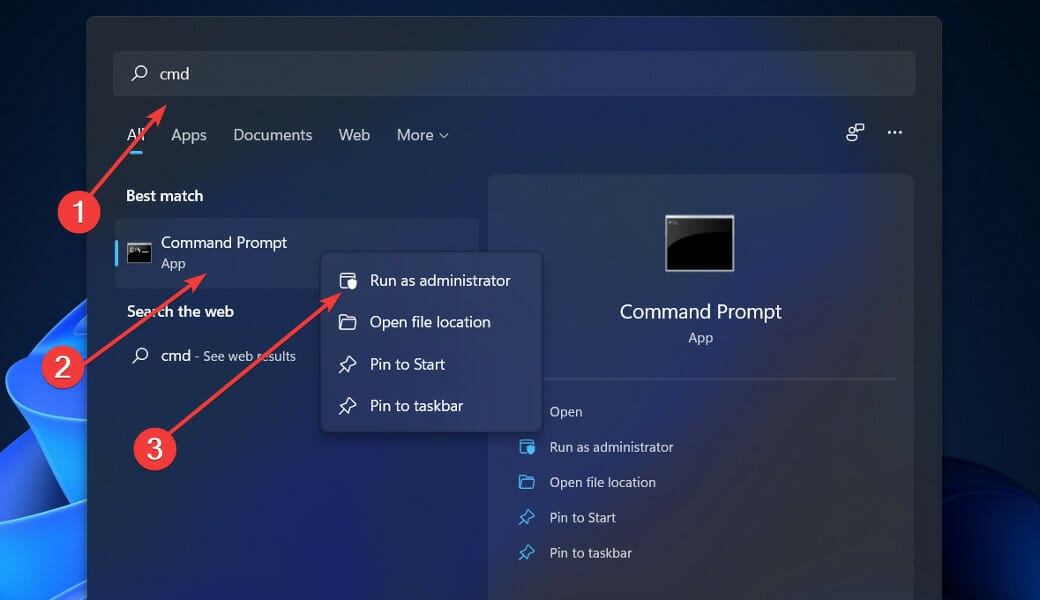
- Press the Windows + S keys then search for cmd and right-click on the top result to open it as an administrator and get full privileges.
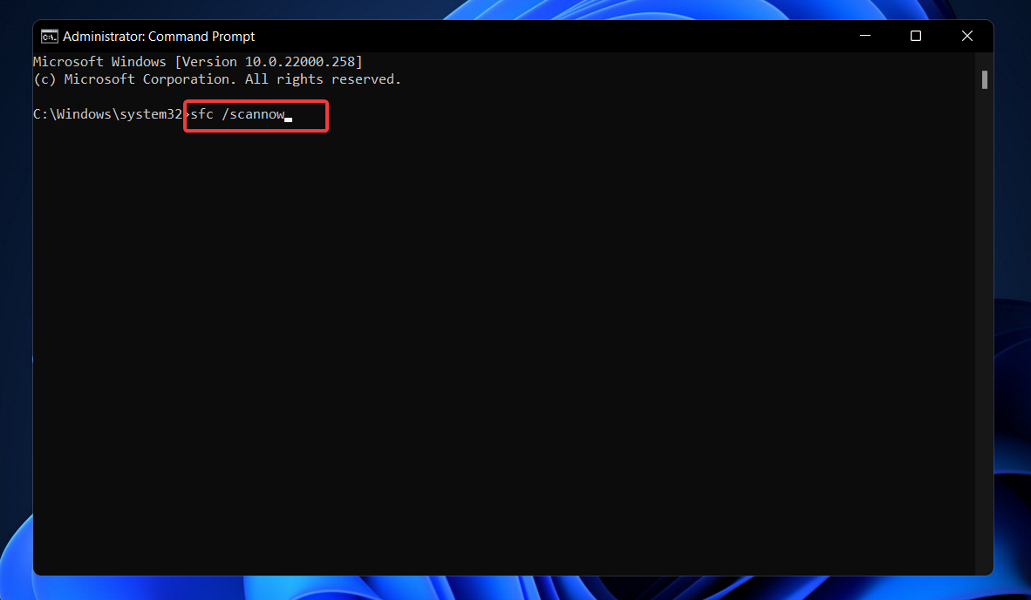
- Type or paste in the CMD prompt the following command then press Enter:
sfc /scannow
Wait for the procedure to be completed. Restart your computer and run the Snipping Tool software to see if everything is operating properly.
How do I change where screenshots go in Windows 11?
With the Snipping Tool, you might not need to use a third-party screenshot application anymore. Everything on the screen can be simply captured with the built-in app.
The location of screenshots taken with the built-in tool on Windows 11 is this directory: C:Users<user name>PicturesScreenshots
However, you can move the default location to a different folder for easy access or if the Windows 11 screenshot is not saving.
- To begin, use Windows Explorer and navigate to the directory:
C:Users<user name>PicturesScreenshots
 NOTE
NOTE
- Right-click the Screenshots folder in the photos directory and choose Properties from the popup menu. The next step is to go to the Location tab and press the Move button.
- Select the destination folder you want to use as your default screenshot folder in the File Explorer box and click Select Folder.
- You’ll get a dialogue box asking if you want to move all of your files from the old location to the new one, you’ll need to select Yes.
Those programs, including Snipping Tool, that used the Screenshots folder to store photographs by default will now use the newly selected destination directory after completing the aforementioned instructions.
Why is PrtSc not working?
If the PrtSc key is not working, it might be down to the F Mode or F Lock keys on your keyboard. This is because these keys disable the print screen key.
Another known cause of the issue is outdated drivers. We have shown how to fix these issues in this guide. So, be sure to check out the solutions.
As you can see, certain features in the new OS have changed dramatically, while others haven’t. If you want to learn more about the subject, here’s a full comparison of Windows 10 vs Windows 11.
If you are interested in finding out more about screenshot tools, check out our guide on how to take a screenshot in Windows 11.
Comment below and tell us the screenshot tool you are using and which solution you found to be the most effective.



User forum
1 messages