All the procedures that worked on Windows 10 will do nicely on this iteration too.
One important upgrade is the Snip & Sketch tool which will gradually replace the Snipping Tool.
You can also use the Game Bar or the dedicated Prt Sc key to take a screenshot on Windows 11.
XINSTALL BY CLICKING THE DOWNLOAD
FILE
Fix Windows 11 OS errors with Fortect:
Download Fortect and install it on your PC
Launch the tool and Start scanning to find broken files that are causing the problems
Right-click on Start Repair to fix issues affecting your computer’s security and performance
Download NowFortect has been downloaded by 0 readers this month,
rated 4.6 on TrustPilot
Taking a screenshot on Windows 11 is quick and easy, whether you want to grab the whole screen, a specific window, or just a part of it. In this guide, we’ll show you the fastest and most efficient ways to take screenshots using built-in tools and shortcuts
The PrtSc button is a core Windows function that’s here to stay. It’s a dedicated key on all Windows keyboards that will essentially capture whatever is displayed on your desktop at that particular time.
In this matter, Windows 11 is no different than its predecessor and it responds to the same command.
The Print Screen function can be used in different ways depending on what you want to achieve. Note that this method works for those who wonder how to screenshot on Windows 11 Pro as well.
Print Screen key
You can use the Print Screen button alone. Do keep in mind that this method will copy your screenshot to the clipboard, which means that you’ll lose any other information previously stored there.
One more thing that’s worth mentioning here is that you won’t be able to select a particular area of the screen.
Windows key + Print Screencombination
This key combination will also capture the entire screen, but it has a twist. Instead of copying your screenshot to the clipboard, it will save your image in the Pictures/Screenshots folder.
Press Windows + Shift + S to launch Snipping Tools.
Here you have four options as follows:
Rectangular mode – Allows users to capture the desired rectangular portion as a screenshot.
Freeform mode – With this one, as the name suggests, you can take capture a screenshot of any shape.
Window mode – The current application or program is captured.
Fullscreen mode – A fullscreen screenshot is taken, which includes the taskbar.
To take a screenshot, choose the desired mode, use the cursor to select the desired portion, and click to capture.
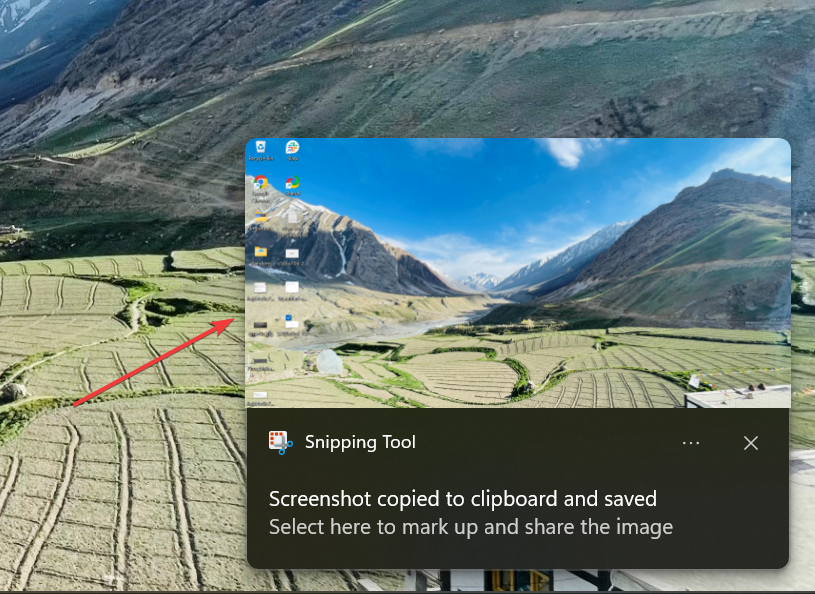
As soon as you take a screenshot using Snipping Tools, it’s saved to the clipboard and a notification appears at the bottom-right corner. Click on it to annotate or edit the screenshot.
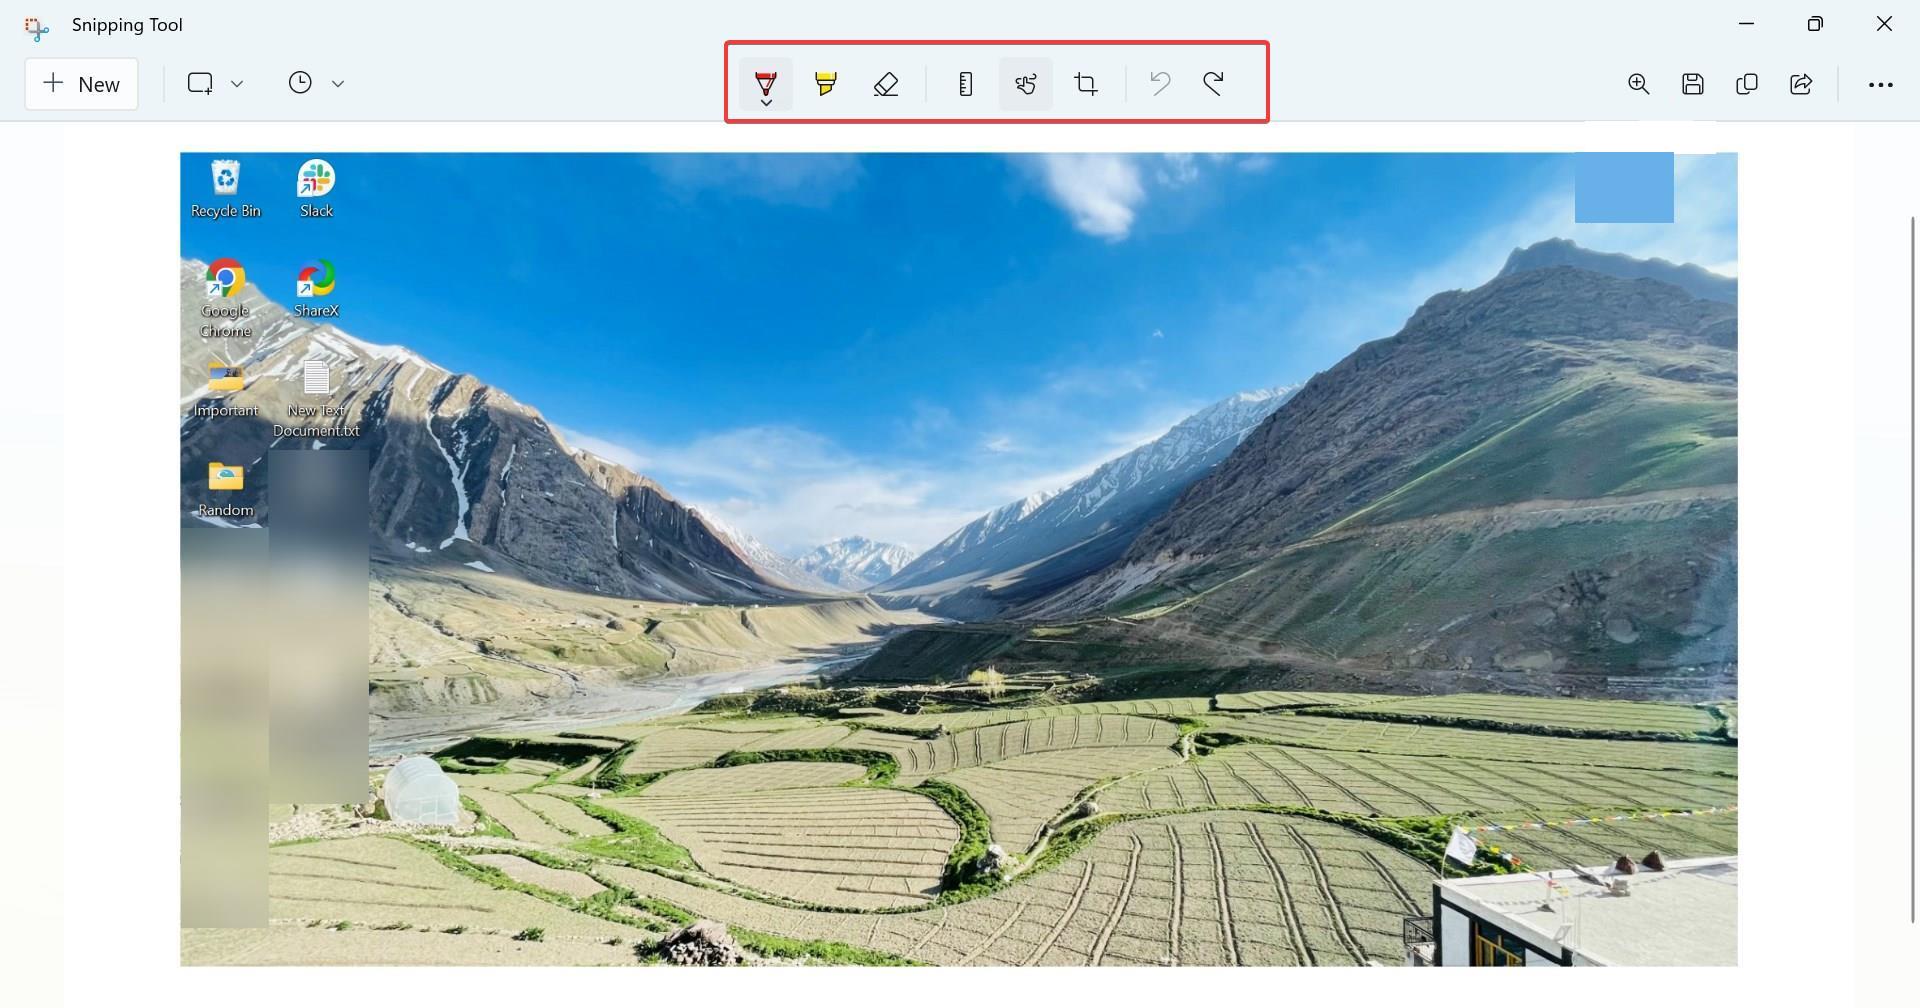
Now, you have the screenshot in the editor. Use the various options here to edit it, for instance, the Ballpoint pen and Highlighter.
Once done, click on the Save icon.
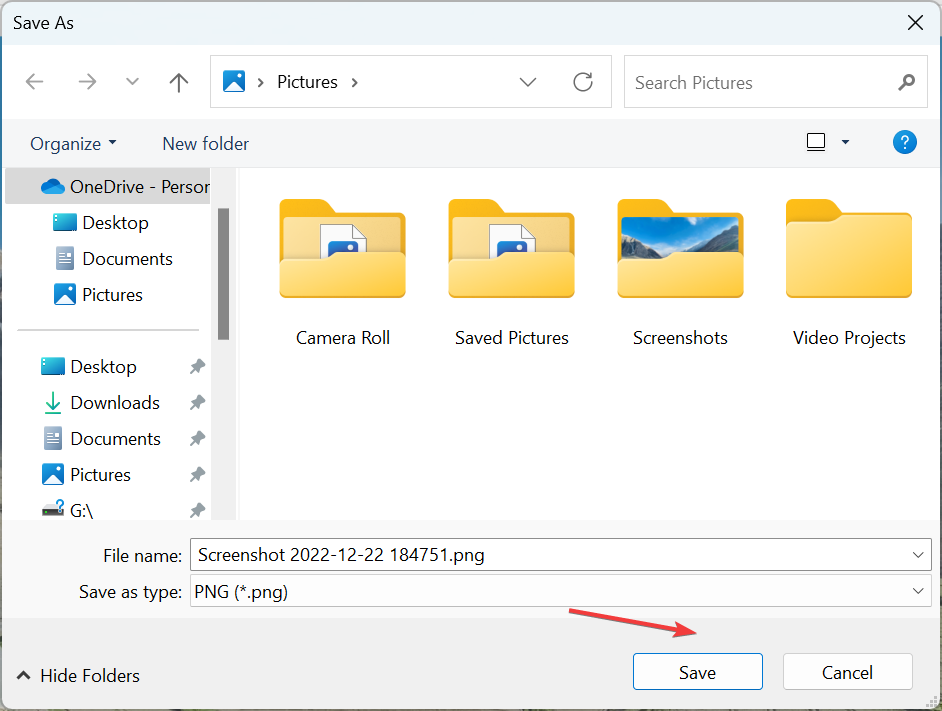
Navigate to the desired location for the file, and again click on Save.
2.2 Set a timer to take the screenshot
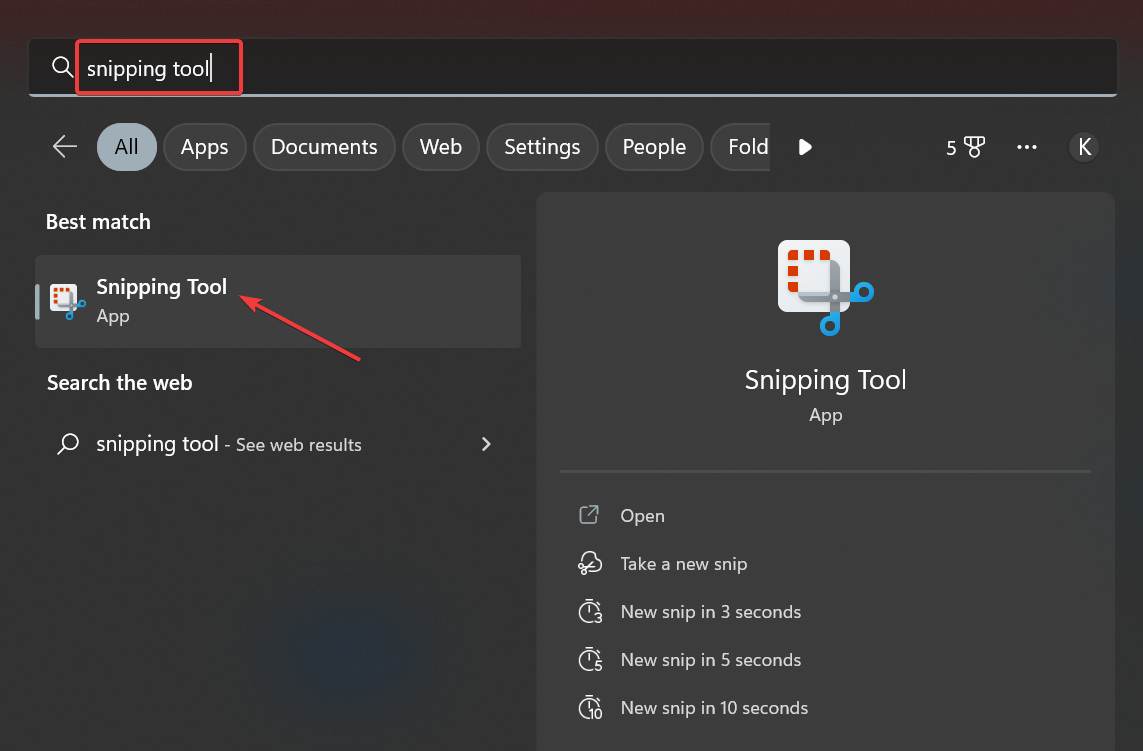
Press Windows + S to open Search, type Snipping Tool, and click on the relevant search result.
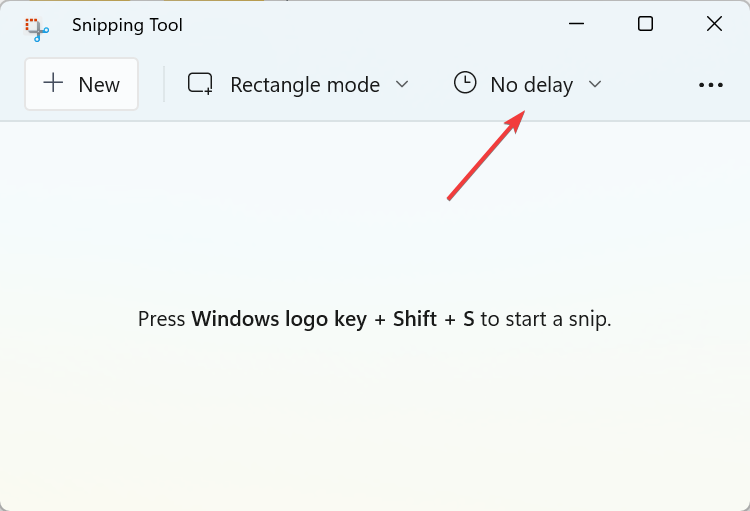
Click on the No delay option.
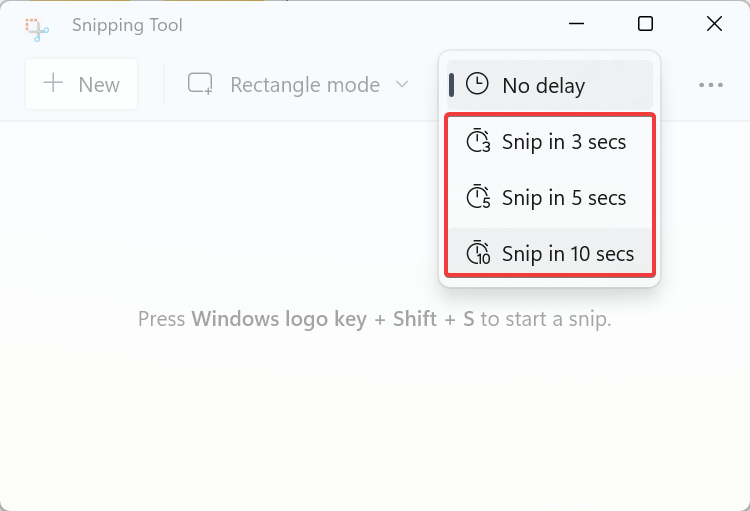
Choose a time here, either 3, 5, or 10 seconds.
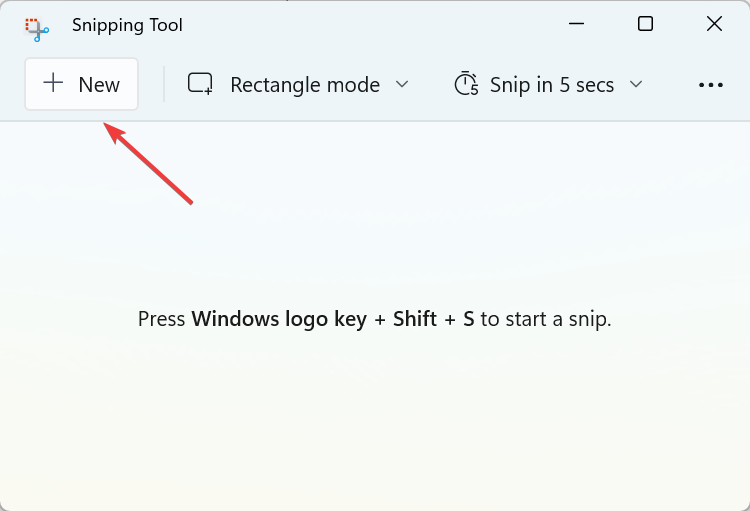
Now, click on New and the Snipping Tools will automatically appear after the chosen period.
That’s it! In Windows 11, Microsoft integrated Snipping Tools and Snip and Sketch into one, and it got the former’s name. The app now offers a lot more features and is handy to use.
Also, you could set a timer to take screenshots of specific actions that can’t be captured instantaneously.
3. Use Snip & Sketch
A great option for taking a screenshot in Windows 11 is using the dedicated tool called Snip & Sketch. It is a handy built-in app. This is the new app that replaces Snipping Tool. Here is how to use it:
1. Open Snip & Sketch
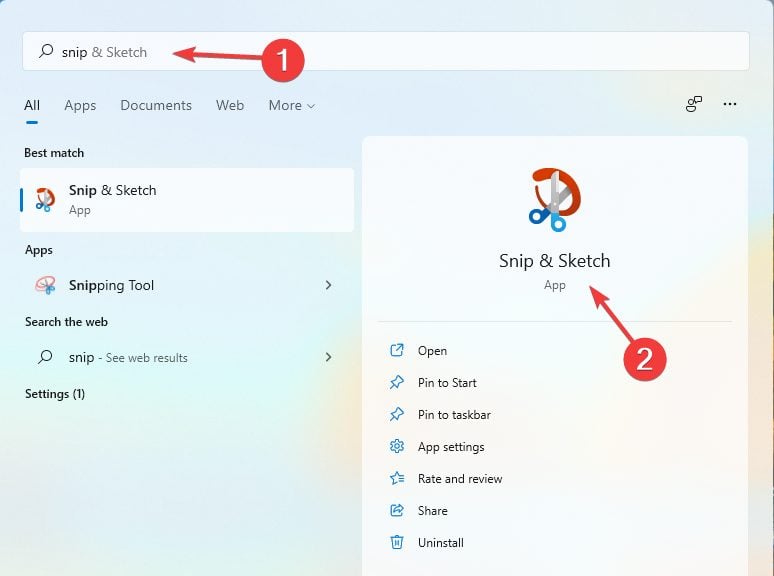
Search for the Snip & Sketch tool in the Start Menu or just type snip in Windows search and select it from the results. Click on it.
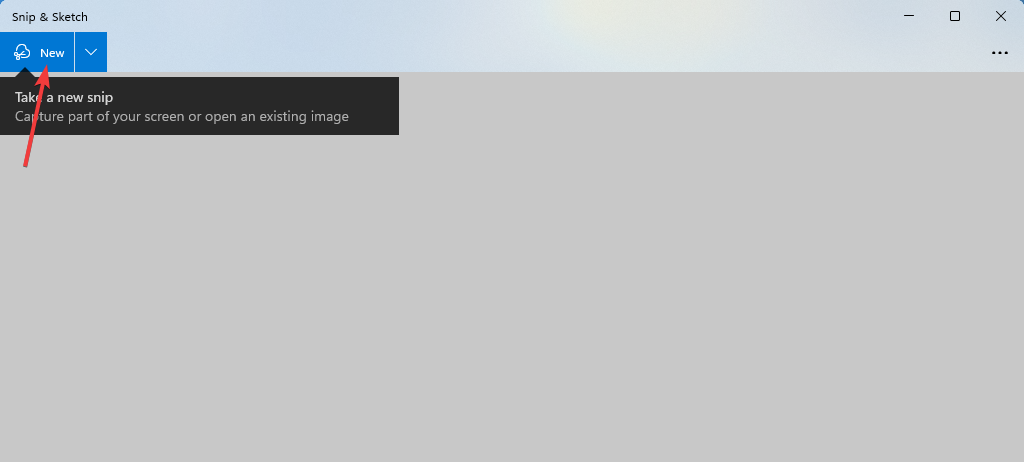
2. Click on New
Now you need to click on the New button in the upper left corner of the application.
3. Select your desired snipping option
You’ll see a couple of different available snipping options: Rectangular Snip, Free-form Snip, Windows Snip, and Full-screen Snip. Choose one of them.
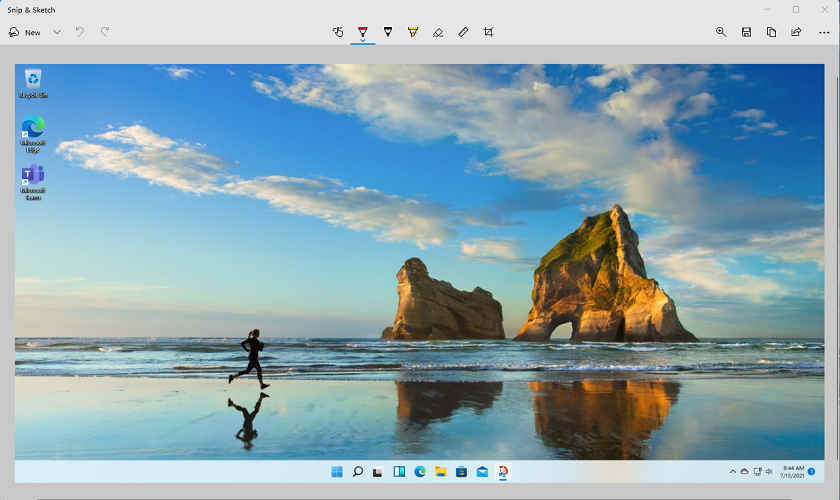
4. Select the screenshot area
Use the mouse cursor to choose what section of the screen you would like to capture in a screenshot.
5. Enter the editor
The tool will automatically transfer your screenshot to the clipboard and then start an editor as soon as you finish selecting your desired area.
6. Edit the screenshot
So now you can edit it as you wish in Snip & Sketch. You can choose to paste the image from the clipboard to another editor or save it on your Windows 11 PC without editing it as a PNG, JPG, or GIF file.
When you’re looking for Snip & Sketch, you will also see that the Snipping Tool app is still available in Windows 11 but we don’t know for how long.
Explore Snip & Sketch
It’s time for the big reveal – introducing the new Snip & Sketch tool which will gradually replace the Snipping Tool. If you were expecting major differences, you’ll be somewhat disappointed.
The new tool basically offers the same features as the original one. In fact, the appearance is the biggest change with the new app offering a more polished look that blends in with the overall flow and feel of the modern Windows 11.
In other words, the Snip & Sketch tool is pretty much a more sophisticated version of the Snipping Tool. For more advanced features, we recommend dedicated software such as Icecream Screen Recorder.
For users who need more powerful capture and editing options, this guide on free Snagit alternatives for Windows 11 can help you choose a dedicated screen capture tool.
When it comes to functionalities, you will have the same modes that allow you to choose a specific area to capture, plus to copy to clipboard flow.
One notable addition is that you can edit the screenshot by adding text, shapes, or highlighting directly in the preview window.
Moreover, accessing the Snip & Sketch tool is as easy as using this keyboard shortcut: Windows + Shift + S.
Basically, the new tool is easier to use, it looks better and it’s a lot more simple to manage by everyone so if you upgraded to Windows 11, you should think about using it.
4. Use the Xbox Game Bar
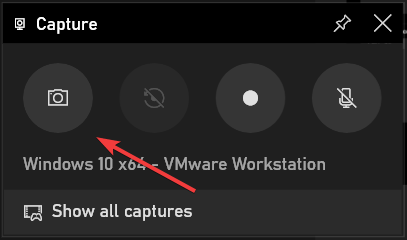
Press the Windows+ G key combination to use the Game Bar or use the Start menu to search for it.
When the app opens, click on the camera icon within its taskbar. This will capture your entire screen.
Even though the Xbox Game Bar is a gaming app, it offers interesting capture functionalities that you can apply to a broader area.
Furthermore, you can use it to record videos of your screen just as you would with a third-party screen recorder. While it’s not a specialized screenshot software, the Game Bar will do the job just fine.
Radu Tyrsina has been a Windows fan ever since he got his first PC, a Pentium III (a monster at that time).
For most of the kids of his age, the Internet was an amazing way to play and communicate with others, but he was deeply impressed by the flow of information and how easily you can find anything on the web.
Prior to founding Windows Report, this particular curiosity about digital content enabled him to grow a number of sites that helped hundreds of millions reach faster the answer they're looking for.
Readers help support Windows Report. We may get a commission if you buy through our links.
Read our disclosure page to find out how can you help Windows Report sustain the editorial team. Read more


User forum
0 messages