0x800f081f on Windows 11: 6 Ways to Fix this Install Error
Running the update troubleshooter is an easy fix
7 min. read
Updated on
Read our disclosure page to find out how can you help Windows Report sustain the editorial team. Read more
Key notes
- Microsoft .NET Framework is an important software to run software and applications on Windows OS.
- If there are some issues with the .NET Framework, then you may experience Windows 11 update error 0x800f081f.
- To fix this, you can try to tweak the Group Policy files, install Windows updates manually, or remove WUServer and WIStatusServer from registry.
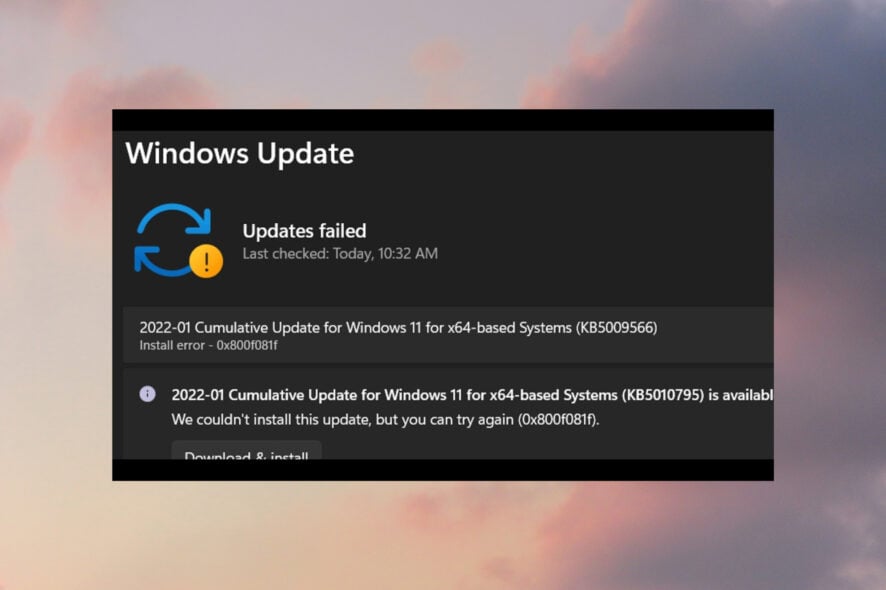
Installing the latest Windows 11 updates is essential for multiple reasons. But our readers have been complaining about the Windows 11 install error 0x800f081f. This error code is mainly related to the Microsoft .NET Framework 3.5 incompatibilities.
Notably, similar issues were reported by users with the Windows 10 OS as well. Here’s what to do to fix it.
What does Windows 11 error code 0x800f081f mean?
Error 0x800f081f is a system error code related to updates in Windows 11. The interesting fact about this error code is that it’s among the most common ones that pop up for the same reason. Here are some of the causes of this error:
- Improper connection – This happens because Windows cannot download the critical files from the available update.
- .Net Framework issue – Microsoft .Net Framework incompatibilities also cause this problem so updating .Net Framework can be a viable solution.
- Improper commands – It may also come up because of the DISM (Deployment Image Servicing and Management) tool, or some Windows PowerShell commands.
The other three error codes are 0x800F0906, 0x800F0907, and 0x800F0922. All these error codes, including error code 0x800F081f, will show you an error message:
There were some problems installing updates, but we’ll try again later. If you keep seeing this and want to search the web or contact support for information, this may help.
Now that we know what we’re dealing with, let’s fix the problem with the solutions below.
How do I fix error code 0x800f081f in Windows 11?
1. Run the Windows Update troubleshooter
1. Open the Start Menu.
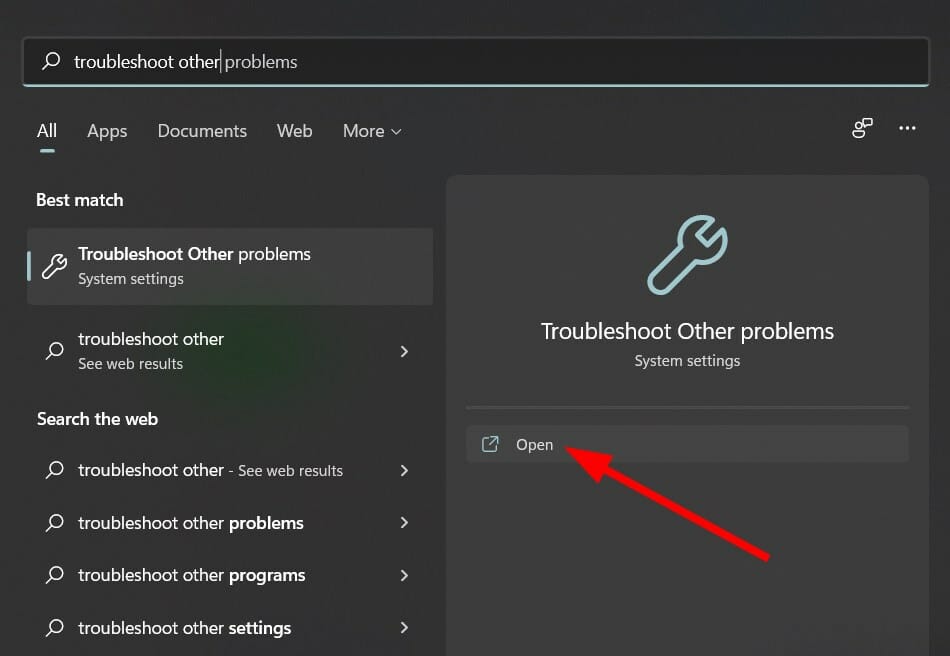
2. Type in Troubleshoot other problems and open the app.
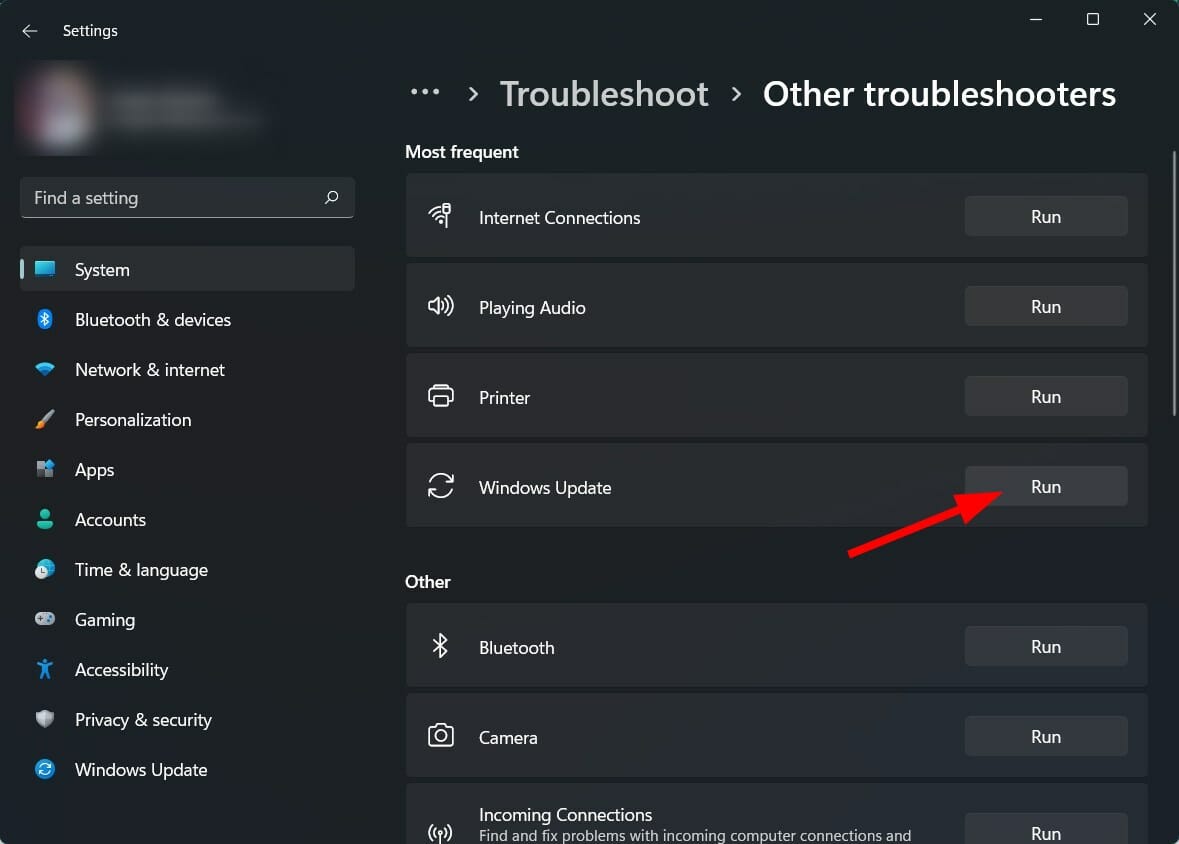
3. Click Run next to Windows Update.
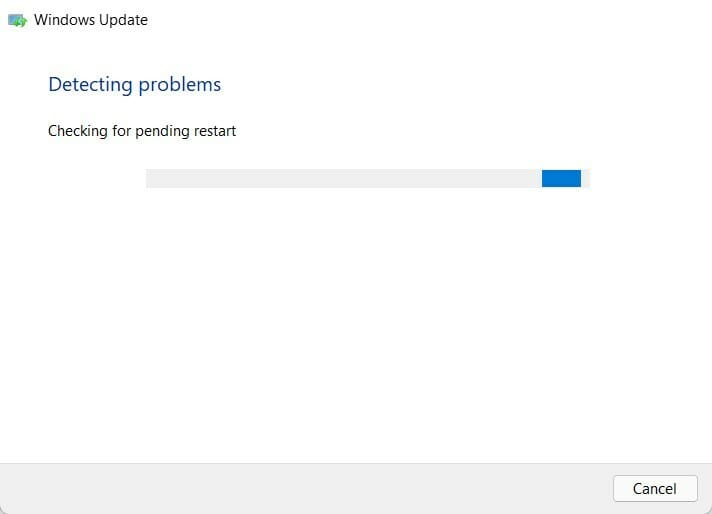
4. The troubleshooter will begin the diagnosis and will check for errors.
5. Apply the recommended fixes.
6. Restart your PC.
Multiple users reported that Windows Update troubleshooter can help you restore the 0x800f081f error on Windows 11 OS.
One of the most common solutions to fix most of the common Windows 11 issues is to run the in-built Windows troubleshooter.
To fix this Windows 11 update error 0x800f081f, we advise you to try the Windows update troubleshooter. It will not only detect the issue but possibly fix it during the process.
2. Tweak your group policy
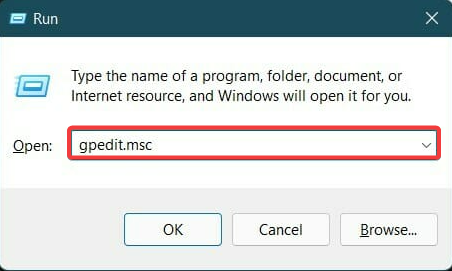
- Press Windows + R keys to open the Run dialogue.
- Type gpedit.msc and hit Enter.
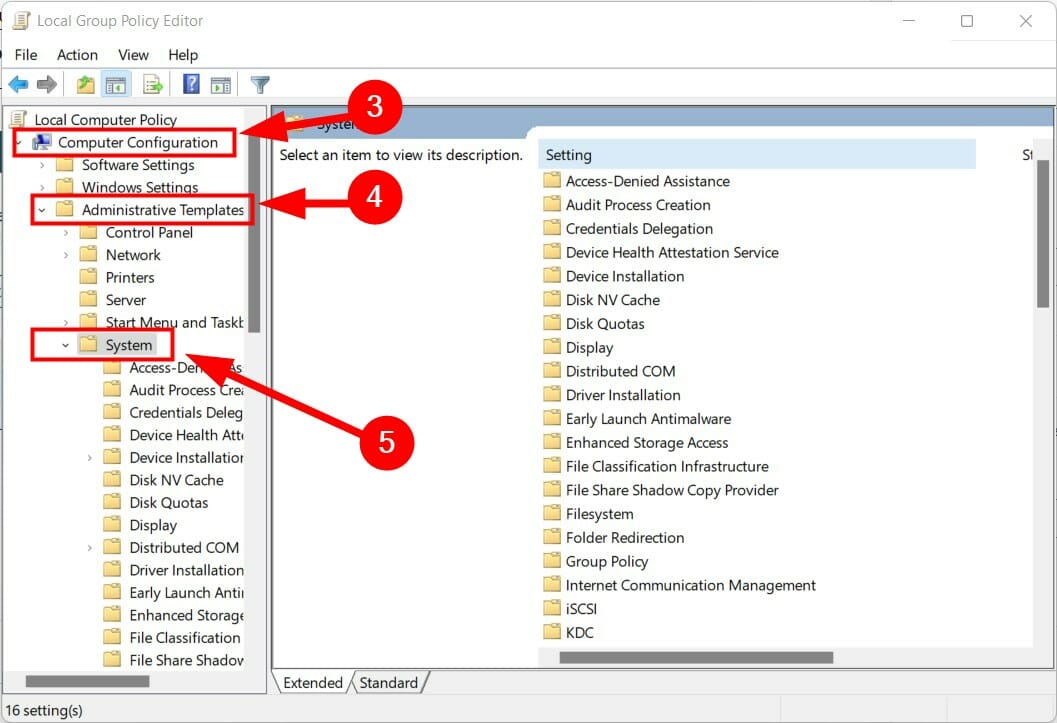
- Expand Computer Configuration.
- Then expand Administrative Templates.
- Click on System.
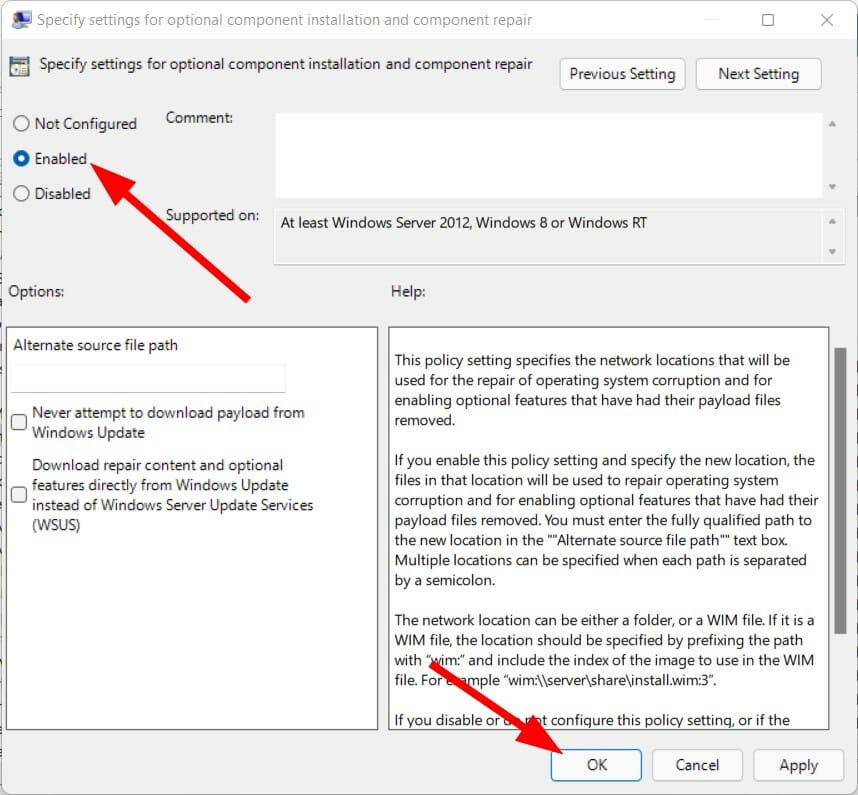
- On the right pane, click on the entry labeled Specify settings for optional component installation and component repair.
- Double-click on this entry to open it.
- Check Enabled and hit OK.
3. Repair Windows system files
- Open the Start menu.
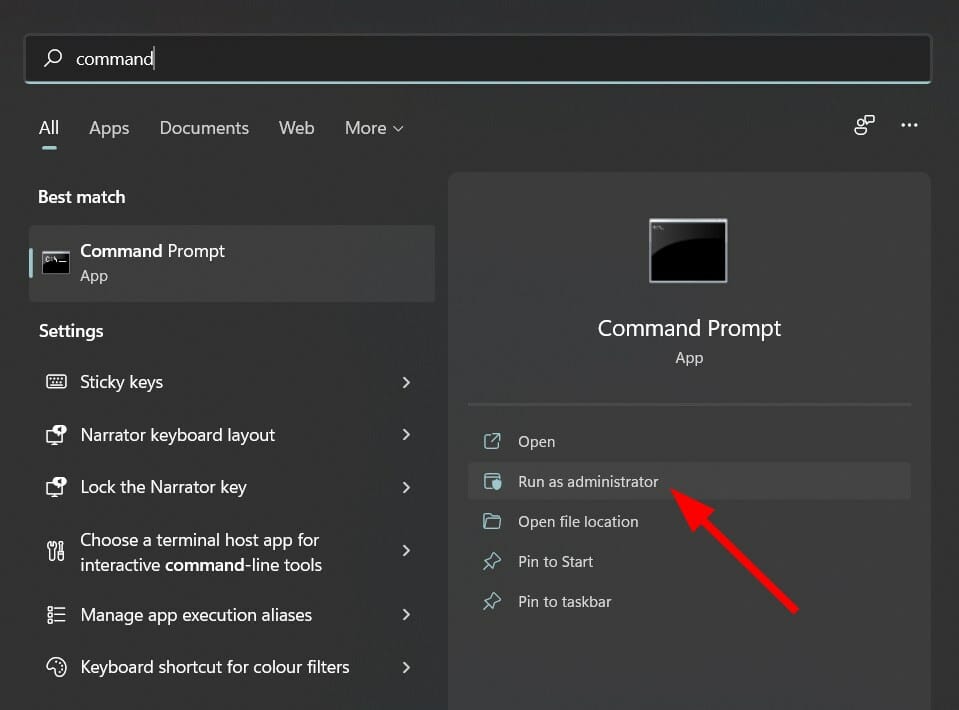
- Search for Command Prompt and run it as an administrator.
- Type the below command and hit Enter.
sfc /scanow - Your PC will start scanning and, in the process, will try to fix the issue.
- Reboot your PC.
- Again open command prompt.
- Type in the below command and hit Enter
chkdsk C: /f /r /x - After the process completes, enter the below command and press Enter.
DISM.exe /Online /Cleanup-image /Restorehealth - You will see the message – The operation completed successfully. Close the window and reboot your PC.
Besides this manual process, you can always choose a professional tool that will perform all these steps automatically. It is a safer and much easier option for your computer’s health and performance.
4. Download Windows 11 update manually
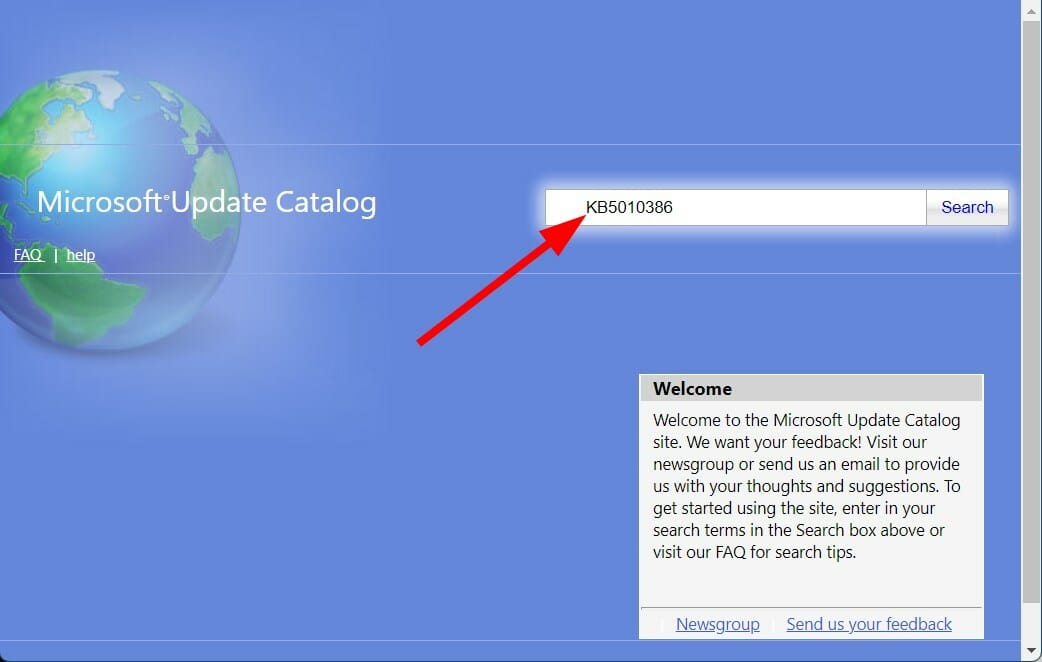
- Open the official Microsoft Catalogue website.
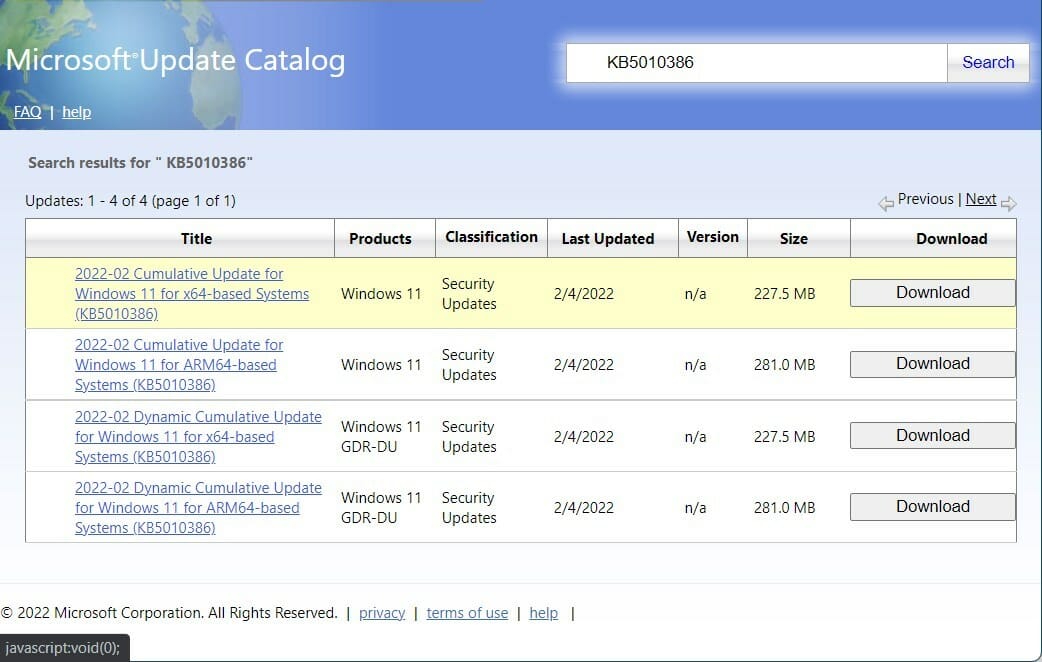
- In the search bar, enter the KB (Knowledge Base) number of the Windows update you wish to download and hit the Search button.
- A list of available update packages associated with the entered KB number will show up.
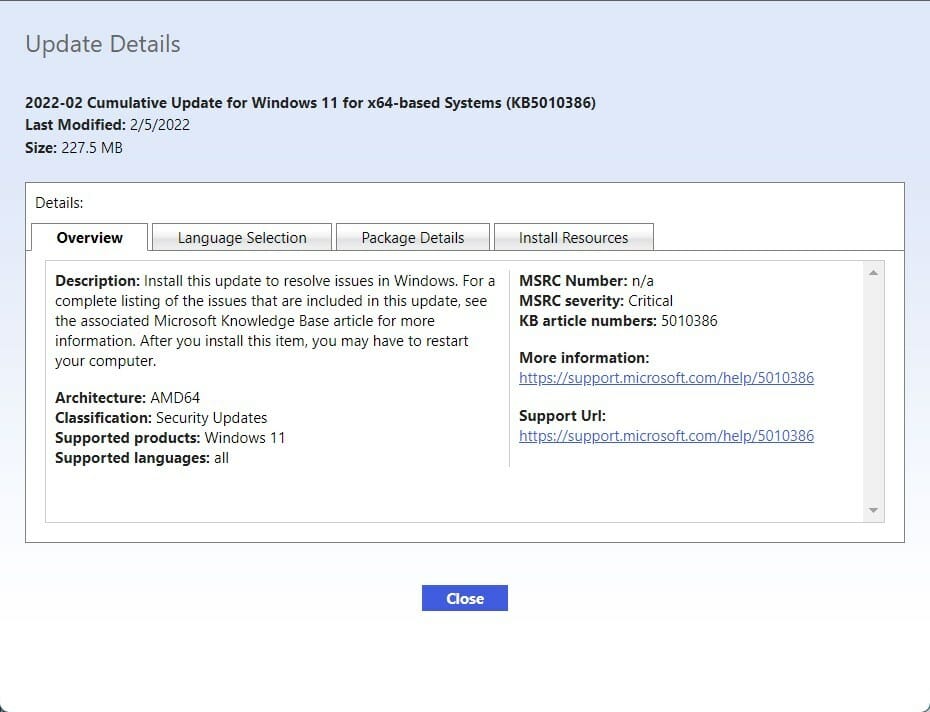
- Click on the update’s title to get more information, such as Installation Resources, Package details, and Languages supported about the update.
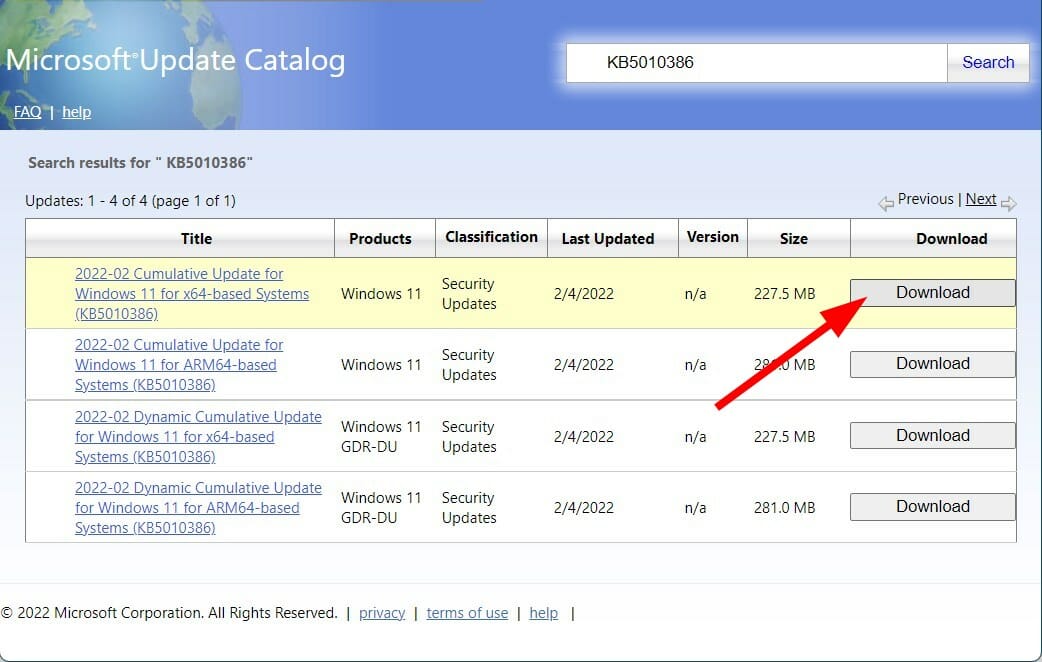
- Identify the correct update and hit the Download button.
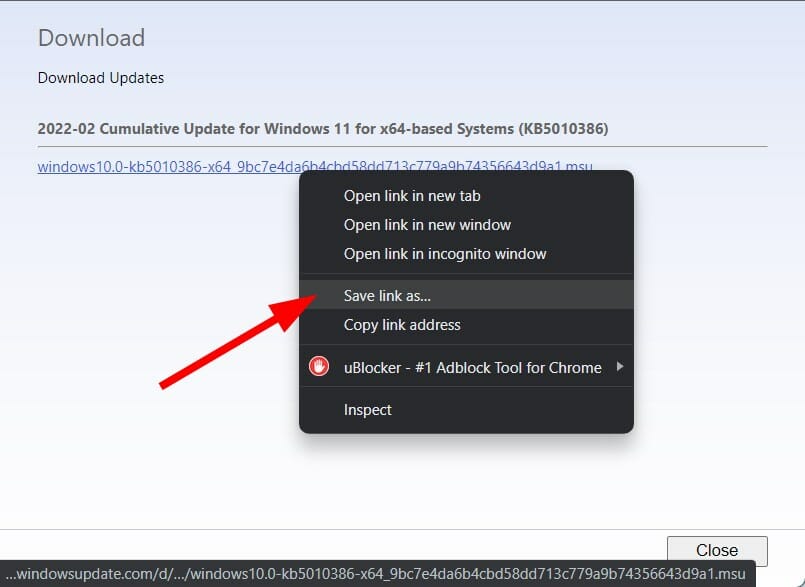
- Right-click on the download link and press Save link as.
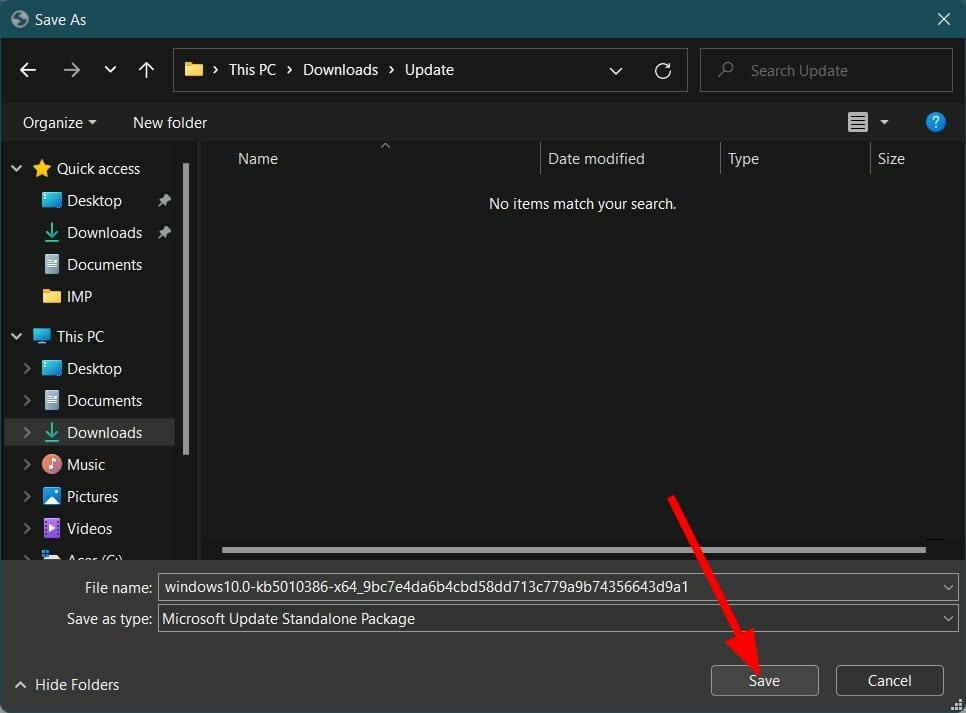
- Choose the download directory and press Save.
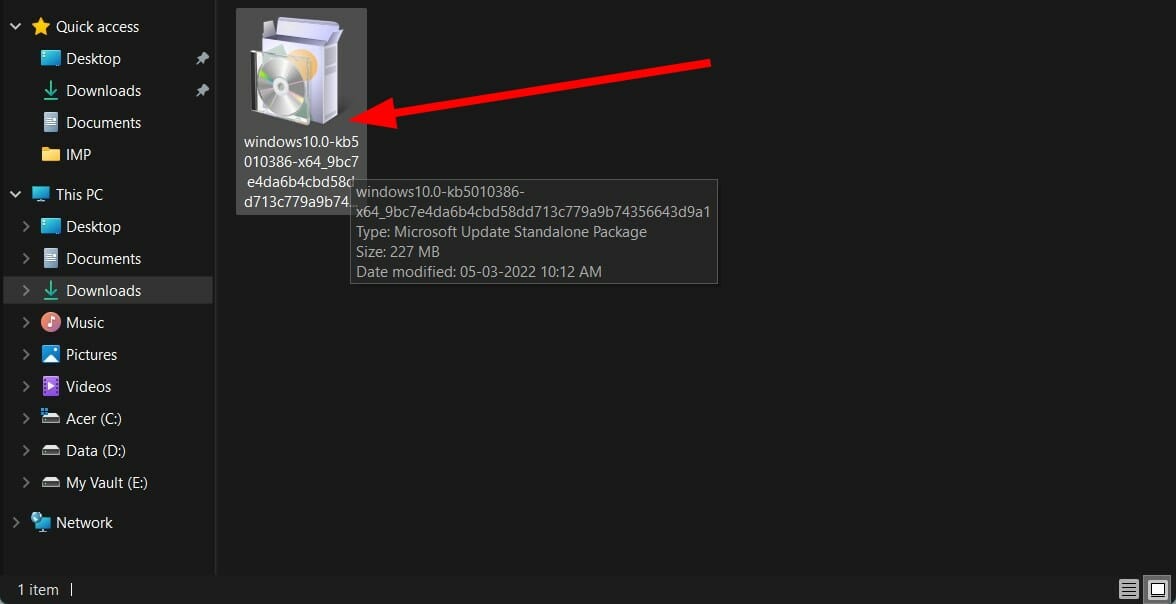
- Open the folder where you have downloaded the Windows 11 update package.
- Double-click on it to run.
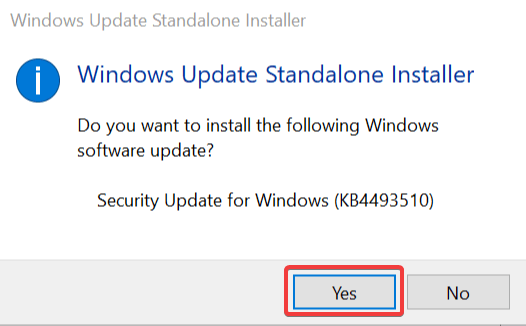
- After a few seconds, press the Yes button on the Windows Update Standalone Installer pop-up to begin the update installation.
- Reboot your PC and check if this fixes the Windows 11 update error 0x800f081f.
5. Clear Windows Update Cache and components
- Open the Start menu.
- Search for Command Prompt and run it as an administrator.
- Type the below commands and hit Enter after you have typed each command, one by one.
Net Stop bitsNet Stop wuauservNet Stop appidsvcNet Stop cryptsvcRen %systemroot%SoftwareDistribution SoftwareDistribution.bakRen %systemroot%system32catroot2 catroot2.bakNet Start bitsNet Start wuauservNet Start appidsvcNet Start cryptsvc
4. Exit cmd and restart your PC.
6. Remove WUServer and WIStatusServer from registry
- Open Run dialog using Windows + R keys on your keyboard.
- Type the below command and press Enter.
regedit - Click on Yes if a prompt asks you for permission.
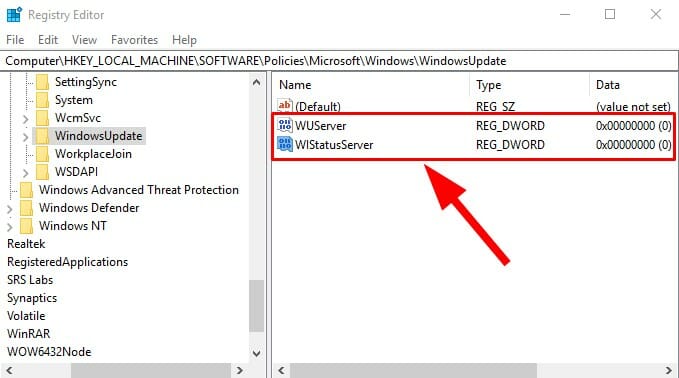
- You need to navigate to the below address
HKEY_LOCAL_MACHINE\SOFTWARE\Policies\Microsoft\Windows\WindowsUpdate - On the right pane, locate WUServer and WIStatusServer.
- Delete both entries.
- If these entries are not available, then hop onto another solution.
Why do my Windows updates keep failing?
There are several potential causes for problems like Windows Update failing repeatedly. Based on user feedback, we have generated a list of the most frequent reasons.
- Out-of-date drivers – Drivers must operate components like graphic cards and network cards that aren’t natively compatible with Windows. Windows Update problems might result from outdated drivers connected to this problem.
- System file errors or absences – System files are essential to the smooth operation of your device. Your system files may have recently been destroyed or damaged, which is why Windows Update failed.
- A problem with the Windows Update service – Your update service may be having problems. If so, alternate methods for downloading the most recent Windows update are provided above.
Remember that not all potential reasons are included in the list mentioned above. However, the error can occur specifically for you because of a problem with your machine.
What else can I do to avoid Windows 11 update error 0x800f081f?
When you come across an error, and that too while installing a Windows 11 update, then it can be frustrating and annoying.
The solutions mentioned above can be of great help when facing Windows 11 update error 0x800f081f, but that’s not all.
If, for some reason, none of the above steps helped you fix it, then we have some important points that you can follow and check if this fixes the issue or not.
➡ Make sure the .NET Framework is turned on
It is essential since this issue is related to the Microsoft .Net Framework. Open Windows Feature by searching for it on the Start menu and checking the box next to .NET Framework 3.5 (includes .NET 2.0 and 3.0).
Hit OK and reboot your PC. Ensuring the .NET Framework is enabled will let you get automatic updates with no issues.
➡ Turn off Developer Mode
All you need to do is open the Start menu and search for Developer mode. Open it and make sure to turn off Developer mode.
There are instances when developer mode may interfere with Windows update installation and, thus, the error. Make sure it is disabled and check if this fixes the issue or not.
➡ Reset your copy of Windows 11
If absolutely nothing works, then as a last resort, all you can do is reset or reinstall the Windows 11 OS on your PC. Possibly, some critical files were not installed during the previous installation.
If you encounter the 0x800f081f error on Windows 10, we have another article on the topic that you can check out.
Let us know in the comments below which one of the above solutions helped you fix the Windows 11 update error 0x800f081f. Moreover, you can also share with us any other solution.









User forum
2 messages