How to Fix Acer Swift 3 Laptop Microphone Not Working
![]() 4 min. read
4 min. read
![]() Updated on
Updated on
Share this article

Improve this guide
Read our disclosure page to find out how can you help Windows Report sustain the editorial team Read more
Key notes
- If your Acer Swift 3 microphone is not detected, and you are unable to hear, record, or the person on the other side can't hear you while gaming or recording audio, this post is for you.
- This issue can occur sometimes after an upgrade to Windows 11 if access to the microphone is disabled or if the microphone is not set as default.
- While running the recording audio troubleshooter should be the first step, we have listed other possible solutions in this post just for you.
If your Acer Swift 3 laptop microphone is not detected and there’s no sound, this can be annoying.
While the microphone shows active, you simply don’t hear any sounds while playing or recording audio, playing games on apps like Discord, or communicating on Skype.
There could be different reasons that may trigger this issue, some of the common ones include outdated or corrupt drivers, etc.
This post will cover all these issues and more and offer you different solutions to fix the Acer Swift 3 built-in microphone not working issue.
What can I do if the Acer Swift 3 Microphone is not detected?
1. Run the Recording Audio troubleshooter
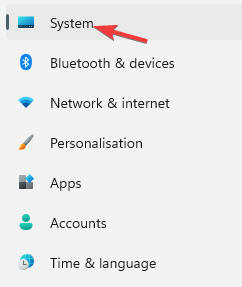
- Press the Win + I keys together on your keyboard to launch the Settings app and click on Systems.

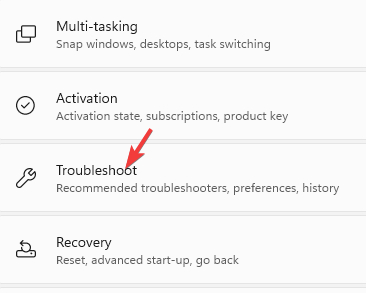
- Now, on the right side look for Troubleshooter and click on it.

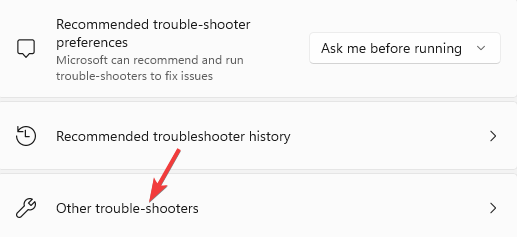
- On the next screen, on the right side, select Other trouble-shooters.

- Next, on the right side, click on Run next to Recording Audio.

- Wait for the troubleshooter to detect any issues with the microphone.
- Follow the on-screen instructions to fix the issue automatically.
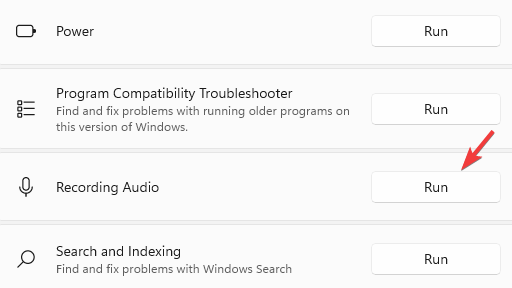
This is a basic step that should you must follow even before you try any other methods. Once done, your laptop microphone should be working now.
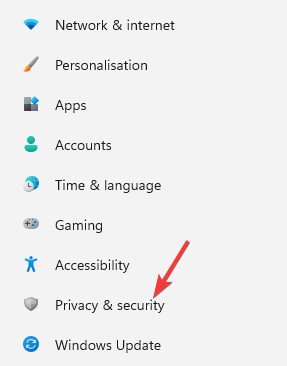
2. Check the microphone privacy settings
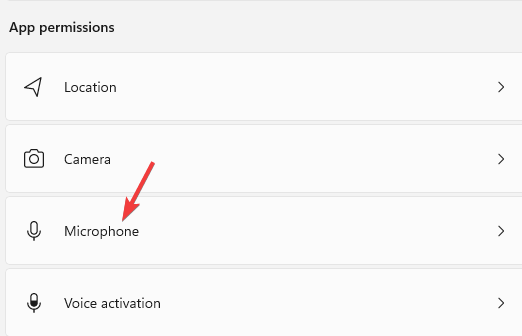
- Press the Win + I shortcut key to open the Settings app and click on Privacy & Security.

- On the right, under App permissions, click on Microphone.

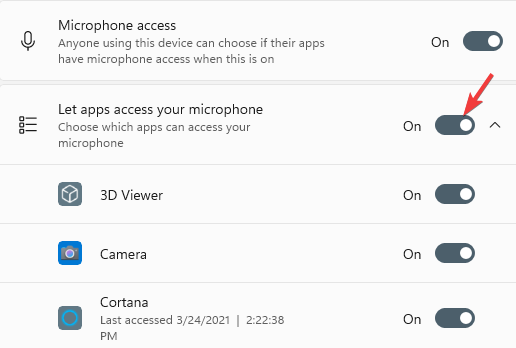
- Now, turn on the option – Let apps access your Microphone.

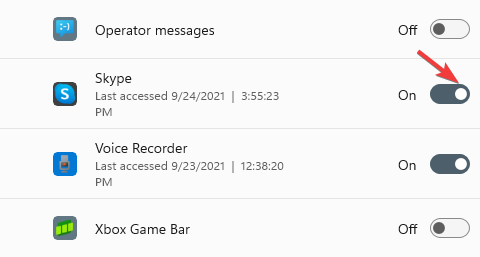
- Go to the Microsoft store apps in the list and turn on the microphone for the desired app.

- Navigate to Let desktop apps access your microphone and turn it on.

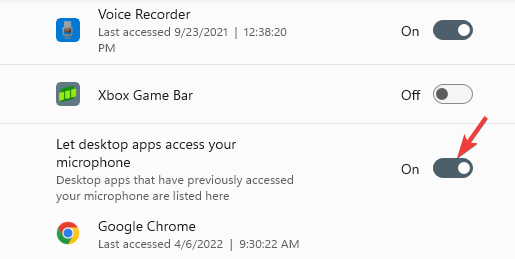
Close the Settings app and now check if your Acer Swift 3 microphone is working.
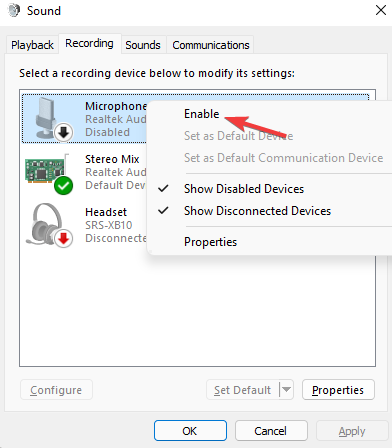
3. Check if the microphone is enabled
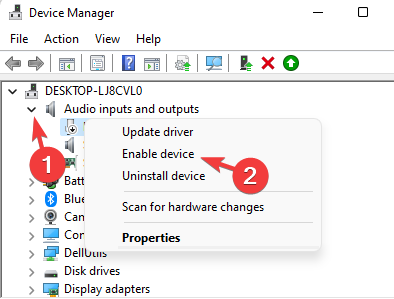
- Right-click on Start and select Device Manager.

- Expand the Audio inputs and outputs section, right-click on the built-in microphone, and select Enable (if it shows disabled).

- Skip the above two steps if it’s already active and continue with the below steps
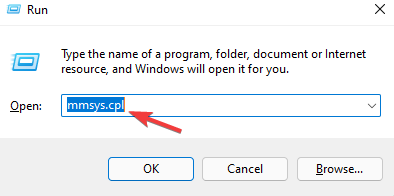
- Press the Win + R keys simultaneously and the Run console opens.
- Type mmsys.cpl in the search bar and hit Enter.

- In the Sound dialogue box, go to the Recording tab. Here, right-click on the active microphone and check for an arrow pointing downwards. Select Enable.

Now, close the window, reboot your PC and check if the microphone is working on your Acer Swift 3 laptop.
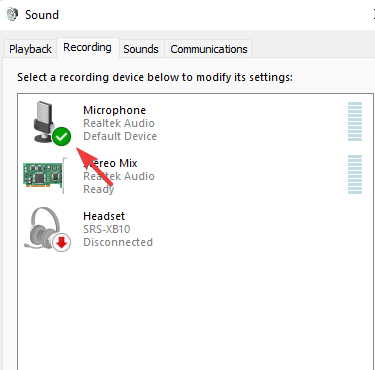
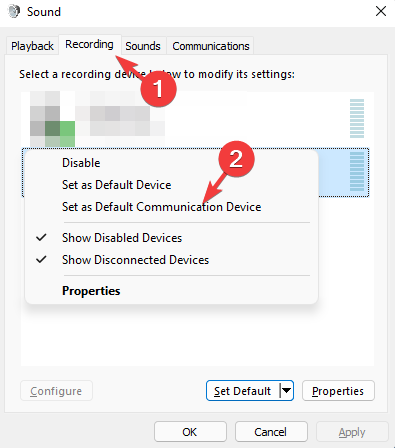
4. Set as the default recording device
- Right-click the Start button and select Run to open the Run console.
- In the search box, type mmsys.cpl in the search bar and press Enter to open the Sound dialogue box.
- Under the Recording tab, check which microphone has the green checkmark. This means that this device is set as default.

- If the correct microphone is not set as default, right-click on the preferred device and select Set as the Default Communication Device. Press Apply and OK to save changes and exit.

Now, test your microphone and see if it’s working.
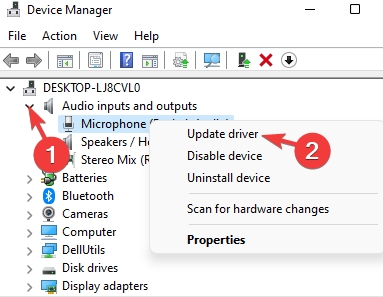
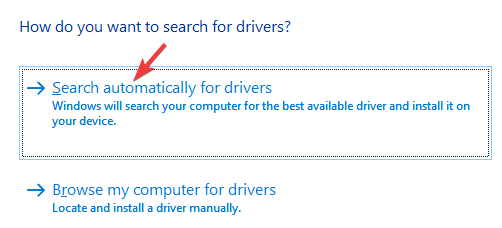
5. Update the audio drivers
- Go to Start, right-click and select Device Manager. Now look for Audio inputs and outputs.
- Right-click on it and select Update driver.

- In the Update Drivers screen, click on Search automatically for drivers.

- Wait till Windows finds and recommends a new driver. Follow the on-screen instructions to finish the installation.
Close Device Manager and reboot your PC. Check if the Acer Swift microphone not detected issue still persists.
It could be possible that the microphone is not detected on your Acer Swift 3 laptop due to outdated drivers. Hence, updating the driver may help resolve the issue.
Alternatively, visit the official website for Acer support drivers and manuals and install the driver manually.
Sometimes, manually updating drivers can be time-consuming. If you are looking for an automated solution to update your drivers faster and safely without any risk to harm your PC, we recommend you Outbyte Driver Updater, a third-party tool that can update, fix, or replace drivers automatically.
Additionally, you can also uninstall and reinstall the driver to check if it helps fix the issue. You can also test your microphone levels to make sure it’s set correctly.
Sometimes, the microphone not working issue could be corrupted and missing files. In such cases, you can run the built-in system file checker (SFC scan) and the DISM utility to detect and fix such files.
If all the above methods fail, you can perform a repair install using a Windows installation media. This will help you replace all the Windows files with healthy ones and ensure that the Acer Swift 3 microphone is working.
Let us know in the comments section below which of the solutions worked for you.