Using Acronis to Prevent Ransomware and File Loss for Home Users
This solution offers business-grade protection at consumer cost
5 min. read
Updated on
Read our disclosure page to find out how can you help Windows Report sustain the editorial team. Read more
Key notes
- Acronis Cyber Protect Home Office (formerly Acronis True Image) can help you prevent any intrusion or attack with the built-in antivirus.
- The solution also offers all the tools to back up your entire system in the cloud or on an external drive.
- In this article, you will find out how to use its features to protect your PC from ransomware and file loss.
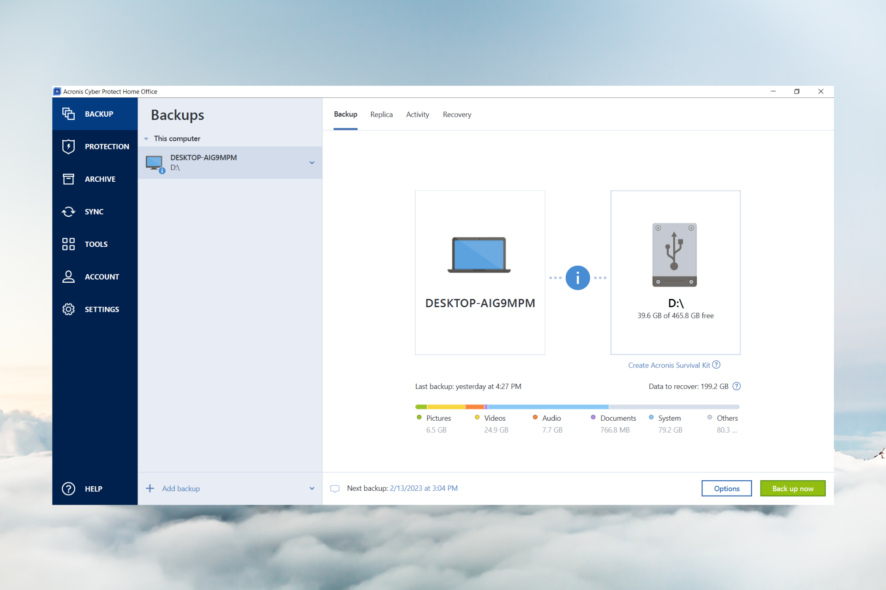
Our digital lives tend to be more complex each day and we have data scattered on all our devices. However, saving our data in the cloud is not really the same as creating a professional backup.
That’s where a dedicated security and backup tool like Acronis Cyber Protect Home Office (formerly Acronis True Image) can help you prevent ransomware and file loss.
How Acronis Cyber Protect Home Office helps you secure data?
First, we should know the difference between storing our data on a cloud service and creating a backup.
Don’t get us wrong, it’s OK to copy your files to your cloud storage account, but if the whole system breaks down, you will have to restore it before copying back your files.
Acronis Cyber Protect Home Office not only allows file backup, but it can go as far as backing up the whole system or even cloning all the disks on your machine.
Moreover, the solution comes with full antivirus, anti-malware, and anti-ransomware protection and it encrypts all the data from your backups.
In this article, we will explain how you can prevent ransomware and file loss with Acronis Cyber Protect Home Office.
How do I use Acronis Cyber Protect Home Office?
1. Back up and recover your entire PC
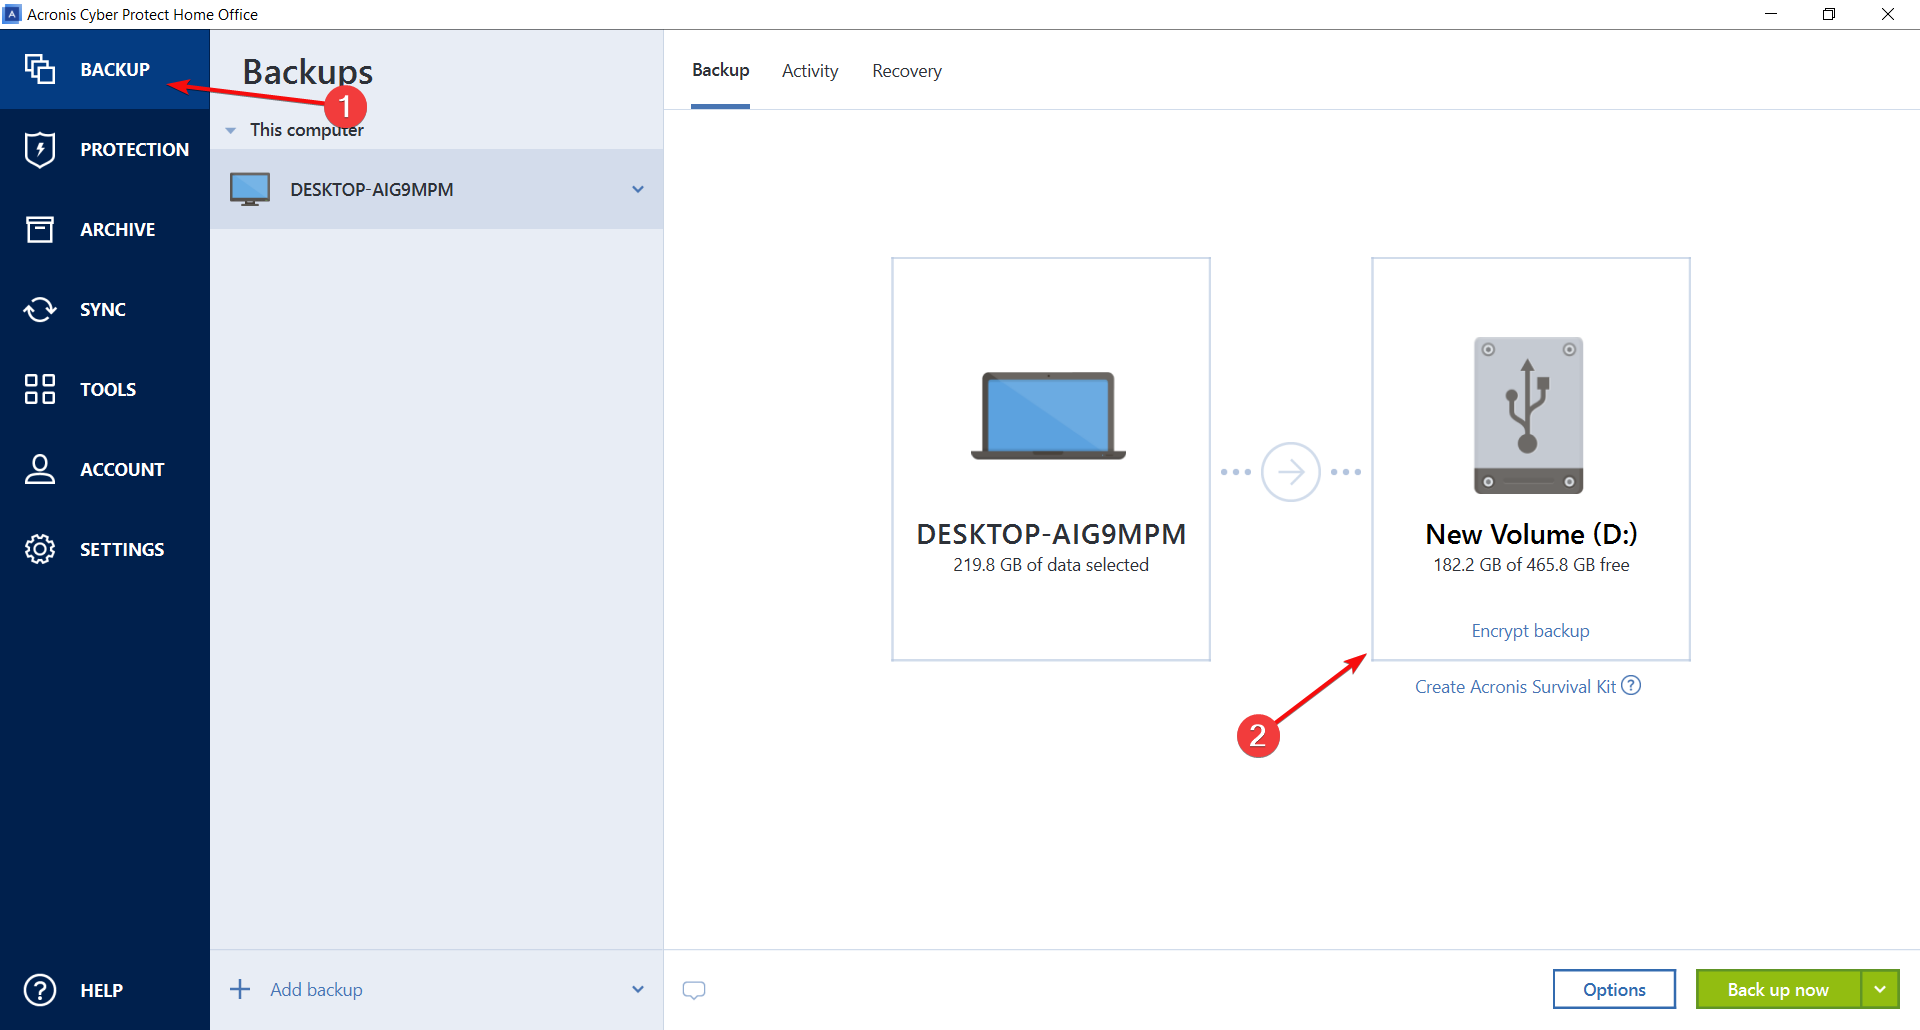
- Click on the Backup menu from the left and then select the destination for your backup. By default, the source part will be selected for the whole system.
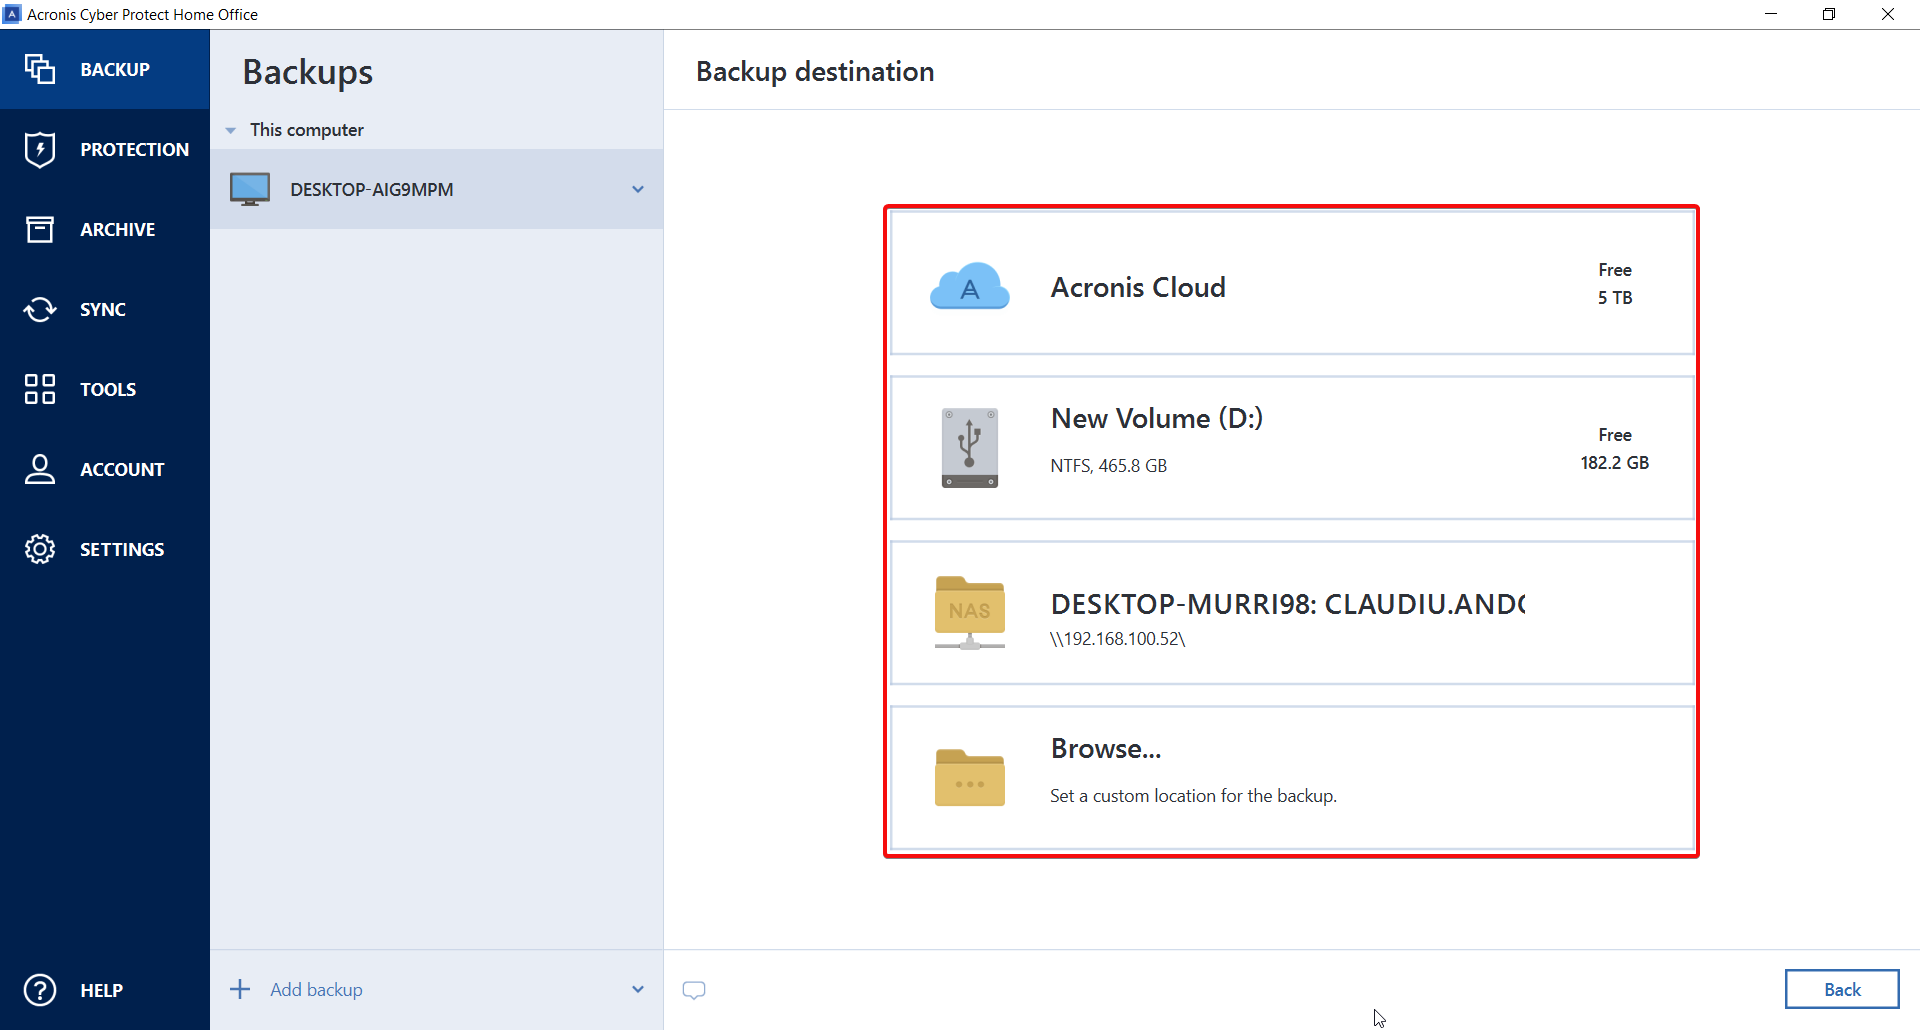
- You will be able to choose between 4 options: Acronis Cloud (you have 5 GB of free storage), an external drive, a NAS on your network (could be another PC linked on the same network), or to browse for a location on the same PC.
- Anything you choose, make sure you match the storage you need for the system backup.
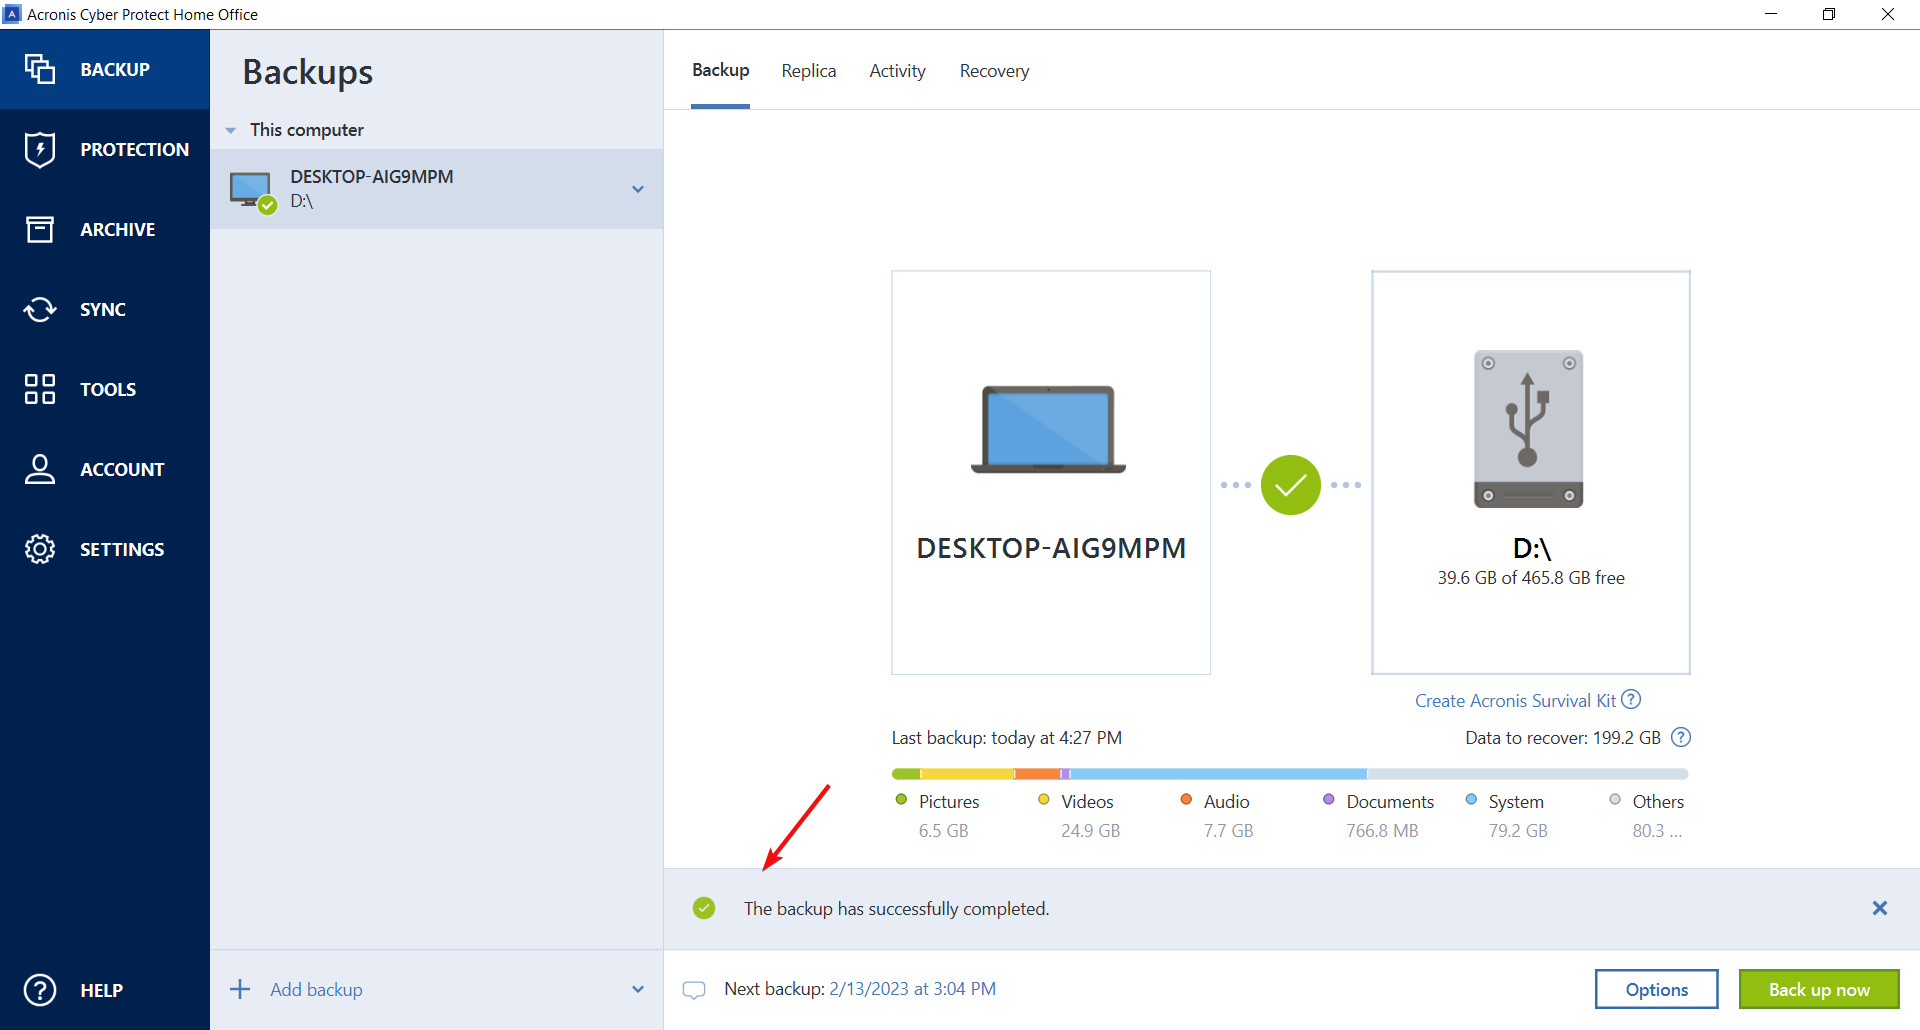
- After performing the backup, you will get a success message.
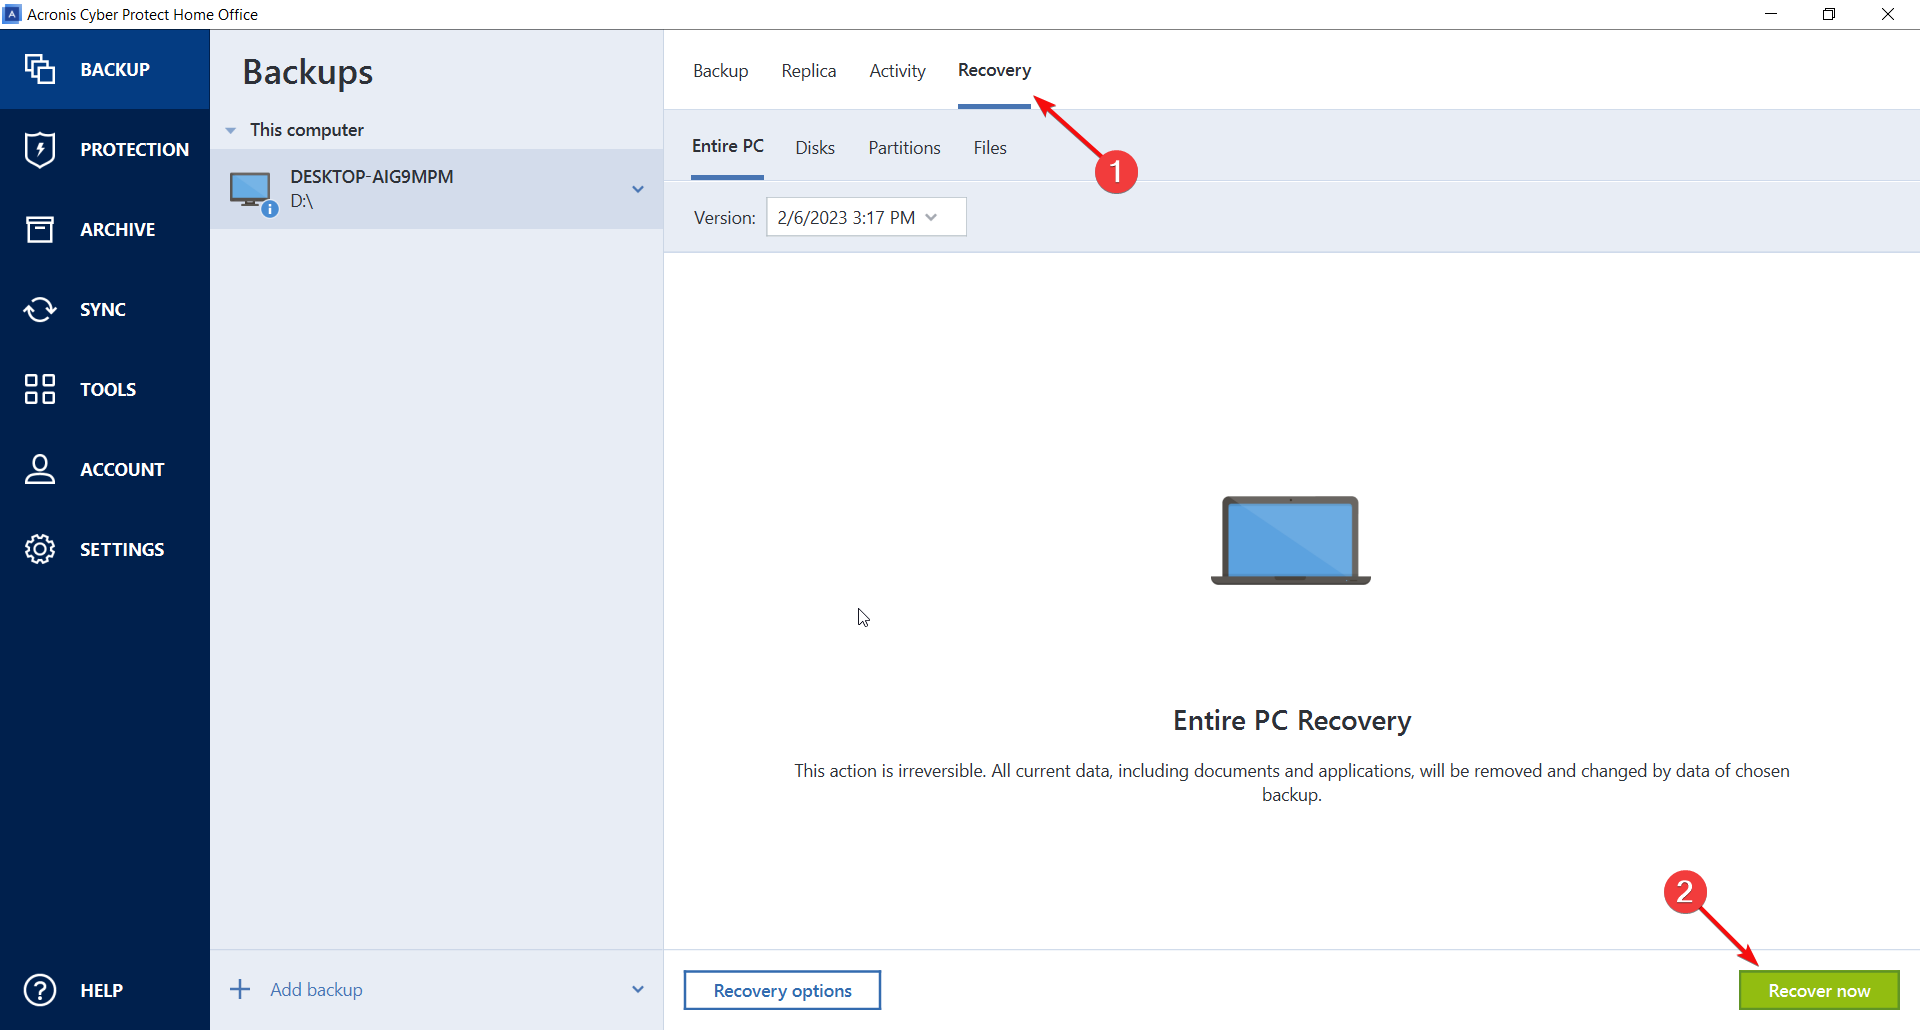
- Now, if something happens to your system, click on Recovery from the Backup menu and hit the Recover now button.
- You will be prompted to restart your PC and Acronis Cyber Protect Home Office will start the process after reboot.
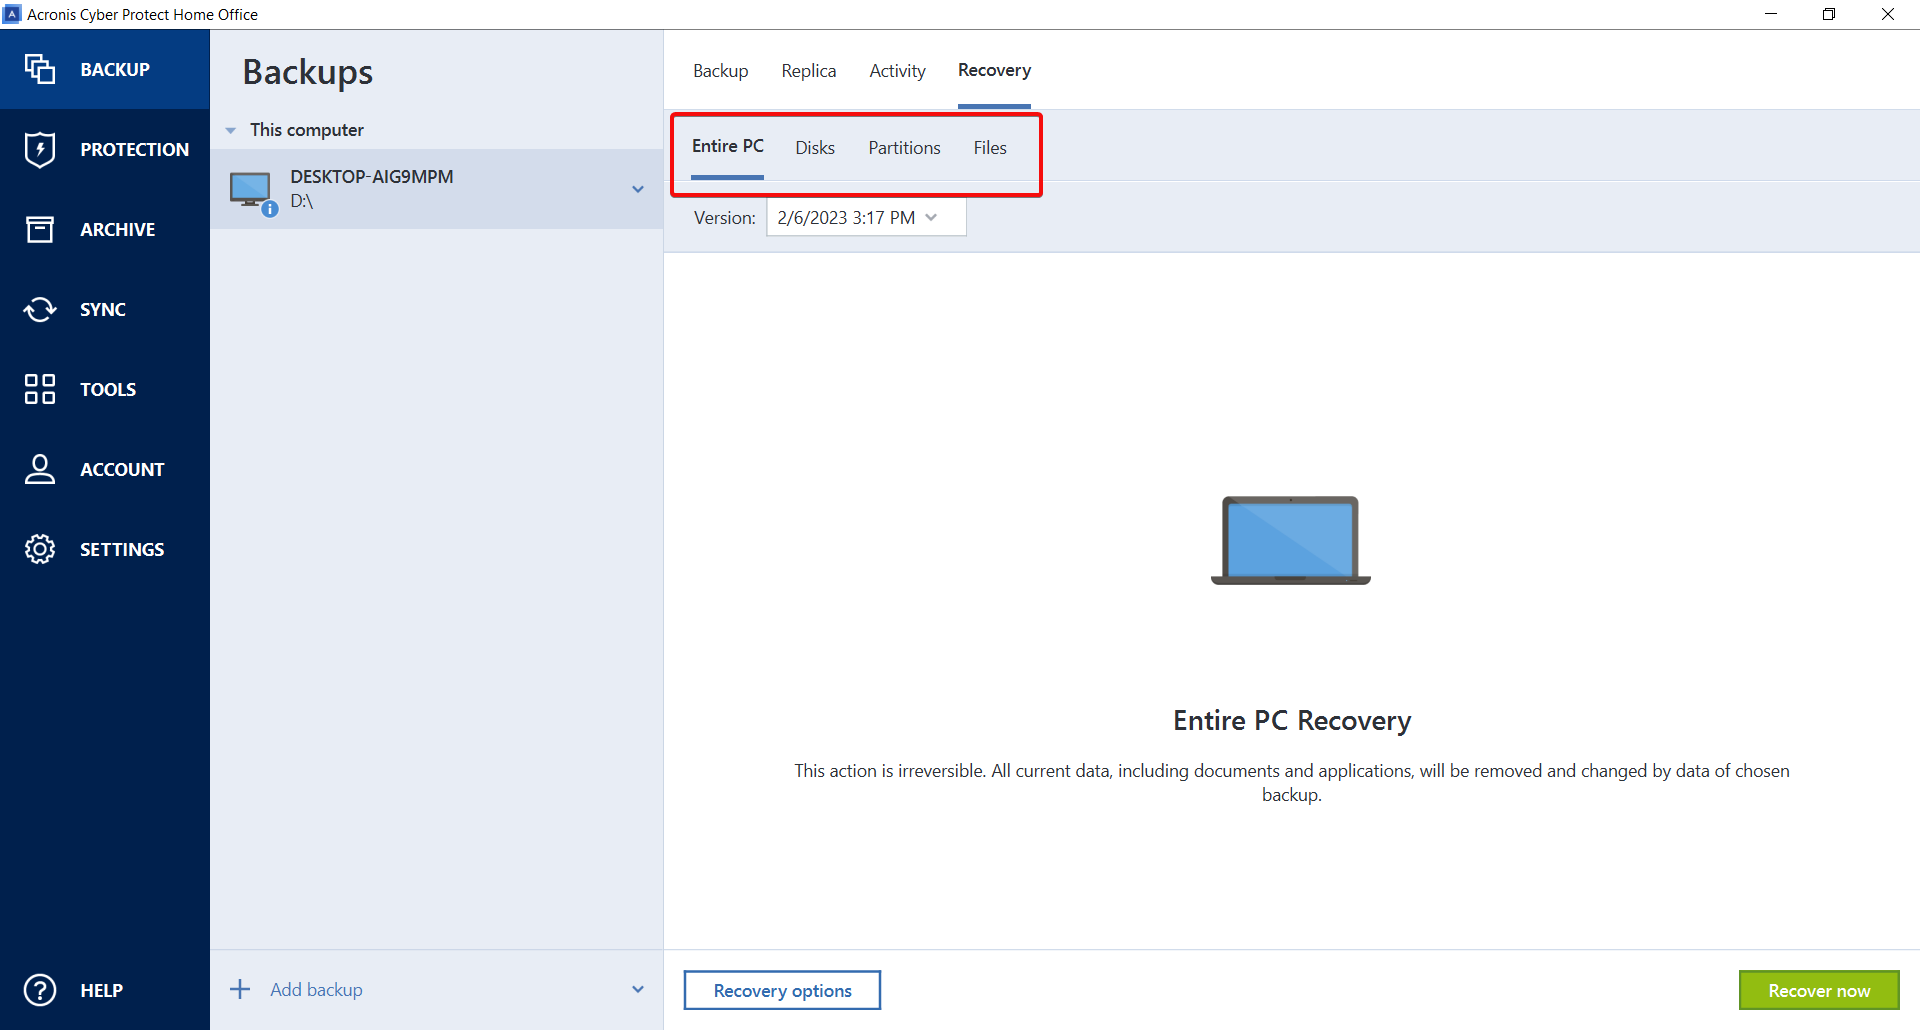
- You may change the recovery options in case you want to recover a disk, a partition, or just files.
Of course, we chose to back up the whole system, but you may click on the source button and select only a drive, or one or more files or folders.
2. Create a bootable media for recovery
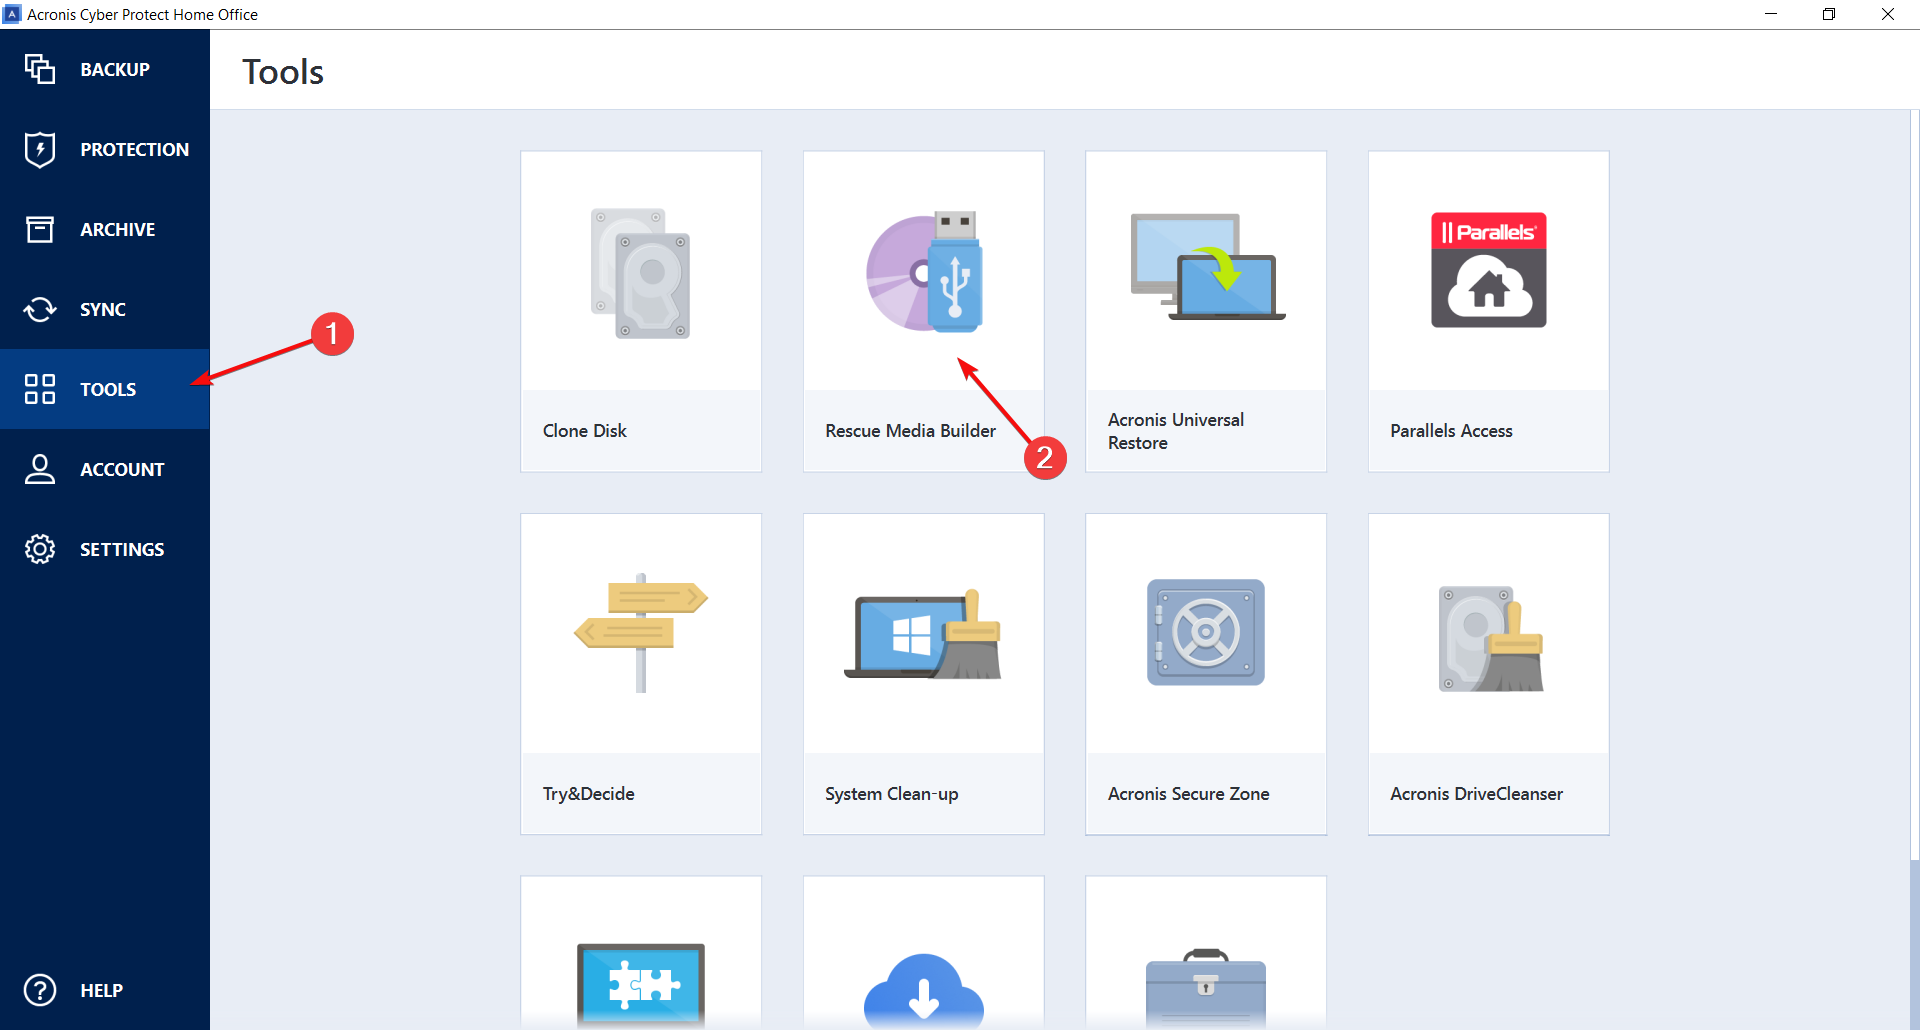
- Select the Tools menu from the left, then click on the Rescue Media Builder from the list of tools.
- Choose the Simple option.
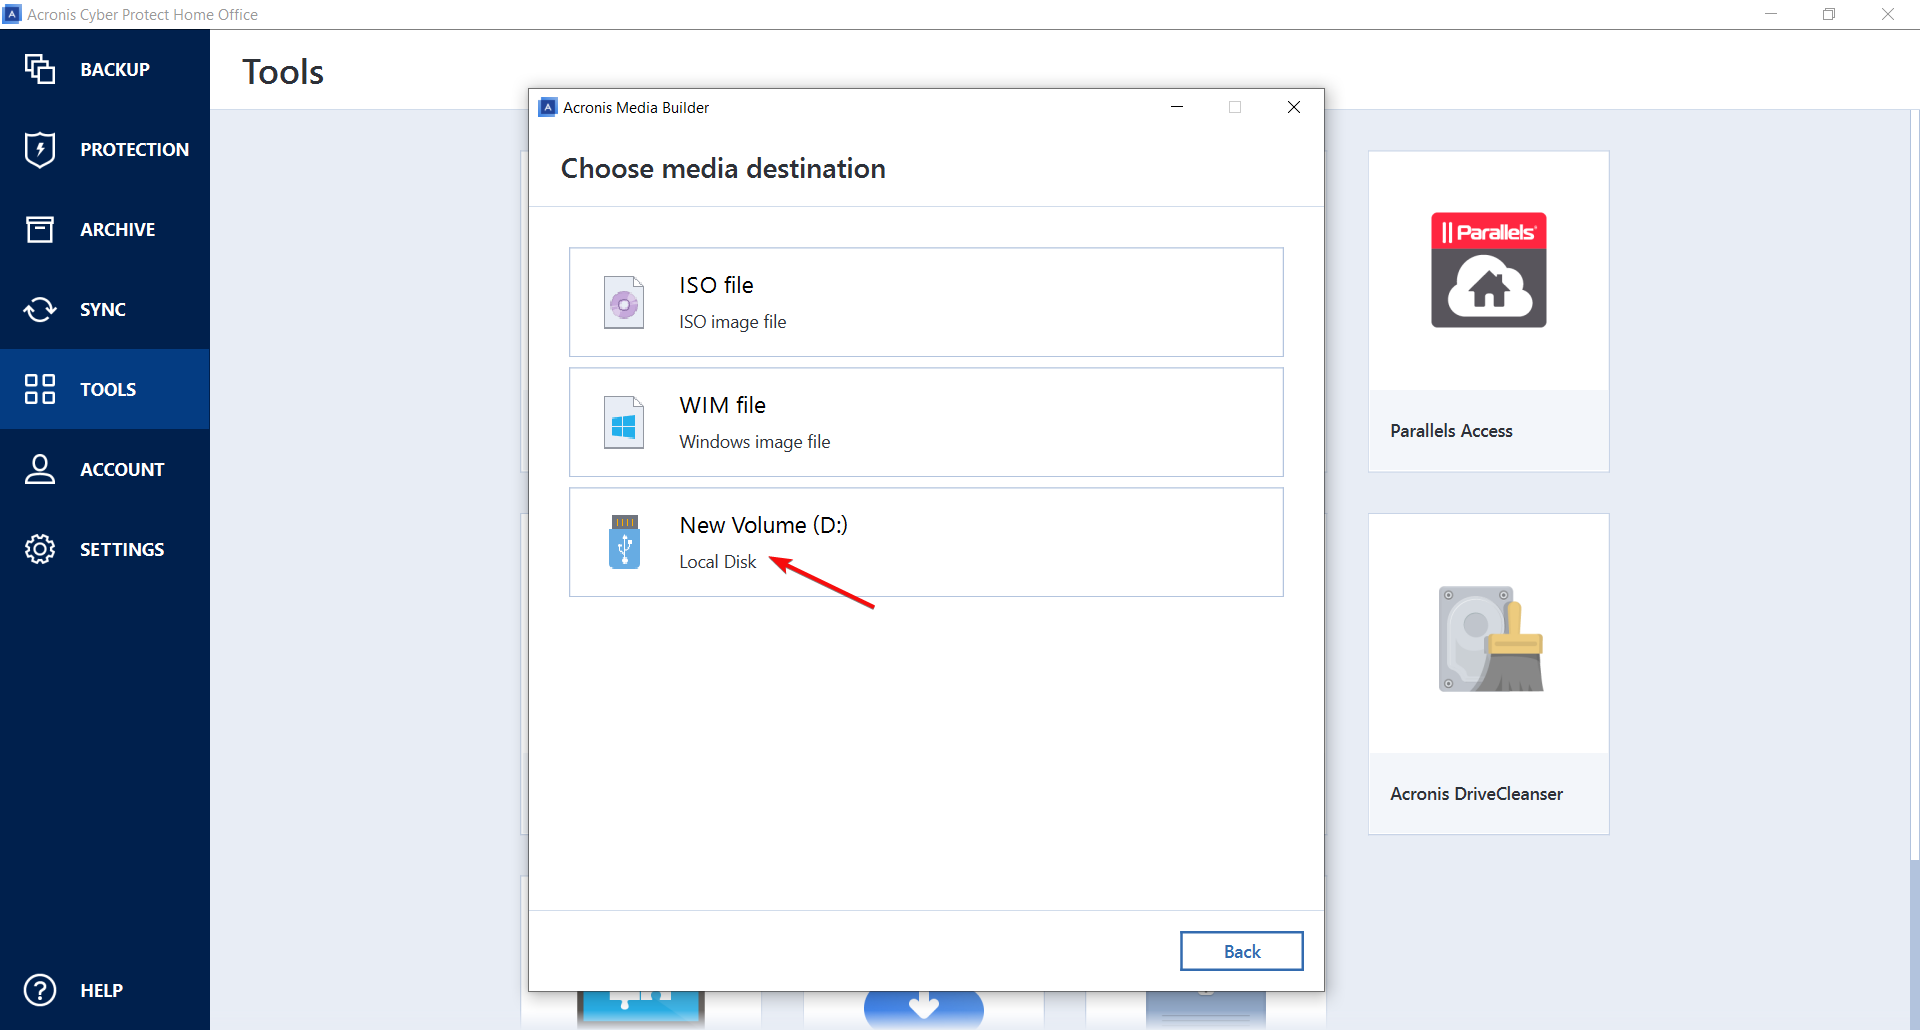
- Now, you have 3 options: Save the recovery media as ISO or WIM images and burn or install them on an external media, or, the easier solution, plug in a USB flash drive and select it as the third option.
- Now, you may click the Proceed button, but you also have the option to format and permanently delete all the data from the drive.
That’s it! Now, if something happens to your system, you have an emergency media to boot from.
3. Protect your PC from viruses and ransomware
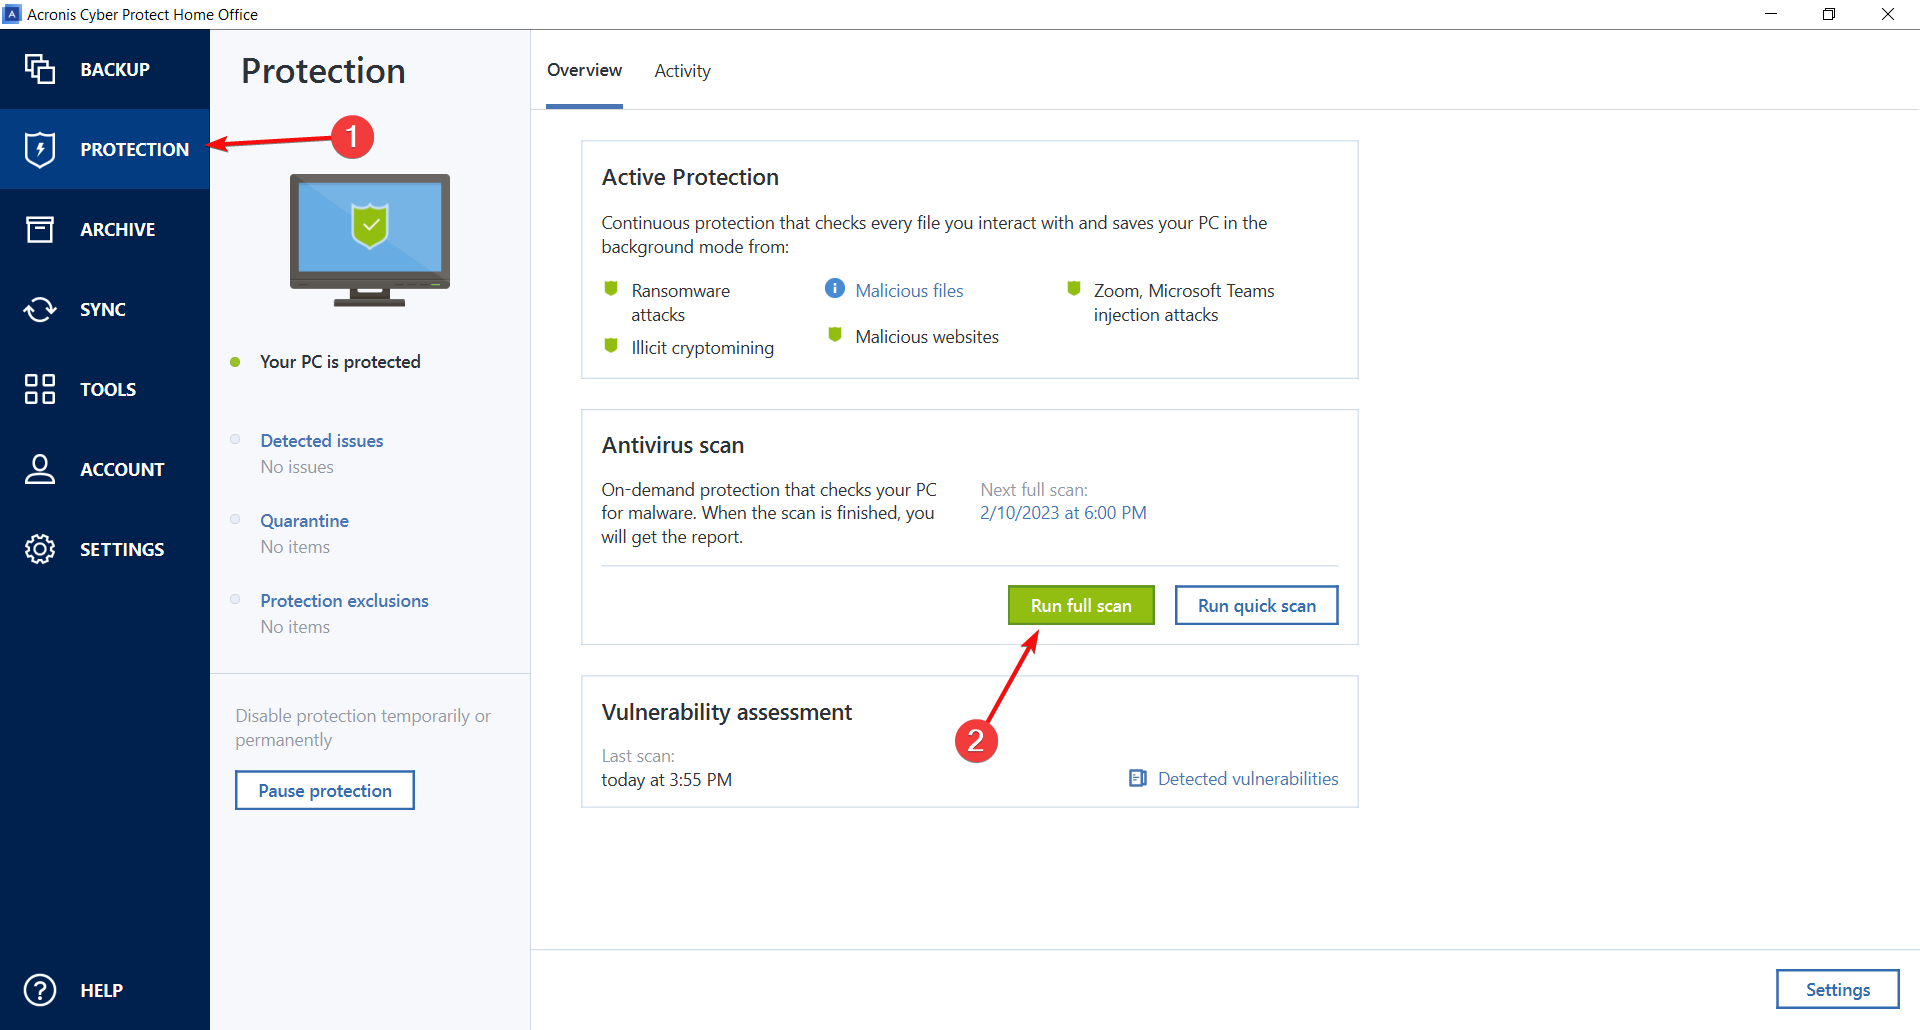
- Click on the Protection menu from the left and hit the Run a full scan button.
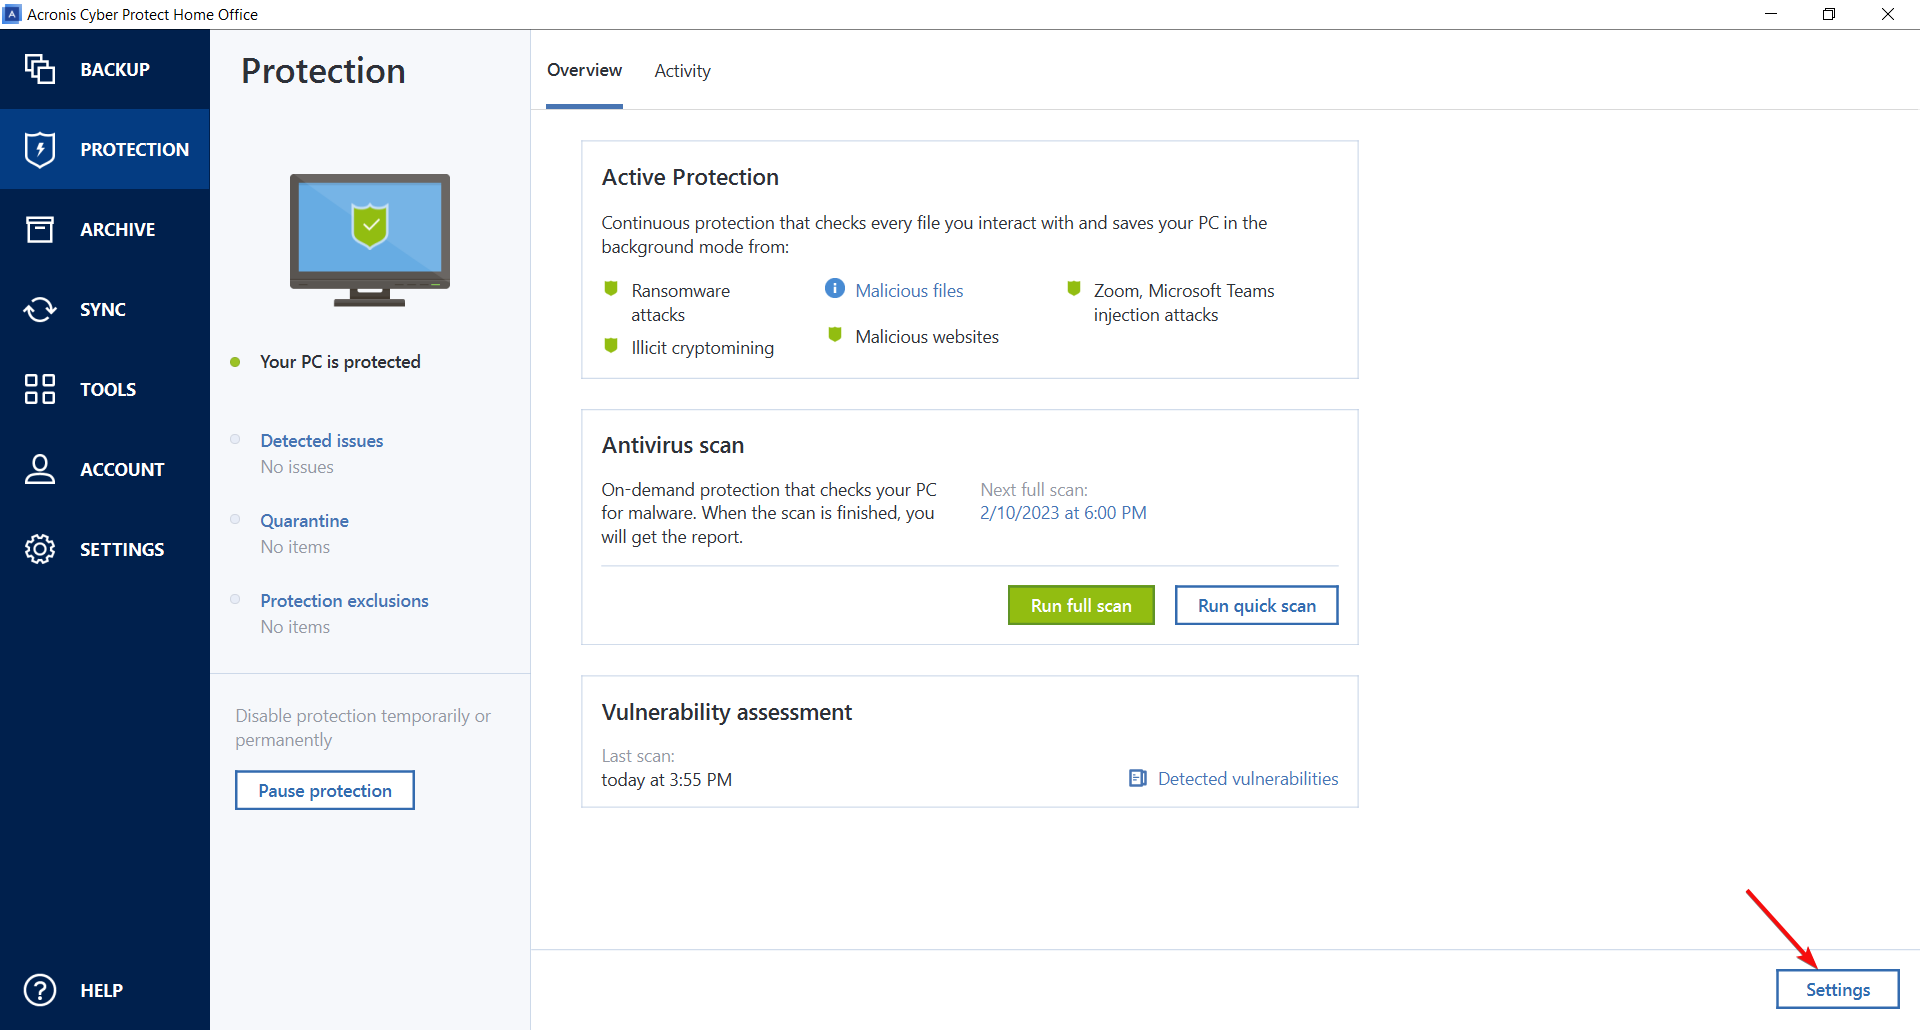
- After completing the scan, click on Settings to set up the protection elements.
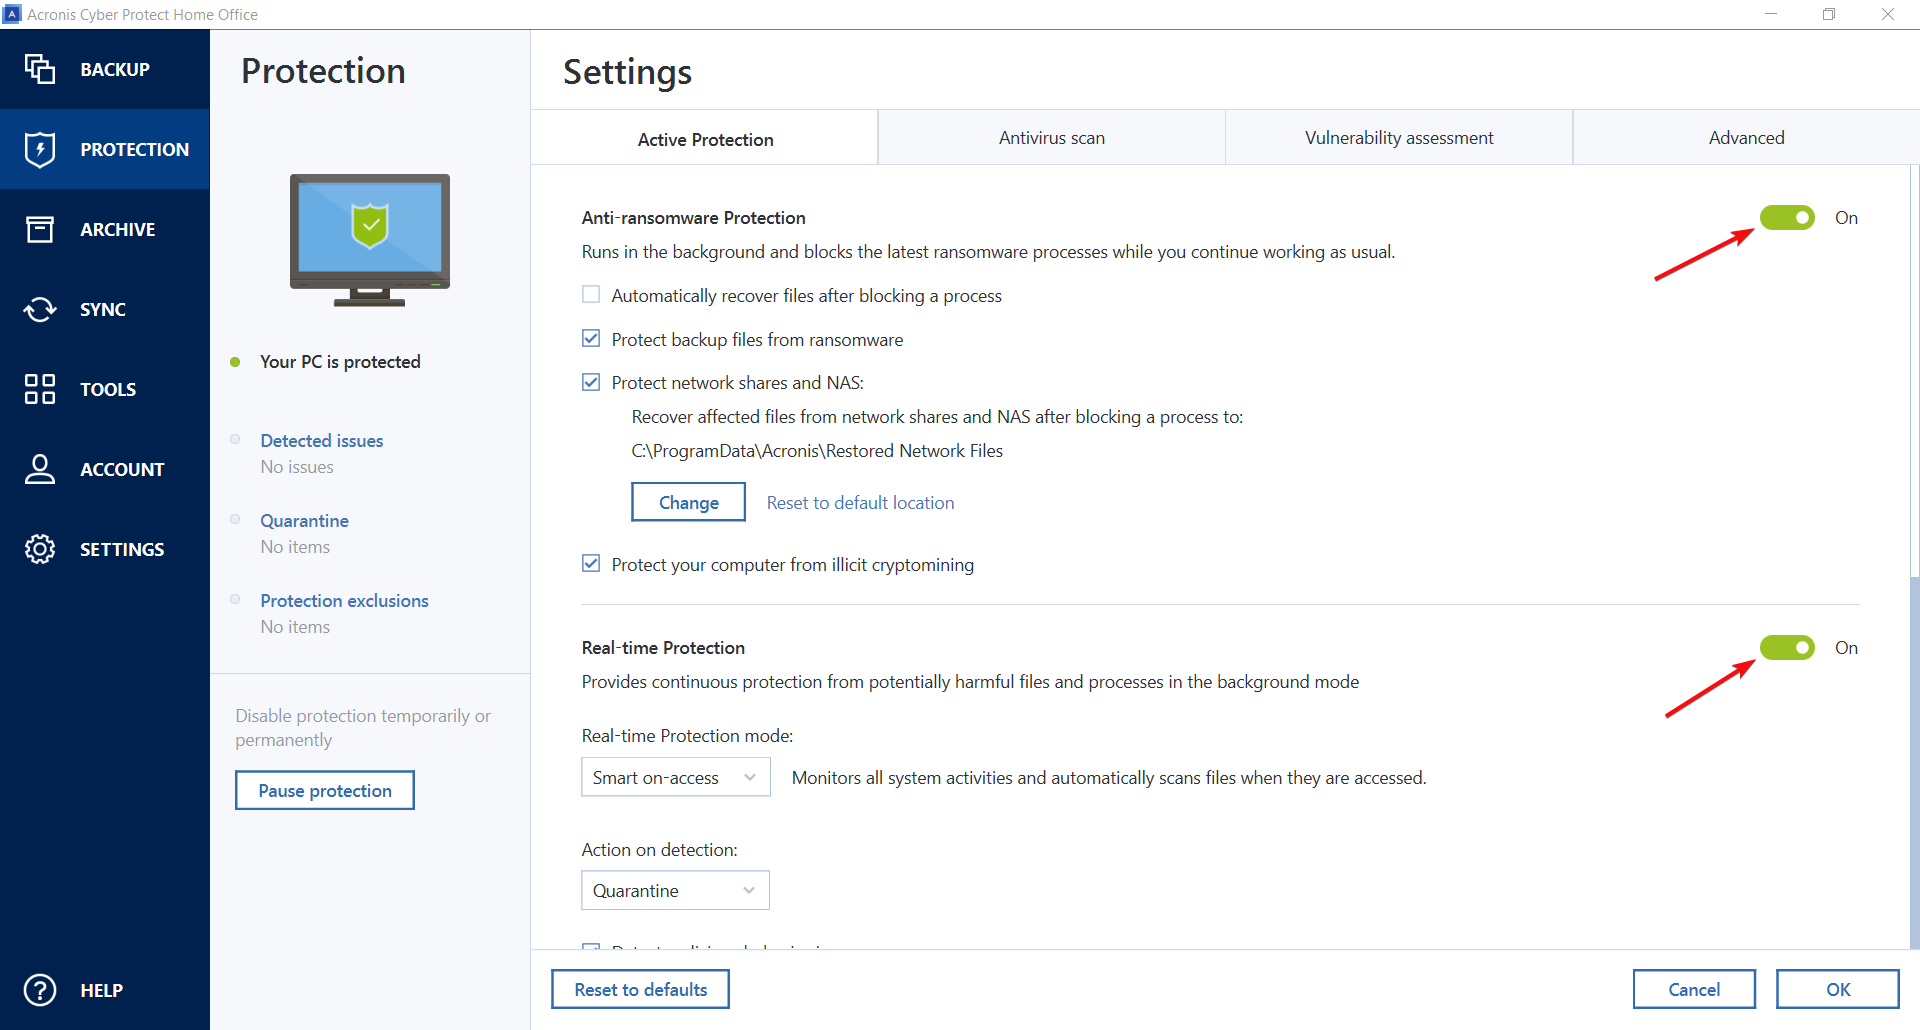
- Make sure that Anti-ransomware Protection and Real-time Protection are ON.
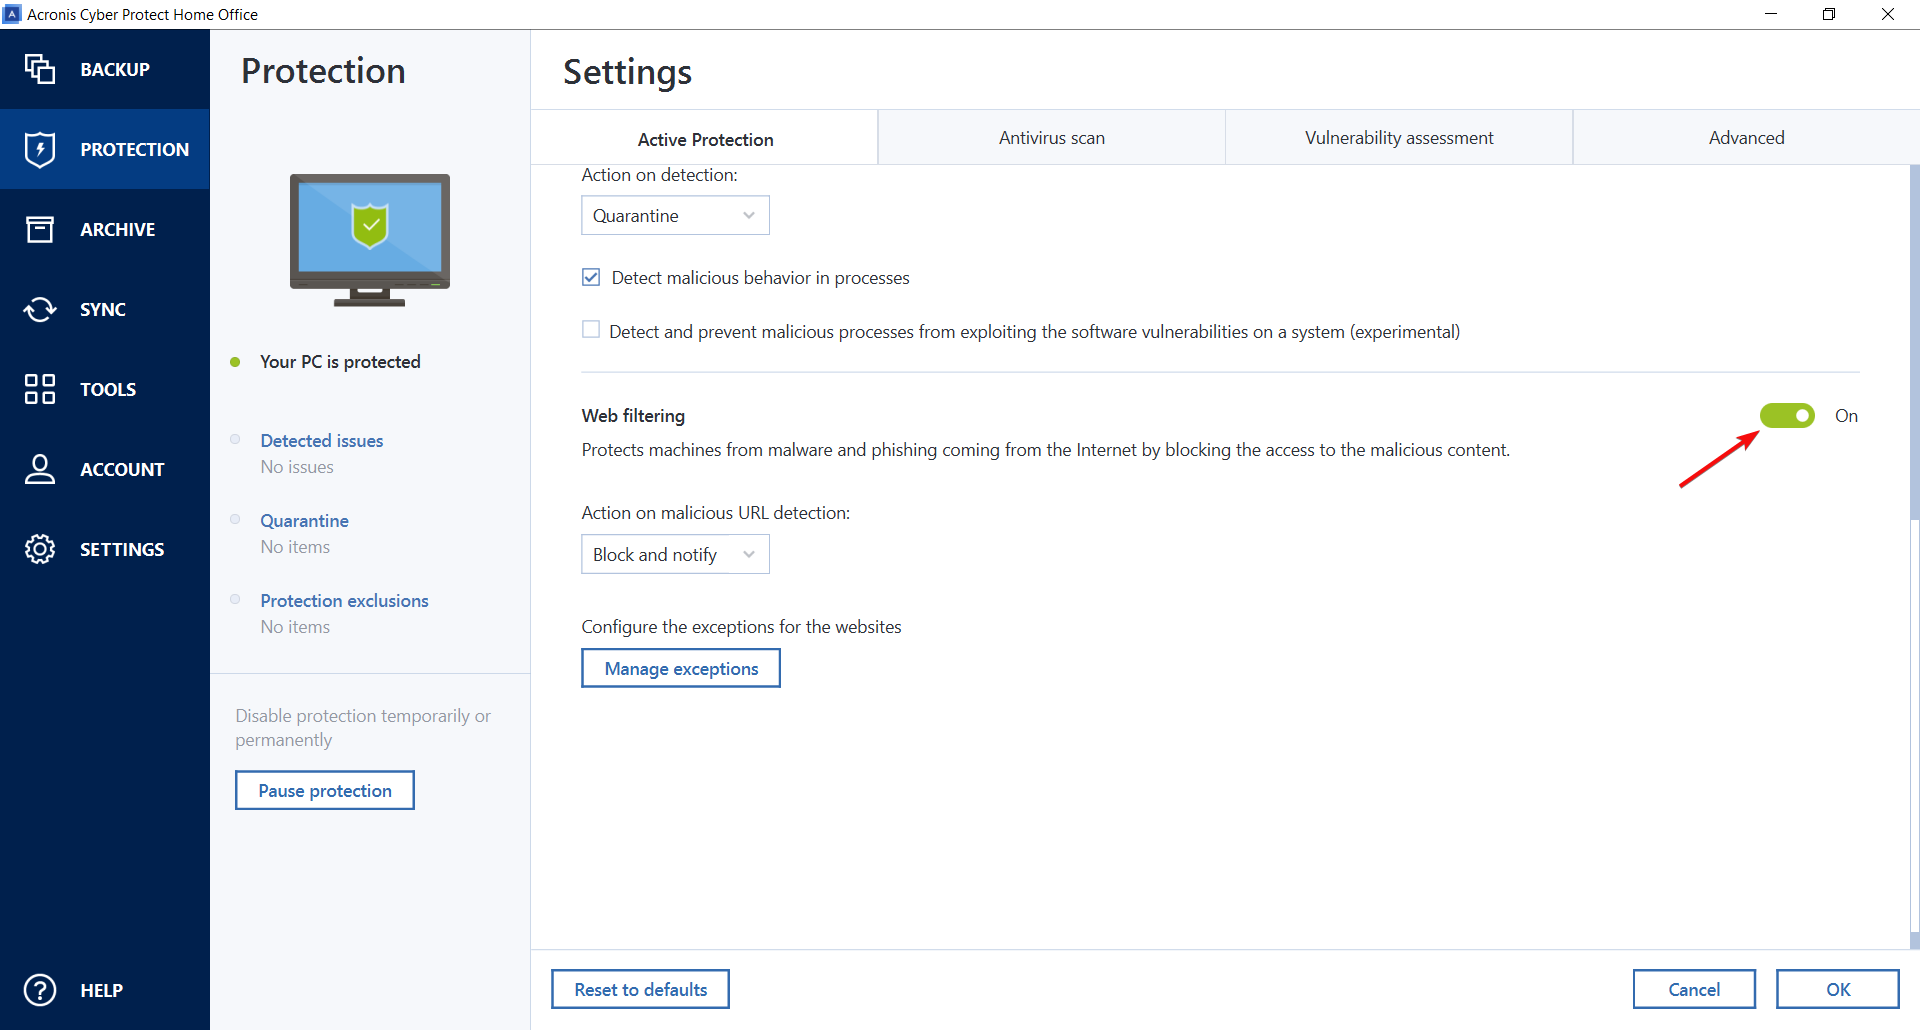
- Scroll down and activate the Web filtering feature as well. It will protect you against malicious websites. In case of any incorrect detections, you can click the Manage exceptions button and add the trusted website.
- Now, click on the Antivirus scan tab and set up the schedule interval and type of scans for your system. By default, it’s set for weekly full scans but you can change that from this menu easily.
Other important features of Acronis Cyber Protect Home Office
We have shown you how to create a full backup of your system and protect your PC from viruses and ransomware.
However, Acronis Cyber Protect Home Office has a lot more important features that we will highlight briefly:
- Sync – With this feature, you can synchronize the folders between two PCs that have the software installed or between your PC and Acronis Cloud.
- Archive – If your PC is full of old and big files, use this tool to select and compress them to occupy less space on your drive.
- Clone Disk – Obviously, this tool is useful to create a mirror image of your disks on another internal or external disk.
- Parallels Access – It is an extremely useful tool that allows you to control another PC remotely.
- System Clean-up – This tool scans your system, then cleans and removes any junk from your system or system components.
- Acronis Secure Zone – With this app, you may create a specially protected partition to store any backups.
- DriveCleanser – This feature helps you completely wipe out all the data and partitions from a disk.
For more information on this solution, we have a complete review of Acronis Cyber Protect Home Office.
We also recommend checking our selection of the best automatic backup solutions for your PC.
The software has a free trial version for 30-day limited testing, but we recommend the full product anytime.
⇒ Get Acronis Cyber Protect Home Office
Have you tried the software yet? Let us know about your experience in the comments section below.




User forum
0 messages