[Fix] Arma Reforger Can't Join Server / No Connection With Backend
Key notes
- Arma Reforger players report not being able to play because of a connection issue.
- If you experience No connection to backend/Can't join server errors, we can help.
- First, you just have to make sure that your Internet connection is up and running.

So, you think that after playing all these shooter games out there, your skills are fine-tuned enough to join the ranks of the Arma Reforger players?
We sure hope so, for your sake. And, if you aren’t jumping the gun here, you might just have a chance against the other pros engaged in this intense battle simulation.
Great, all that’s left is for each and every one of us to get their gear ready and load up the trucks. However, for some players, doing so is not quite as easy as you might think.
Lots of Arma Reforger players have actually reported dealing with no connection with backend errors which prevent them from playing the game.
If that is the case, we can show you the necessary troubleshooting steps you should take in order to get past this annoying situation and keep on playing.
How can I fix the no connection with backend error?
People reported even creating their own servers to be able to play but ended up receiving the same annoying errors.
But, rest assured, we will help you fix this situation quickly with the guide we prepared for you. Thus, carefully go through the troubleshooting process and restore game functionality.
1. Troubleshoot your Internet connection
- Test if your network connection is working
- Restart your router (make sure you unplug the power cord and leave it for 30 seconds switched off)
- Right-click the network icon in the Taskbar and select Troubleshoot problems
- Open a Command Prompt and type the following commands (one by one):
ipconfig/releaseipconfig/allipconfig/flushdnsipconfig/renewnetsh winsock reset
- Try to run Steam again
2. Allow Arma Reforger through your Firewall
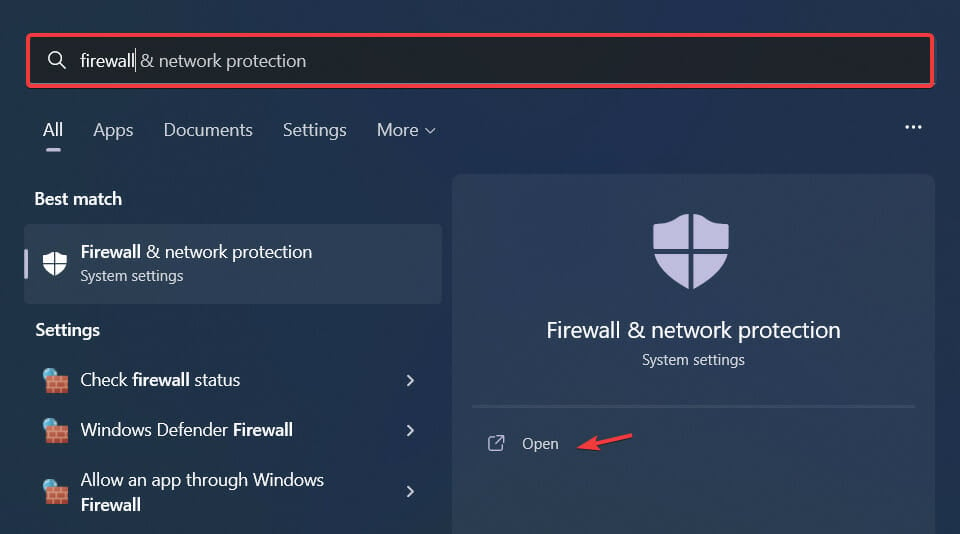
- Press the Windows key, search for Firewall and select Open.
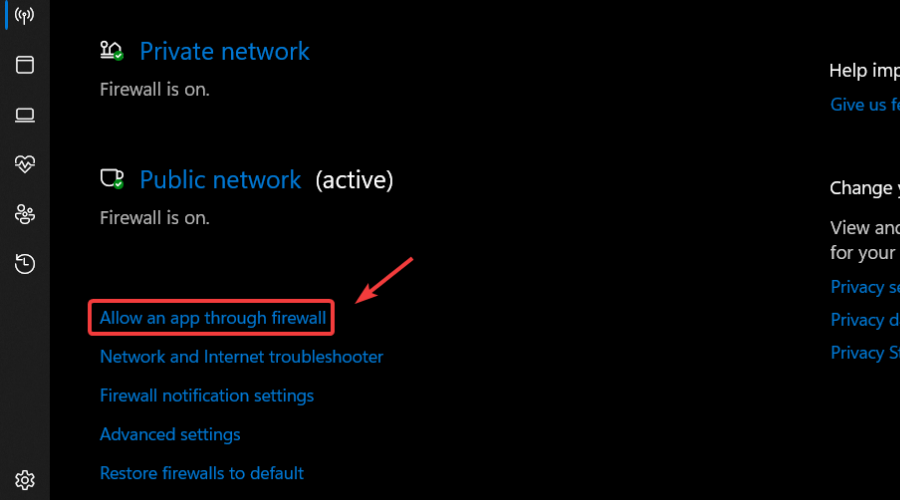
- Click on Allow an app through Firewall.
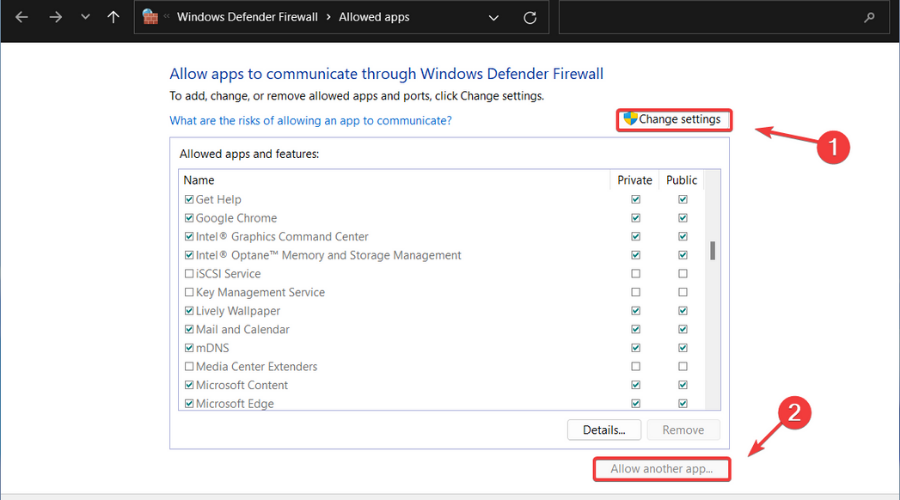
- If Arma Reforger isn’t in the list, click Change Settings, then Allow another app.
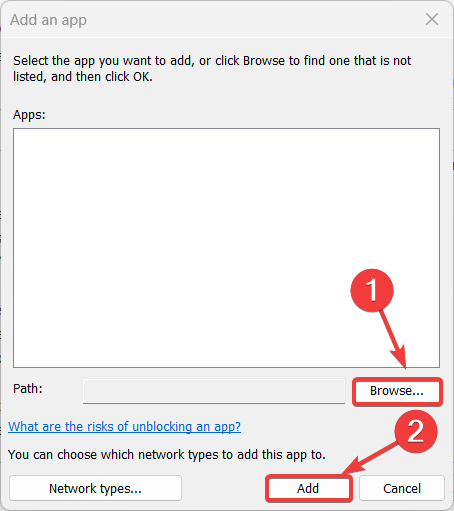
- Click the Browse button, locate your game and press the Add button.
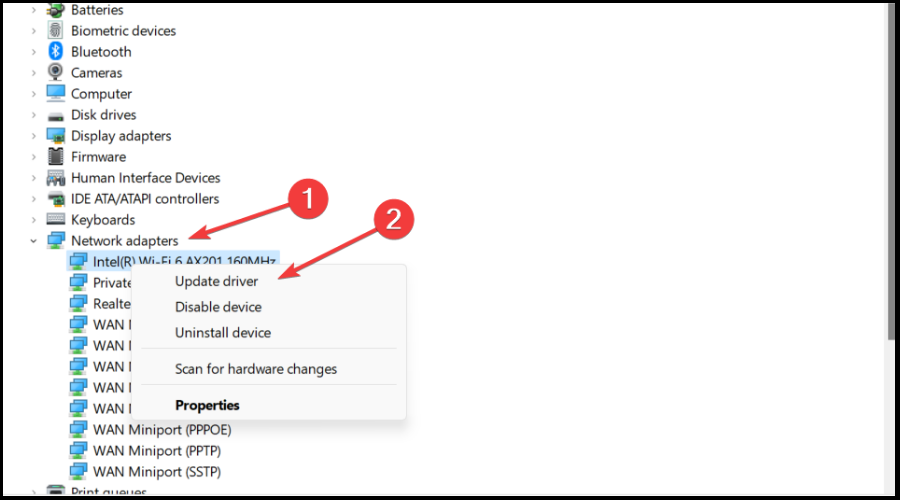
3. Update your network drier
- Press the Windows key, search for Device Manager and click on Open.

- Expand Network Adapters, right-click on the one you use and select Update driver.
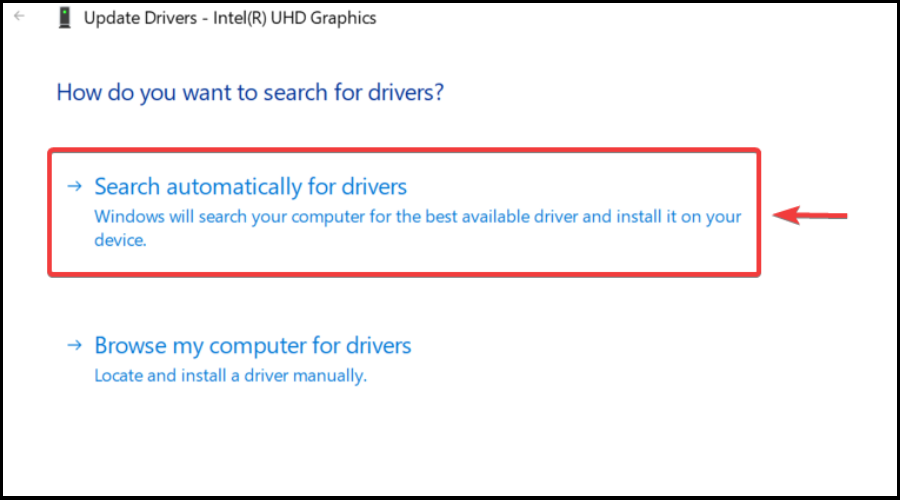
- Select Search automatically for drivers.
If you’re into gaming, surely you can do without all the crashes, lags, or freezes by keeping all drivers up to date and error-free easily.
Sometimes, manual checks are hard to perform, that’s why we recommend using an automated assistant that will scan for fresh driver versions daily.
In case you’re a beginner, you don’t have to worry! Outbyte Driver Updater is smart, simple, engaging and its user interface was built to make your life easier.
4. Check game file integrity
- In Steam, right-click Arma Reforger and select Properties.
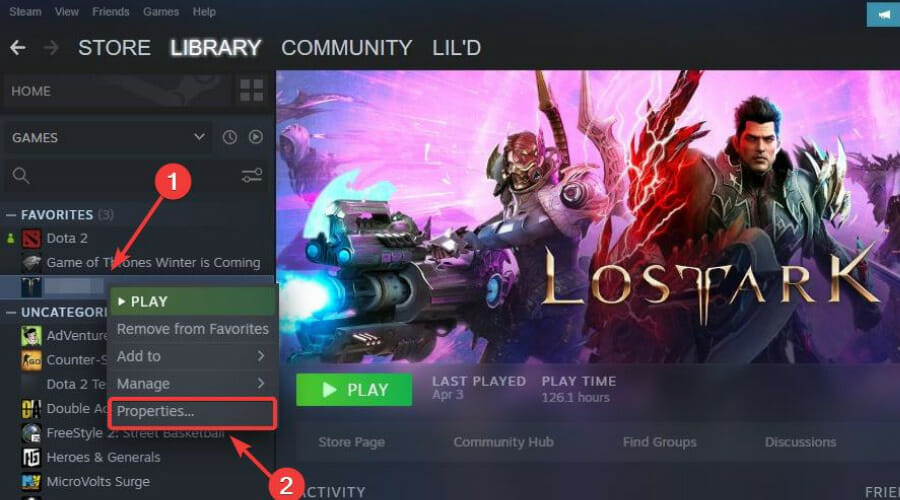
- Select the Local Files tab and click on the Verify integrity of game files.

5. Opt out of all Steam Beta programs
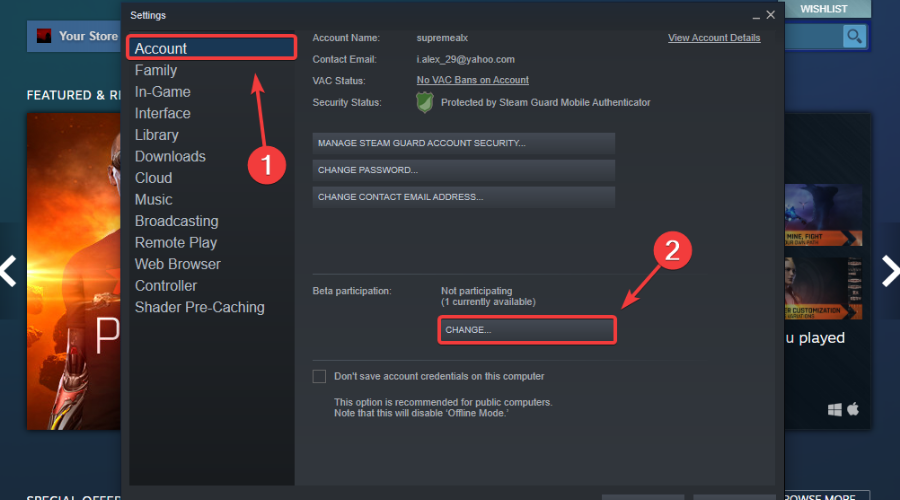
- Click on Steam and select Settings.
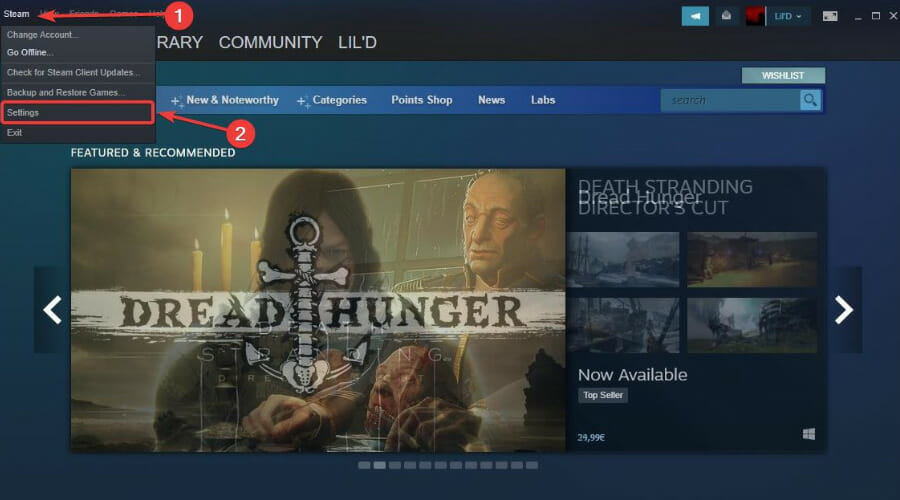
- Select Account and press the Change button under Beta participation.
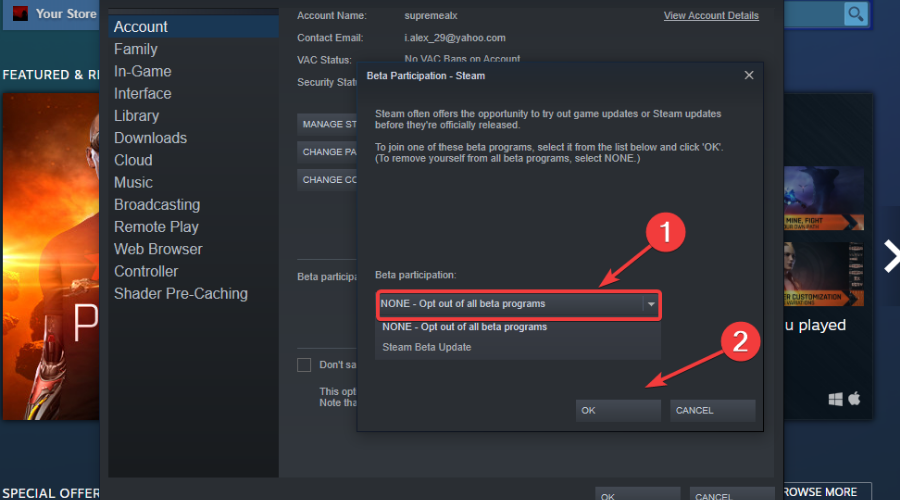
- Click on None – opt out of all beta programs and press the OK button.
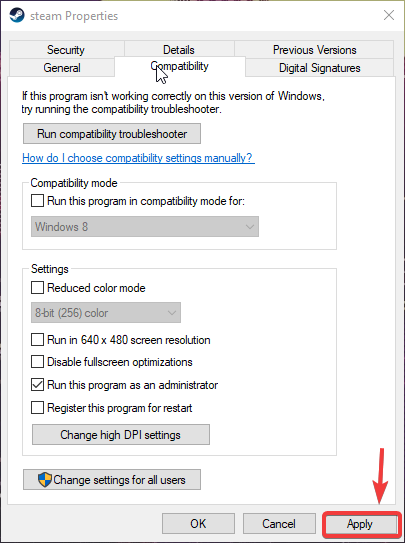
6. Run Steam as an administrator
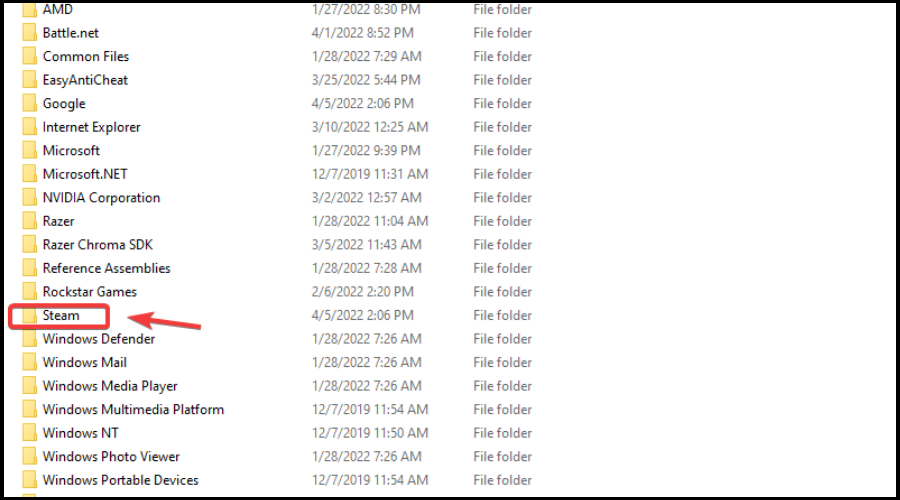
- Locate your Steam installation folder.
- Right-click on the Steam executable and select Properties.
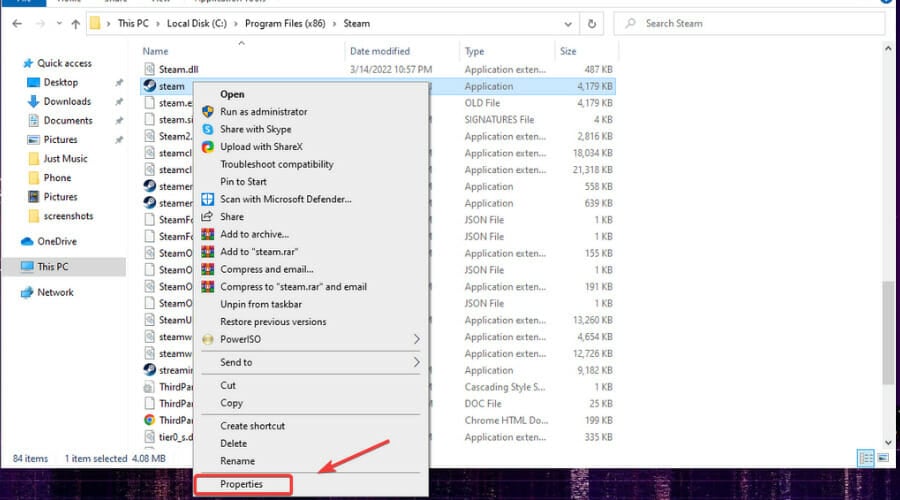
- Click on the Compatibility tab and tick the box next to Run this program as an administrator.

- Press the Apply button and close the window.
These are pretty much the troubleshooting steps you are looking at if you happen to be in a situation like the one described in this article.
Be sure to always start with troubleshooting your Internet connection, just to make sure you don’t go through the entire process needlessly.
Go through the fix steps listed above and tell us which one did the trick for you in the dedicated comments section located below.
Read our disclosure page to find out how can you help Windows Report sustain the editorial team. Read more


Improve this guide


User forum
2 messages