Asus Armoury Crate Error 4151: 5 Ways to Fix it
Solve install errors with a fresh install
4 min. read
Updated on
Read our disclosure page to find out how can you help Windows Report sustain the editorial team. Read more
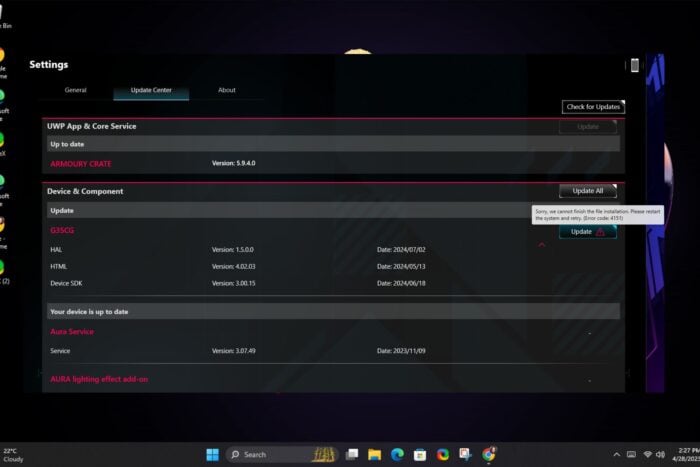
Sorry, we cannot finish the file installation. Please restart the system and retry. (Error code: 4151). This is an error message you may come across when trying to update your Armoury crate.
Armoury Crate install errors can happen if your BIOS is outdated, your PC’s OS is outdated, or the Armoury crate app has malfunctioned.
How do I fix the error code 4151 on the Armoury crate?
1. Check for Windows updates
- Hit the Windows key and click on Settings.

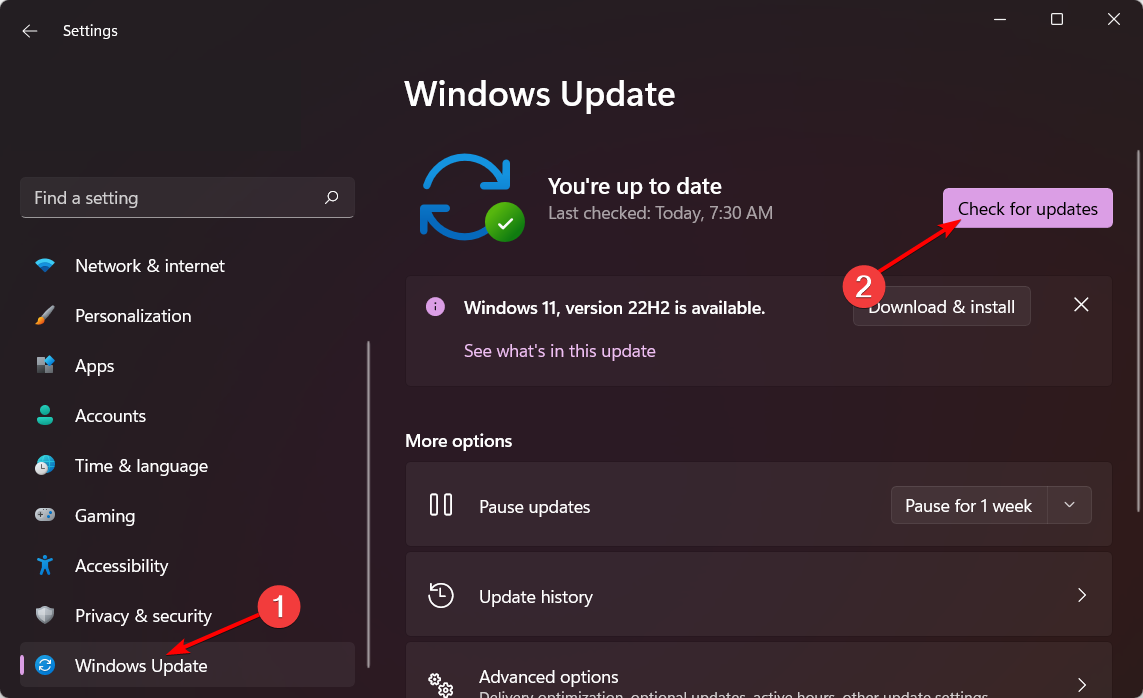
- Click on Windows Update and select Check for updates.
- Download and install if available.
2. Disable your firewall temporarily
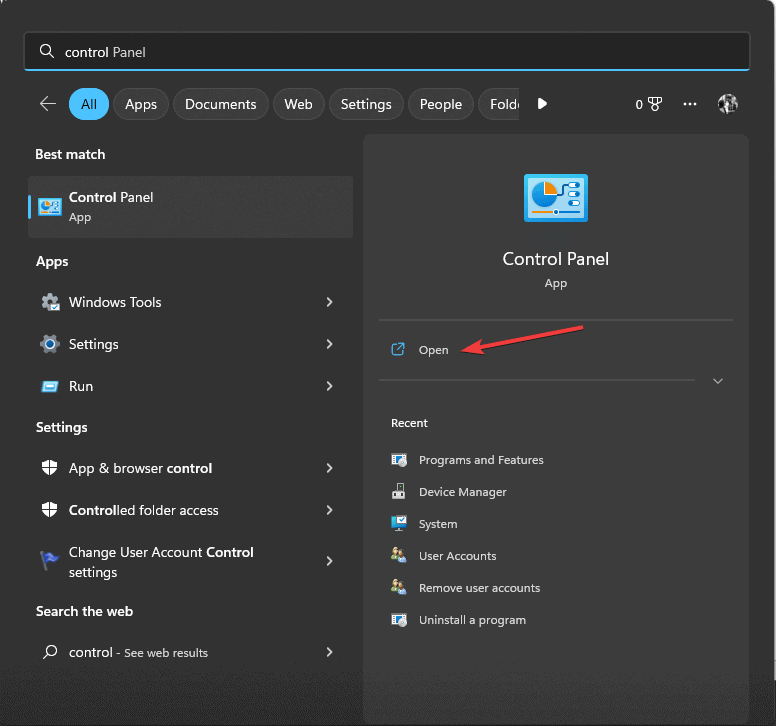
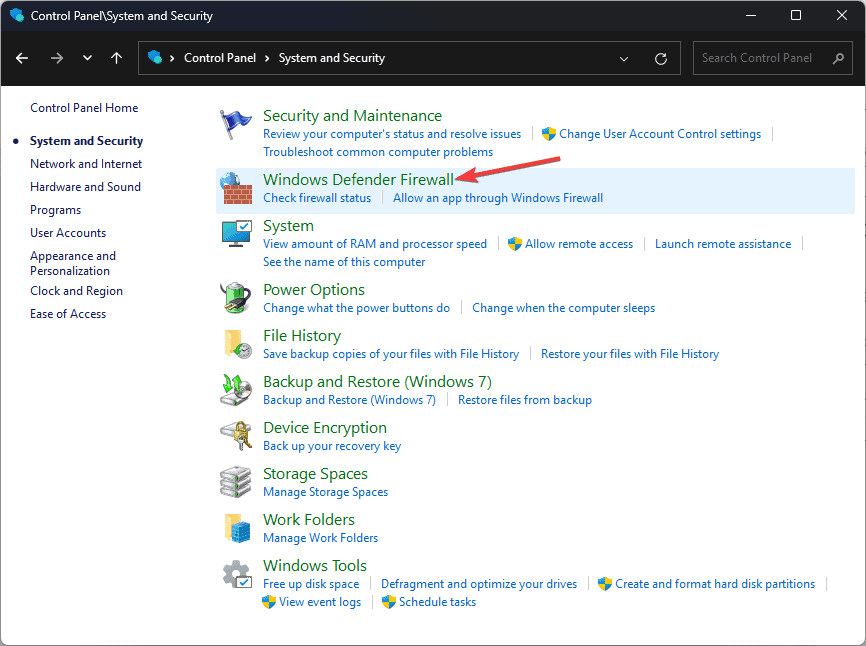
- Press Windows key, type control panel in the search box and click Open from the list of options.
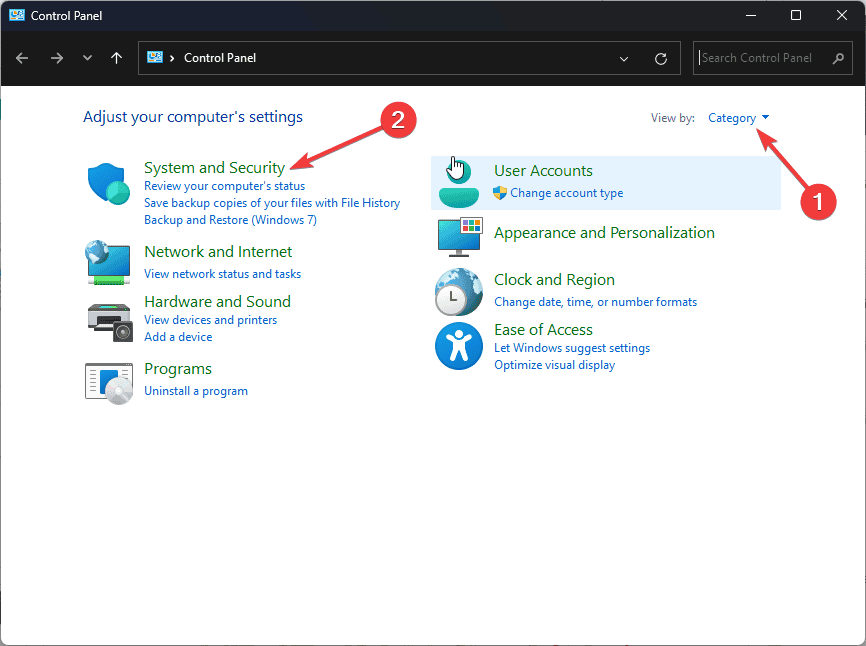
- Select Category for View by and choose System and Security.
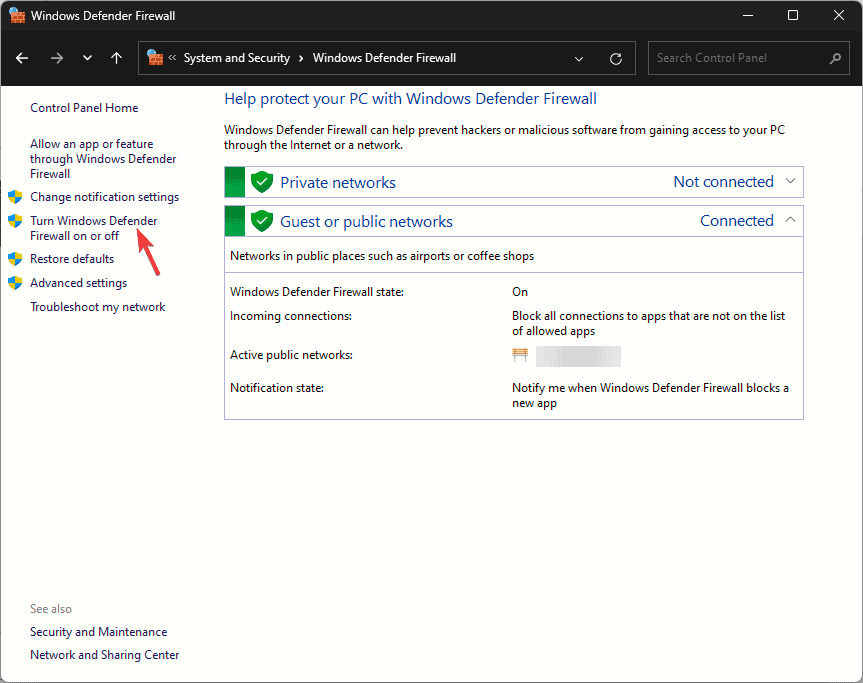
- Select Windows Defender Firewall.
- Click Turn Windows Defender Firewall on or off.
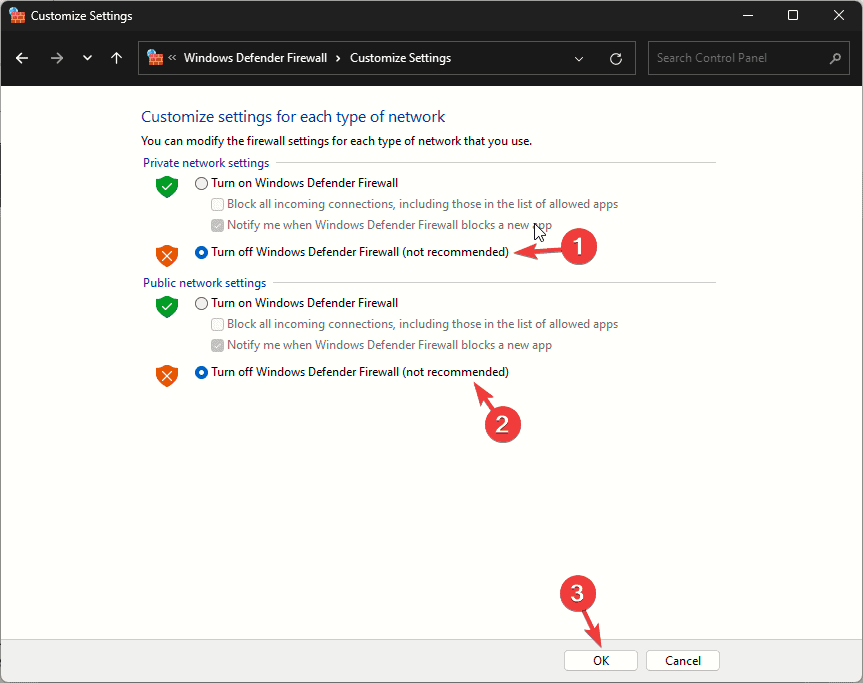
- Now under select Turn off Windows Defender Firewall (not recommended) for both Private network settings and Public network settings.
- Click OK to save the changes.
3. Reinstall the Armoury Crate app
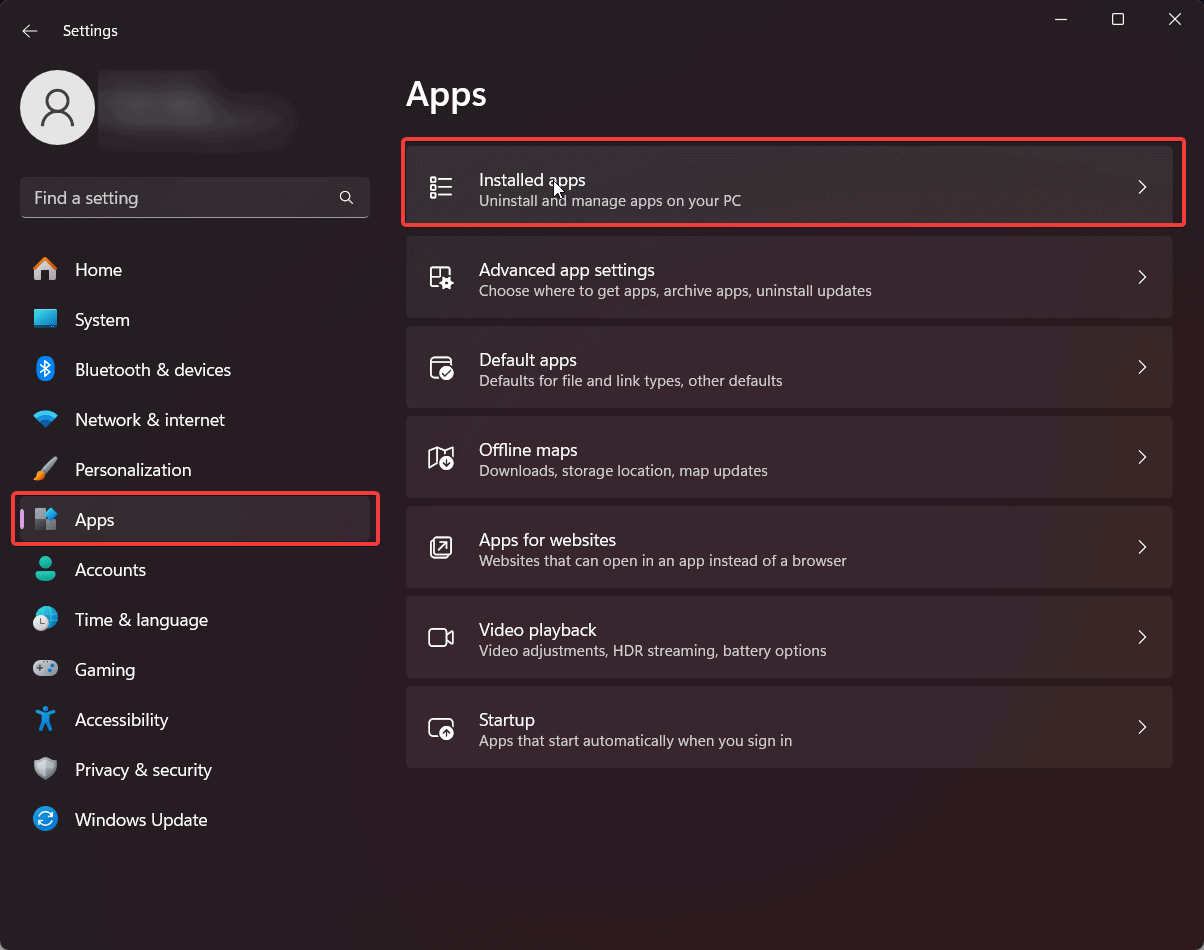
- Go to Windows Settings and select Apps>Installed Apps.
- Locate Armoury Crate and uninstall it. Uninstall all related software too (like Game SDK and ROG Live).
- Visit the official ASUS Armoury Crate download page and download the latest version.
- Follow the installation instructions and restart your computer.
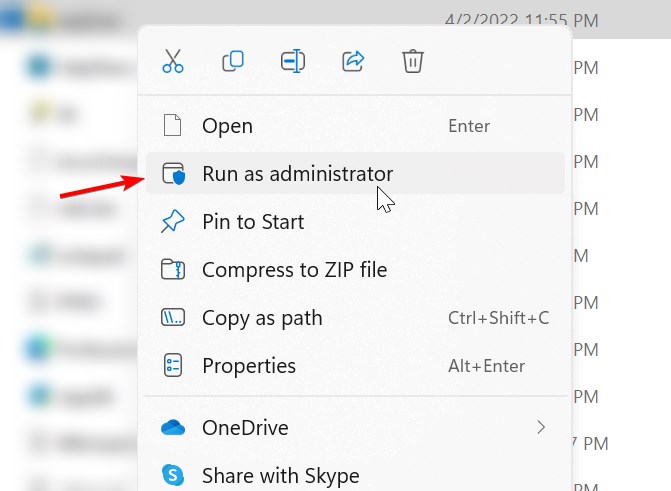
- Right-click the setup file and choose Run as administrator.
- Once installed, locate the Armoury Crate shortcut and run it as administrator.
4. Update ASUS BIOS
4.1. Extract the BIOS Update file
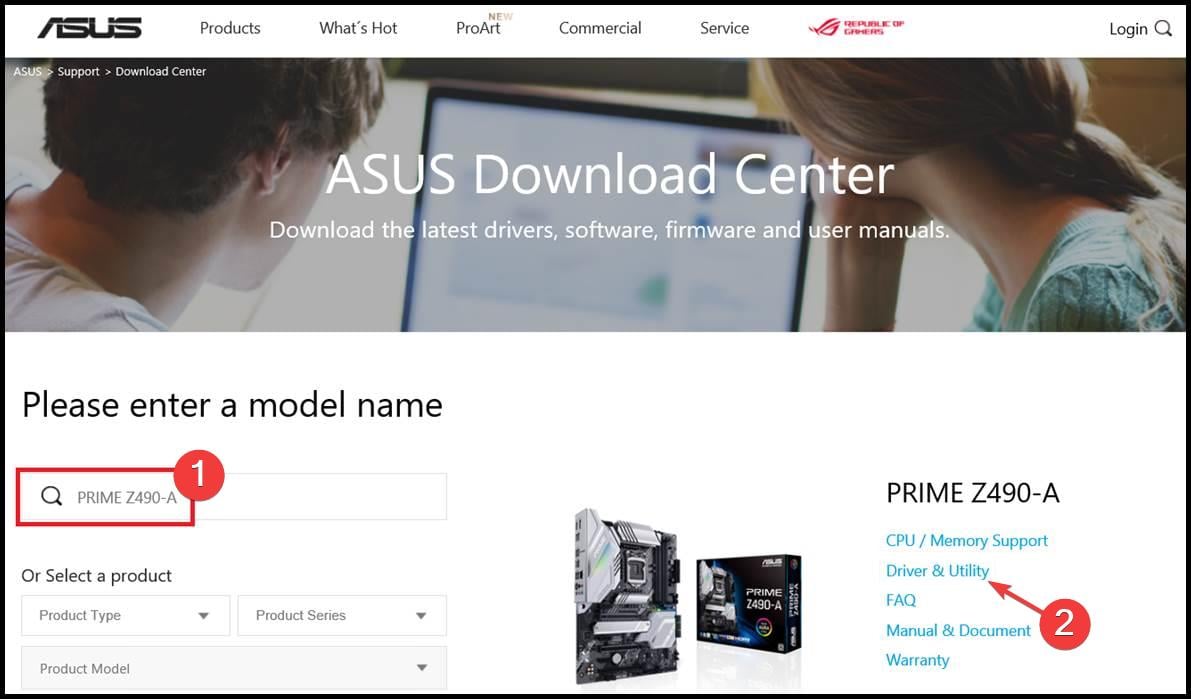
- Visit the official ASUS download center and search for your motherboard’s model name.
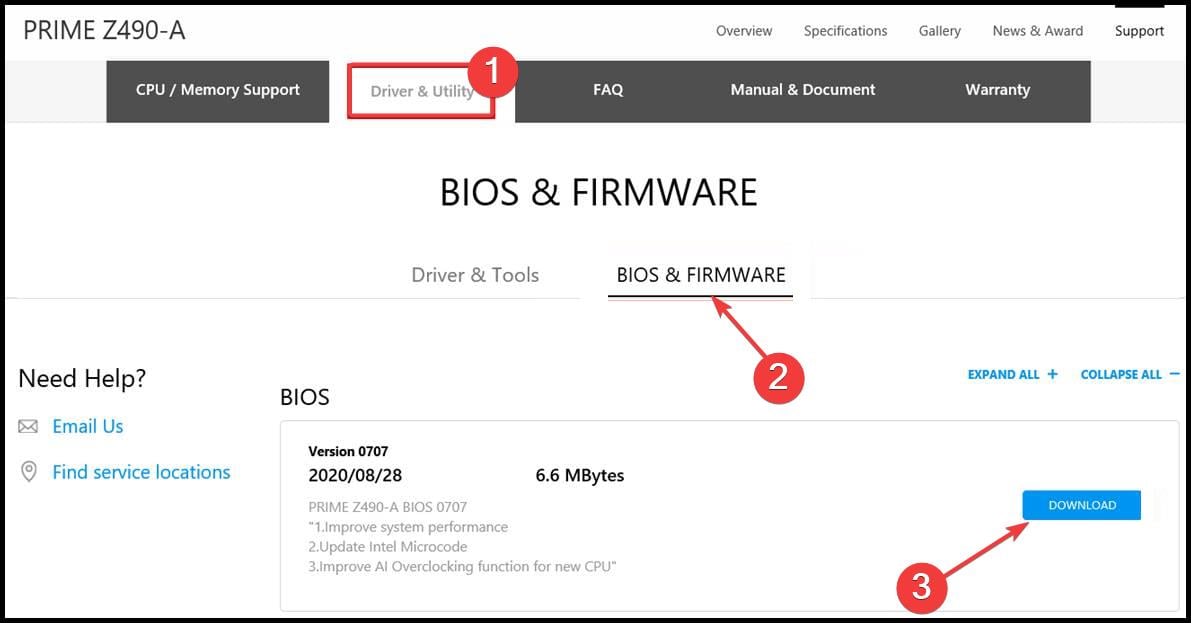
- Click the Driver and Utility option.
- Now, select the BIOS & FIRMWARE tab.
- Next, download the BIOS and right-click the downloaded file.
- Choose the Extract files option.
- Finally, copy the extracted file with the largest size to a USB size. Ensure the USB drive is formatted to FAT32 format before using it.
4.2. Employ the EZ Flash Utility
- Shut down your PC. Now, power it on again and keep pressing the BIOS key (F2 or Del) to enter BIOS.
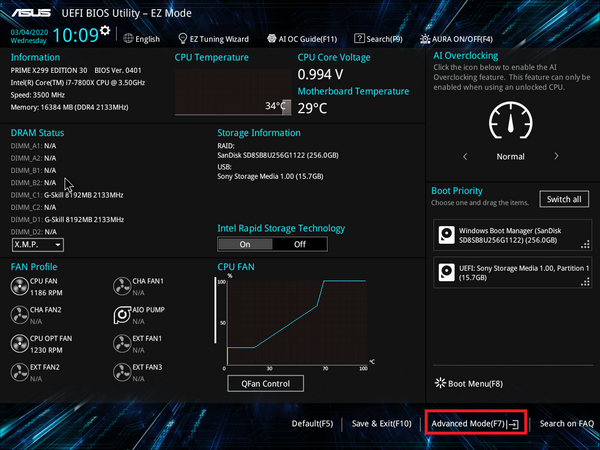
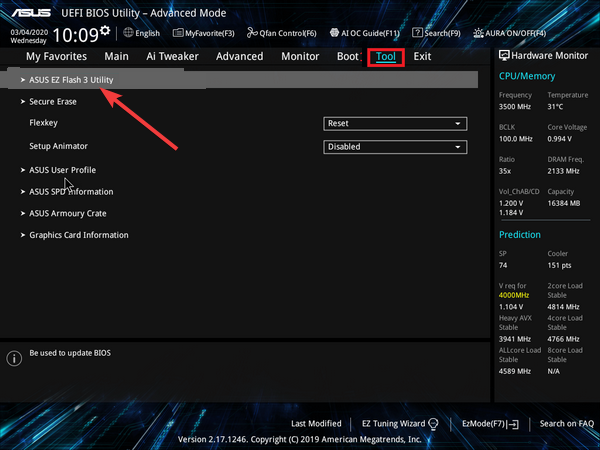
- When you enter the BIOS, click the Advanced Mode option at the bottom of the page.
- Click the Tool tab at the top.
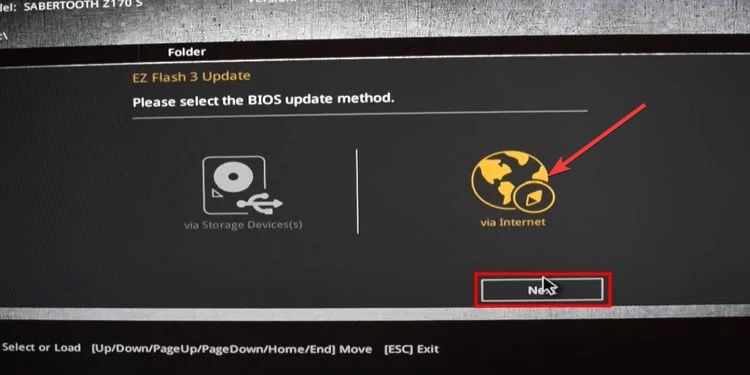
- Now, select the ASUS EZ Flash Utility option in the left pane. If you have the ASUS EZ Flash 2 Utility, you can only use USB for the update, while ASUS Flash 3 can use both USB and the internet.
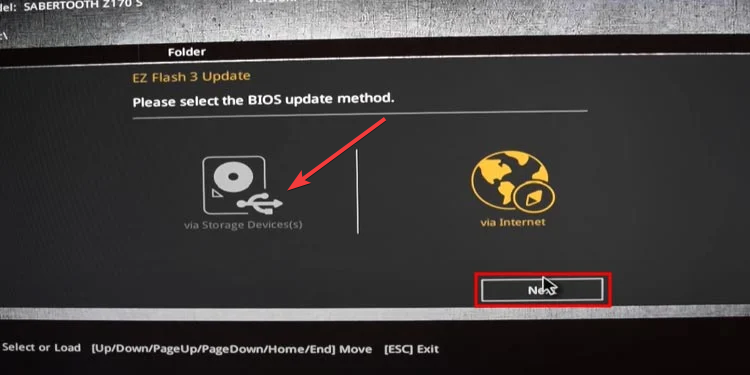
- To use the USB drive:
- Select via Storage Device on the next page and click Next.
- Now, choose the USB drive created above and select the BIOS update file you extracted.
- Click the Yes button when the confirmation page to read the drive pops up.
- Lastly, click the Yes button again to confirm the update, and your PC will restart when the process is complete.
- Select via Storage Device on the next page and click Next.
- If you have ASUS EZ Flash 3 and want to use the internet (note that you can only use a wired connection):
- Finally, note that you must not press any key or allow your PC to power off when it restarts after the BIOS update.
5. Perform a System Restore
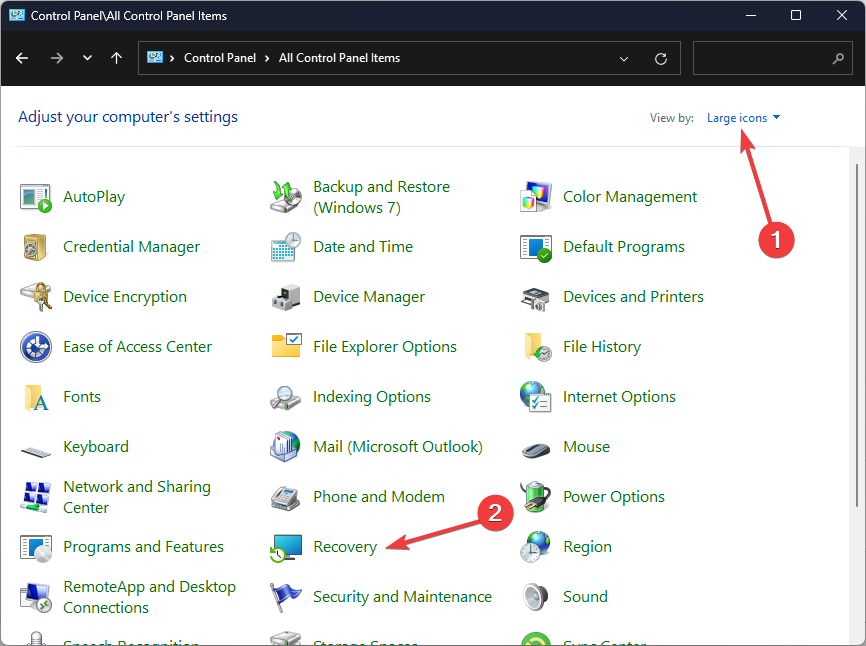
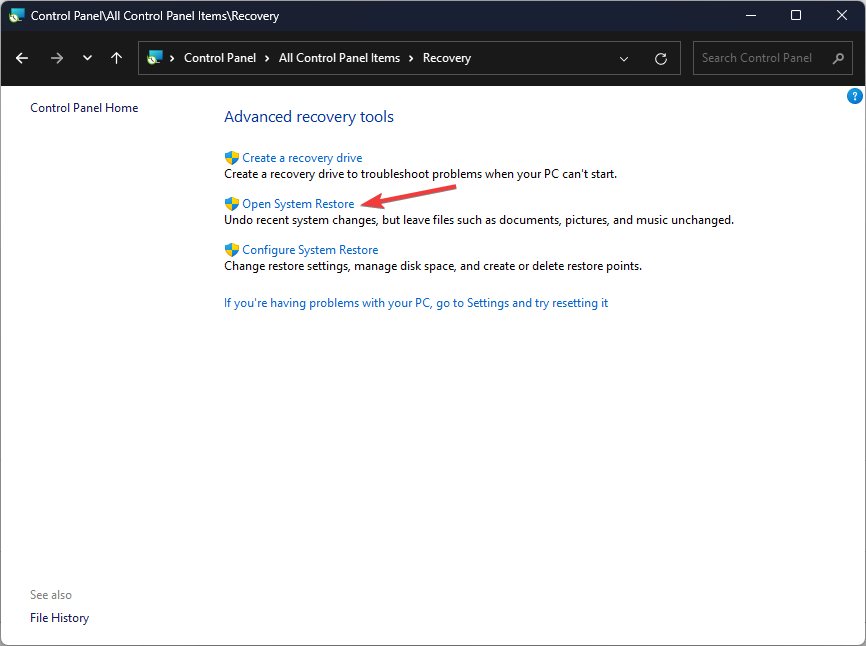
- Press the Windows key, type Control Panel, and click Open.
- Select Large icons as View by and click Recovery.
- Click Open System Restore.
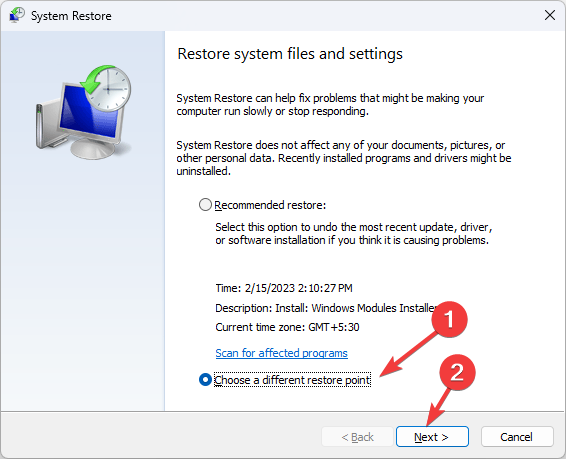
- Select Choose a different restore point and click Next.
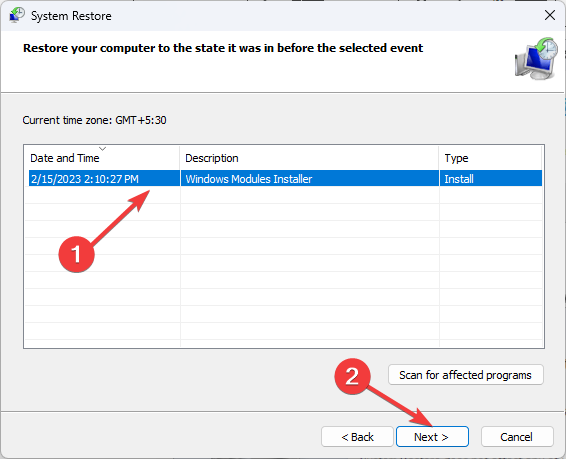
- Now select the restore point and click Next.
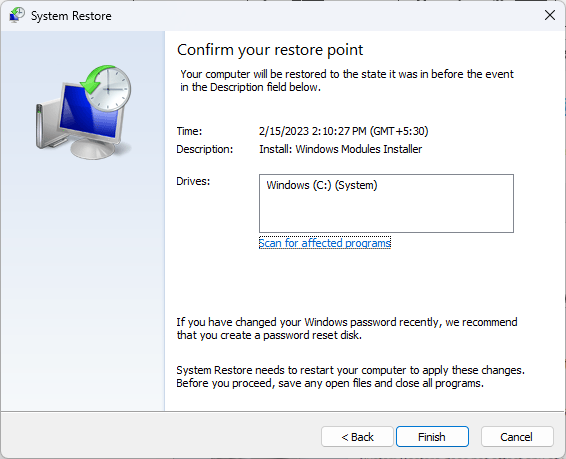
- Click Finish to restore the previous settings, and Windows will restart.
Aside from error 4151, you may also find the Armoury crate keeps crashing your PC or is unable to detect devices. If this is the case, refer to our detailed guides on how to fix these issues.
Conversely, you can opt for other Armoury crate alternatives that can optimize your system just as well as the Armoury crate but with fewer performance issues. Before you leave, don’t miss our latest guide on the ASUS Armoury Crate error 4101 for more information.
If you have any other solutions you’d like to recommend for this error that worked for you, feel free to drop it in the comment section below.









User forum
0 messages