Battle.net Update Stuck at 0%: How to Easily Fix It?
Disable your antivirus temporarily and try again
Key notes
- This error could occur due to third-party interference, slow internet connection, or faulty network settings.
- This guide will cover all the available methods to fix the issue.
Battle.net update stuck at 0% while trying to update a game, or the app itself is a common issue reported by many gamers. In this guide, we will discuss all the available methods and the causes of the issue.
What causes the Battle.net update to get stuck at 0% issue?
Various reasons could cause this issue; some of the common ones are:
- Weak internet connection – Slow internet could be the reason for your update getting stuck. Check your internet connection.
- Third-party interference – The security program on your computer might conflict with the update files, causing the issue.
- Using a standard account – If you use a standard user account instead of one with administrator rights, you may face this issue.
- The server is under maintenance – To install an update, the files must be downloaded from the server; if the server is under maintenance, you might encounter the problem.
- Unnecessary apps consuming the internet – If you have unwanted apps running in the background using high bandwidth, this issue can occur.
- Incorrect network settings – If the network settings are not configured properly, it could cause slow internet, hence the issue.
How can I fix the Battle.net update stuck at 0% issue?
Before engaging in advanced troubleshooting steps, you should consider performing the following checks:
- Restart the Battle.net Desktop app.
- Check your internet connection.
- Run the app as an administrator.
- Close unwanted apps from Task Manager.
- Check if your Windows is up to date.
1. Delete the app’s existing files
- Press Windows + R to open the Run console.
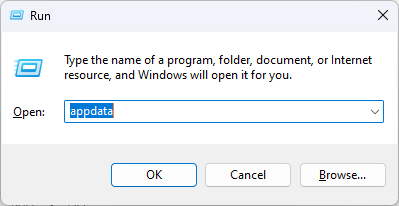
- Type AppData and click OK to open the AppData folder.
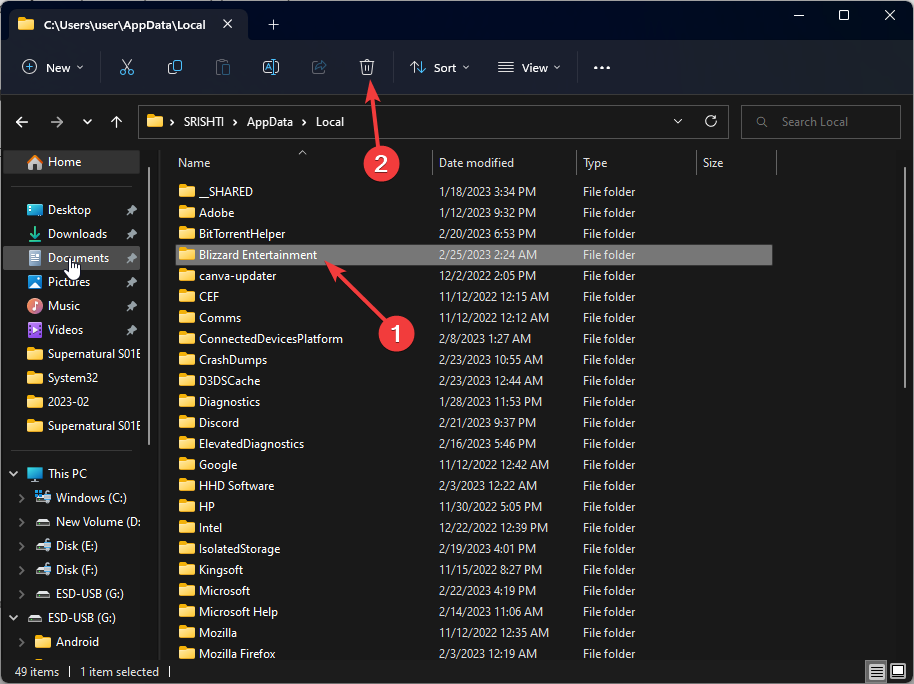
- Go to the Local folder.
- Right-click Blizzard Entertainment and click Delete.
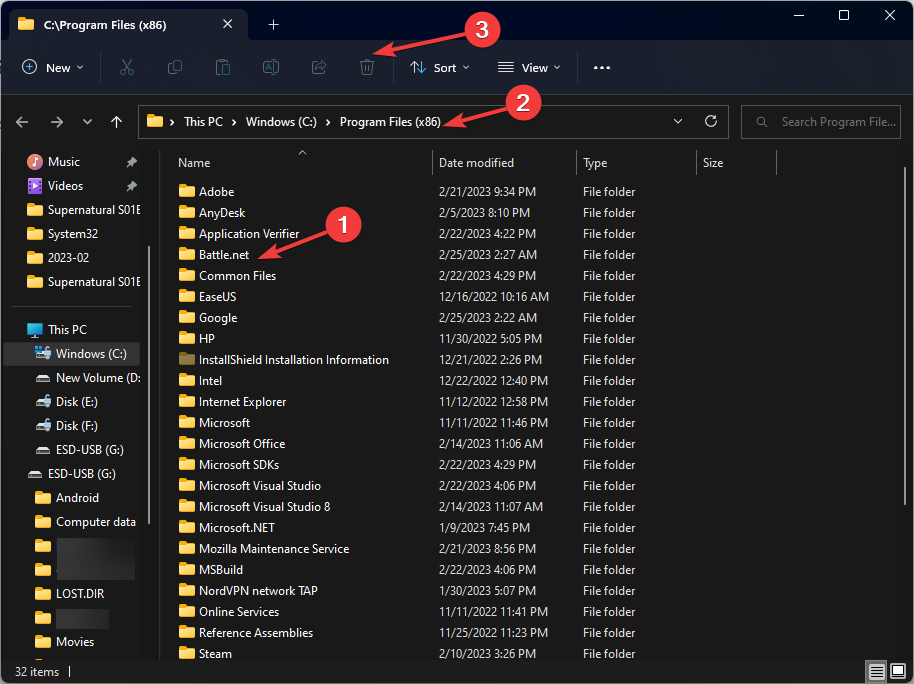
- Now navigate to this path
C:\Program Files (x86) - Right-click the Battle.net folder and select Delete.
- Download the Battle.net file, launch the installer, and follow the onscreen instructions to install the app.
2. Power cycle your router
- Turn off your router and wait until the lights are off.
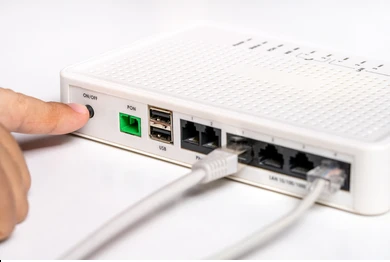
- Remove the power cords from the socket.
- Please 2-3 minutes and then plug in the power cord again.
- Turn on the router and wait till the lights are on.
- Now reinstall Battle.net to see if the issue persists.
3. Allow the app through the firewall
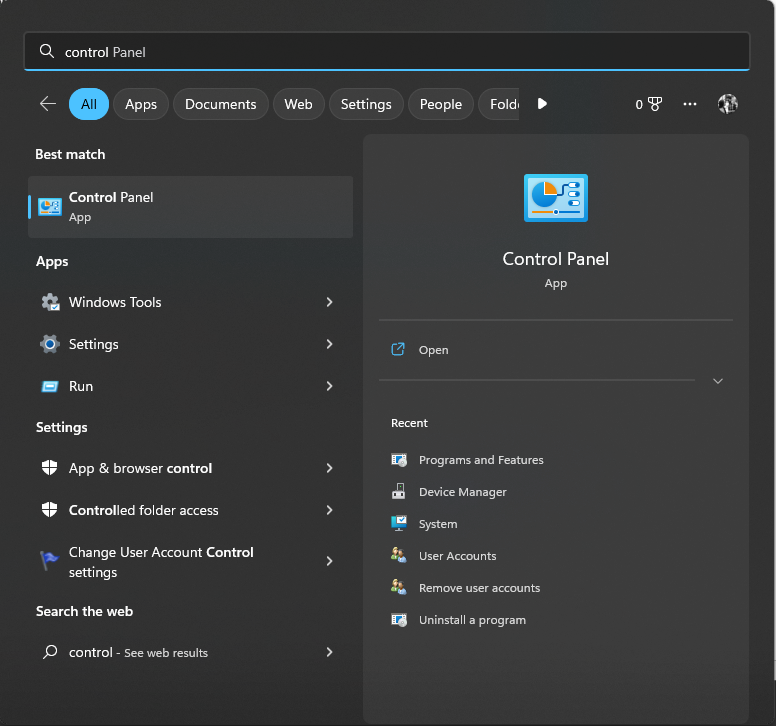
- Press the Windows key, type Control Panel, and click Open.
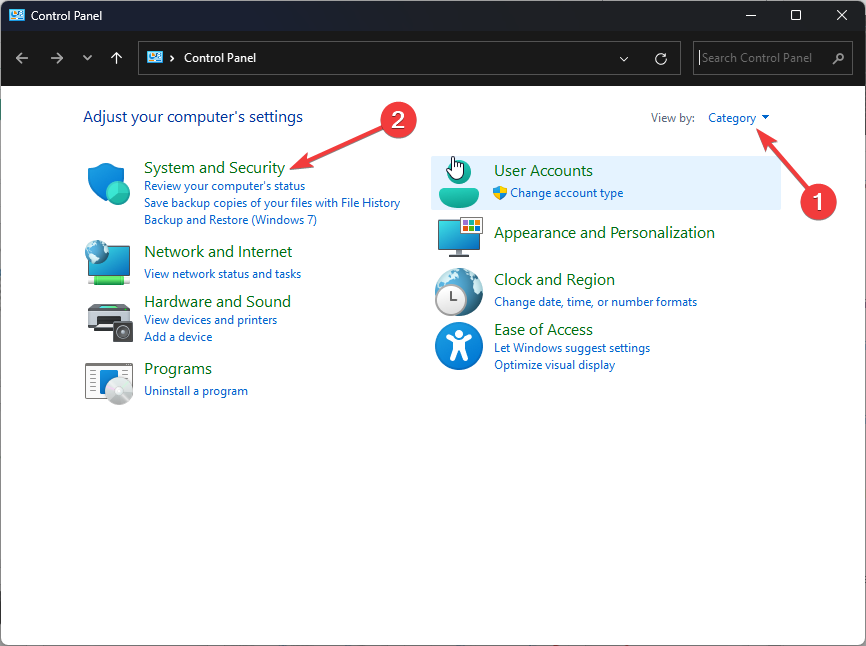
- Select View by as Category and click System and Security.
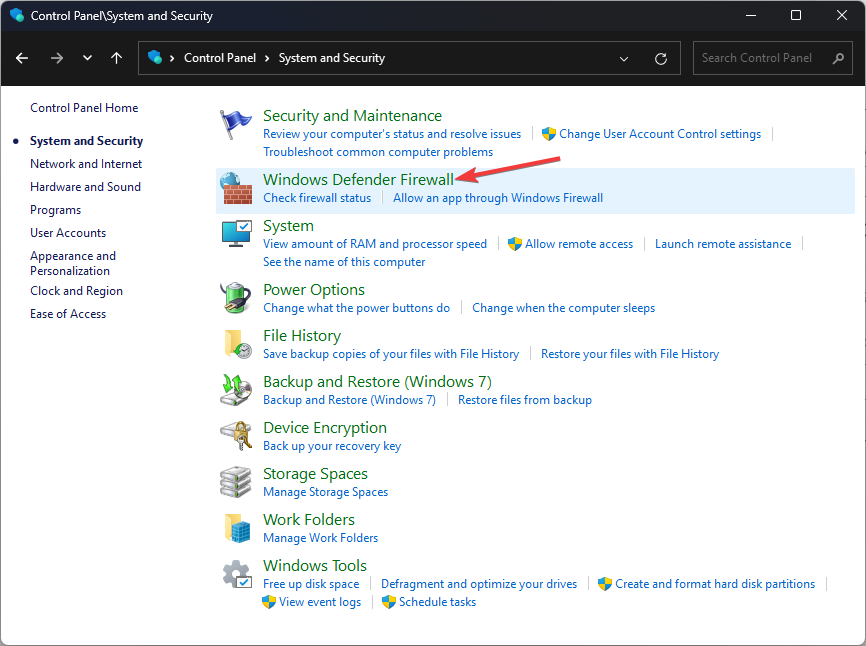
- Click Windows Defender Firewall.
- Locate and click Allow an app or feature through Windows Defender Firewall.

- Click Change Settings, then locate Battle.net under Allowed apps and features.
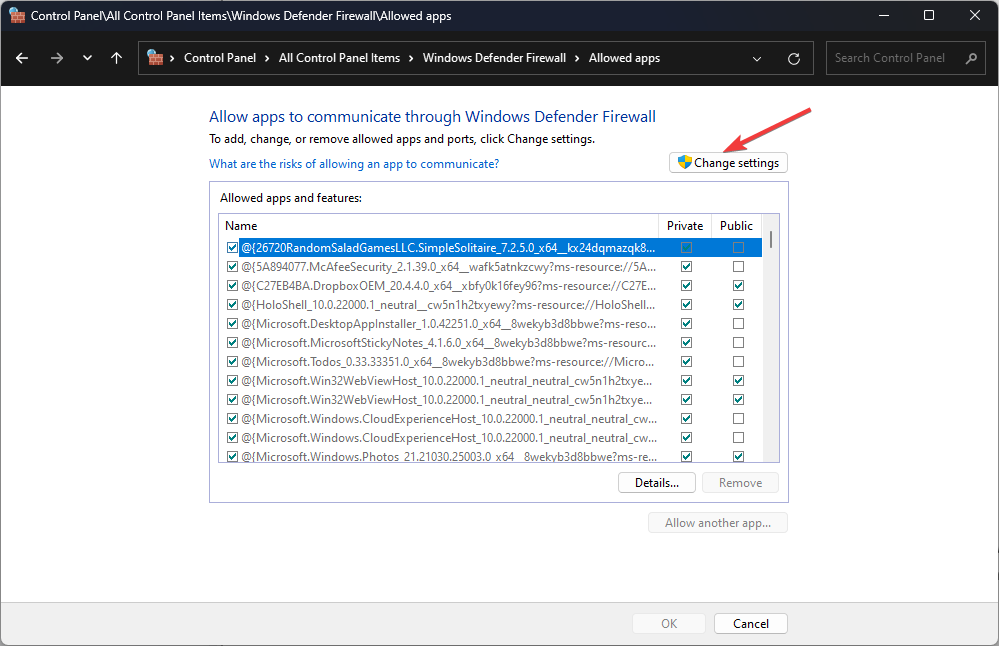
- If you are not able to find it, click Allow another app.
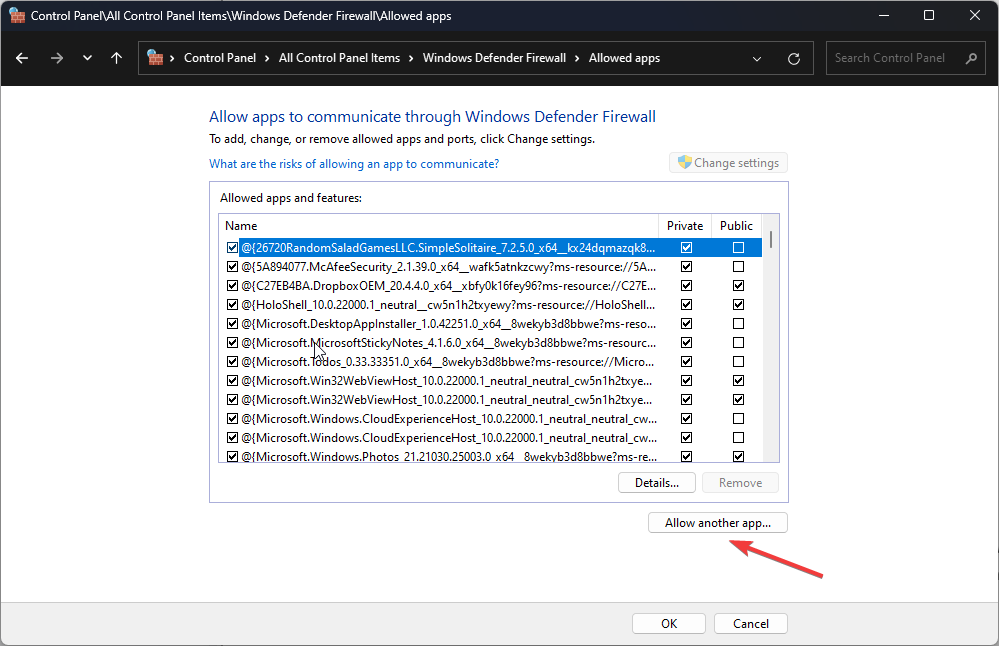
- Click Browse.

- Select the app and click Open.
- Now click Add.

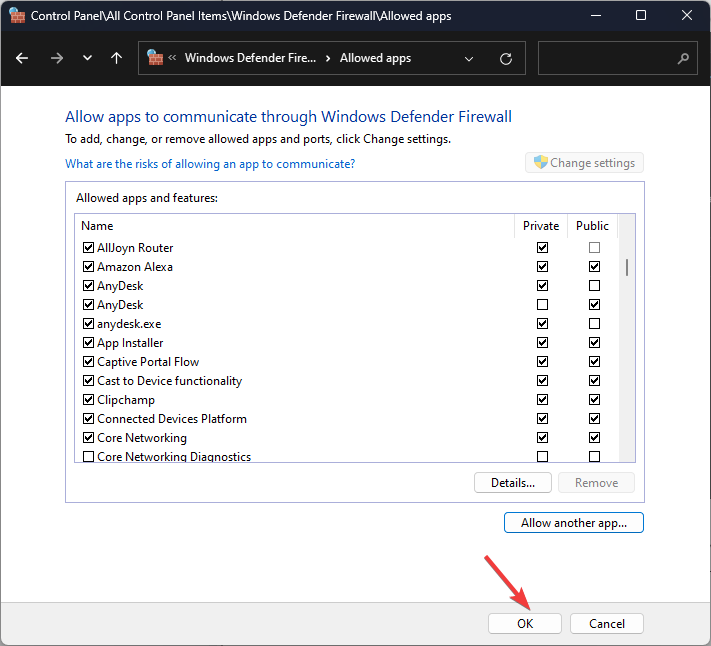
- Place a checkmark on the Public and Private options for Battle.net.
- Click OK. Now try to install the update or app to check if the issue is fixed.
4. Disable antivirus temporarily
- Press the Windows key, type Windows Security, and click Open.
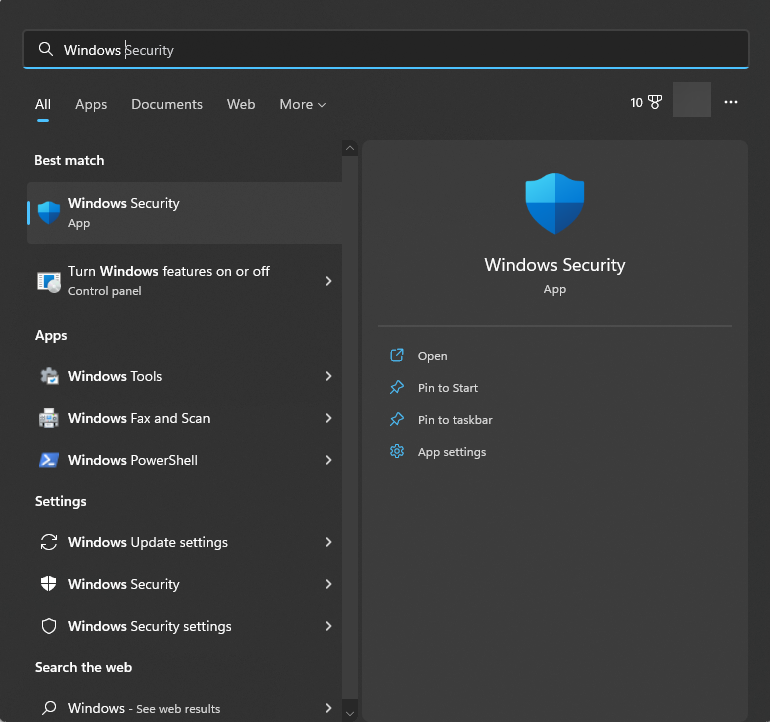
- Click Virus & threat protection and then click Manage settings.
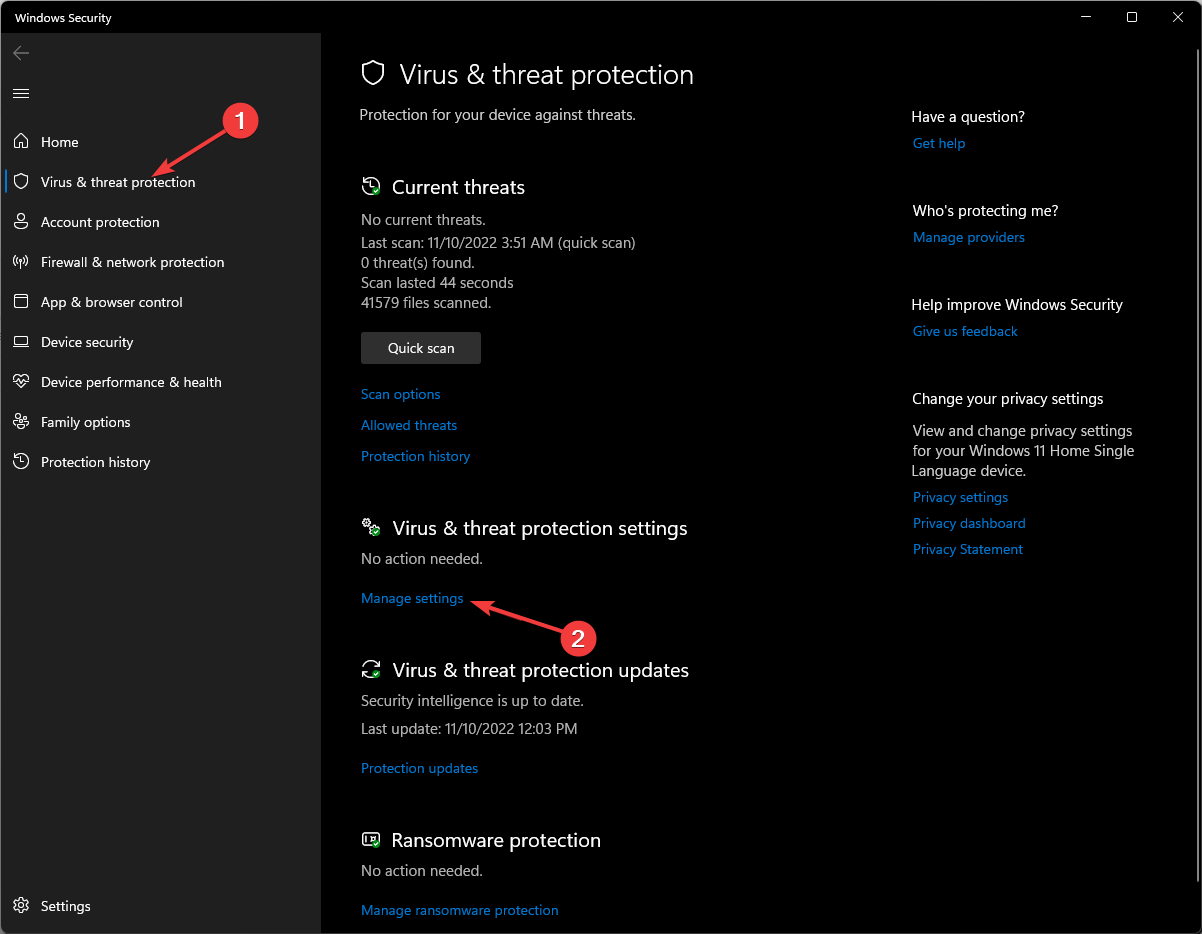
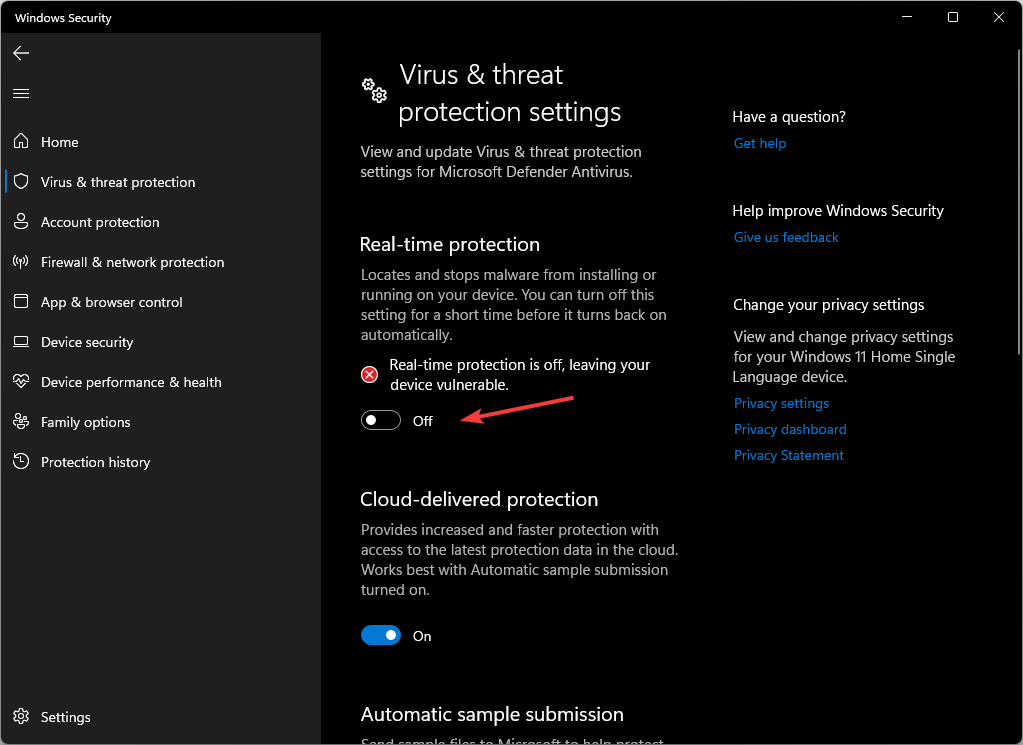
- Now toggle off the switch for Real-time protection.
5. Update graphics drivers
- Press Windows + R to open the Run dialog box.
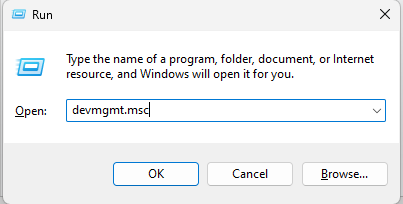
- Type devmgmt.msc and click OK to open Device Manager.
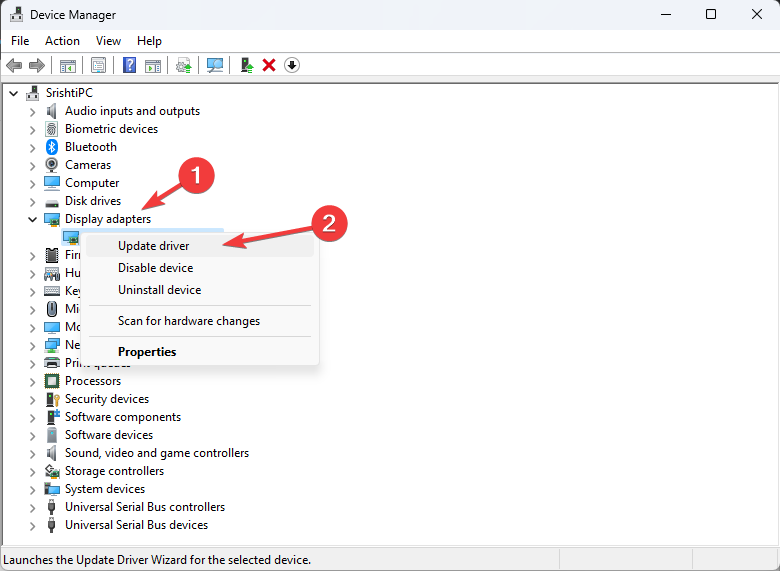
- Go to Display adapters and expand it.
- Right-click the driver and select the Update driver.
- Click the Search automatically for the drivers option.

- Follow the onscreen instructions to complete the process.
Do you prefer an alternative way to update drivers in less time and entirely safely? There is a go-to software to perform this task automatically in a short time.
- Download and install the Outbyte Driver Updater app.
- Launch the software and wait for the app to detect all incompatible drivers.
- Now, it will show you a list of all faulty drivers to select the ones to Update or Ignore.

- Click on Update & Apply Selected to download and install the newest versions.
- Restart your PC to ensure the applied changes.

OutByte
Keep your GPU in a flawless state without worrying about possible driver issues.6. Make changes to network settings
6.1 Reset network
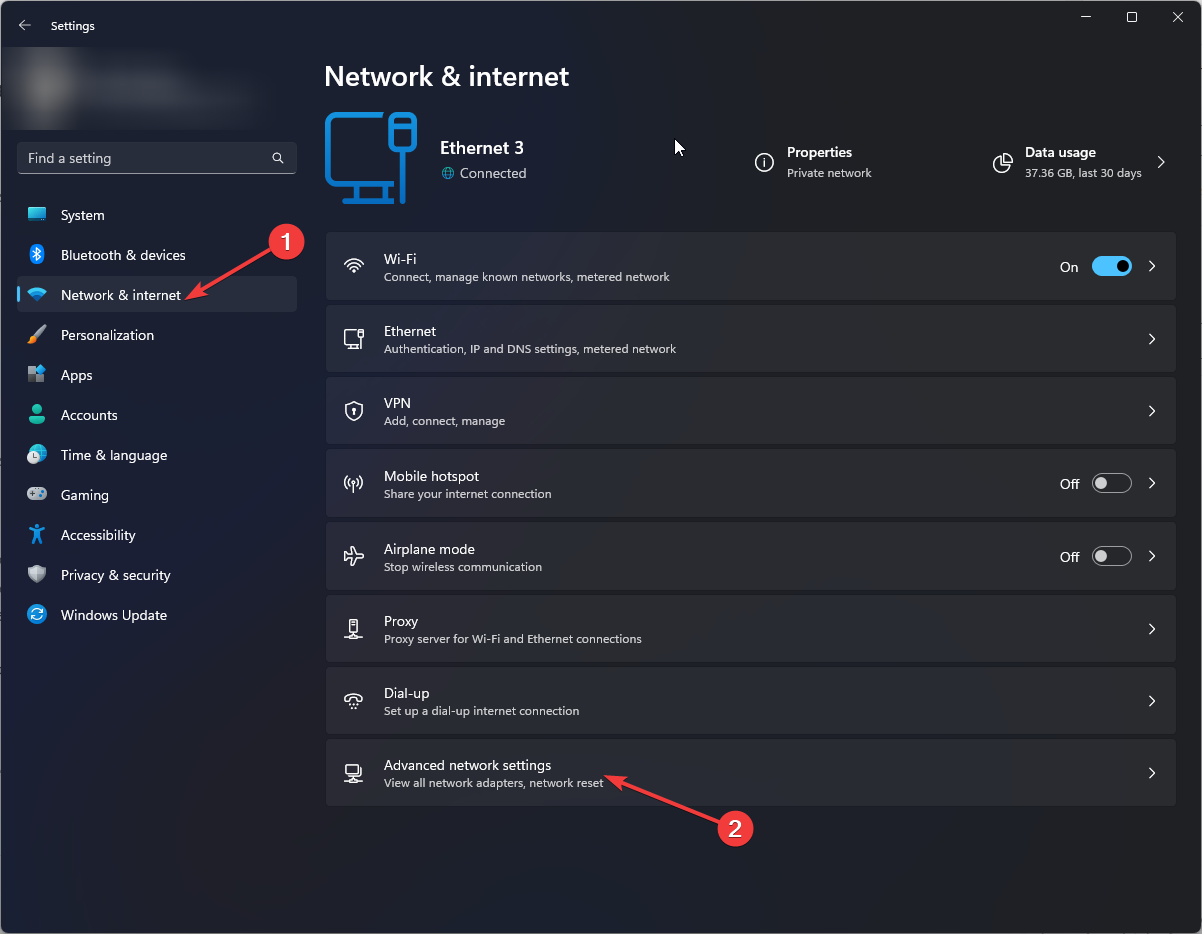
- Press Windows + I to open Settings.
- Go to Network & Internet and click Advanced network settings.
- Scroll and locate Network Reset.
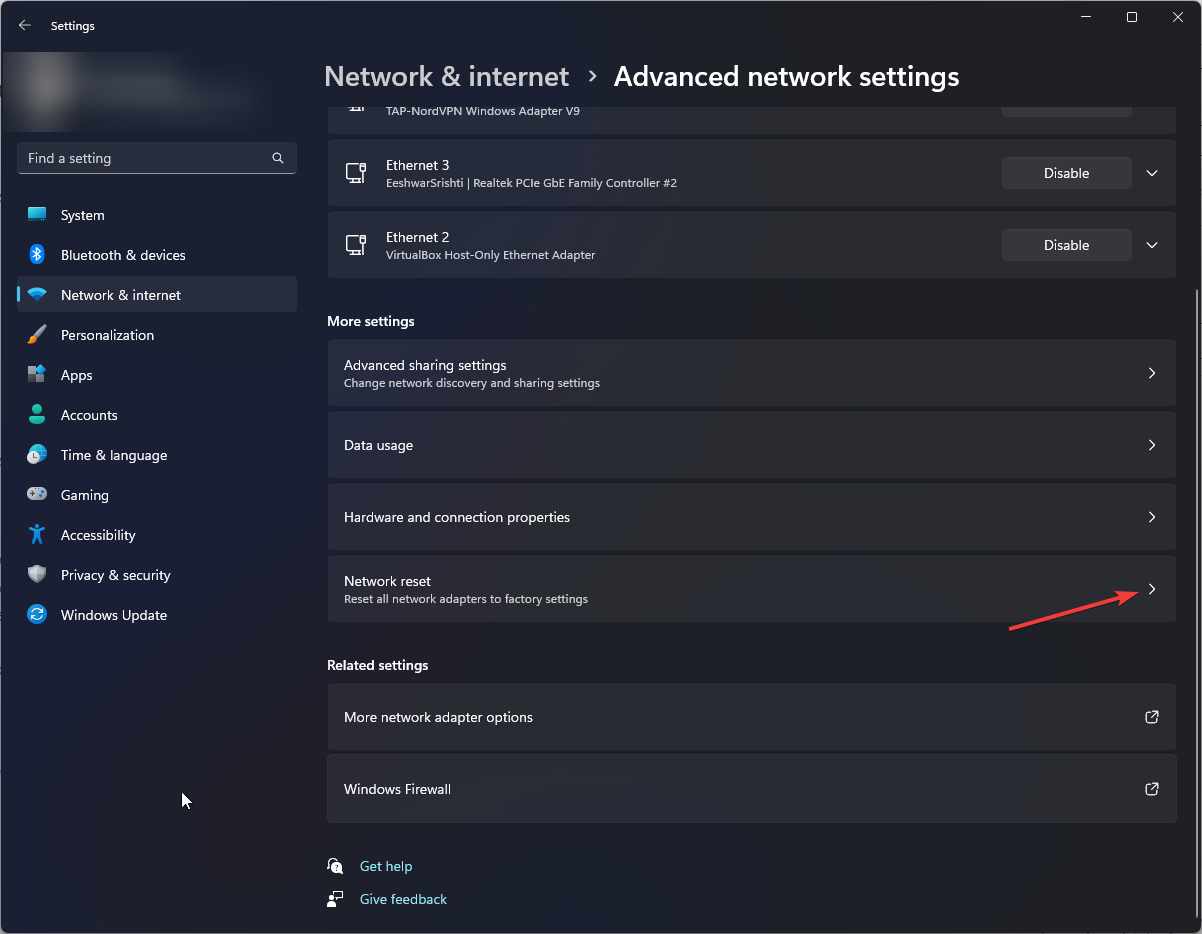
- Click Reset Now.
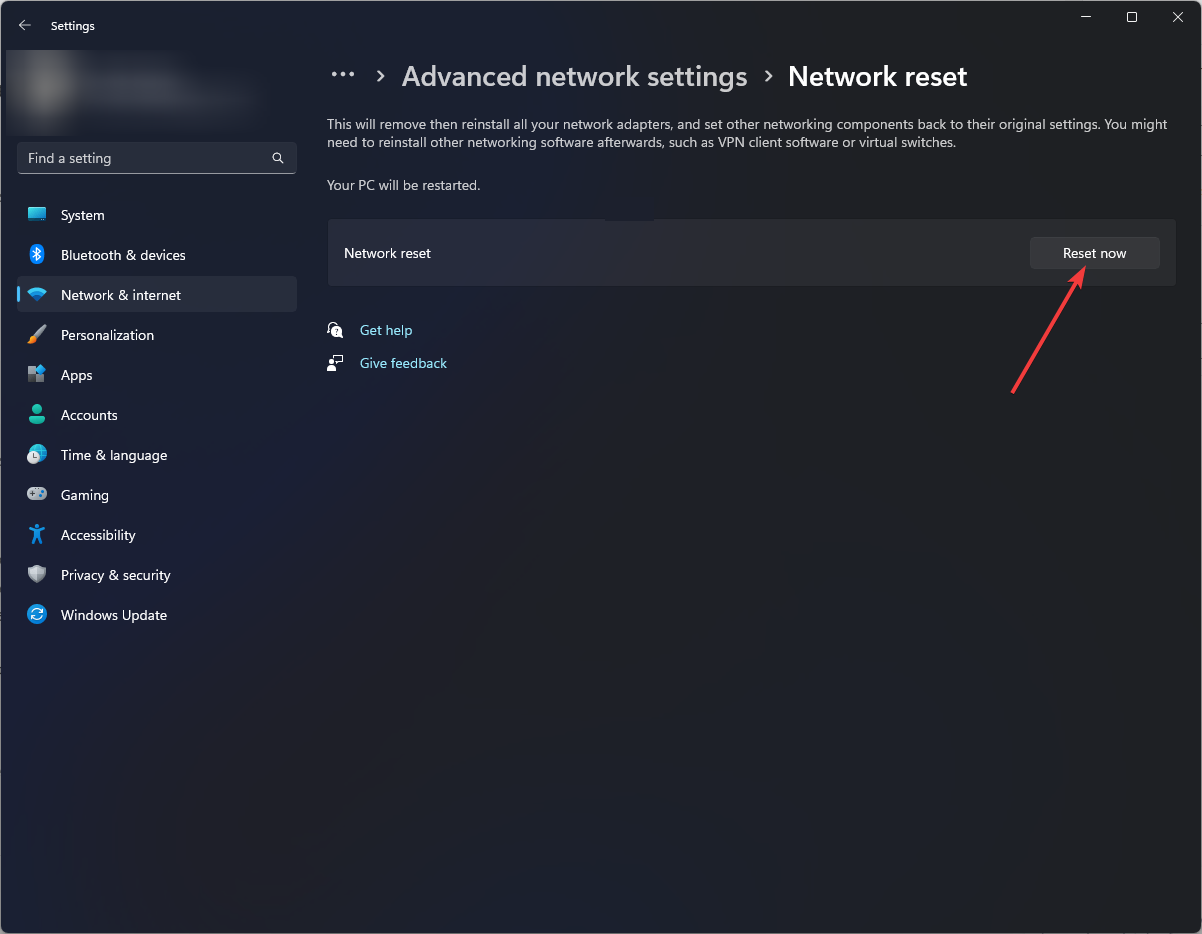
- Follow the onscreen instructions to complete the process.
6.2 Use Google DNS
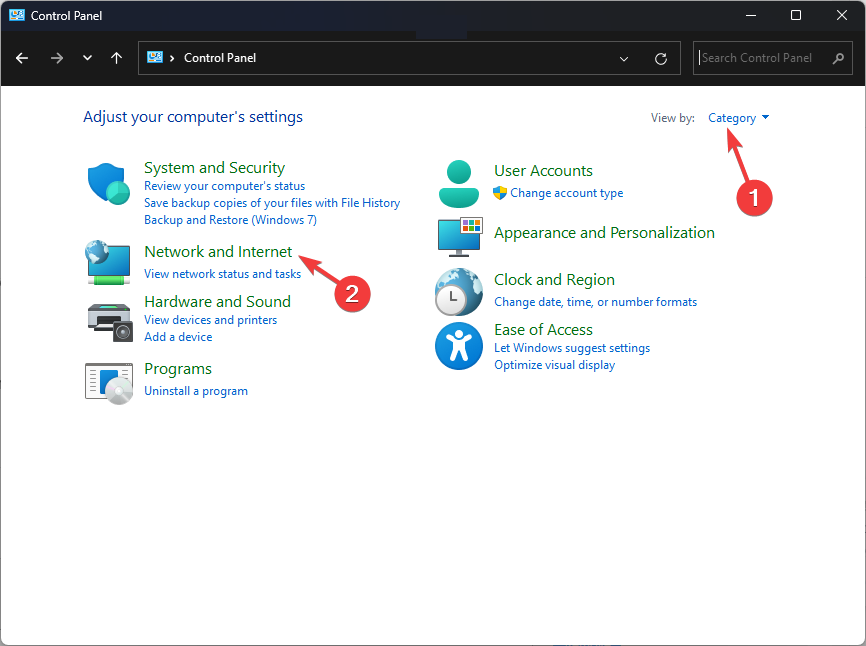
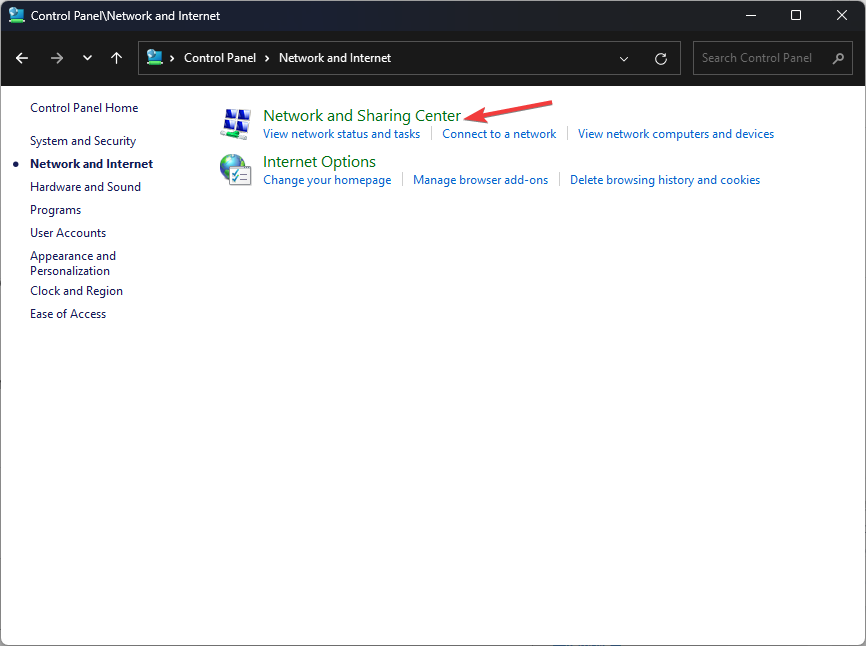
- Press the Windows key, type Control Panel, and click Open.
- Select Category from the drop-down for View by and click Network & Internet.
- Click Network and Sharing Center.
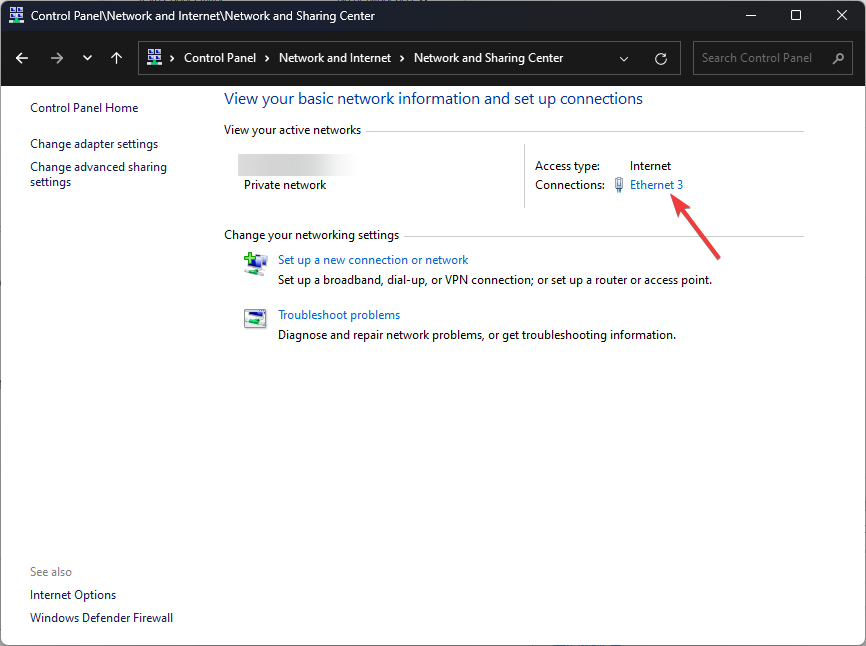
- Now, click on the active connection, and you will be directed to the Status page.
- Click Properties.
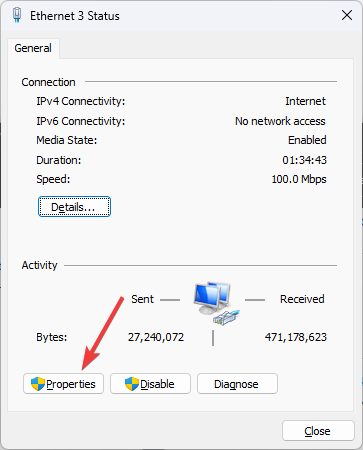
- Double-click the Internet Protocol Version 4 (TCP/IPv4) to open Properties.

- Select the Use the following DNS server addresses option; for the Preferred DNS server, type 8.8.8.8, and the Alternate DNS server, 8.8.4.4
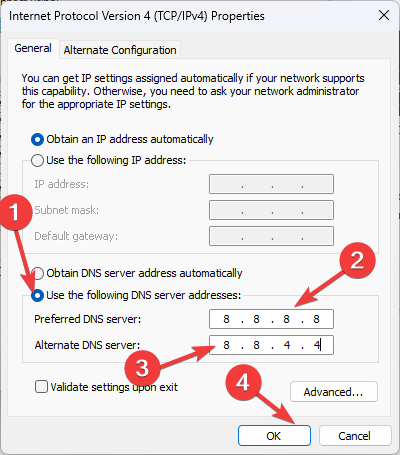
- Click OK.
So, these are steps that you need to follow to fix the Battle.net update stuck at 0%. Try them and let us know what worked in the comments section below.
Read our disclosure page to find out how can you help Windows Report sustain the editorial team. Read more


Improve this guide


User forum
0 messages