Tired of Bing AI popups? Remove the pesky BGAUpsell to get rid of them
It's slightly tricky but won't take more than a few minutes
3 min. read
Updated on
Read our disclosure page to find out how can you help Windows Report sustain the editorial team. Read more
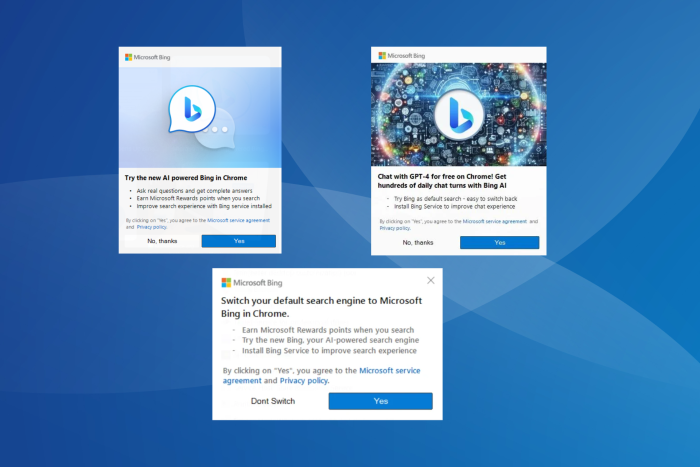
Microsoft’s push for the native browser and search engine is well known. But sometimes, these excessive pop-ups become unbearable. When we examined things, it appears the BGAUpsell process is the underlying cause!
This process is reportedly associated with Microsoft and is used to send pop-ups in order to persuade users to switch from Google to Bing as the search engine when using Chrome. Of late, the number of pop-ups is increasing by the day, often hampering the ongoing work.
Users have expressed their frustration about the whole situation in forums.
The constant barrage of ads is the reason I went back to the Mac and have barely touched my desktop PC. Seriously, it’s relentless. I know I can just disable it, but I shouldn’t have to do that in the first place. It’s a shame.
What, didn’t you know that Windows is essentially an advertisement platform nowadays? 🙂
The only way to be sure not to get Microsoft’s adware is to not run Microsoft products.
You don’t have to switch operating systems just yet. Just delete BGAUpsell, and you are good to go!
How can I remove BGAUpsell?
1. Terminate the process
- Press Ctrl + Shift + Esc to open the Task Manager.
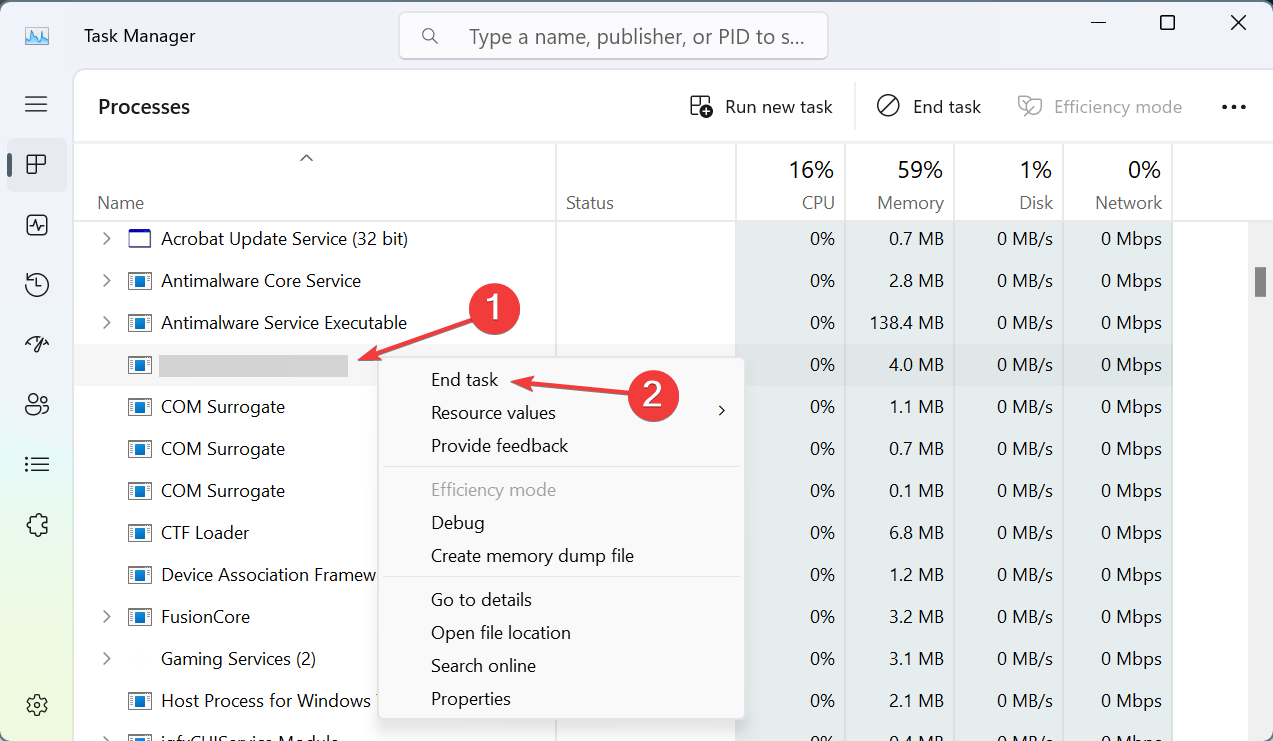
- Locate the BGAUpsell process in the list, right-click on it, and select End task.
2. Take folder access permissions
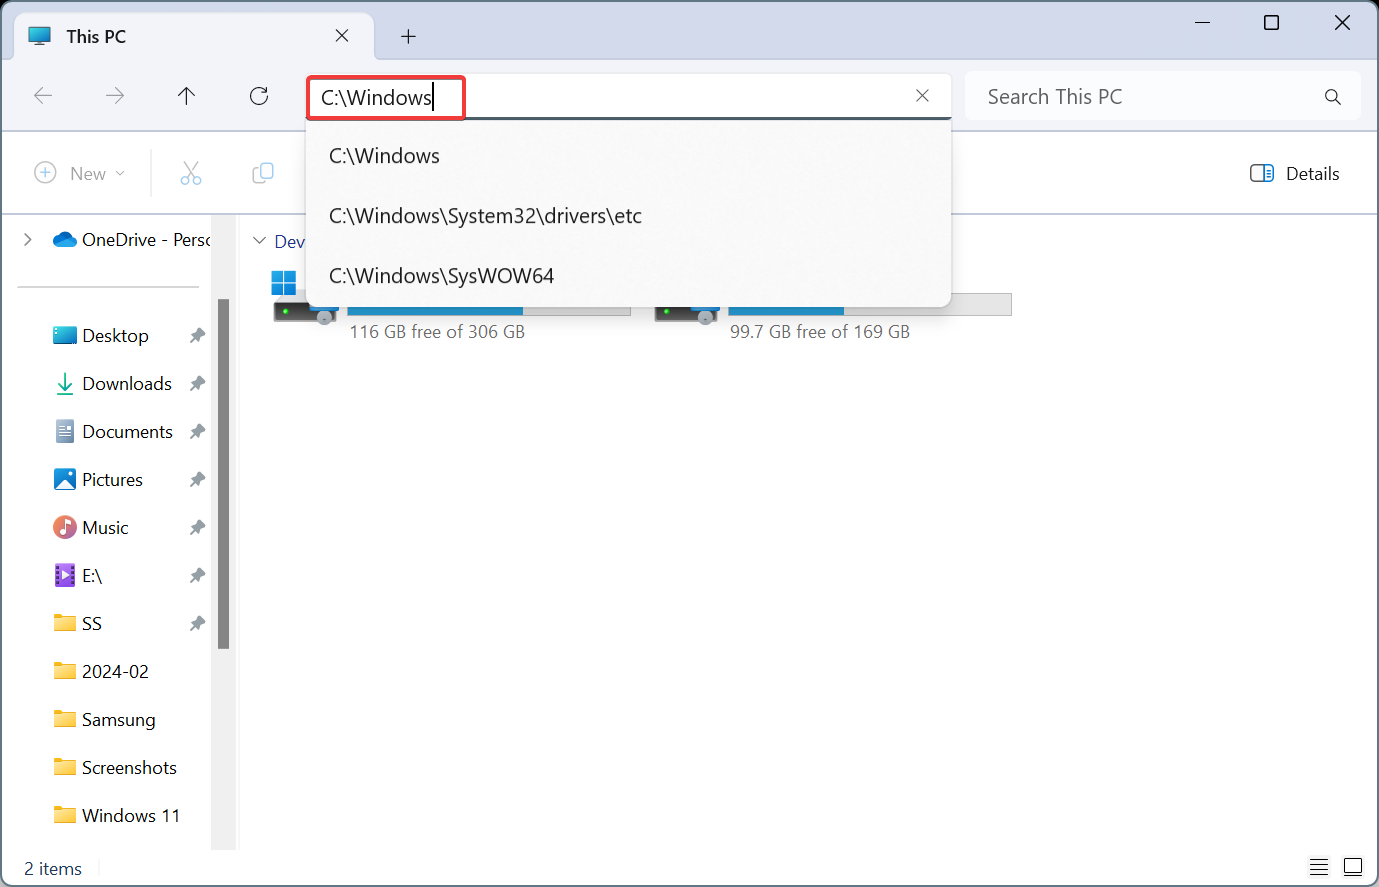
- Press Windows + E to open File Explorer, paste the following path in the address bar and hit Enter:
C:\Windows - Right-click on the Temp folder, and select Properties.
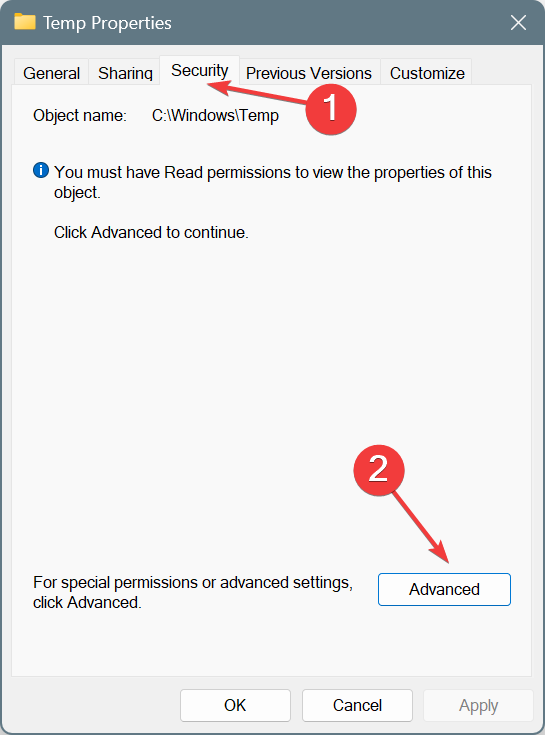
- Go to the Security tab, and click on Advanced.
- Click the Change option next to Owner.
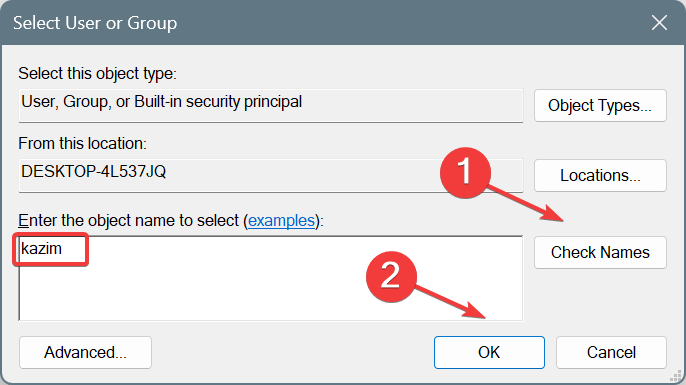
- Type your active profile name in the text field, then click on Check names and OK.
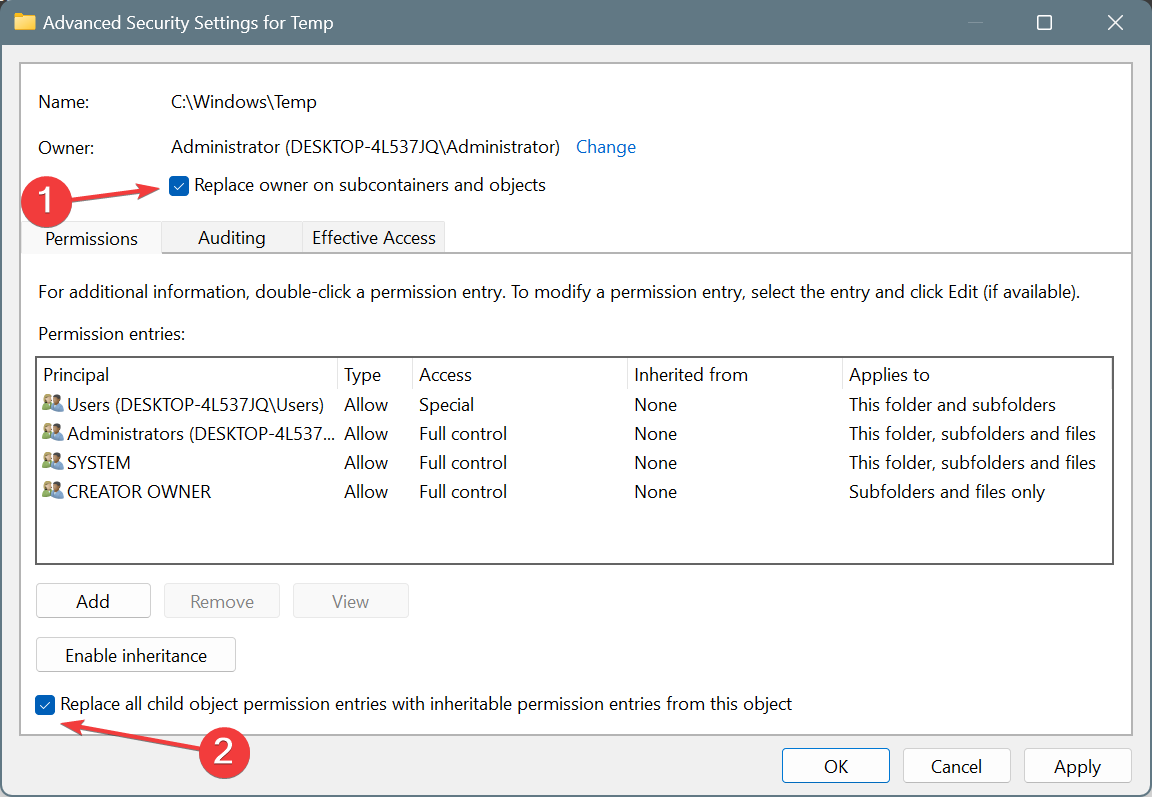
- Tick the checkboxes for Replace owner on subcontainers and objects and Replace all child object permission entries with inheritable permission entries from this object.
- Click on Apply and OK to save the changes, and choose the appropriate response in all the follow-up prompts.
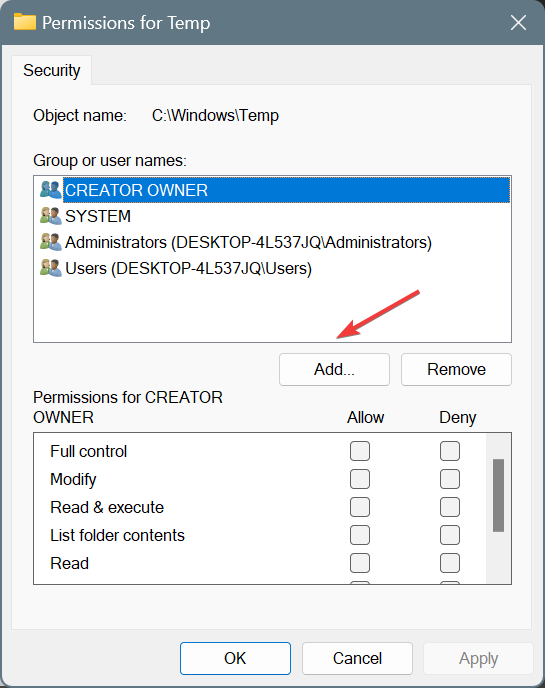
- Again, go to the Security tab in Properties, click Edit and then on Add.
- Type the active username as you did earlier, click Check names and then OK.
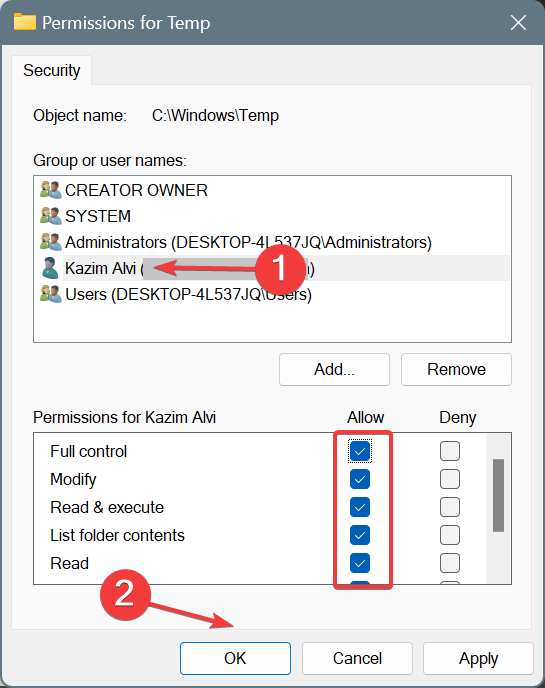
- Next, select the username from the list, tick the checkbox for Allow under all permissions, and click OK to save the changes.
Taking full folder access for Temp is imperative, because otherwise, you won’t able to able open it. The folder is system-protected by default.
3. Delete the BGAUpsell file
- Double-click on the MUBSTemp folder.
- Finally, right-click on BGAUpsell (executable file), select Delete, and confirm the change.
4. Remove the Registry entries
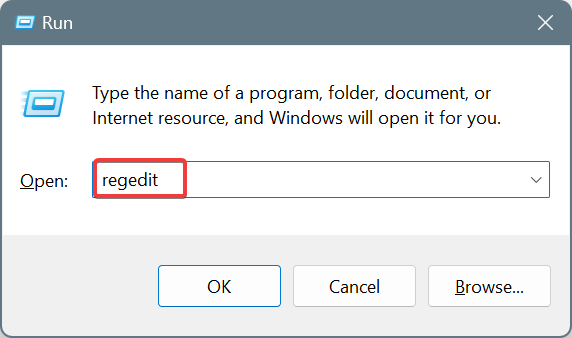
- Press Windows + R to open Run, type regedit in the text field, and hit Enter.
- Click Yes in the UAC prompt.
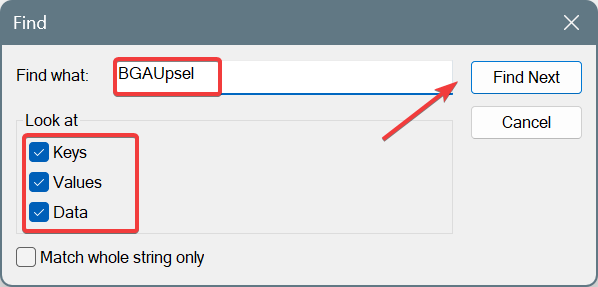
- Press Ctrl + F to open the Find tool.
- Enter BGAUpsell in the text field, tick the three checkboxes and click on Find Next.
- If any entries are found, delete them.
Deleting any instances of BGAUpsell in the Registry will ensure that you don’t face any conflicts later on. Remember, manually deleting Registry entries may cause problems. So it’s best that you use a safe Registry cleaner to optimize the PC’s performance!
As you can see, removing BGAUpsell is slightly complex because that’s how Microsoft intends it to be. Files that trigger promotional messages are a crucial part of Microsoft’s revenue stream. Letting users easily delete them will negatively affect that!
Last month, Microsoft was criticized for sending Windows 11 upgrade prompts to users running the previous iteration.
If you face any issues while removing BGAUpsell, let us know in the comments section.



User forum
0 messages