Folder Access Denied Windows 11: How to Get Full Permissions
Taking full control of the inaccessible folder or file should fix this
7 min. read
Updated on
Read our disclosure page to find out how can you help Windows Report sustain the editorial team Read more
Key notes
- When attempting to access particular folders or apps, the Access is denied notice may display, interfering with your work.
- The first thing you should do is alter the directory's owner.
- Your antivirus software could be the source of this issue, so check it out.
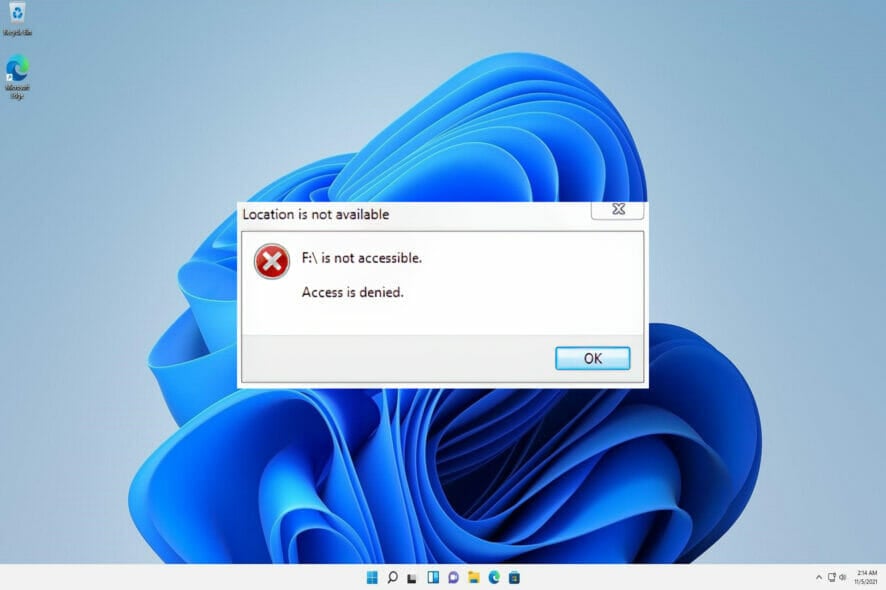
The Windows 11 Access is denied error prevents you from uninstalling applications or accessing particular directories on your computer. The reasons for the error vary from issues with your PC to permission and setting problems.
Fortunately, it is not the most challenging problem to solve, requiring just a few tweaks on your PC.
Why do I keep getting access denied?
You can get the Access is denied error on Windows 11 for various reasons. Below are some of the factors that can cause it:
- Lack of permission – If a folder or external hard drive shows the Access is denied prompt on Windows 11, it might be because you lack permission to view or open the file. You need to take complete control of the folder to circumvent this.
- Lack of ownership – This error can also show up if you don’t have ownership rights to the folder. So, you must take ownership of the folder or file and restart your PC to fix this.
- Encryption – If a folder is encrypted on one user account, you can’t open it from another. So, you need to change your account to admin or provide the admin password to access it.
- Antivirus interference – Sometimes, your antivirus might deem a safe folder or file as dangerous due to some of its properties. This can lead to this error. You need to disable or remove the security software and switch to one of the best antiviruses for Windows 11.
How do I fix the Access denied error in Windows 11?
Before making changes to your PC, here are a few quick things to do:
- It is advised to disable your antivirus temporarily. This is because it might be flagging the folder or file, preventing it from opening.
- Ensure the file you are opening is not corrupt or problematic, say, lesser than the intended size. Check that, and if that turns out to be the case, restore the file from another PC or download it from the web.
If this does not solve the issue, you can now proceed to the fixes below:
1. Use the Registry Editor
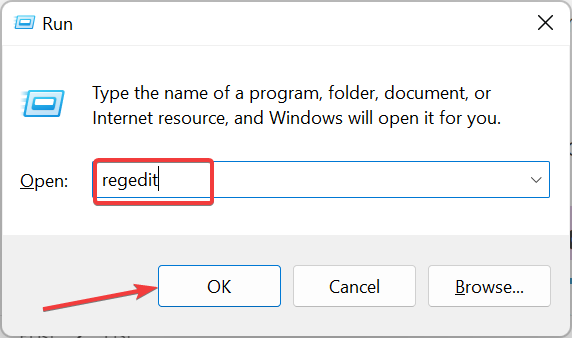
- Press the Windows key + R, type regedit, and click the OK button.
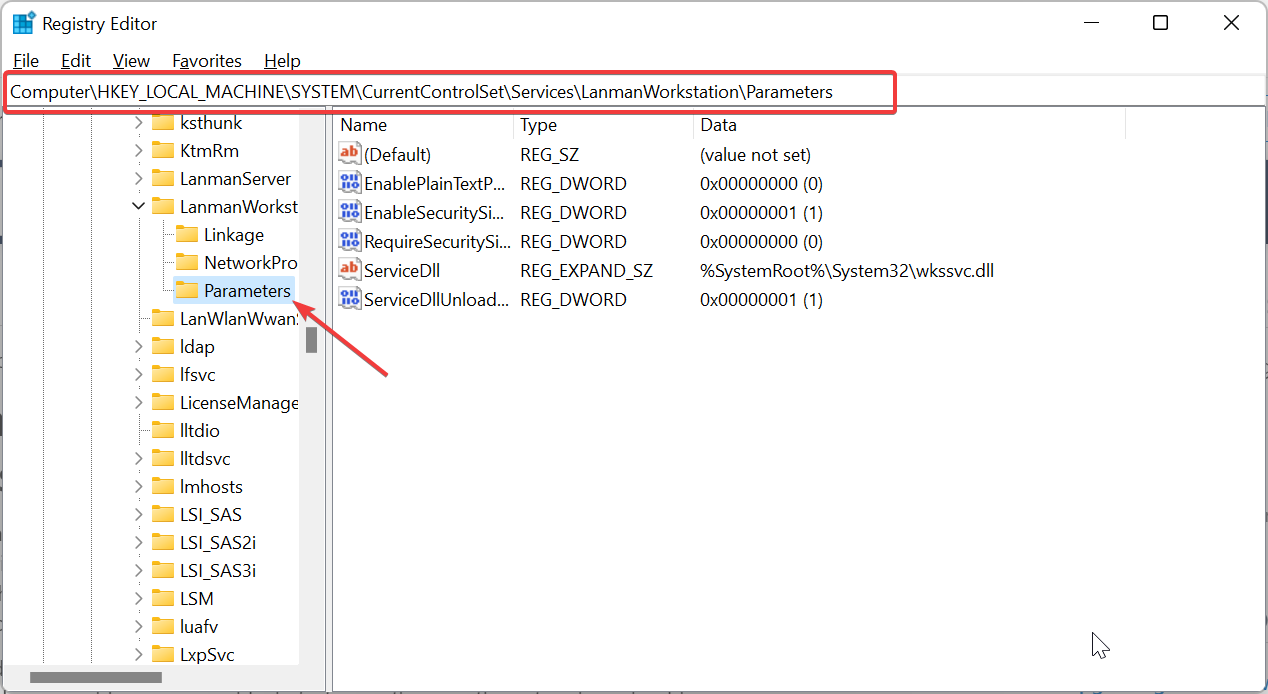
- Navigate to the path below in the left pane:
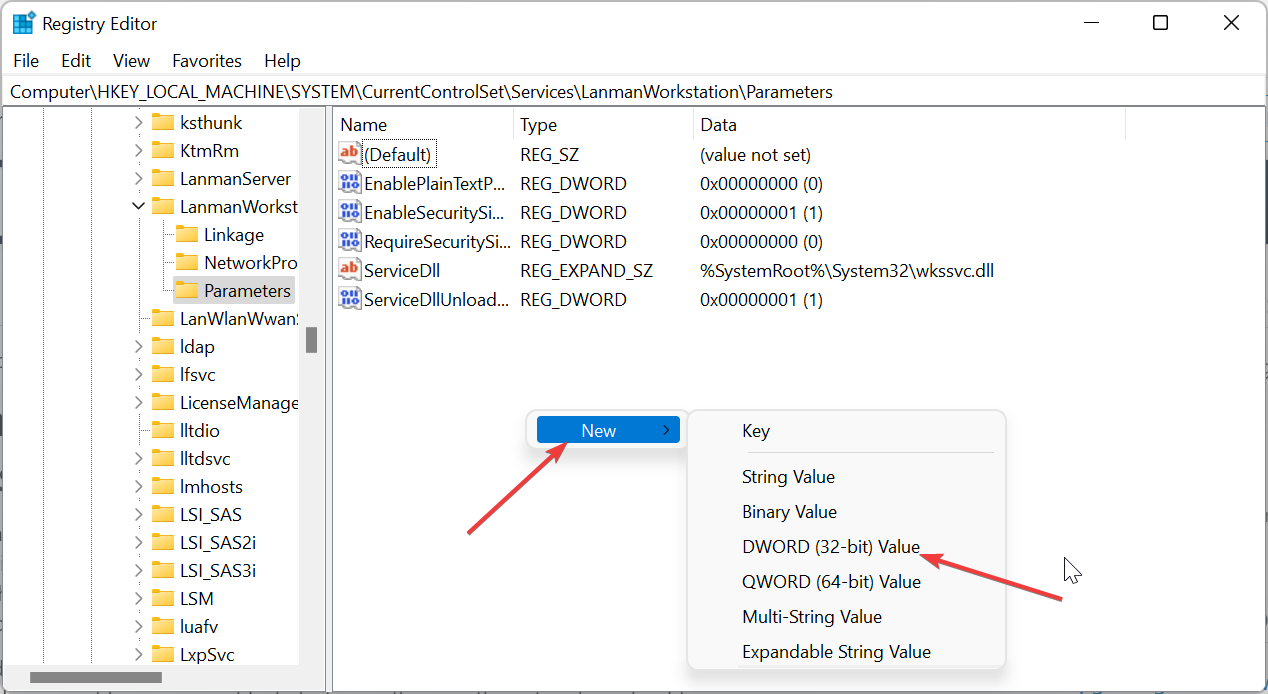
HKEY_LOCAL_MACHINE/SYSTEM/CurrentControlSet/Services/LanmanWorkstation/Parameters - Now, right-click on any space in the right pane, select New, and then DWORD (32-Bit) Value.
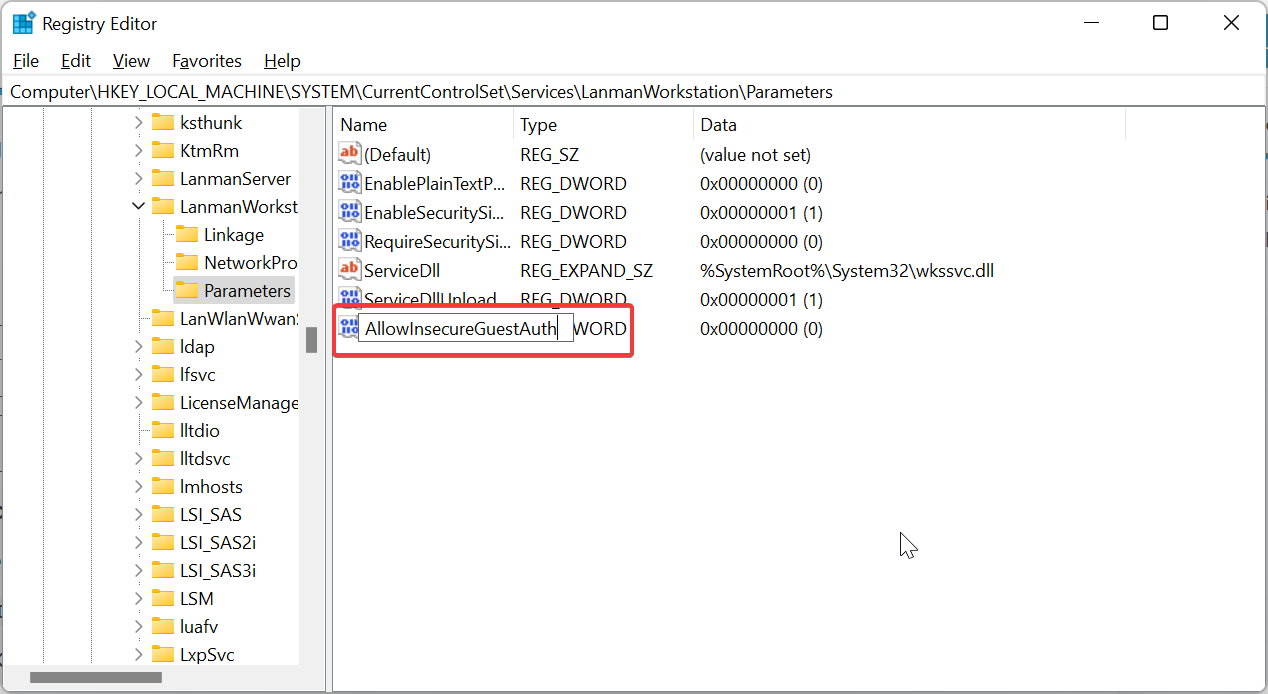
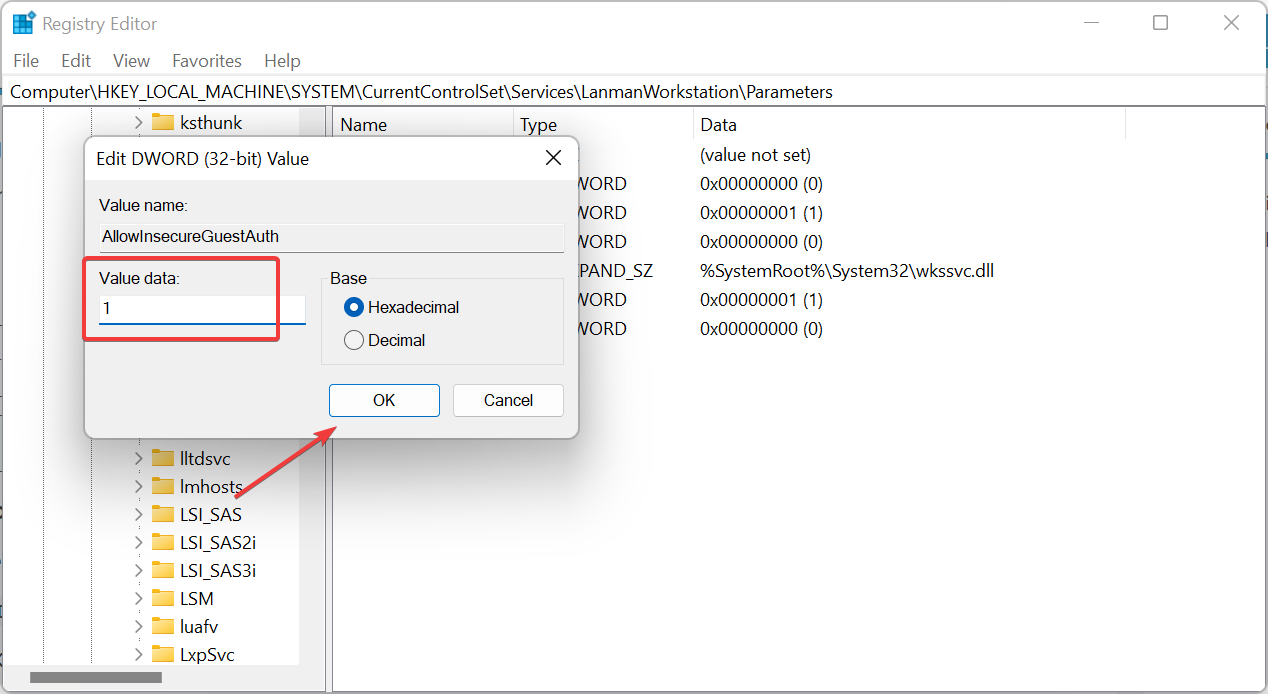
- Enter AllowInsecureGuestAuth as the name of the new entry.
- Finally, double-click the new entry, set the Value data to 1, and click OK.
If you are getting the Windows 11 Access denied as administrator, the steps above will help remove all restrictions that might be causing the issue.
2. Use Computer Management
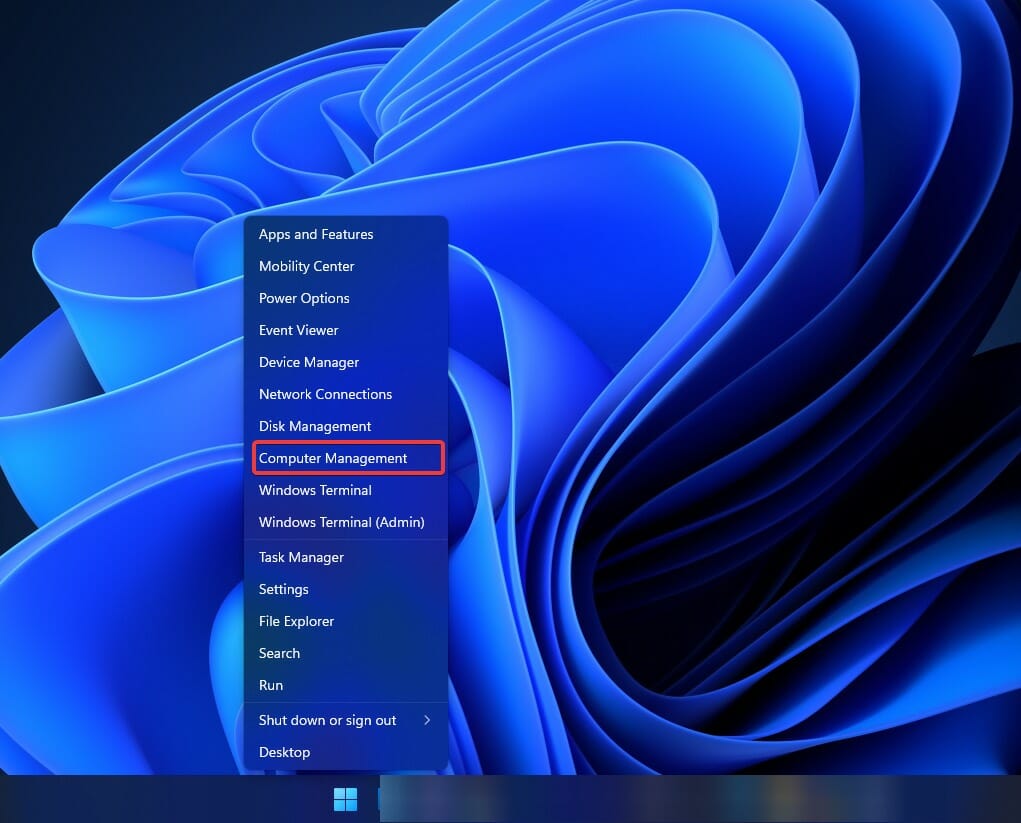
- Right-click on the Start button and choose Computer Management.
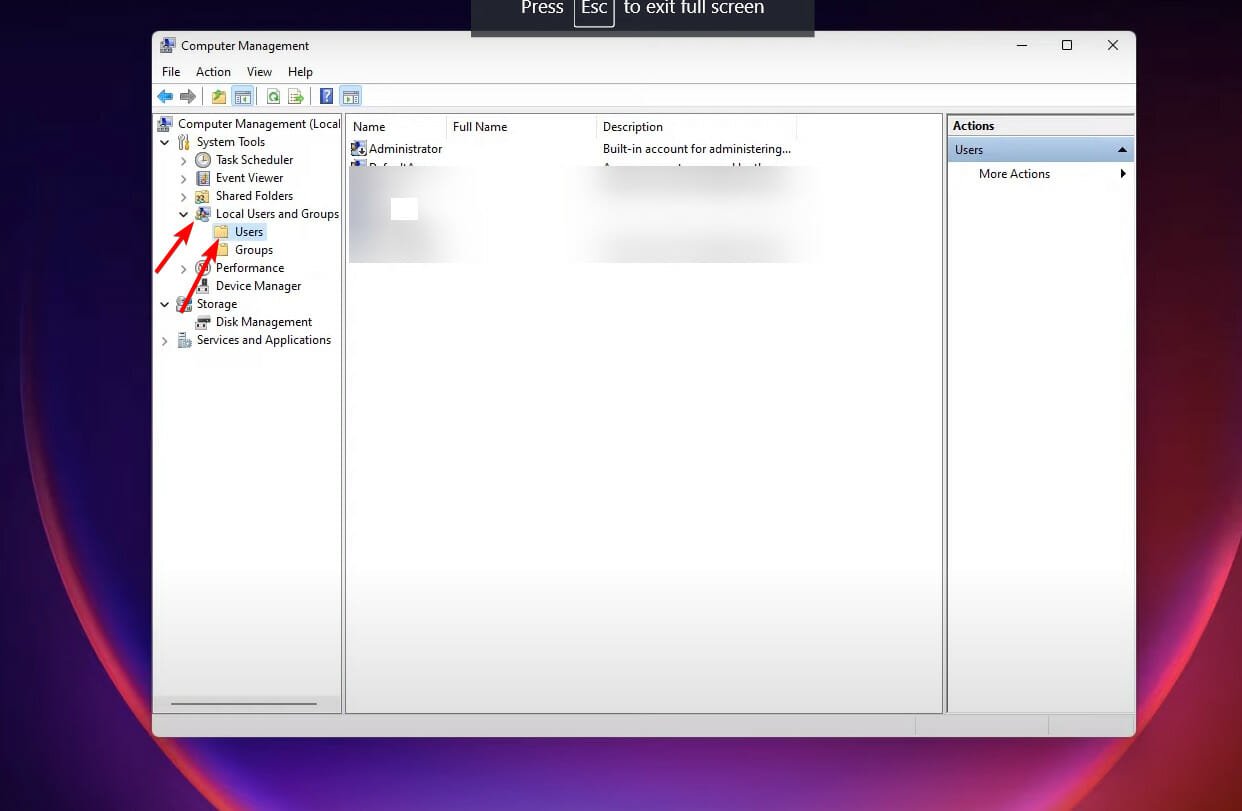
- Expand Local Users and Groups, then open the Users folder.
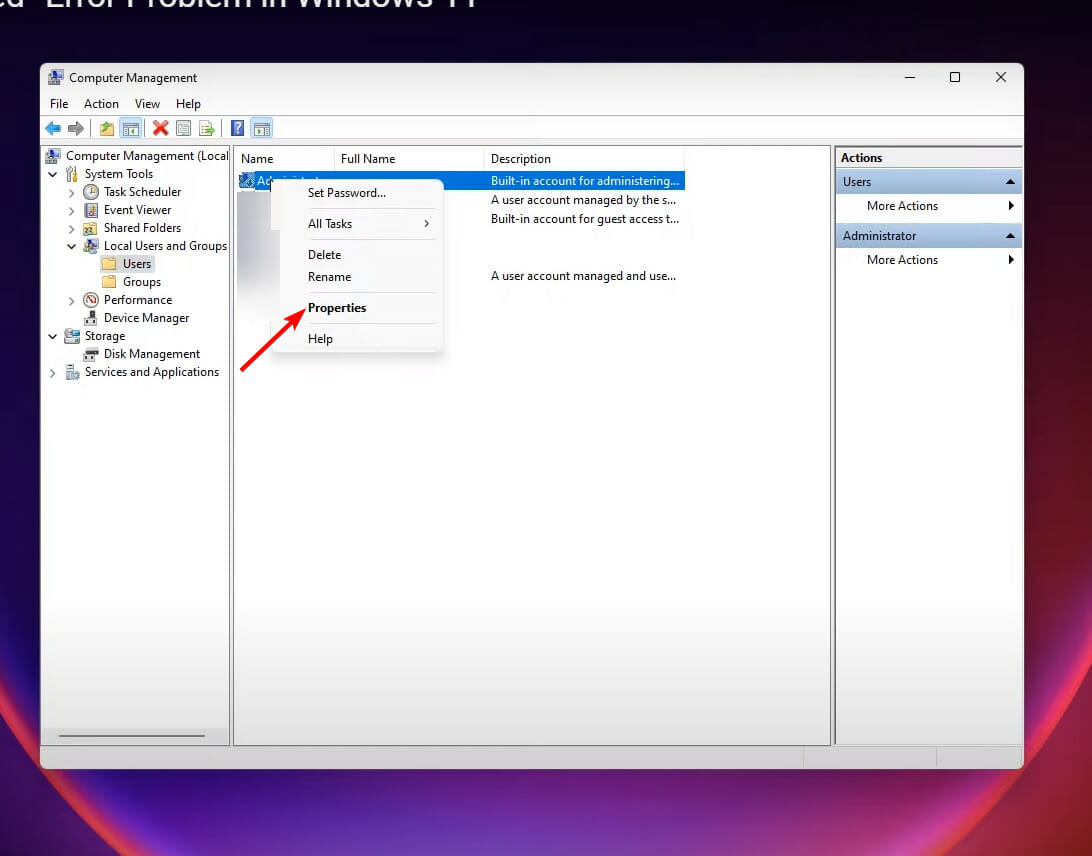
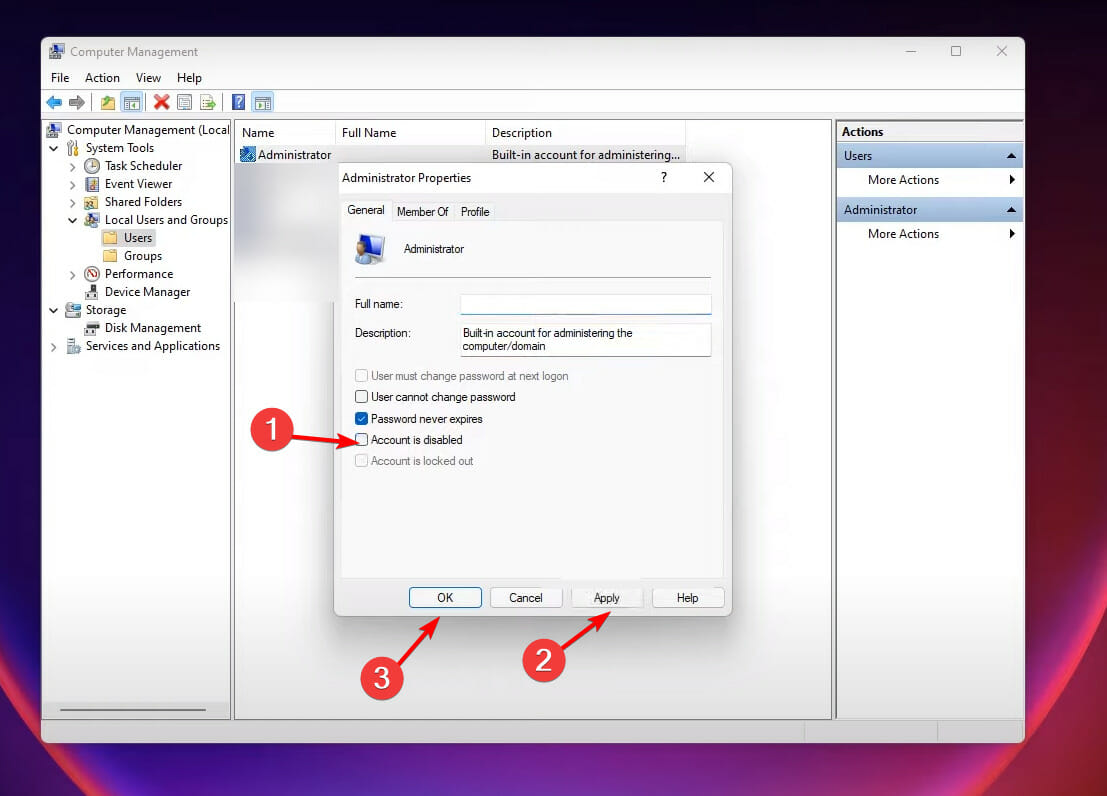
- Right-click on Administrator, then tap on Properties.
- Uncheck the box next to Account is disabled and press the Apply and the OK button on the bottom side.
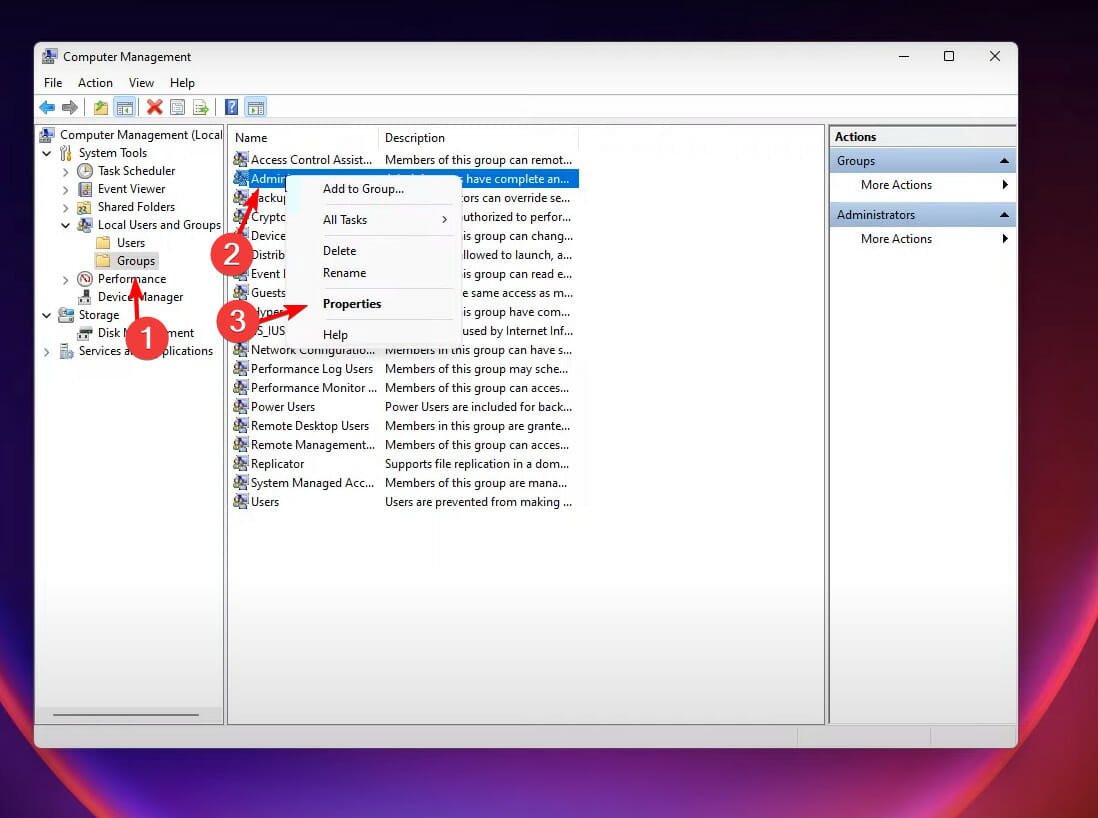
- Click on the Groups folder on the left side, right-click on Administrator, then tap on Properties.
- Click on the Add button.
- Enter the word test in the opened window, click on Check Names, then press the Apply and the OK button in the current window as well as in the Properties window.
3. Set your account as administrator
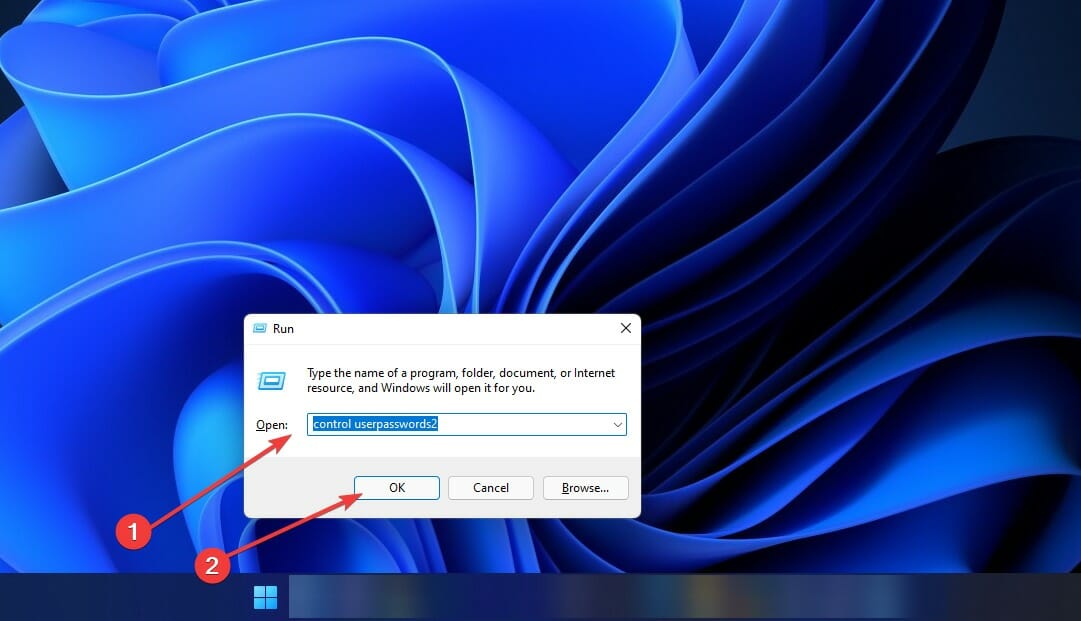
- Press the Windows key + R then enter control userpasswords2. Lastly, click the OK button.
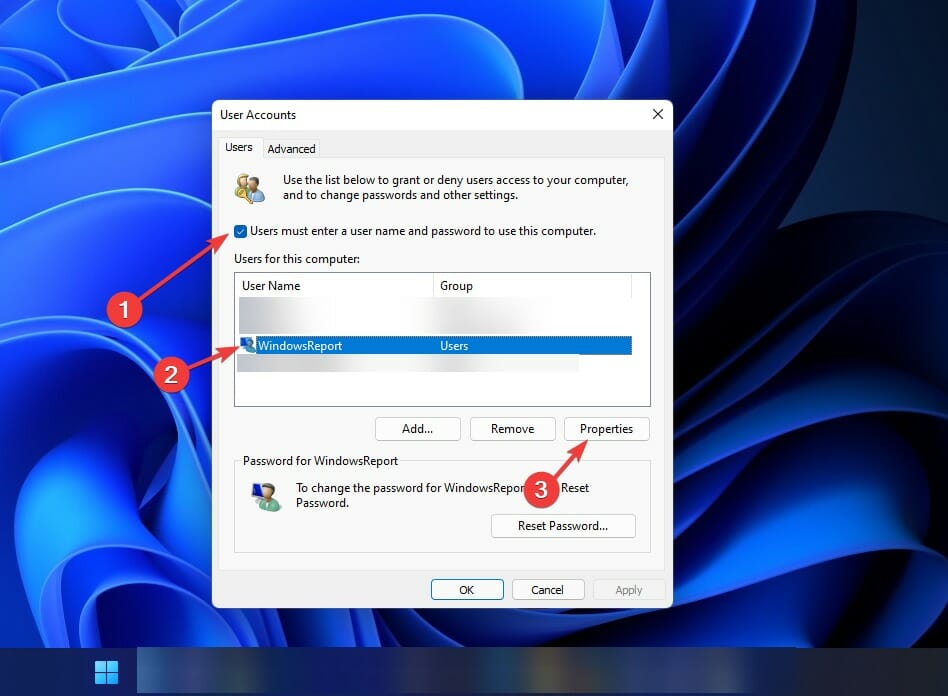
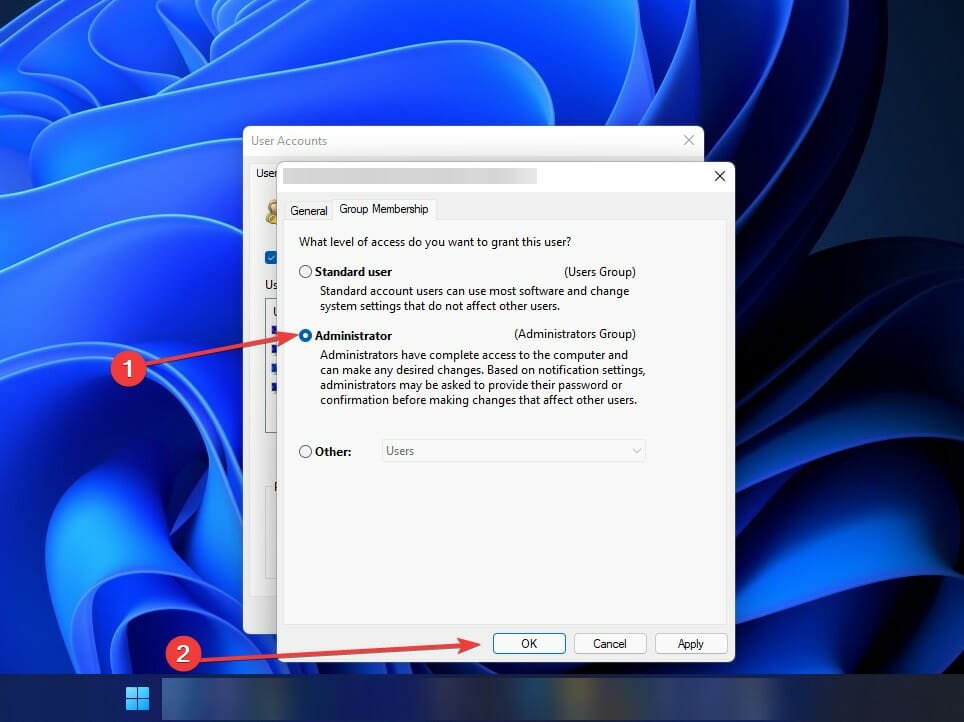
- The User Accounts window will now appear. Check the box next to Users must enter a user name and password to use this computer, then select your account and click on the Properties button below it.
- Navigate to the Group Membership tab. Select Administrator and click Apply and OK.
Restart your computer once you’ve completed the procedures outlined above to determine whether or not the external hard drive access denied in Windows 11 problem has been resolved.
4. Check your permissions
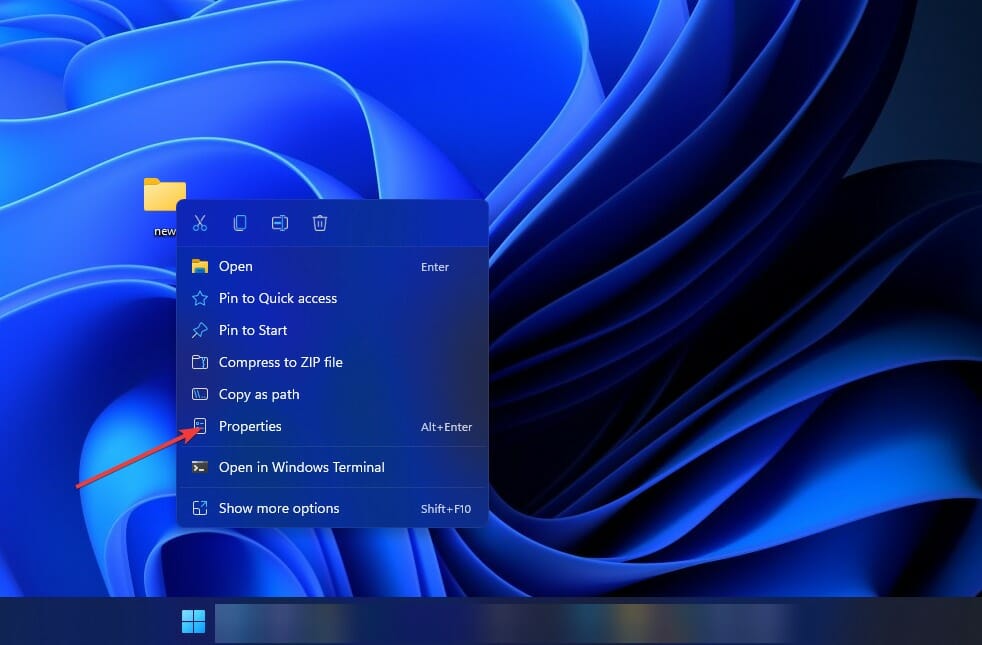
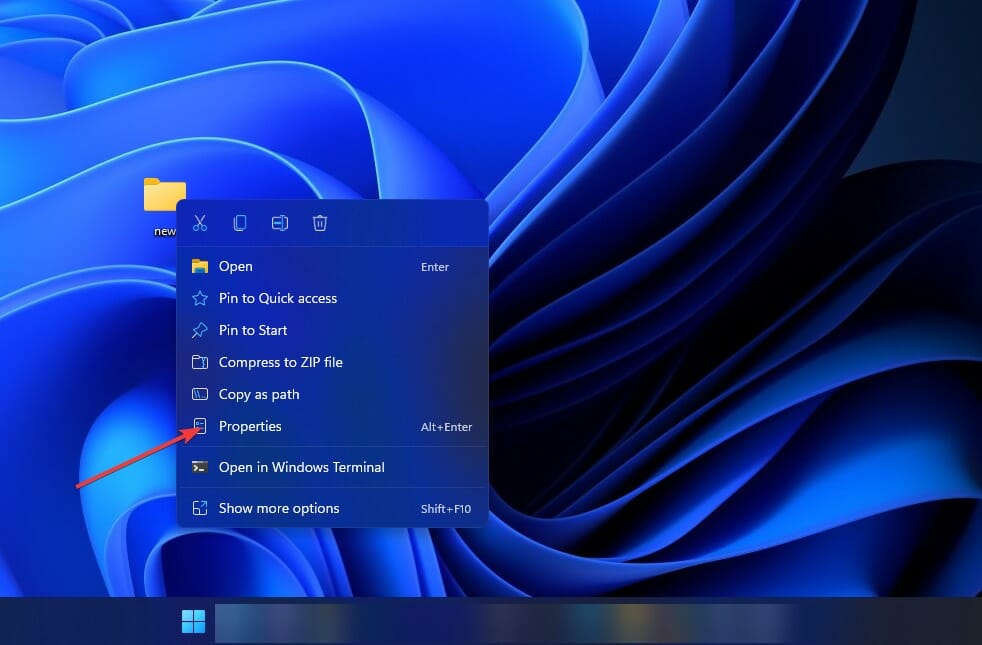
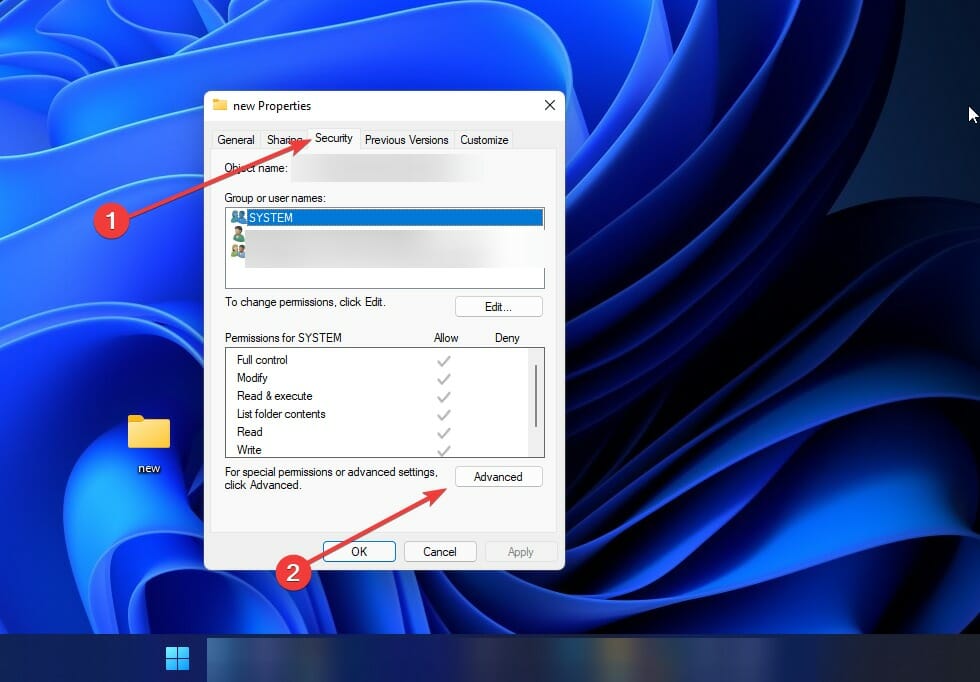
- Locate the problematic directory, right-click on it, and choose Properties from the menu.
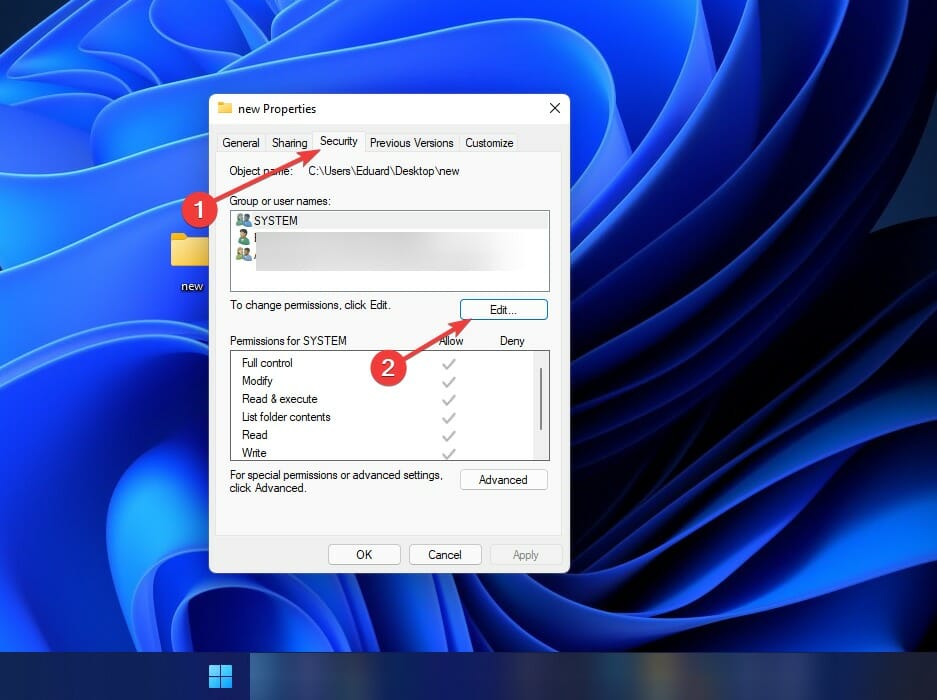
- Next, navigate to the Security tab and click the Edit button.
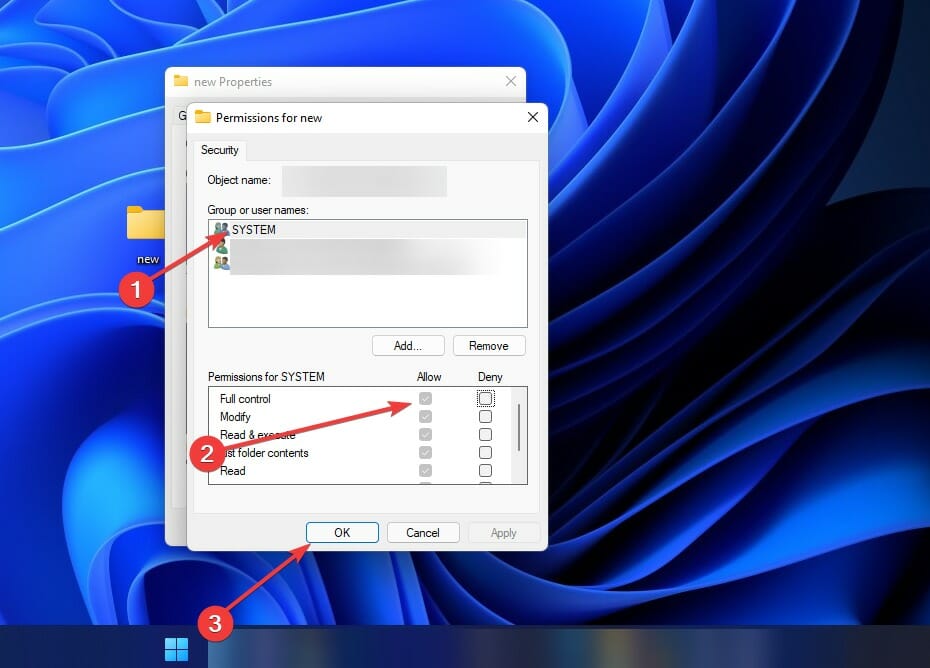
- Select your user name from the list and make sure that you check the box next to Full control for Allow column in the Permissions sections, then click OK.
This is a rather simple solution when the destination folder access is denied in Windows 11. But if your user name isn’t on the list, you’ll have to add it manually and then change its permissions.
5. Enable the hidden Administrator account
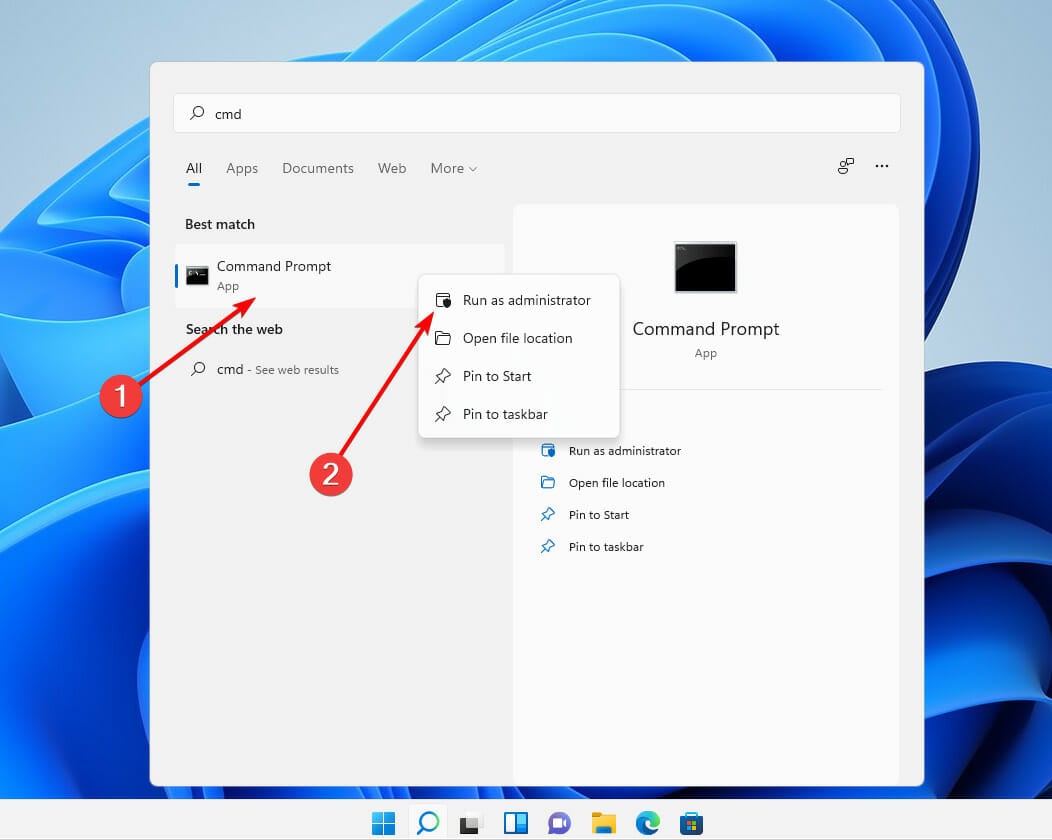
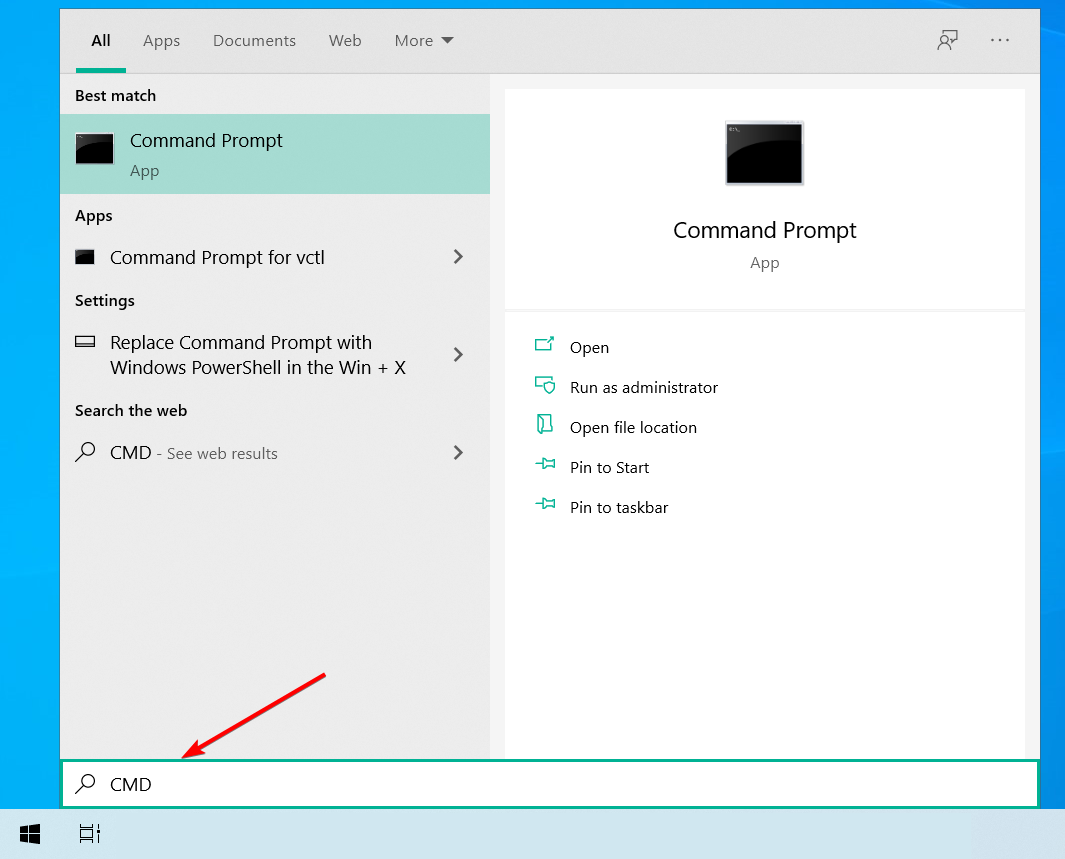
- Press the Windows key + S, type in cmd, and right-click on the most relevant result to Run as administrator.
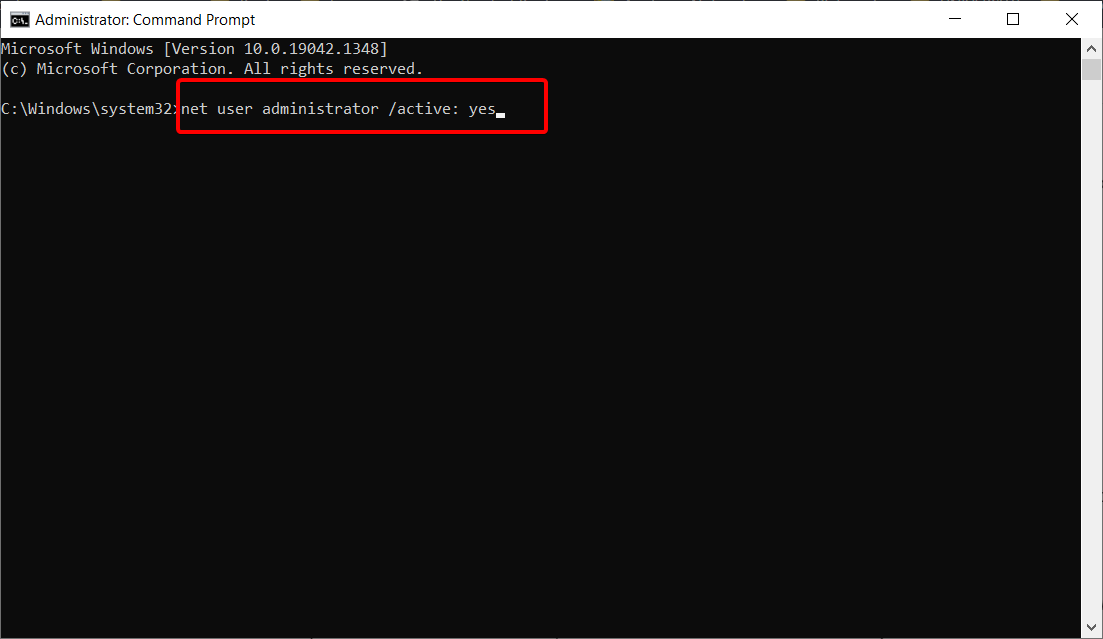
- When Command Prompt starts, run the command below. By doing so you’ll unlock the administrator account:
net user administrator /active: yes - Now log off of your account and switch to the newly enabled Administrator account. From there you should be able to access your files without any problems.
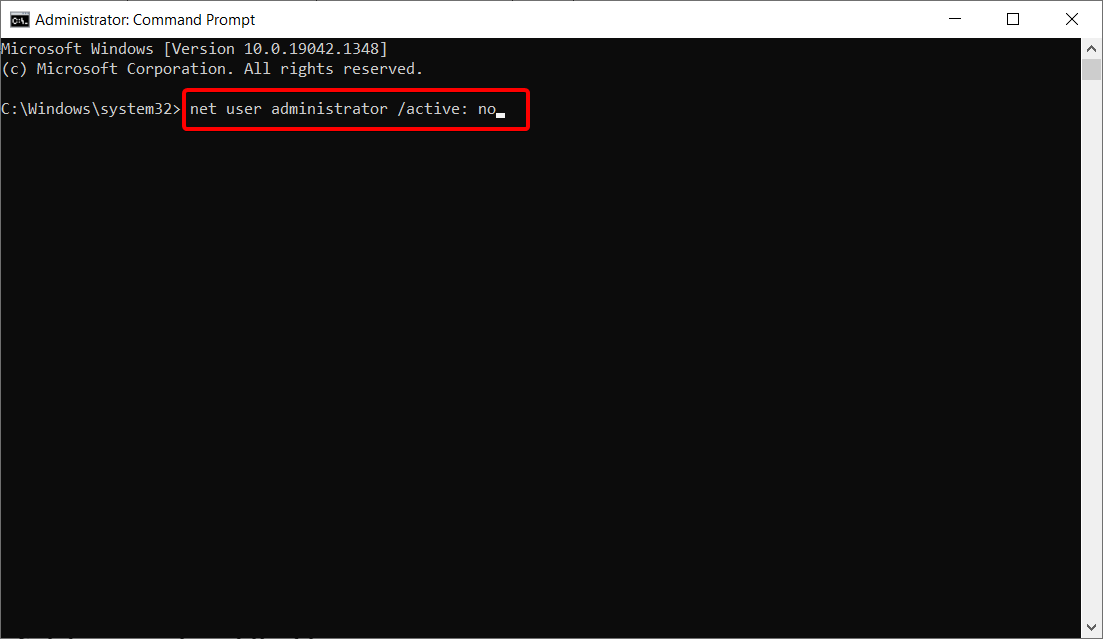
- After you’re done using the Administrator account, go back to your main account and start Command Prompt as administrator again as we did in the first step. Now enter this command to disable the Administrator account:
net user administrator /active: no
Remember that after switching back to your main account, the Windows 11 Access is denied issue might persist.
If needed, you can use the Administrator account to make the necessary changes to your system and fix things when you have Drive is not accessible Access is denied error in Windows 11.
6. Take ownership of the file
6.1. Take ownership via Properties
- Locate the problematic folder, right-click on it, and choose Properties from the menu.
- Navigate to the Security tab and click the Advanced button.
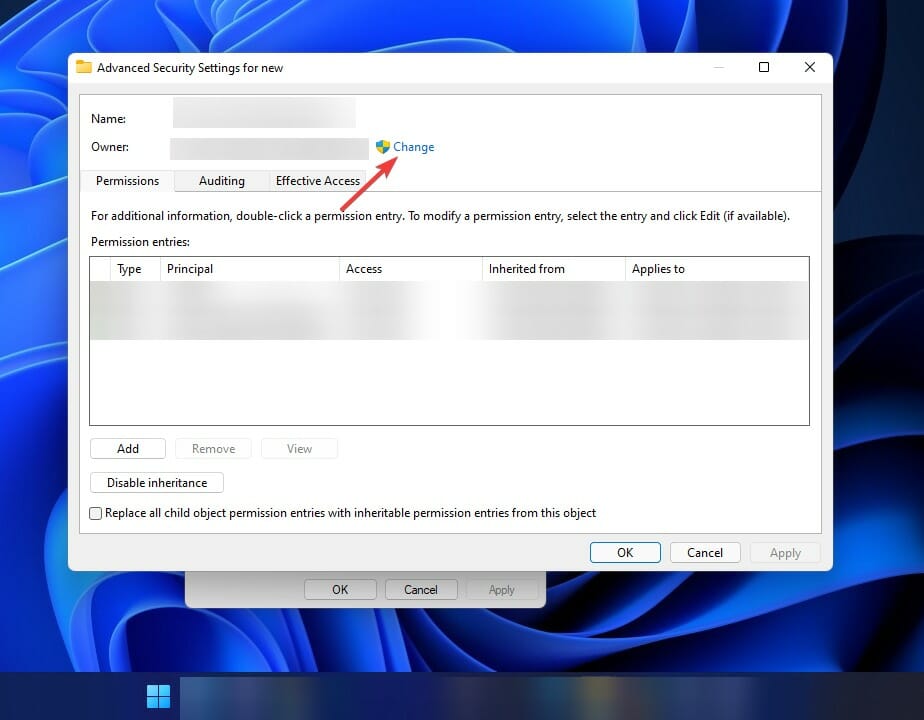
- Locate the Owner section at the top and click on Change.
- In the Enter the object name to select field, enter Administrators or enter your user name.
- Now, click the Check Names button, then tap the OK button to save the changes made.
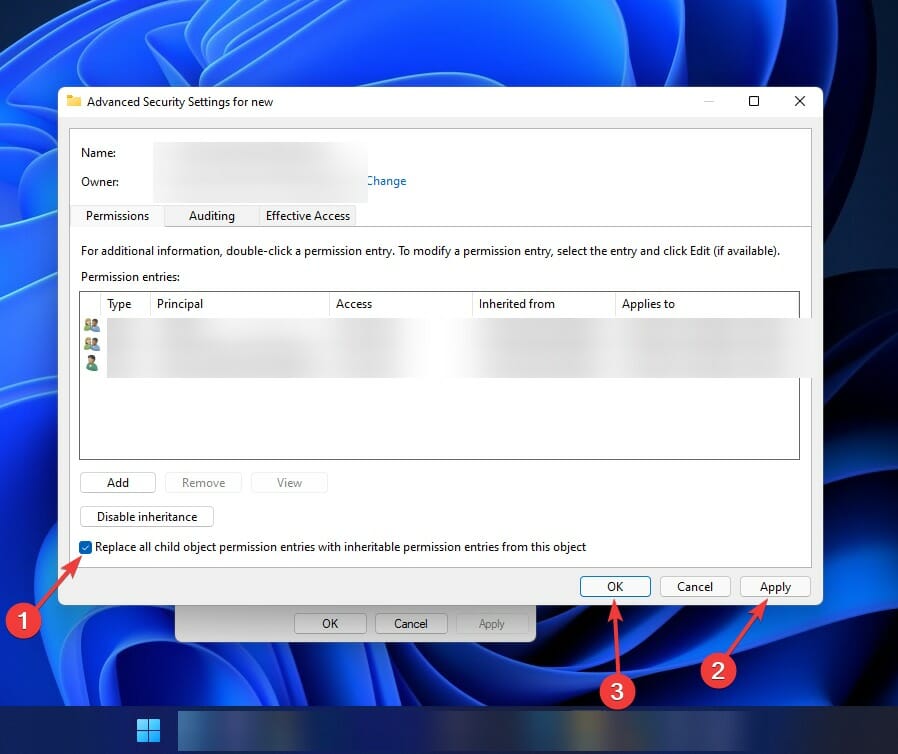
- Check the box next to Replace all child object permission entries with inheritable permission entries from this object and click Apply and OK to save changes.
After applying these steps, the Windows 11 Access is denied error should be solved.
6.2. Take ownership via Command Prompt
- Press the Windows key + S in then enter cmd, and click on the most relevant result.
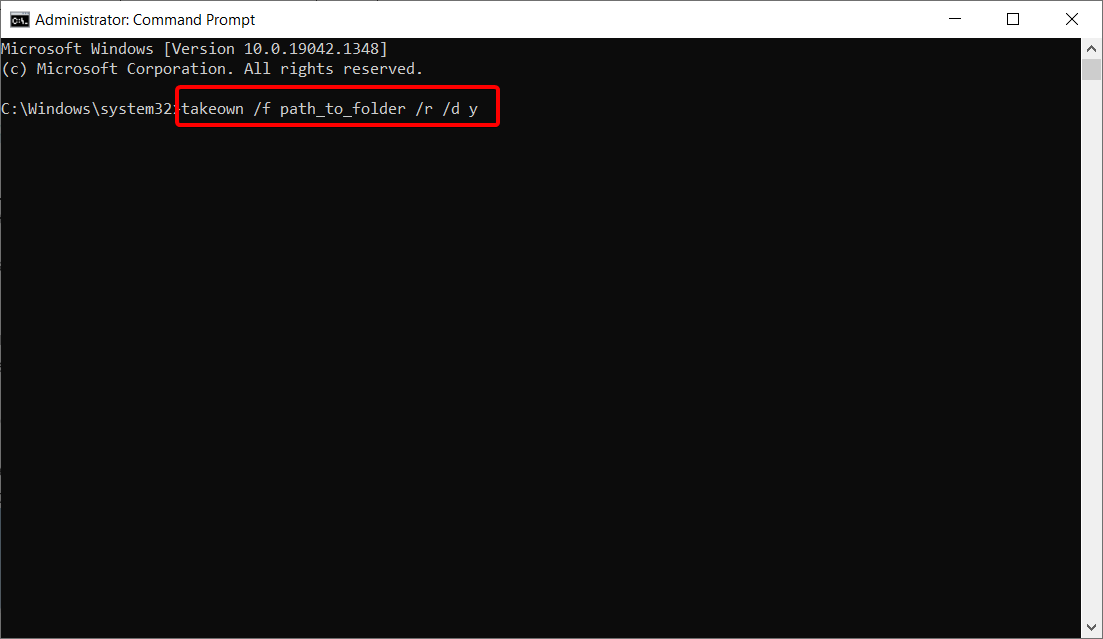
- Type or paste the following commands and press Enter after each. Note that you need to replace the path_to_folder in the commands with the correct path of the inaccessible folder.
takeown /f "path_to_folder" /r /d y icacls "path_to_folder" /grant administrators:F /T
If you were trying to find out how to remove access denied in CMD, reconfiguring the permissions by using the icacls command should do the trick.
After running these two commands, you should have full access to them. Reboot your computer once you’ve completed the procedures outlined above to determine whether or not the problem has been resolved.
If nothing else works, you might consider resetting your Windows 11 to factory defaults. It’s not ideal, but it’s a last-resort solution that will wipe the ownership settings and let you access the folder.
The Windows 11 Access is denied error can be frustrating as it can stop you from opening important files. But with the fixes in this guide, you should be able to fix it for good.
Many reported this error while trying to access the user folder from an old hard drive, but that’s not the only instance.
In the same vein, if you want to know how to fix Error 5 Access is denied on Windows 11, check our detailed guide for the steps to follow. We also recommend checking our guide on how to assign read/write permissions properly and avoid future issues.
Let us know which procedure worked for you in the comments area below.

