FIX: Can't Take Photos With Camera App in Windows 10/11
Key notes
- If your Windows 10 camera app doesn't take photos at command, the first thing you should check is the drivers
- Using the right tools, you will be able to fix this problem in a few simple steps with automated support.
- There is a number of reasons for your camera to not respond, and maybe you have to check your privacy settings.
- In case you're using Windows 8 or 8.1 and have this problem with your camera, the following solutions will provide good help.

A couple of our readers have sent in lots of emails complaining about the fact that their built-in camera app doesn’t allow them to take photos on Windows 10, Windows 8 and Windows 8.1.
A good number of Windows 8 and Windows 8.1, as well as Windows RT users, seem to be affected by the fact that their built-in camera app is not working. The issues reported by affected users range from crashes and hanging reports to the simple occurrence that the app simply doesn’t open or they can’t take photos, which is the most annoying aspect. Below we will include what somebody has been saying about this problem and some potential fixes to solve this problem.
Here’s how one of the most recent complaints with regards to the Camera app functionality in Windows 8 sounds like:
The camera app on Windows 8 is not allowing me to take photos. It will let me get onto the app and try to take a photo, but once I have click my screen to let me take the picture it says “Something went wrong while taking this photo.” This has been going on for about 2 months or so. If someone could help me with my camera problems that would be great!
What to do if Windows 10 camera app won’t take photos
- Update your drivers
- Update your computer
- Delete the Picture folder from Libraries
- Scan your system for malware
- Run the built-in troubleshooter
- Change camera privacy settings
1. Update your drivers
So, if you have been getting the “Something went wrong while taking this photo” issue, then this means that there might be an issue with your webcam, as well. Therefore, make sure that you have installed the latest drivers and that everything runs smoothly.
Go ahead and open ‘Device Manager’ and if need be, then uninstall and download fresh drivers from your brand maker. Outdated drivers are usually marked with a yellow exclamation mark. Here are the steps to follow to uninstall Windows 10 Camera app drivers:
- Go to Start > type ‘device manager’ > double-click on the first result to launch Device Manager
- Go to Imaging devices and expand the list
- Right-click on the camera drivers that appear and select Uninstall device.
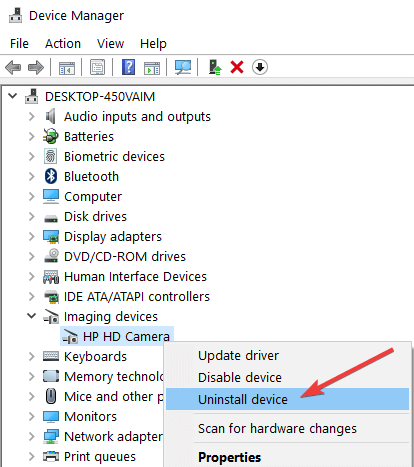
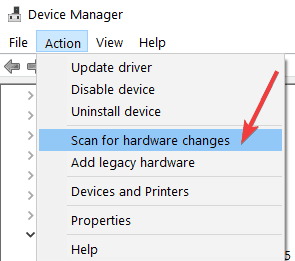
- Now, go to the Action tab and select the option ‘Check for hardware changes’ to install the latest drivers.
Alternatively, if you are looking for an easier solution rather than updating your drivers manually, we recommend using reliable third-party software that downloads and installs Windows drivers automatically.
With dedicated tools, the process of updating camera drivers will go as easy as possible. The first step is to select the drivers that need to update, and the right drivers will be found in minutes.
Thus, it’s possible to optimize hardware components using reliable automated software that can install or update any drivers from your PC.
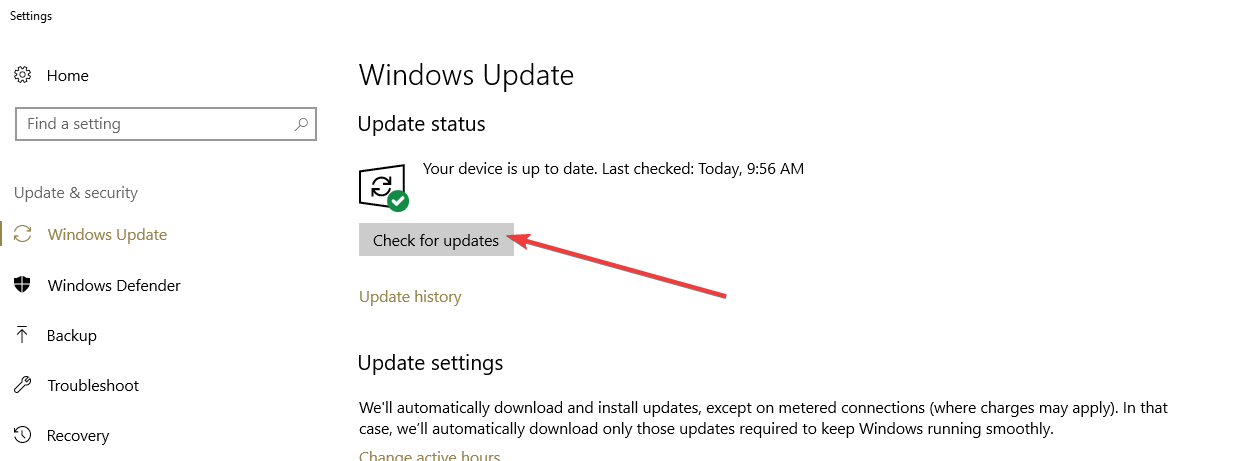
2. Update your computer
Also, make sure that you are running the latest updates, for that, access the ‘Windows Update’ option. Click on the ‘Check for updates’ button and install the available updates.
3. Delete the Picture folder from Libraries
If you’re still having troubles, then try the following:
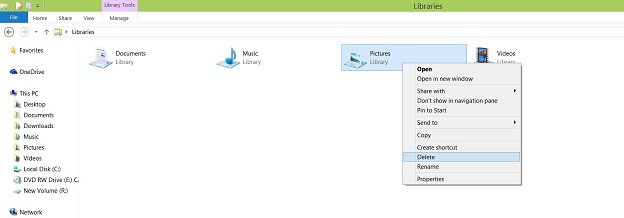
1. Go to Libraries in Windows Explorer. If it doesn’t appear, then you will find it in Favorites > Desktop > Libraries.
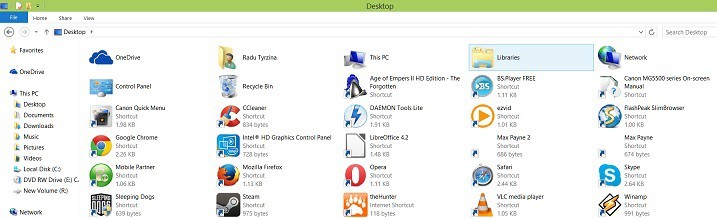
2. Open the Libraries location and the right-click on the Picture folder. Then delete the folder.
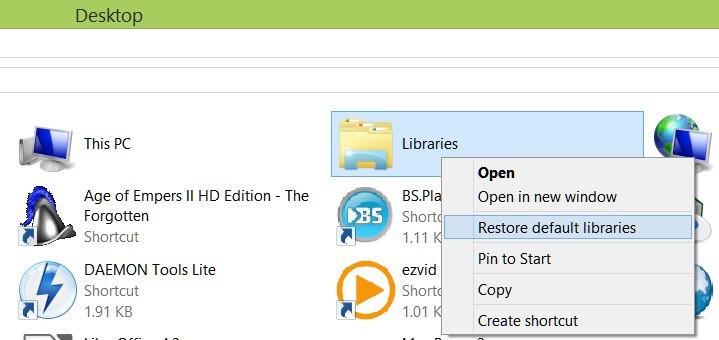
3. Go back and now right-click on the “Libraries” folder. From there, choose the “Restore Default Libraries” command.
4. Scan your system for malware
If you still can’t use your camera, run an in-depth antivirus scan. If a virus or a piece of malware got control over your camera, this may explain why you can’t take any photos. Use a reliable antivirus solution to scan your system. Also, download and install a dedicated anti-malware program to make sure that nothing could escape your scan.
After you’ve scanned your system, you can also turn off your antivirus. Sometimes, your security software may block your camera.
5. Run the built-in troubleshooter
There is one built-in troubleshooter that could help you to fix this issue: the Windows Store Apps troubleshooter. To launch it, go to Settings > Update & Security > Troubleshoot > select and run the troubleshooter as shown in the screenshot below.

6. Change camera privacy settings
Windows lets you control which apps and programs can access your camera. If you can’t use your Windows 10 camera app while using other apps and programs, make sure the respective apps have access to your camera.
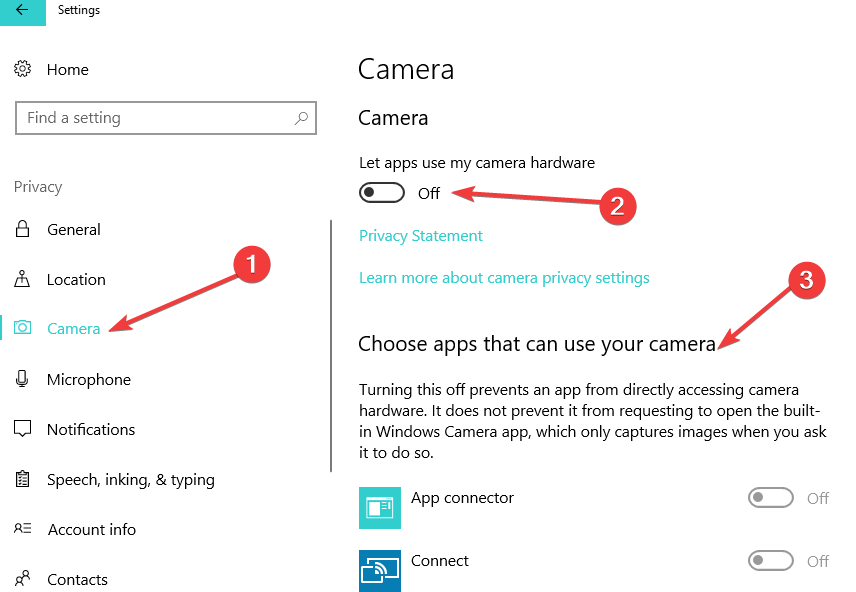
- Go to Settings > Privacy
- Go to Camera > enable Let apps use my camera and select which apps can access it.
If you happen to know of any other fixes that you could think are useful to solving this problem, then do leave us a comment, informing the whole community.
Read our disclosure page to find out how can you help Windows Report sustain the editorial team. Read more


Improve this guide


User forum
0 messages