How to Disable Dynamic DNS Updates on Windows 10/11
Don't disable DNS updates if have a DHCP connection

The good news is that you can disable DNS updates on your Windows computer.
However, please note that you do not need to disable dynamic DNS updates if you’ve configured static IP on Windows or If DHCP is enabled to fetch the global IP address.
How do I disable DNS updates on Windows?
- First, open the network connections from the start menu.

- It will list the available network interfaces on your system (mostly two: Wi-Fi and Ethernet). Choose the active one, right-click on the target network interface, and choose Properties.

- From the shown menu, find the listing ending with TCP/IP. If you can’t find the TCP/IP protocol, then refer to our detailed guide on how to fix the missing protocol on Windows 10/11.
After selecting the TCP/IP option, click on Properties.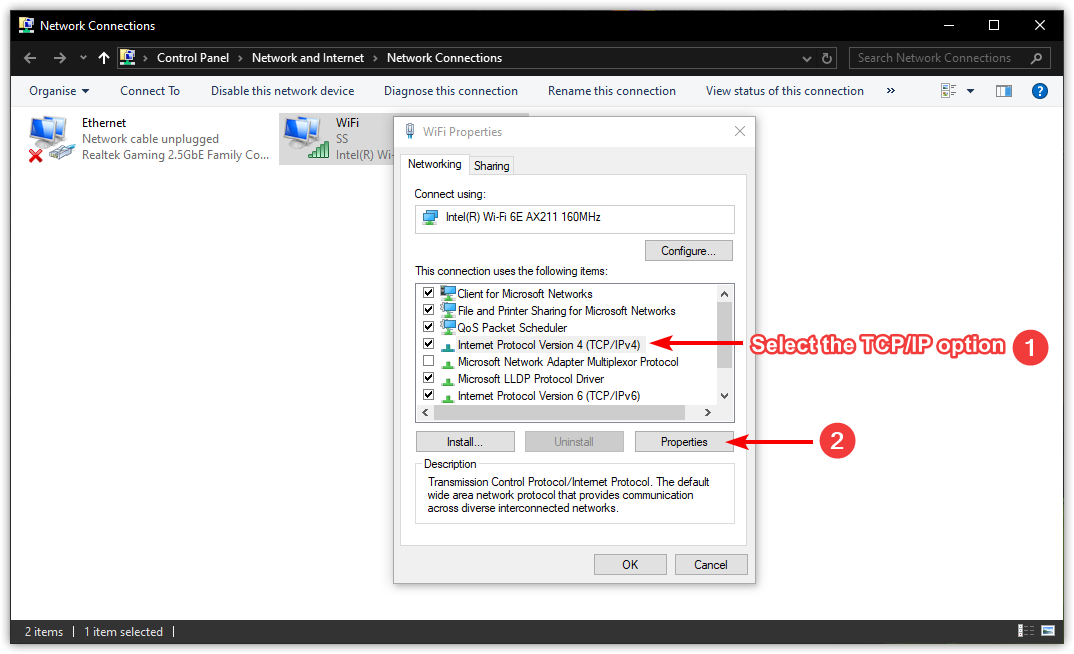
- In the next prompt, all you have to do is hit the Advanced button to proceed further.

- Next, it will show you the advanced TCP/IP settings. Here, click on the DNS tab and uncheck the second last option saying Register this connection’s addresses in DNS and hit the OK button.

- Now, restart your system, and you will have dynamic DNS disabled!
Overall, disabling dynamic DNS in Windows computers ensures your data is not included in the occasional DNS data leaks. Personally, I like to tweak the networking settings as I don’t trust most VPN services, especially after knowing that 16% of VPN services leak your IP addresses.
But after following this guide, you can easily disable the dynamic DNS of your Windows computer and configure the other network-related settings to suit your needs.
Read our disclosure page to find out how can you help Windows Report sustain the editorial team. Read more


Improve this guide


User forum
0 messages