Unable to Display to a VGA Projector in Windows 10/11 [FIX]
Key notes
- Many users claimed that they are unable to display to a VGA projector in Windows 10.
- This error usually occurs due to outdated drivers, but you can also update them automatically.
- Run a great Windows built-in software to troubleshoot your hardware issues.
- Also, consider rolling back your drivers by following our step-by-step guide below.

Many Windows 10 users have been saying that they are unable to display to a VGA projector in Windows 10. Here are a couple of basic fixes that you could try for this problem.
A few fresh Windows 10 users have been complaining about the fact that they have various problems with their VGA projector. Here’s what one affected user has been saying:
I have an Acer One S1002 laptop/tablet. I use the Micro HDMI output with a Micro HDMI to VGA adapter. This worked properly when I originally purchased the laptop, but, after upgrade to Windows 10, I have not been able to project to a VGA projector. The laptop recognized that the second display is there, but it does not extend or duplicate the screen.
This works fairly well with my Micro HDMI to HDMI adapter (although, occasionally, the signal will disappear for about 2 seconds before returning. I have also upgraded the Intel graphics drivers for the computer, but no change.
If your VGA projector doesn’t work in Windows 10, we’ve found the quickest solutions to fix the problem. Keep reading this article and get rid of this issue in no time!
What to do if the VGA projector won’t work in Windows 10?
1. Update your drivers
- Press the Windows key + R, type devmgmt.msc, and hit Enter.
- Now click on Ports (COM & LPT) and expand it.
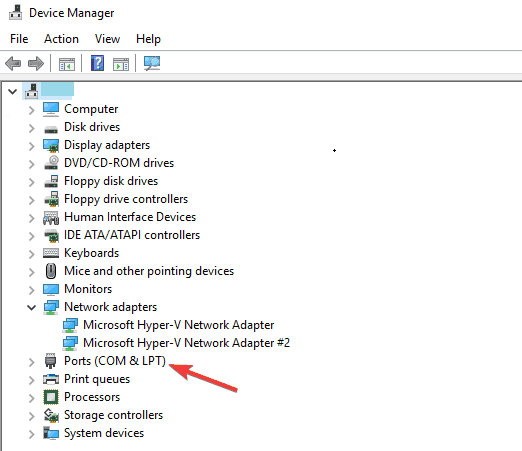
- Right-click on the device driver and click on Update.
The problem only appeared after the Windows 10 upgrade. It goes without saying that you should update your drivers, and that’s what the user in question did, as well.
But what most users do is update the graphics drivers only. You need to updated the HDMI adapter driver as well, just in case it’s outdated.
Did you know that the majority of Windows 10 users have outdated drivers? Be a step ahead using our guide.
If Windows can’t automatically find and download new drivers, don’t worry, we’ve got the right solution for you. You can rely on a great third-party solution.
You can prevent these problems by using an automatic tool that will search and install the correct drivers on your computer with just a few clicks. That's why we recommend you use Outbyte Driver Updater. Here's how to do it:
- Download and install the Outbyte Driver Updater app.
- Launch the software.
- Wait for the app to detect all incompatible drivers.

- Afterward, it will show you a list of the drivers found to select the ones to Update or Ignore.
- Click on Update & Apply Selected to download and install the newest versions.
- Restart your PC to ensure the applied changes.

Outbyte Driver Updater
Use this software and solve all driver-related issues from your PC.2. Update the operating system
- Press the Win key + I to open the Settings app.
- Navigate to Update & Security.
- Under Windows Update click on Check for updates.
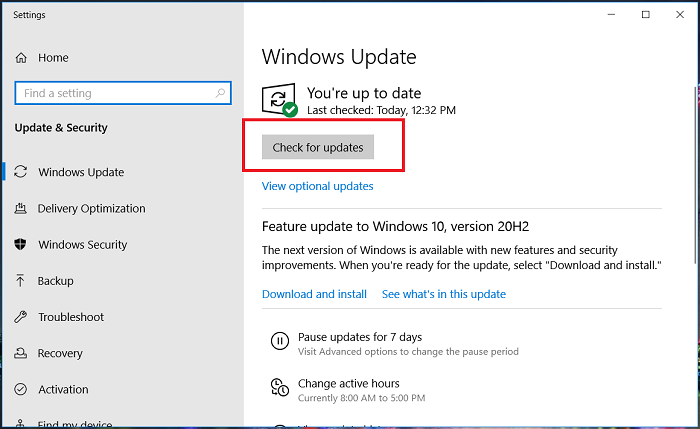
- Restart your PC to apply the updates, and check if you can now use your VGA projector.
If updating your computer driver didn’t help, you can also try to install the latest OS updates on your PC.
As you already know, Microsoft regularly rolls out Windows 10 updates to fix the issues reported by users and improve the operating system’s overall performance.
In fact, the latest patches may target directly VGA projector issues. So, make sure that you’re running the latest updates on your machine.
Also, if you are having trouble updating your Windows 10, take a closer look at our guide to fix it in no time.
3. Run the Hardware and Devices Troubleshooter
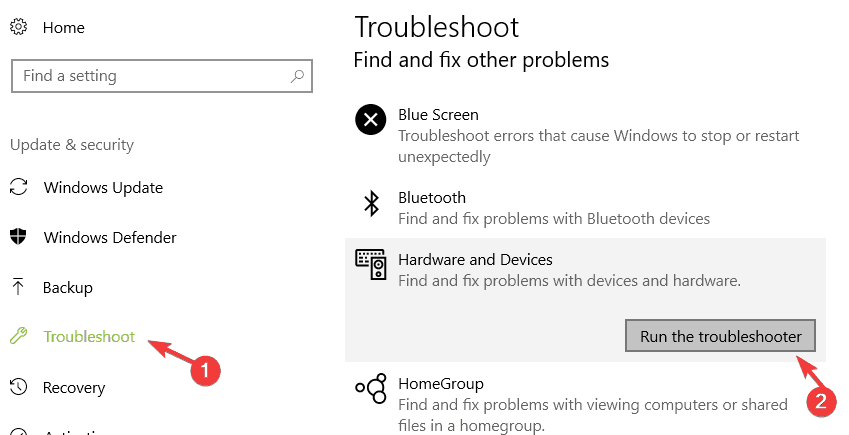
- Go to Settings, click on Update & Security, and select Troubleshoot.
- Under Find and fix other problems, select the Hardware and Devices Troubleshooter and run it.
Windows 10 features a useful built-in troubleshooter that allows users to fix hardware issues. Running this troubleshooter may help you solve this problem and connect your VGA projector to Windows 10.
If the Troubleshooter stops before completing the process, fix it with the help of our complete guide.
4. Roll back your drivers
- Go to Start, type device manager, and double-click the first result.
- Locate the Display Adapter and Monitor drivers, and right-click on them.
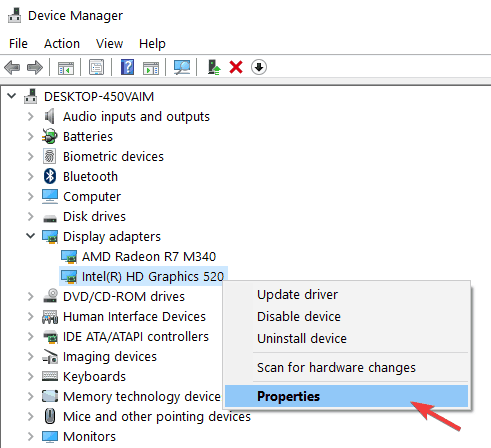
- Go to the Driver tab, and select Rollback driver.
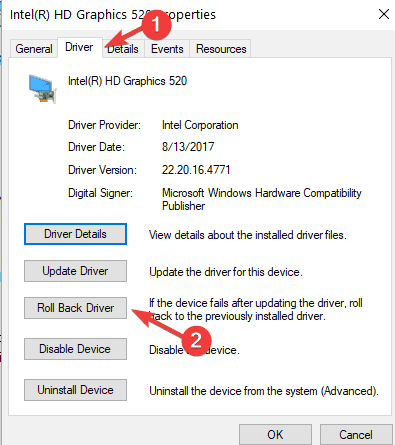
There are also cases where you’re no longer able to display Windows 10 on your VGA projector after installing the latest updates on your PC.
In this case, the best solution is to simply roll back your Display Adapter and Monitor drivers.
If the older driver works for you, then you’ll have to prevent Windows from automatically updating it. To do that, follow the simple steps in our dedicated guide.
These are the fixes that we can suggest at the moment. If you happen to know another solution, then do use the comments section below and help the community.
Read our disclosure page to find out how can you help Windows Report sustain the editorial team. Read more


Improve this guide

User forum
6 messages