How to Connect a Projector to Windows 10 [Step-by-Step]
Connecting a projector is similar to using an external display

Need to connect a projector to your Windows 10 PC? We’ll show you how to do it step by step. Just make sure your ports match (HDMI, VGA, or DisplayPort), or use an adapter.
Most projectors work plug-and-play, but you can install drivers if needed. For older models, check the manufacturer’s site. And if you’re shopping for one, see our picks for 360-degree projectors.
Let’s get to the good part.
How do I connect my Windows laptop to a projector?
1. How to connect your projector to a Windows 10 computer
- Make sure that the projector is powered On and connect the video cable to the PC in the appropriate port.
- Press the Windows key + P and choose one of the following options:

- Duplicate These Displays – This option shows the exact same image on your regular monitor and on the projected screen
- Extend These Displays – This option stretches Windows to fit across both screens
- Show only on 1 – Choose this before you’re ready to show off your presentation. Then switch to Duplicate These Displays
- Show Only on 2 – Choose this to show only the second display, which is useful when hooking up a tablet to a TV for watching movies in a dark room
- Click Apply to save your settings.
2. How to connect a laptop to a projector using HDMI to VGA cable
What if the technical configuration available forces you to connect your computer to a projector using an HDMI to VGA cable? How do you connect a laptop that has no VGA port to a projector?
If one of your devices has an HDMI port, while the other sports only a VGA port, then you’ll need an HDMI to VGA converter to connect your laptop to your projector.
Connect the converter to your laptop, and then connect the projector to the converter and you’re done.
That’s it, you now know how to connect and adjust your projector and Windows 10 computer, and you can get ready for the presentation. If you have any comments or suggestions, reach for the comments section, below.
3. How to connect a projector via wireless display
- Click the Start button and go to Settings.
- Choose System, and then select Display.
- Click on Connect to a wireless display.
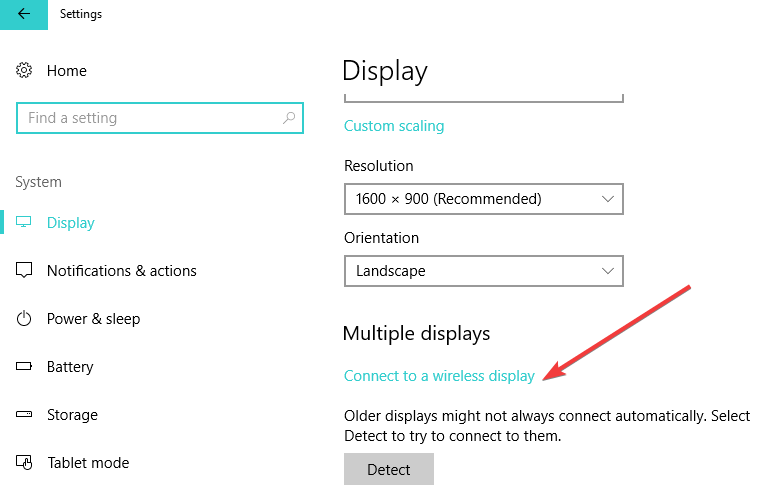
- A new window will appear on the right side of the screen displaying all wireless devices found.

- Select the projector that you want to connect to, and you’re done.
It is worth mentioning that you don’t need a cable to connect your Windows 10 computer to a projector. If both devices support Miracast, you can simply select the option ‘Connect to a wireless display’ choose a projector and then the projector will mirror your computer’s screen.
Speaking of Miracast, we have dedicated a series of articles to this tool. Check them out to better understand what Miracast is, how to use it and how to fix various issues that may occur during usage:
4. Connect your computer to a projector on Bluetooth
- Click the Start button and choose Settings.
- Choose Devices and click on Add Bluetooth or other device. Also, ensure that Bluetooth connectivity is turned on for both devices.

- Select your projector and follow the on-screen instructions to link the two.
Of course, if both your computer and projector support Bluetooth technology, you can also use this method to connect the two.
What do I do if Windows 10 doesn’t recognize my projector?
If Windows 10 doesn’t recognize or detect your projector, there is probably a problem with the connection itself or the drivers.
Make sure that you connected the projector to the correct port in the PC or laptop and if you’re using a converter, test it to see if it works with another video device such as an external monitor.
If the connection is not the problem, check if you have the correct drivers installed for the projector.
Alright, so this is how you can get your computer to display on a projector and also fix potential issues along the way. Here’s how you can connect a projector to Windows 11.
If you have any more suggestions or questions, don’t hesitate to leave them in the comments section below.
Read our disclosure page to find out how can you help Windows Report sustain the editorial team. Read more


Improve this guide


User forum
5 messages