How to Change the Install Location of Microsoft Office
The Office Deployment Tool comes to aid!
Key notes
- Many users want to change the install location of Microsoft Office due to storage constraints or better file management.
- You can do that for Microsoft Office, and it shouldn’t take more than a few minutes.
- All you require is the Office Deployment Tool and a basic understanding of Windows.

Microsoft Office offers all sorts of new features, but there’s one major flaw. Microsoft Office 2016 can only be installed in the default directory. However, there is a way to change the default install location for Office 2016.
With Office 2010 and newer versions, Microsoft has decided to use a different technology called Click-to-Run that downloads Office setup files directly from Microsoft servers into the default directory.
This is great for new users who want to install Office 2016 easily, but as you can see, it lacks many customization features. So, let’s find out how to install Office to a different folder!
How do I change the default install location for Office 2016?
Use the Office Deployment tool
- Download Office 2016 Deployment Tool.
- Run Office Deployment Tool to extract files to the desired directory. We’ll use the Office folder in the E: drive for our example, but you can use any other directory or hard drive partition.
- Go to the folder you choose earlier, and then find the configuration.xml file. Right-click it and choose Edit.
- Delete all the contents from the configuration.xml file and then replace them with:
<Configuration><Add SourcePath="E:Office" OfficeClientEdition="64" ><Product ID="O365ProPlusRetail"><Language ID="en-us" /><ExcludeApp ID="Access" /><ExcludeApp ID="Groove" /><ExcludeApp ID="InfoPath" /><ExcludeApp ID="Lync" /><ExcludeApp ID="OneNote" /><ExcludeApp ID="PowerPoint" /><ExcludeApp ID="Publisher" /><ExcludeApp ID="SharePointDesigner" /></Product></Add></Configuration> - You can change some of the values, such as:
- Source path – This should match the directory you specified in Step 2. In our case, it’s:E:\Office
- OfficeClientEdition – This value is used to select which version you want to download. Set it to 32 or 64, depending on your operating system.
- Product ID – The value is used to set which version of Office 2016 you wish to download. There are several options available:
- ProPlusRetail
- ProfessionalRetail
- HomeStudentRetail
- HomeBusinessRetail
- O365ProPlusRetail
- O365HomePremRetail
- O365BusinessRetail
- O365SmallBusPremRetail
- VisioProRetail
- ProjectProRetail
- SPDRetail
- Language ID – This value is used to set the language for Office 2016. We’ve used en-us in our case.
- ExcludeApp ID – The value is used to specify which Office apps you do not wish to install. The list of values is:
- Access
- Excel
- Groove
- InfoPath
- Lync
- OneNote
- Outlook
- PowerPoint
- Project
- Publisher
- SharePointDesigner
- Visio
- Word
- You can also add more entries if you want to skip the installation of more Office 2016 tools. Keep all the values you enter between quotes, or else the installation might not work.
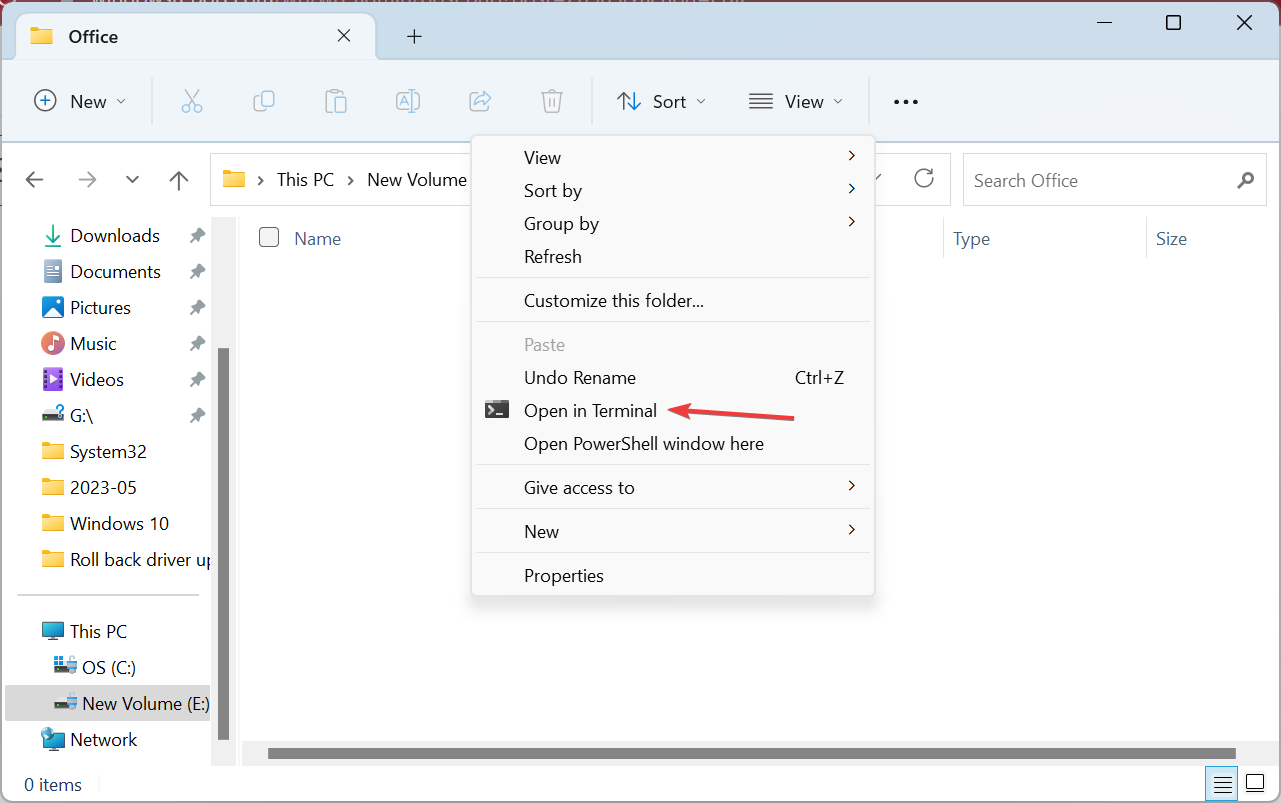
- After you’ve done with the changes, save them, close the file, and go to the folder you specified earlier.
- Hold Shift and then right-click on an empty space. Choose Open in Terminal here from the menu.
- Execute the following command and then wait for Office 2016 to download:
setup.exe /download configuration.xml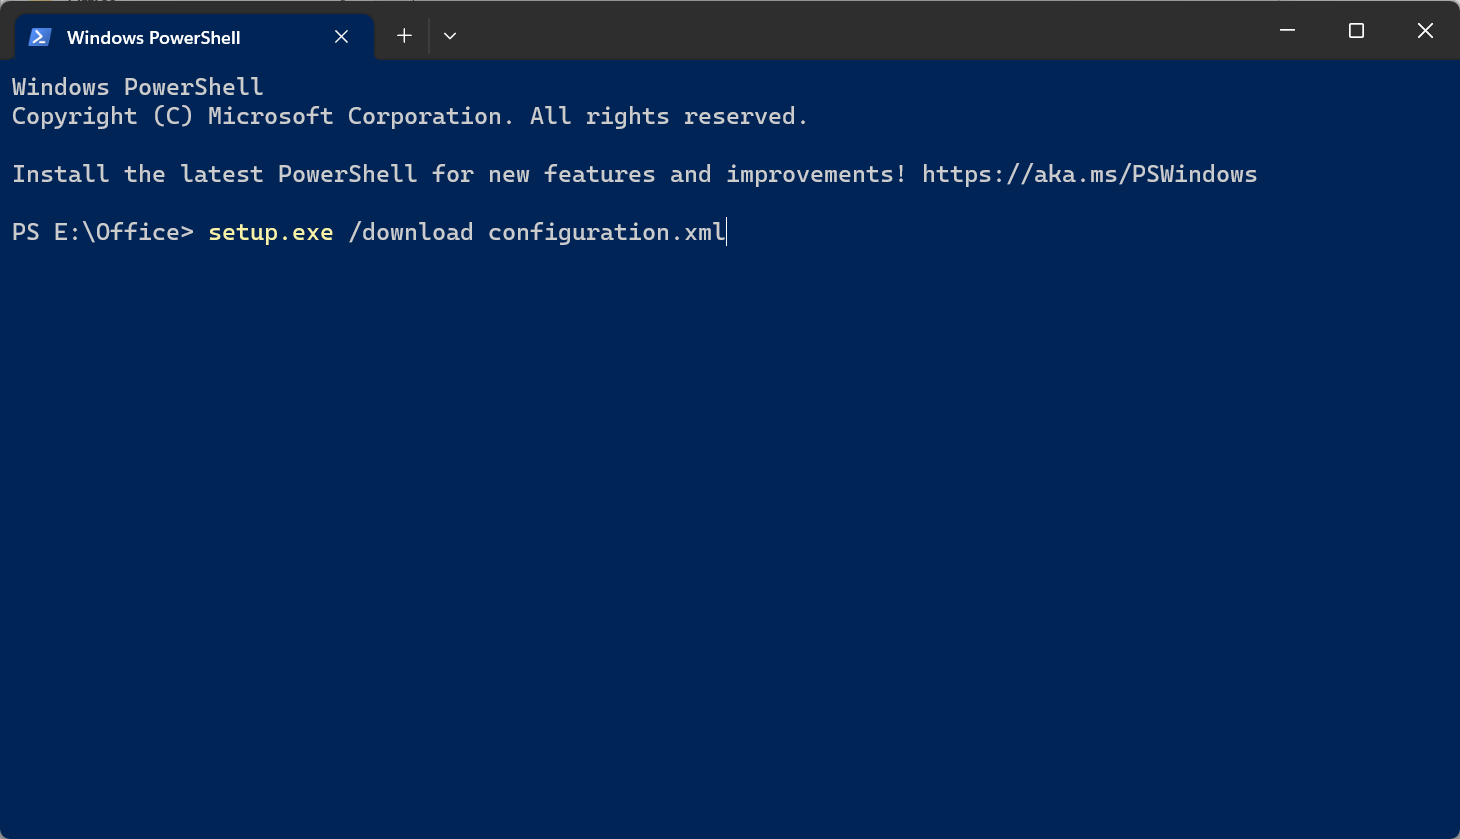
- If there are any errors, this means that your configuration.xml isn’t configured properly, so you might want to go a few steps back and check if you’ve configured the configuration.xml file properly
- After the download process is complete, type the following command and then press Enter:
setup.exe /configure configuration.xml
That’s it! By now, Office should be installed in the desired location instead of the default system drive. However, beware that a proplusww.msi installation error may occur if you have corrupt files.
You can solve many common Office sync and caching issues by reviewing this guide on how to disable Microsoft Office Upload Center, which helps you avoid unwanted save prompts during custom installations.
If you are looking for other options, check the most reliable Office alternatives to use in Windows.
For any queries or to share your review of Microsoft Office, drop a comment below.
Read our disclosure page to find out how can you help Windows Report sustain the editorial team. Read more


Improve this guide


User forum
8 messages