Cisco Webex Service High CPU Usage: 3 Ways to Stop it
Everything you need to balance the CPU usage of this tool
2 min. read
Updated on
Read our disclosure page to find out how can you help Windows Report sustain the editorial team Read more
Key notes
- The Cisco Webex Service is one of the market's top video conferencing and collaboration tools.
- Unfortunately, some users complain that the software drives their CPU usage up.
- While there are a series of potential causes for this issue, it is a problem you can quickly solve, as we will show in this detailed guide.
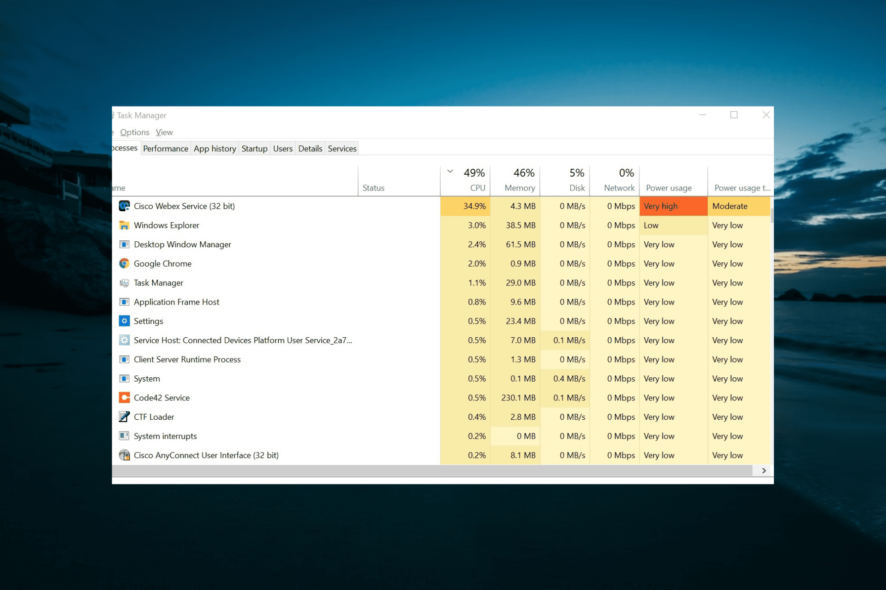
The fixes in this guide are confirmed adequate for the Cisco Webex Service’s high CPU usage and do not need any technical know-how.
How do I fix high CPU usage on Webex?
1. End the process
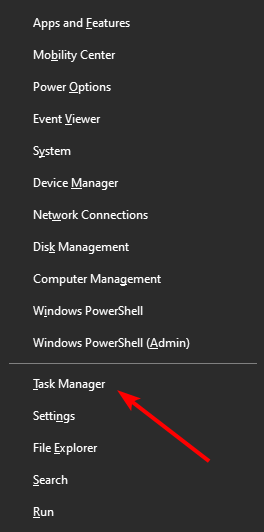
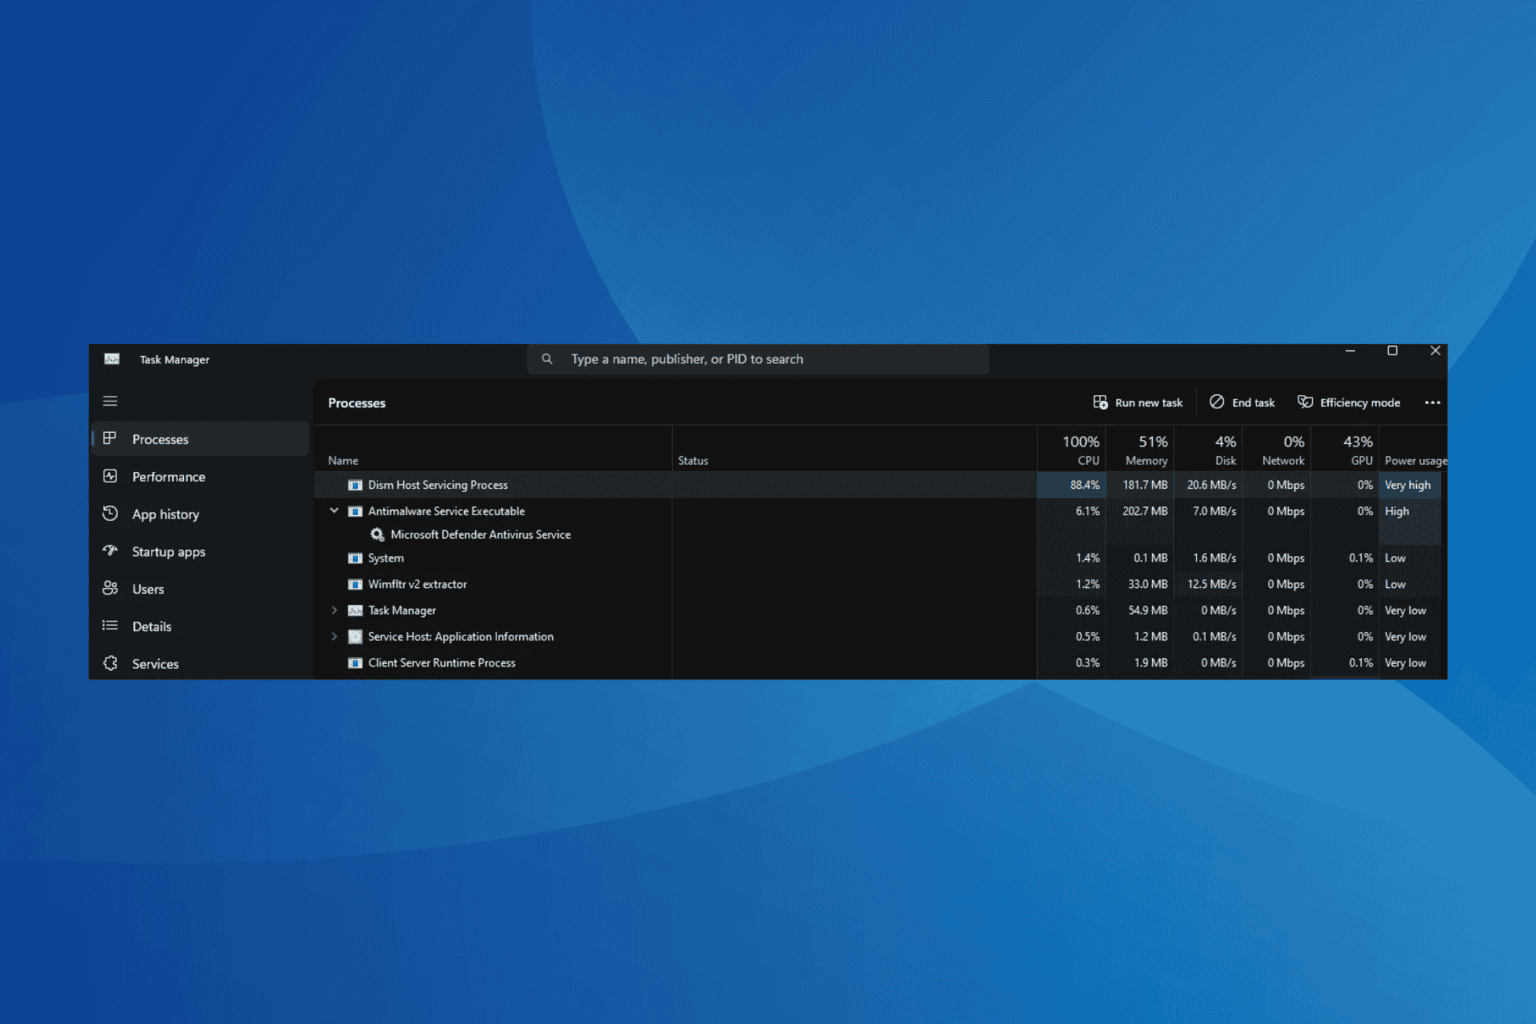
- Press the Windows key + X and select the Task Manager option.
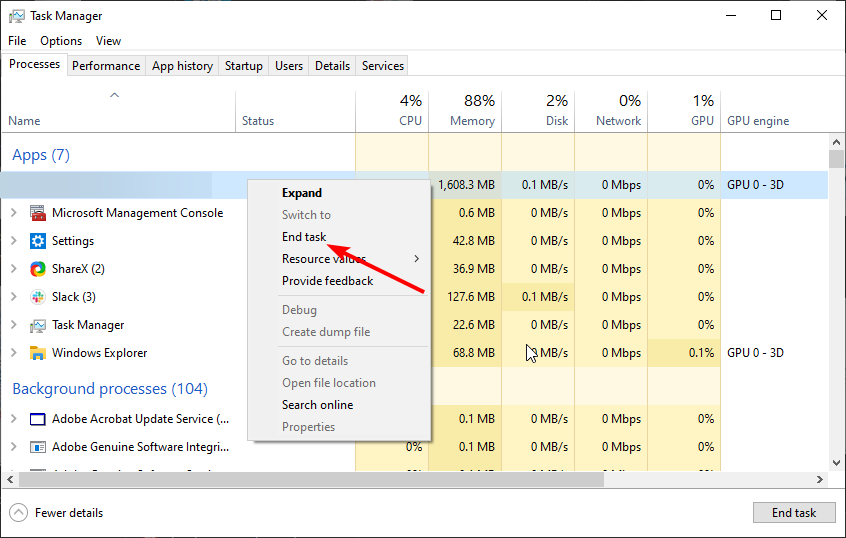
- Right-click the Webex service and its associated components and select End task.
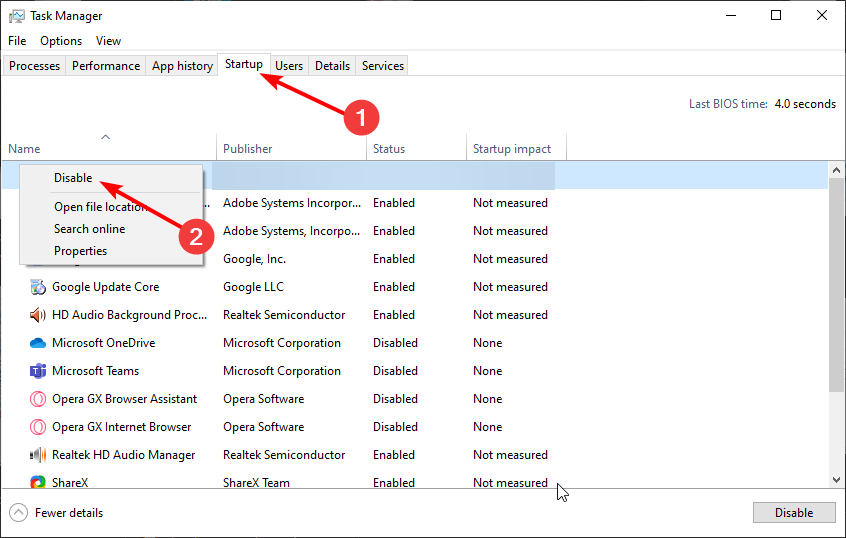
- If the service starts with your PC, click the Startup tab at the top and right-click it.
- Finally, click the Disable option.
If you are experiencing the Cisco Webex Service’s high CPU usage when you are not using the app, the best thing to do is to end the task in the Task Manager. This has fixed the issue for many users.
2. Enable hardware acceleration
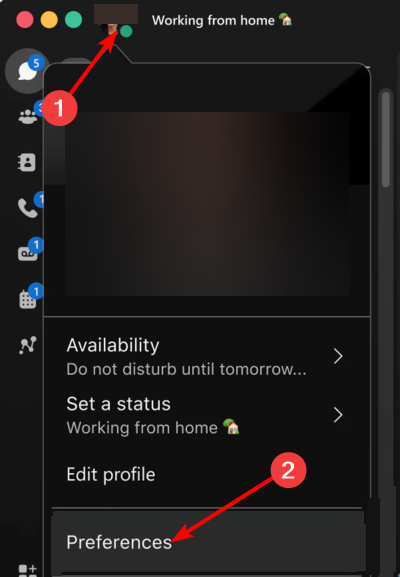
- Launch the Cisco Webex Service app and click your profile picture.
- Choose the Preferences option.
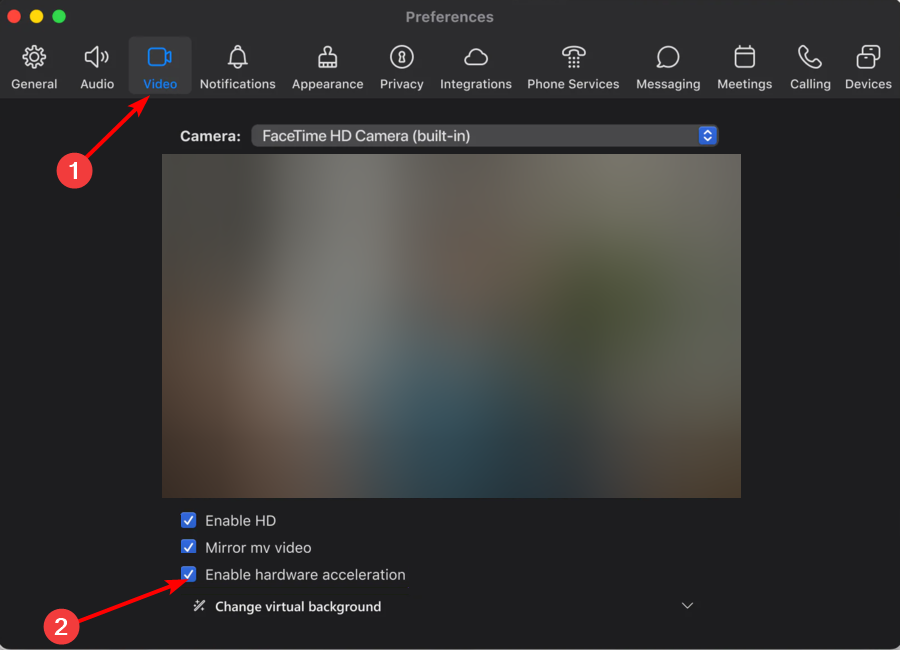
- Now, select the Video tab at the top.
- Finally, check the box for Enable hardware acceleration.
If the Cisco Webex Service is registering high CPU usage during video calls, you might need to enable the hardware acceleration feature to make it normal. This feature help encode your self-view video better, thereby balancing the CPU usage.
However, it is essential to note that hardware acceleration is only available on Intel and Mac CPUs. So, if you can’t find it on your PC, know it is unavailable.
3. Uninstall and reinstall the app
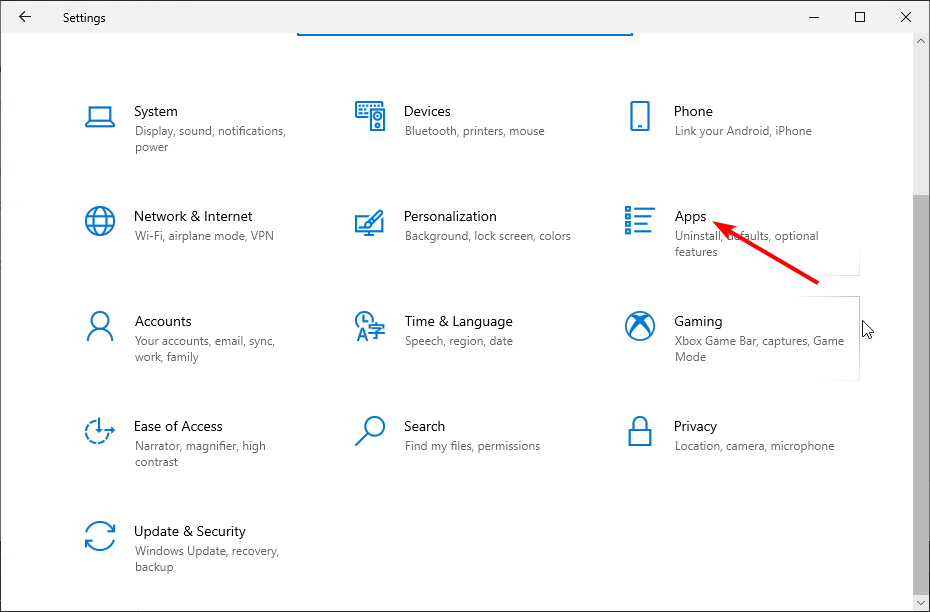
- Press the Windows key + I and select the Apps option.
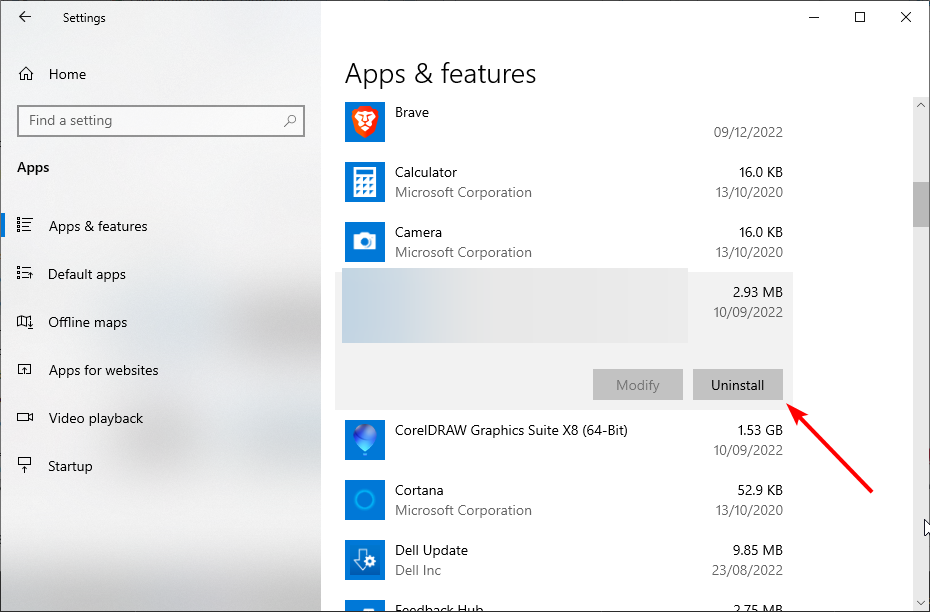
- Select the Cisco Webex Service app and click the Uninstall button.
- Now, follow the onscreen instruction to complete the removal.
- Finally, go to the official website to download the latest version of the app.
Many users have been able to fix the Cisco Webex Service’s high CPU usage by simply reinstalling the app. So, if the earlier fixes do not work, you should go for the jugular too.
That’s about for this frustrating high CPU usage issue. Feel free to let us know the solution that helped you solve it in the comments below.


User forum
0 messages