Laptop Starts Charging Then Stops [Fix]
If you're having this issue, be sure to check your charging equipment
Key notes
- If this happens, you should use laptop battery health software to ensure your battery is working properly.
- Do not hesitate to also discharge the battery, as described below.

Laptops are great if you’re on the move, however, many reported that the laptop starts charging then stops suddenly.
If this happens, you should use laptop battery health software to ensure that your battery is working properly.
You can use other methods, and we’ll explore them further in this guide.
Why does my laptop start charging then stops?
- Hardware damage – It’s possible that your battery is worn out or your cables or adapters aren’t working properly.
- Battery glitches – These can be caused by bad drivers or outdated BIOS.
What can I do if laptop charges for a second and then stops?
Before we start fixing this issue, there are a few checks that you can perform:
- Check jack, adapter, and battery – Your hardware may be having issues, so be sure to check the cable and jack for physical damage as well as your battery health.
- Update BIOS – In some instances, updating BIOS can solve this issue. To see how to do that, check our guide on how to flash BIOS.
1. Reinstall a driver
- Disconnect charger and shut down your computer.
- Remove the battery and re-connect the charger.
- Power On your PC.
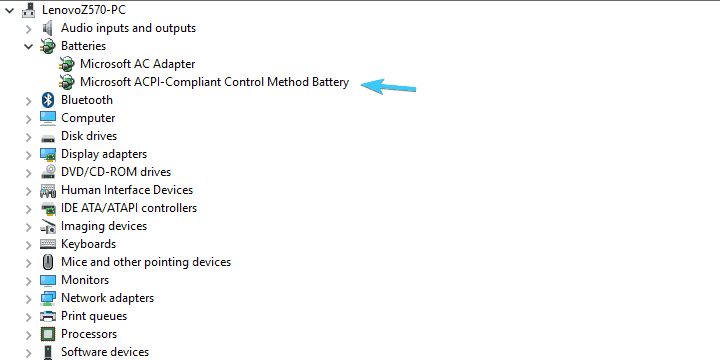
- Right-click on the Start button and open Device Manager.

- Expand the Batteries section.
- Right-click on the Microsoft ACPI Compliant Control Method Battery device and Uninstall it.
- Shut down PC again and disconnect the charger.
- Insert the battery and re-connect the charger.
- Power On the PC again and it the system should reinstall Microsoft ACPI Compliant Control Method Battery device.
In addition, you can remove the battery-related software provided by OEM. For example, Samsung has a tool called Battery Life Extender that will limit the charging percentage to 80% in order to extend the battery life.
This is a simple solution and it might help you if the laptop starts charging then stops.
2. Discharge the battery
- Charge your battery as much as you can and disconnect the DC charger.
- Use the computer until the battery is fully depleted.
- Once the laptop shuts down, remove the battery if possible.
- Press and hold the power button for approximately 60 seconds.
- Insert the battery again and reconnect the DC charger.
- Don’t turn On the laptop until the battery is charged completely.
The standard Lithium-Ion battery is predetermined to last up to 300 full recharge cycles. Meaning that it takes 300 full recharges to wear it off. Now, users are rarely going to fully discharge the battery and charge it again to 100% or regular basis, even though it’s arguable, the best way to extend your battery’s life.
In addition, the constant half cycles can cause a stir in the supporting software and prevent your battery from charging. In other words, discharging has multiple roles, which might help you resolve the issue at hand.
These are just some of the solutions that might help if your laptop starts charging and then stops.
Before you leave, find out how to limit the battery charge in Windows and extend the battery’s lifespan.
We certainly hope that this was a helpful read. In case you have some questions or suggestions regarding the battery charging issue we addressed today, make sure to post them in the comments section below.
Read our disclosure page to find out how can you help Windows Report sustain the editorial team. Read more


Improve this guide


User forum
2 messages