How to Fix Laptop Not Connecting to Mobile Hotspot [2026]
Adjusting the sharing settings usually fixes this problem

If your laptop is unable to connect to a mobile hotspot, we’ve outlined tested solutions in the following lines. The problem most likely stems from faulty sharing or DNS settings on your PC.
At the same time, you may want to take a look at the hotspot settings and service availability on your phone.
We’ll show you how to do that and a couple of more tricks for flawless hotspot connections right down below.
How do I fix a hotspot not working on Windows?
First of all, check hotspot connection settings, ensure devices are allowed to connect, and set a channel for the network. Also, try disabling the Microsoft Wi-Fi Direct Virtual Adapter.
1. Change sharing settings
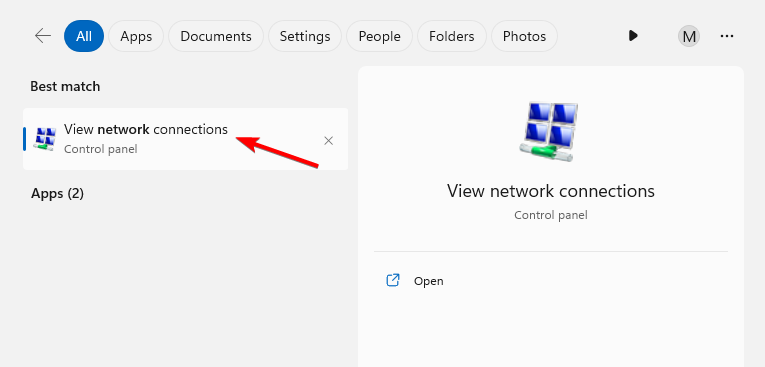
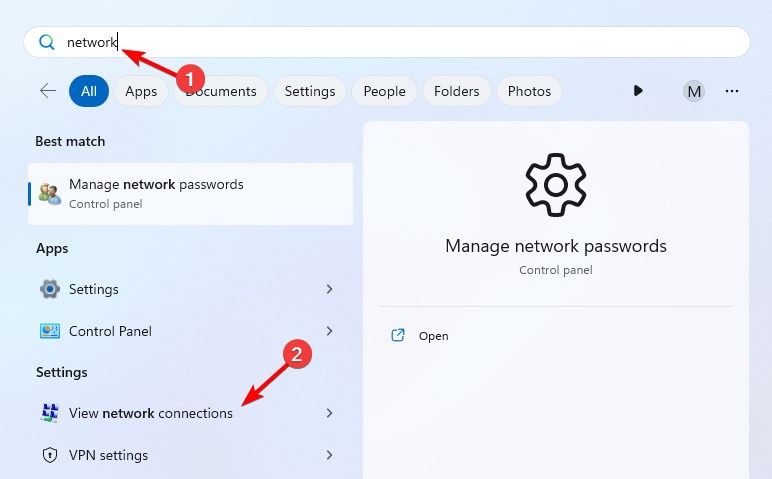
- Press the Windows key + S and type network connections. Select View network connections.
- Locate your hotspot connection, right-click it and choose Properties.
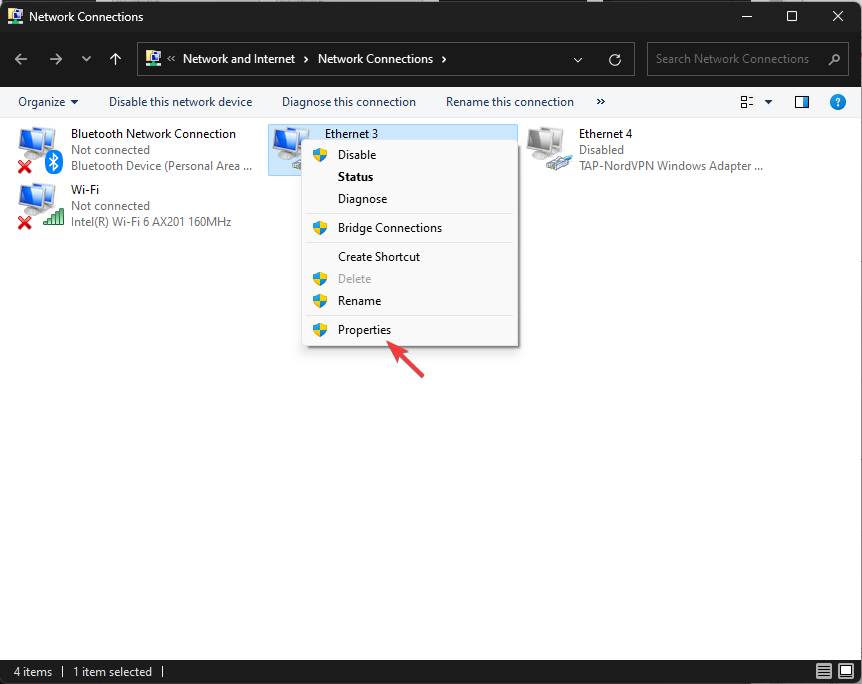
- Navigate to the Sharing tab and enable all settings in Internet Connection Sharing (ICS).
- Save changes.
- Repeat the steps again, but this time disable all Internet Connection Sharing settings.
2. Reconnect to the network
 NOTE
NOTE
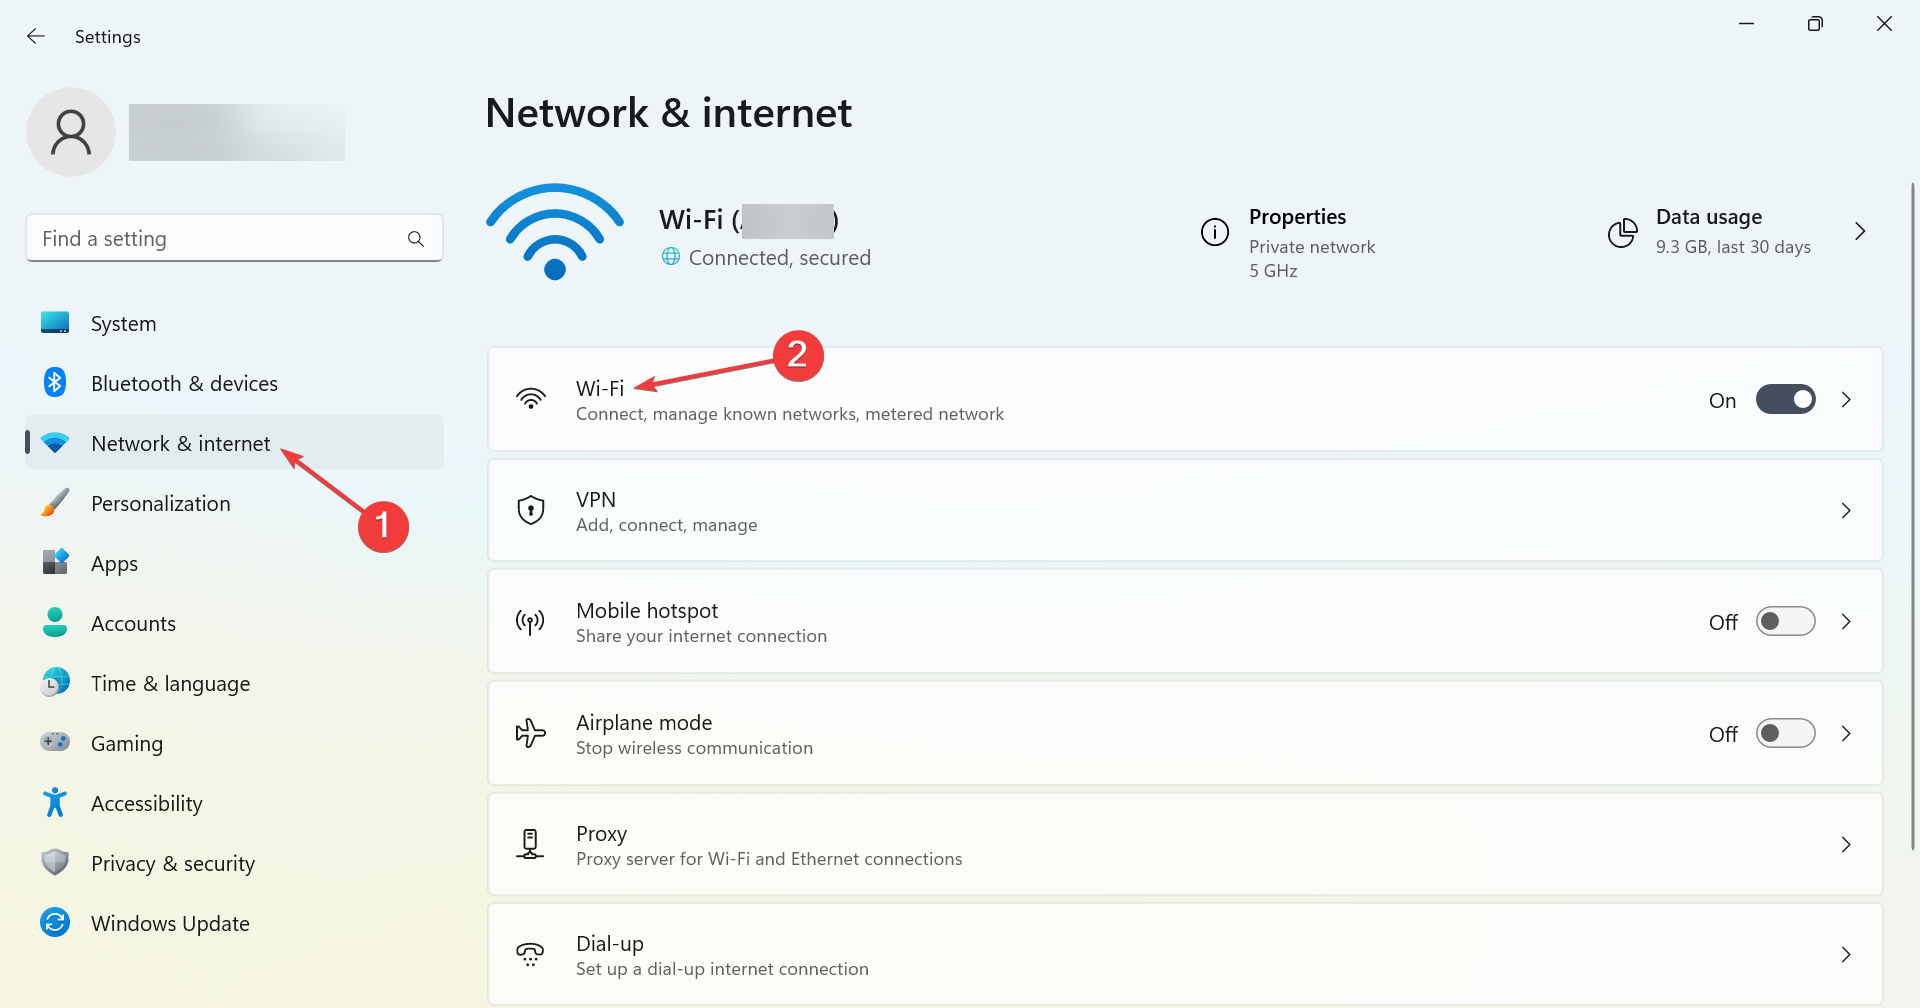
- Press Windows + I to open Settings, head to the Network & Internet tab, and click on Wi-Fi.
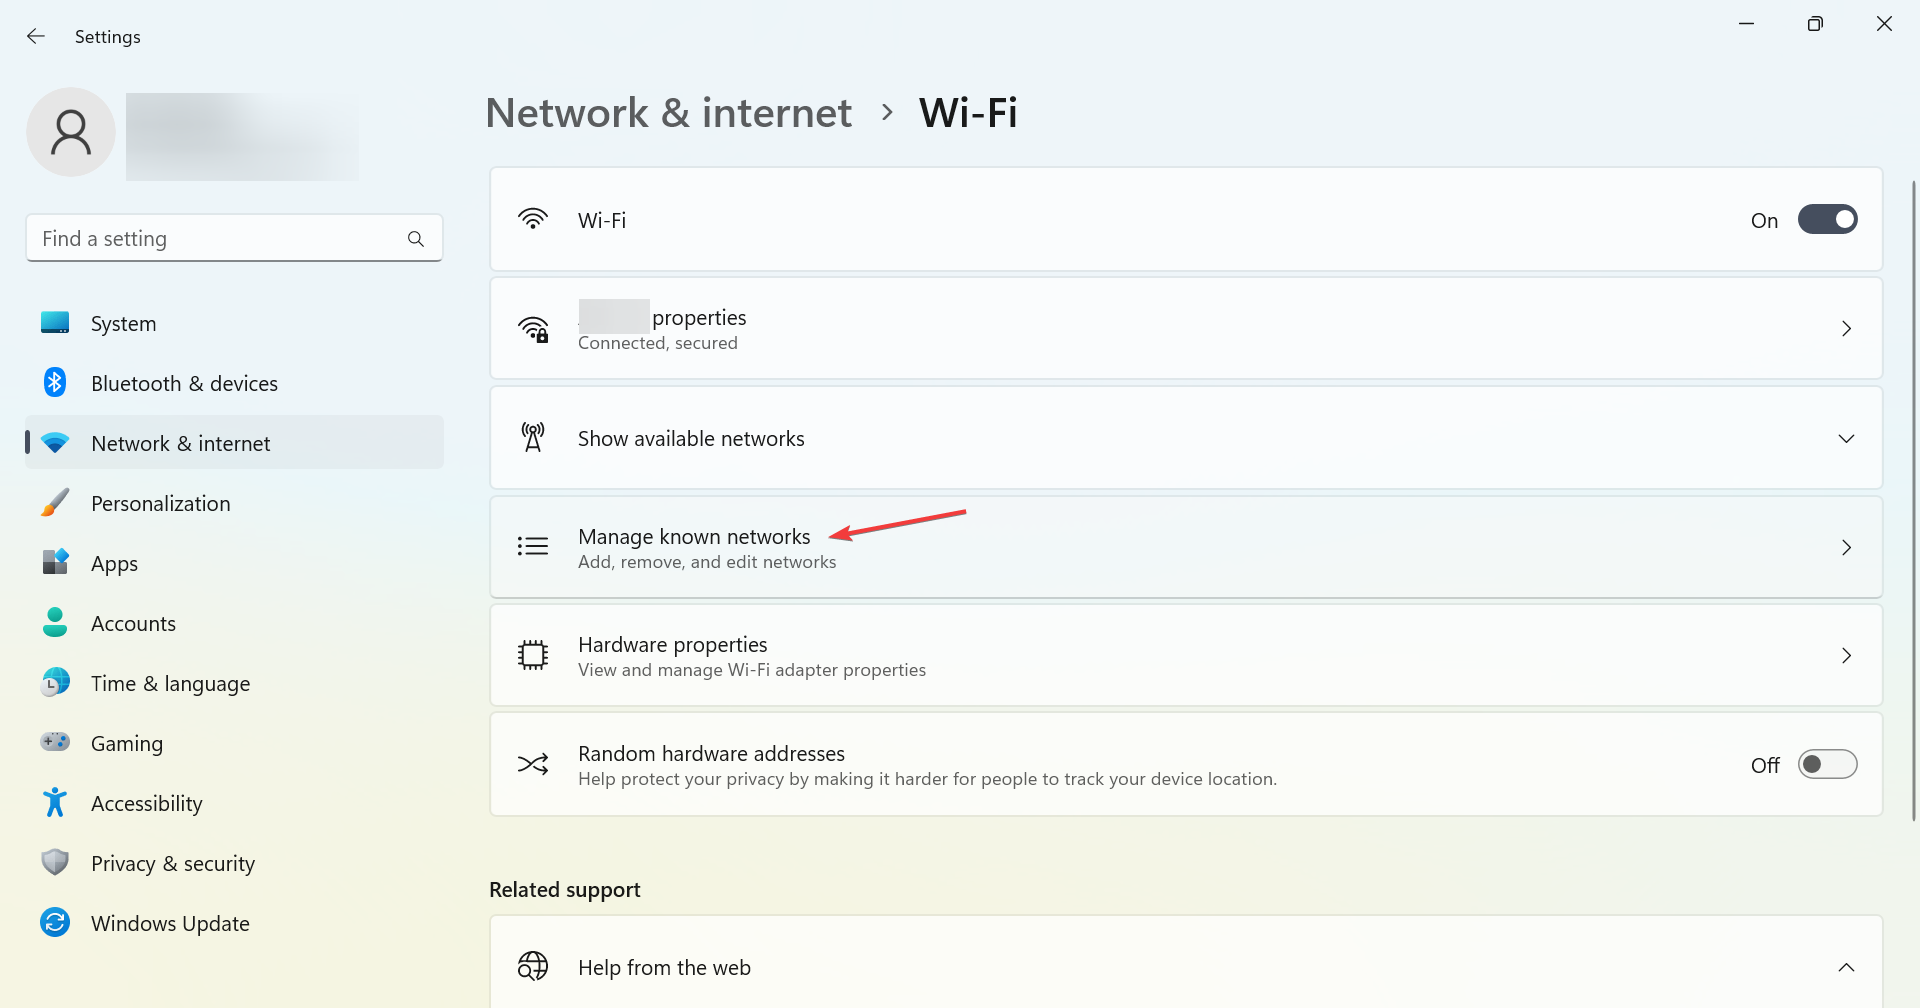
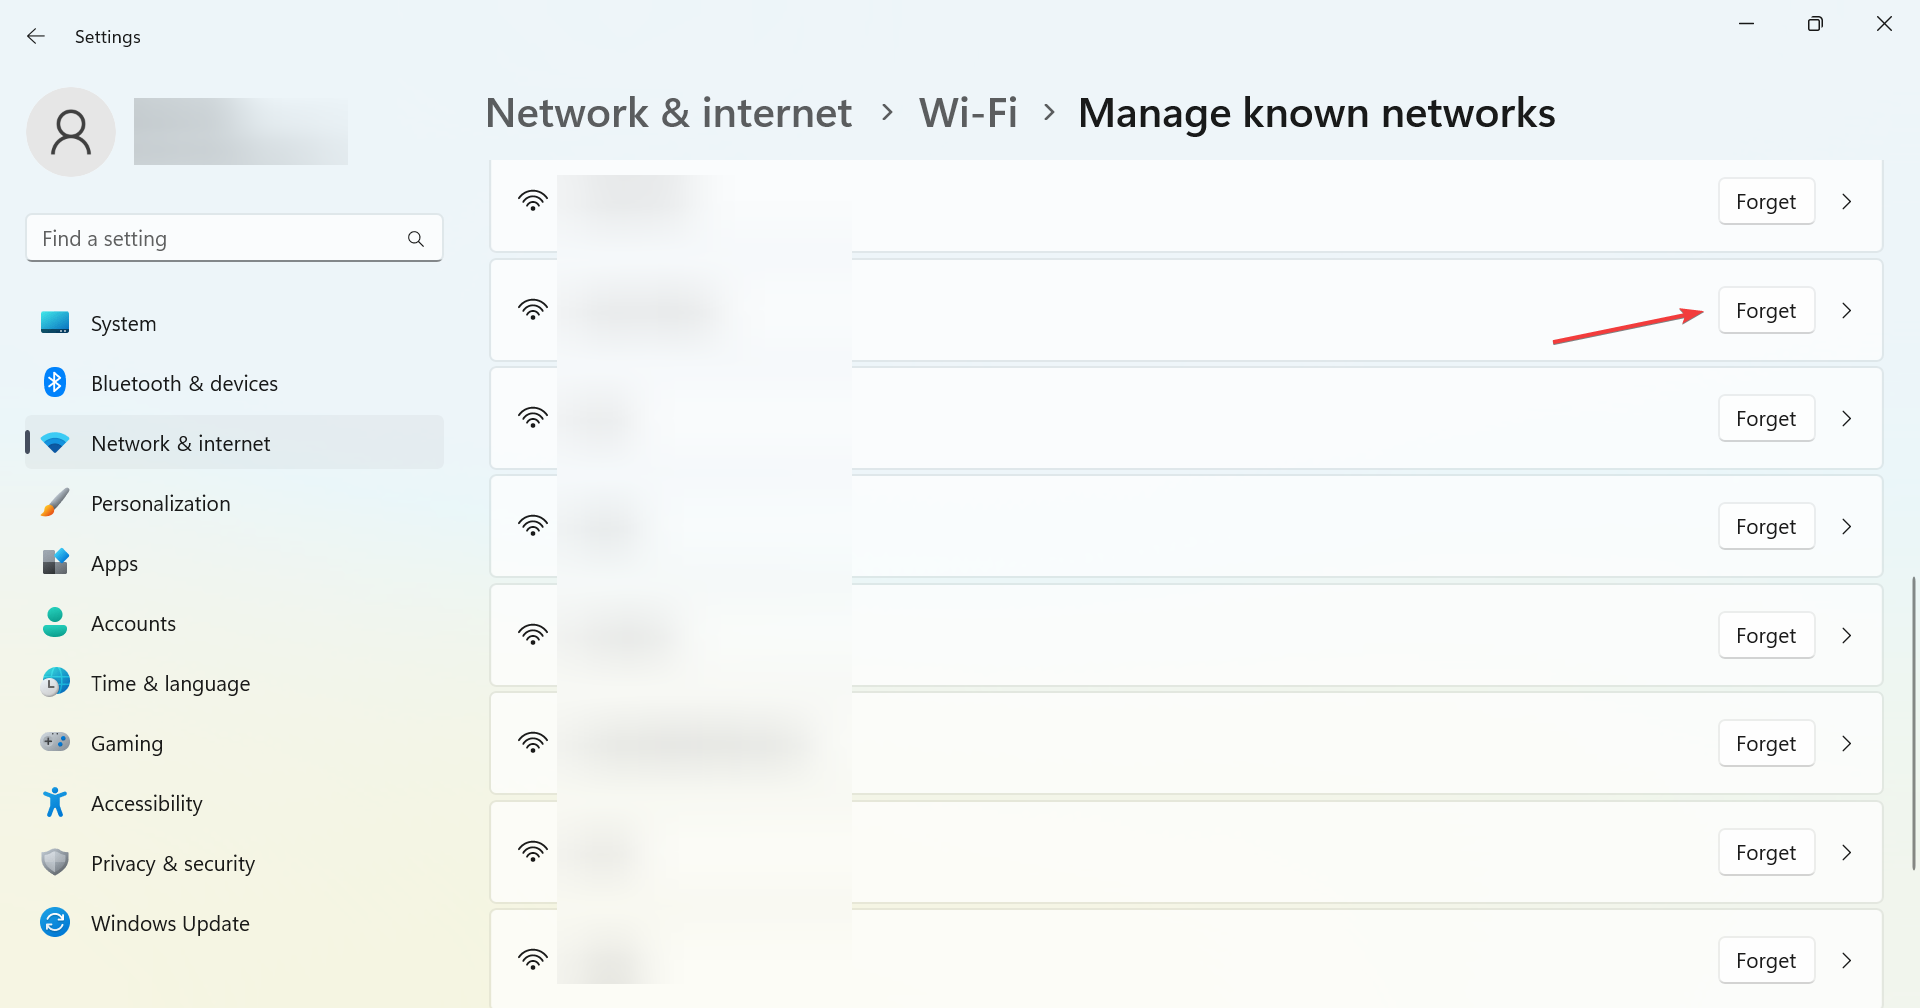
- Choose the Manage known networks option.
- Locate the mobile hotspot, and click the Forget button next to it.
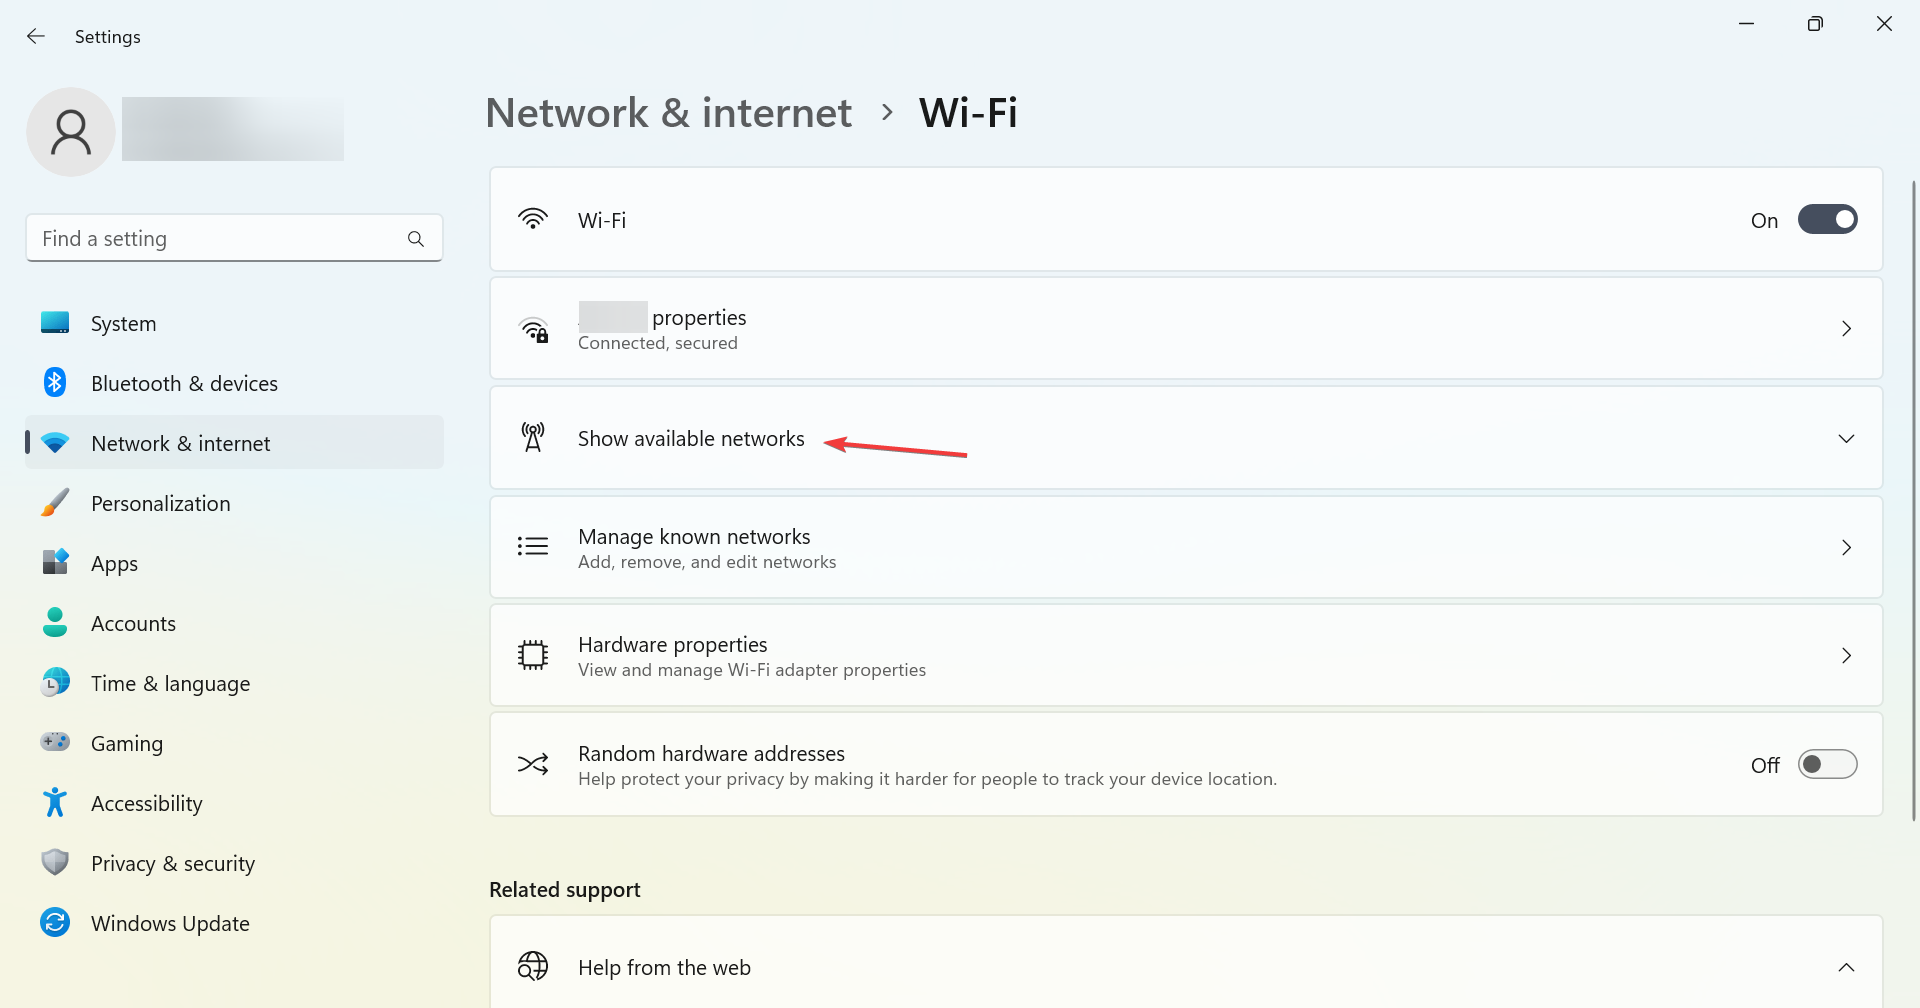
- Once done, head back to Wi-Fi settings, and choose Show available networks.
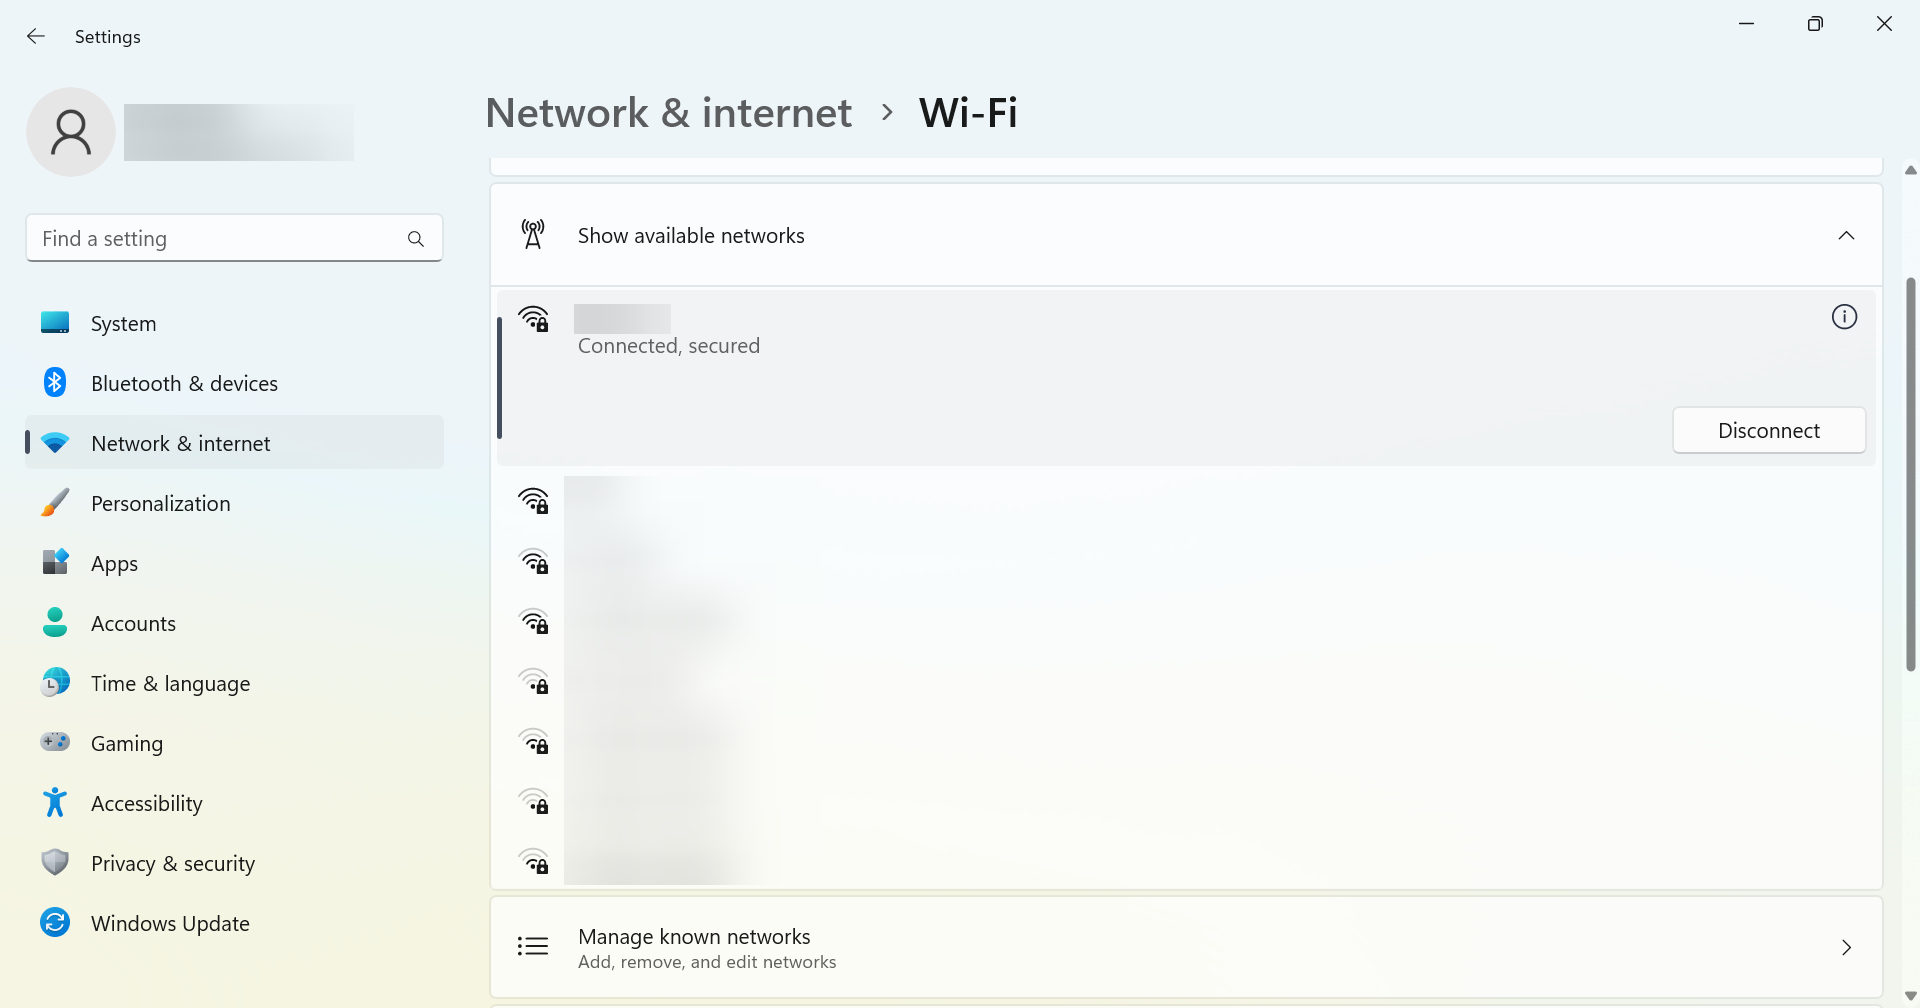
- Now, click on the mobile hotspot here, and enter the password for it to establish a connection.
3. Check if the critical services are running
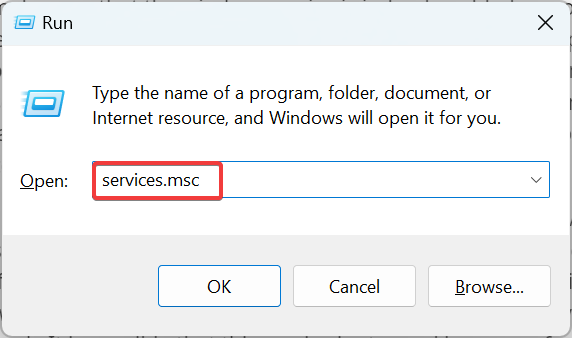
- Press Windows + R to open Run, type services.msc in the text field, and hit Enter.
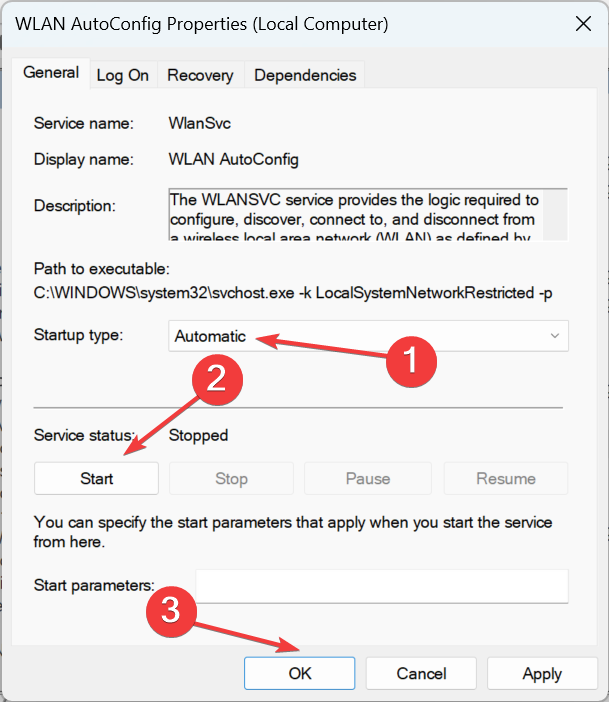
- Locate and double-click on the WLAN AutoConfig service to launch its Properties.
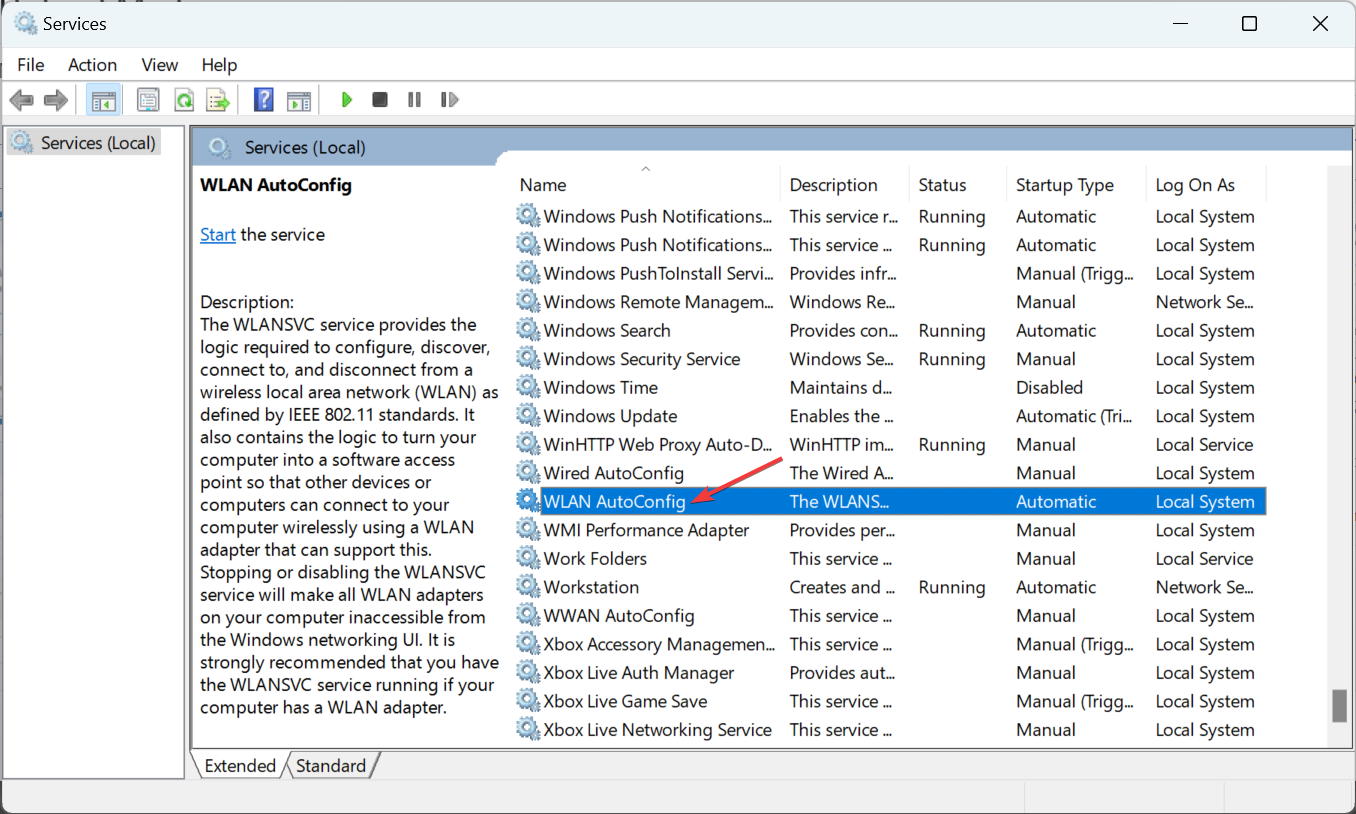
- Now, choose Automatic as the Startup type, click on the Start button if the service is not running, and then click OK to save the changes.
- After you are done, check if the laptop is now connecting to the hotspot.
4. Restore DNS settings to default
- Press the Windows key + S and type network connections. Choose View network connections.
- Locate your hotspot connection and choose Properties.
- Select Internet Protocol Version 4 (TCP/IPv4) and click Properties.
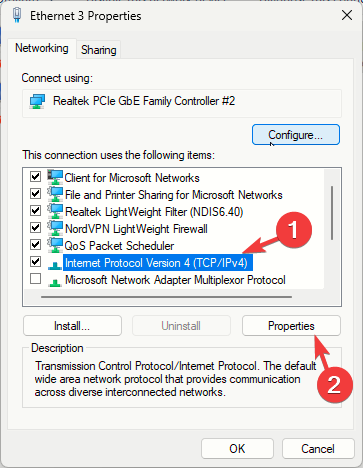
- Enable Obtain an IP address automatically and Obtain DNS server address automatically.
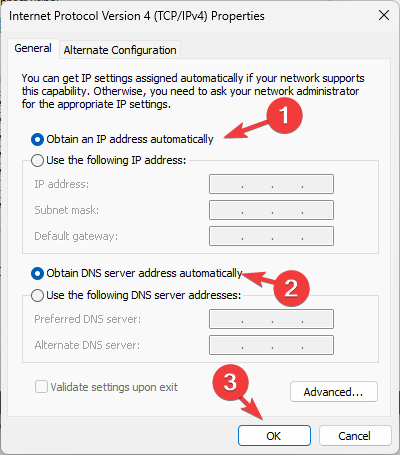
- Save changes, disable your hotspot connection, and enable it again.
5. Change hotspot security settings
- Open the Settings app on your mobile phone and select the Connections option.
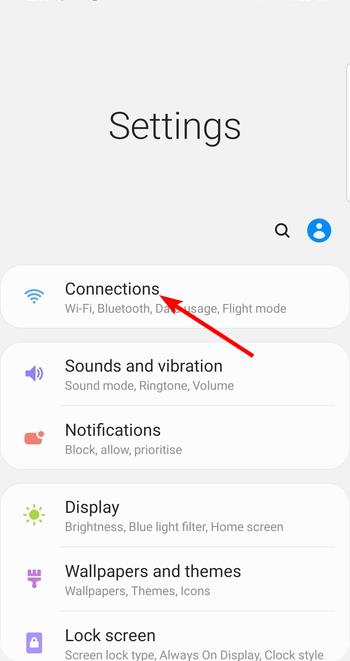
- Now, choose Mobile Hotspot and Tethering.

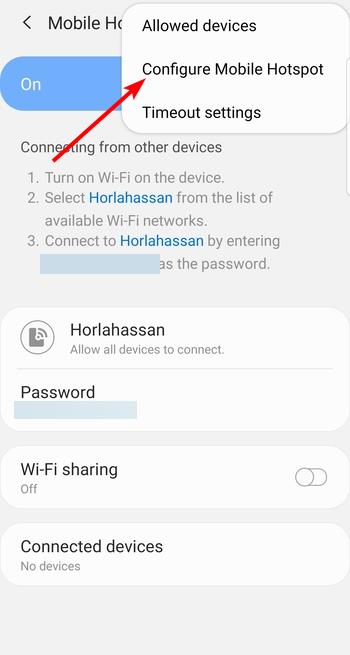
- Tap the Mobile Hotspot option.
- Tap the three vertical dots in the top right corner and select Configure Mobile Hotspot.
- Next, tap the Security dropdown and select WPA2.
- Finally, tap the Save option and try connecting again.
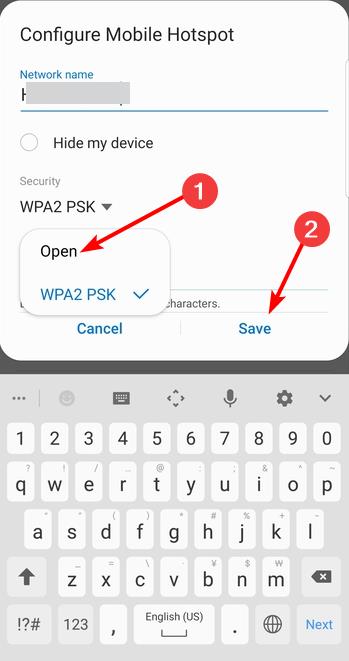
Users reported issues with WPA3, so using a different type of security can help.
6. Change the Wi-Fi frequency
- Open the Settings app on your mobile phone and Choose Connections.
- Now, select Mobile Hotspot and Tethering.
- Tap the Mobile Hotspot option.
- Next, click the three vertical dots in the top right corner and choose Configure Mobile Hotspot.
- Tick the radio button for Show advanced options.
- Finally, select the dropdown under Broadcast channel, select 2.4GHz, and tap the Save button.
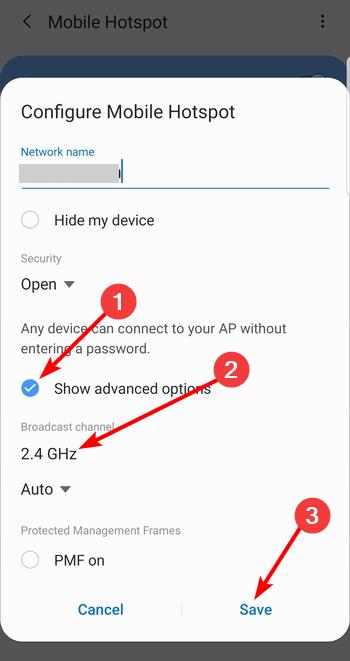
On newer models, you might have to enable the Maximize Compatibility setting to enable 2.4GHz network.
Finally, if your hotspot is not showing up on your laptop, you might want to consider getting another wireless adapter.
Summary
For more information on this feature, check our guide on how to set up a mobile hotspot on Windows 11. In case you can’t set up a hotspot, check our guide on We can’t set up mobile hotspot or the hotspot keeps turning off.
Many complained that Windows 11 mobile hotspot is not working, as well as Macbook hotspot problems and iPhone WiFi hotspot issues. With a few tweaks like the ones above, you’ll figure those out too, and quickly.
With that said, we can conclude this article. Feel free to tell us in the comments section below if you have anything to add or take.
Read our disclosure page to find out how can you help Windows Report sustain the editorial team. Read more


Improve this guide


User forum
6 messages