Corsair Keyboard not Lighting up: 6 Ways to Turn Lights on
A faulty or outdated driver is the main cause of this issue
4 min. read
Updated on
Read our disclosure page to find out how can you help Windows Report sustain the editorial team Read more
Key notes
- If Corsair keyboard lights are not working, the most common causes include outdated drivers and keyboard firmware.
- You might be able to fix the issue by resetting the keyboard settings.
- A specialized driver updater software could help you solve the annoying keyboard lights problem.
One of the greatest things about some Corsair keyboards is their lighting effects. Yet, users have posted on some forums that the Corsair keyboard is not lighting up.
For some users, the lighting can completely stop working. Irrespective of the cause of the issue and its severity, you should be able to fix it with these resolutions.
Why are Corsair keyboard lights not working?
The Corsair keyboard not lighting up issue can be traced to various factors. Below are some of the notable causes:
- Outdated driver: If your Corsair K55, K70, or K100 keyboard is not lighting up, you should first check if you have the latest drivers. If not, you need to update your driver to the newest version.
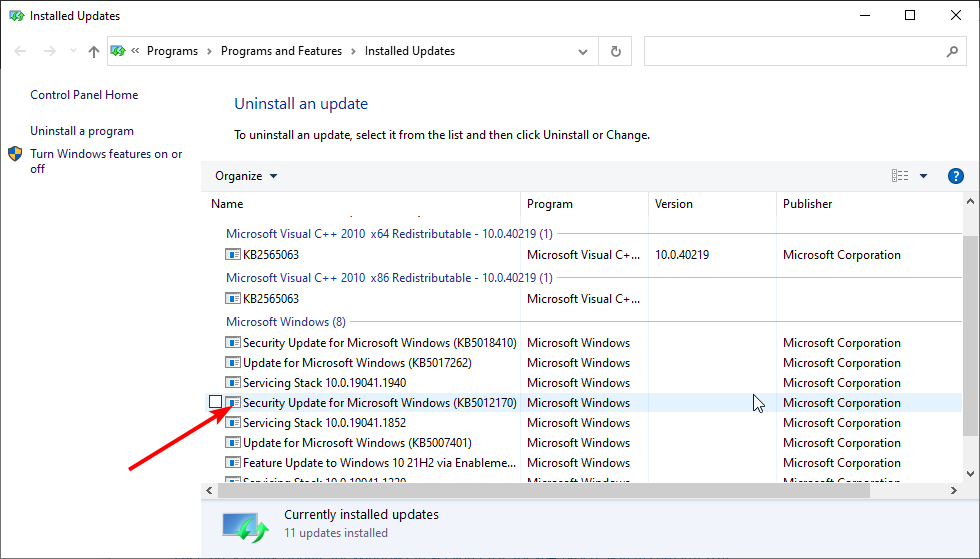
- Problematic Windows update: If you started noticing this issue after updating your PC, there might be an issue with the latest patch you installed. The quick way to fix this is to remove this update.
- Outdated firmware: An outdated Corsair keyboard firmware can potentially lead to issues, including this lighting problem. So, you need to check if an update is available for the software.
What can I do if the Corsair keyboard is not lighting up?
1. Update your keyboard’s driver
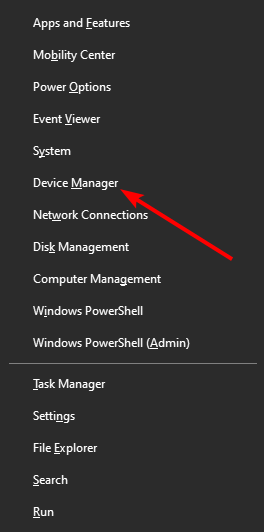
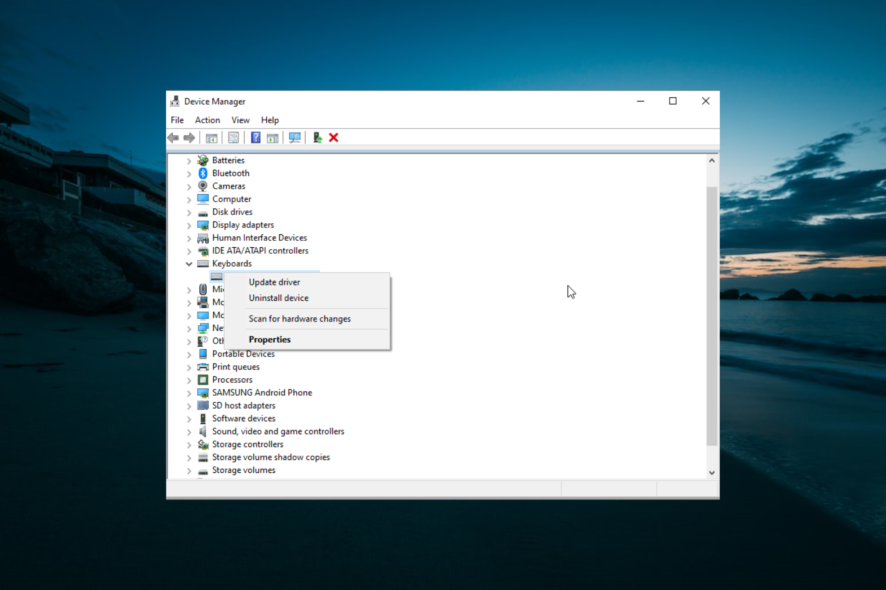
- Press the Windows key + X and select the Device Manager option.
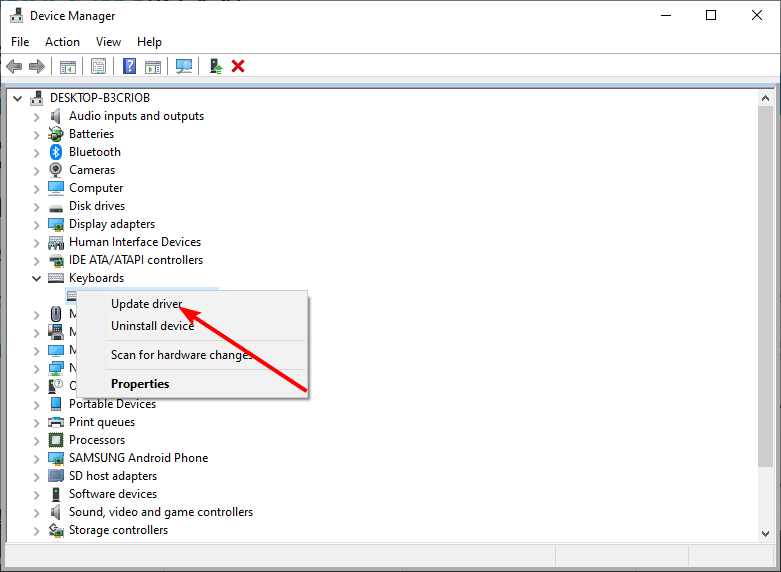
- Double-click the Keyboards option to expand it, and right-click your Corsair keyboard.
- Now, select the Update driver option.
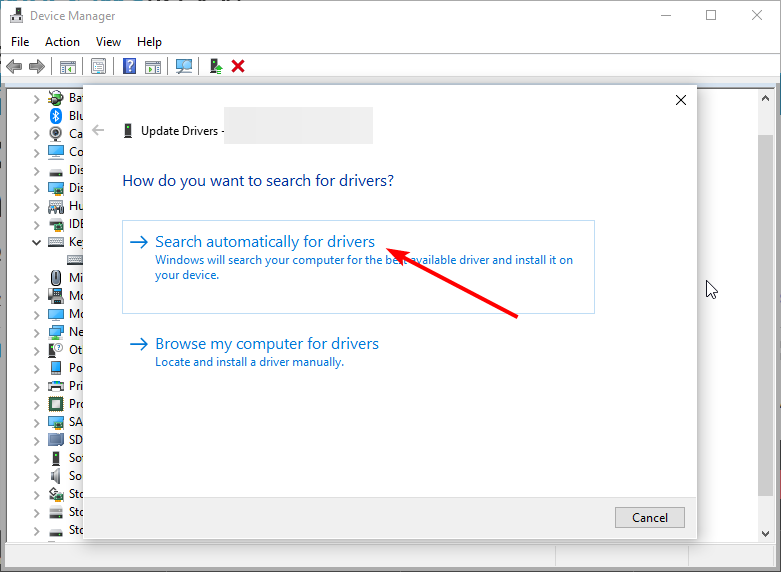
- Finally, choose Search automatically for drivers and install any available updates.
First, check if you need to update your Corsair keyboard’s driver. The easiest way is to run a driver updater software scan.
A driver updater utility will show if your Corsair keyboard’s driver is outdated. Up next, you can install the latest driver for your keyboard with the driver updater software.
You can prevent these problems by using an automatic tool that will search and install the correct drivers on your computer with just a few clicks. That's why we recommend you use Outbyte Driver Updater. Here's how to do it:
- Download and install the Outbyte Driver Updater app.
- Launch the software.
- Wait for the app to detect all incompatible drivers.
- Afterward, it will show you a list of the drivers found to select the ones to Update or Ignore.
- Click on Update & Apply Selected to download and install the newest versions.
- Restart your PC to ensure the applied changes.

Outbyte Driver Updater
Use this software and solve all driver-related issues from your PC.2. Reset the Corsair keyboard
2.1. Wired keyboards
- Unplug the Corsair keyboard from your PC.
- Press and hold down the Esc key.
- While holding the Esc key, plug your Corsair keyboard back into the PC.
- Release the Esc key about five seconds after reconnecting the keyboard. You should then see the keyboard flash after the reset.
2.2. Wireless keyboards
- Users with wireless Corsair keyboards will need to turn them off.
- Then hold down the Esc key while the keyboard is off.
- Turn the keyboard back while pressing and holding the Esc key.
- Let go of the Esc key five seconds after you turn the keyboard back on. The keyboard should flash when it’s reset.
3. Update your Corsair keyboard’s firmware
- Open the iCUE download page in a browser.
- Click to download the latest iCUE software there.
- Then, install iCUE with the setup wizard for it you download.
- Open the iCUE software window.
- Click the Settings tab.
- Select the Corsair keyboard you need to fix lighting for.
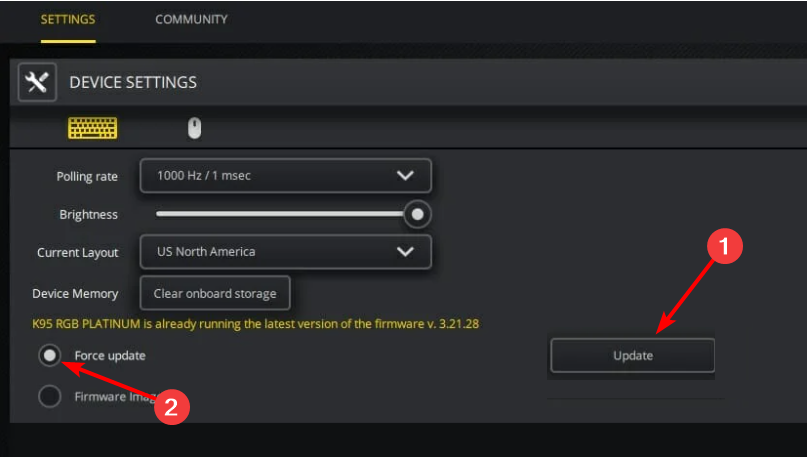
- Press the Update button to install firmware for your keyboard.
- Select the Force update radio button to get the latest firmware version for your keyboard.
After doing this, the Corsair keyboard should start lighting up like before.
 NOTE
NOTE
4. Disable SDK
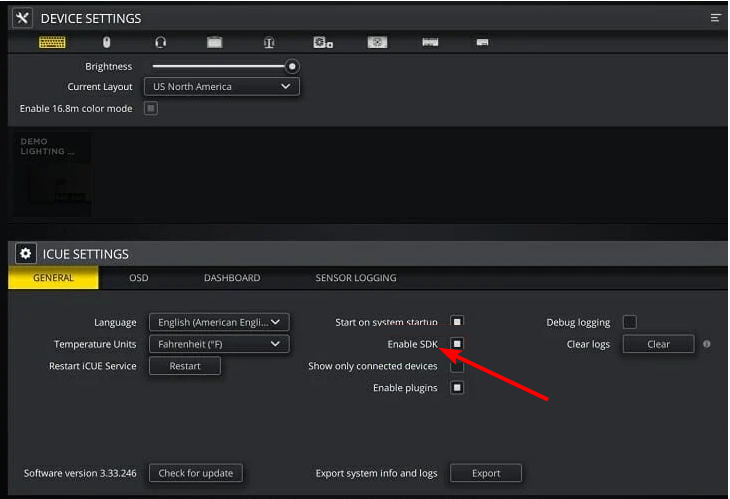
- Download and install iCUE as outlined within the first three steps of the third resolution.
- Launch the iCUE software.
- Select iCUE’s Settings tab.
- Then, select General on the iCUE Settings panel.
- Uncheck the Enable SDK checkbox.
With this done, your Corsair keyboard should start lighting up again.
5. Restore Windows 10 to an earlier date
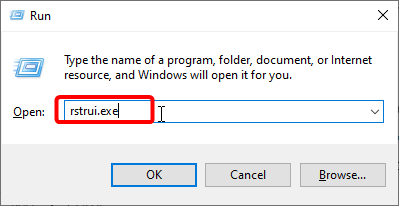
- Press the Windows key + R, type rstrui.exe, and click OK.
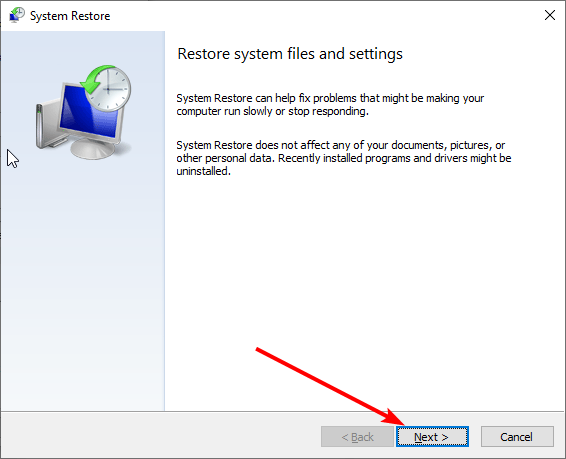
- Click the Next button on the page that pops up.
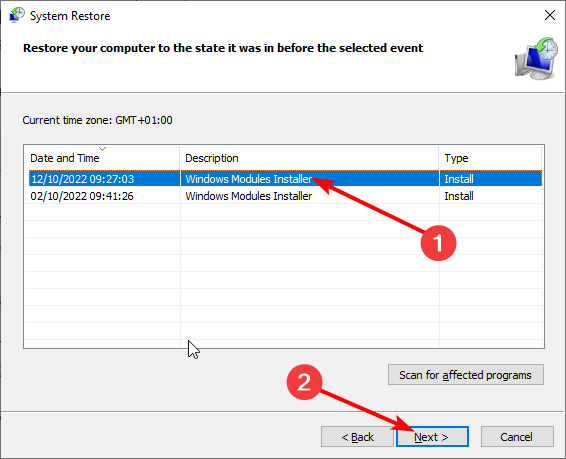
- Now, select your preferred restore point and click the Next button.
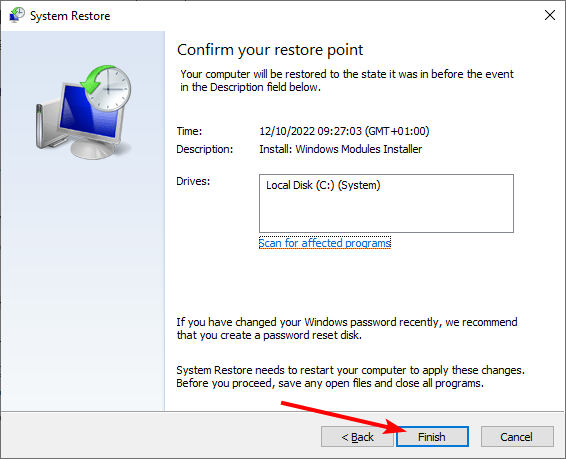
- Finally, click the Finish button and follow the onscreen instructions to complete the process.
You’ll probably need to reinstall some software after rolling back Windows because programs installed after chosen restore points get deleted.
6. Uninstall recent Windows updates
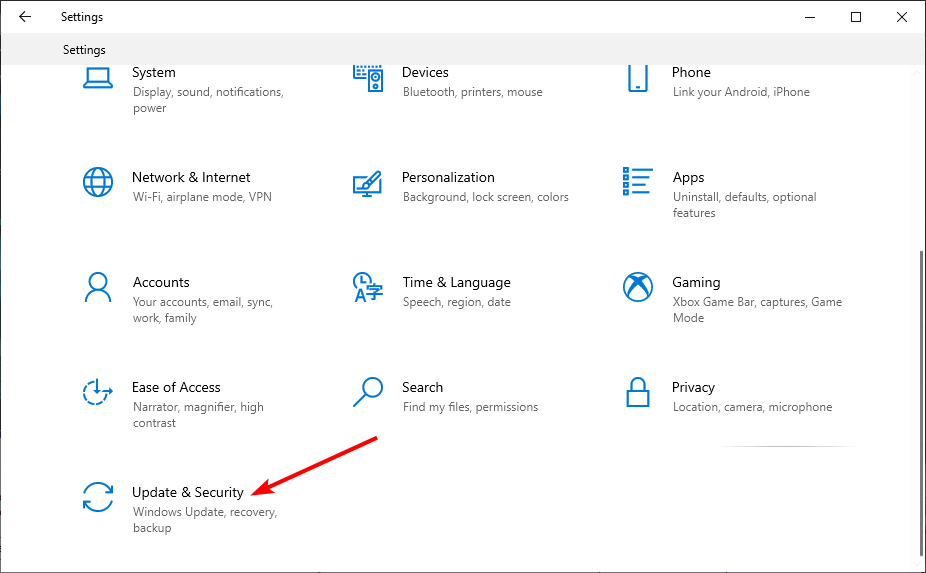
- Press the Windows key + I to open the Settings app and select Update & Security.
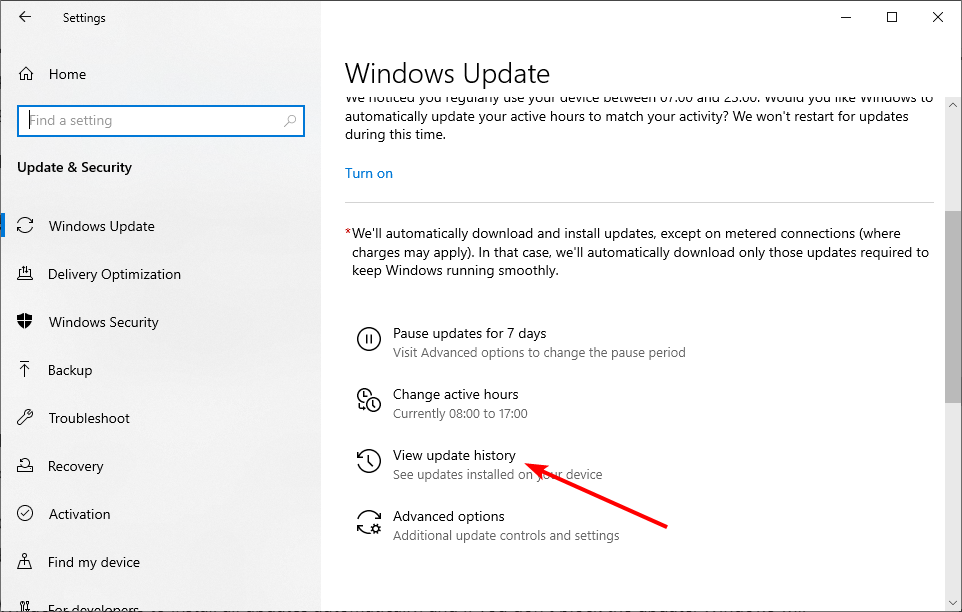
- Click the View update history option.
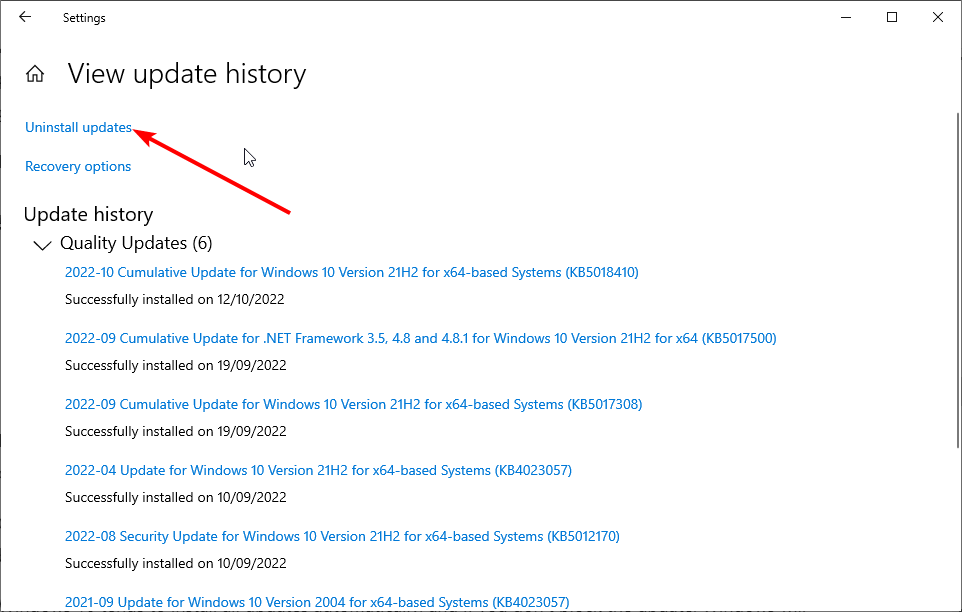
- Now, select Uninstall updates.
- Finally, right-click the most recent update and click Uninstall to remove it.
This resolution specifically fixes Corsair keyboard lighting that stops working after recent Windows updates.
If a keyboard’s lighting stops working after a build update, you must select a rollback option within the Windows Update Settings tab to reinstall the previous build version.
The above fixes are among the possible resolutions to forget about lighting issues. And since you don’t regret your choice, check out these great Corsair keyboards too.
Let us know which of the above fixes worked for you as well. Do not hesitate to use the comments area below in that regard.

