How to Crop an Image on Windows 11 [5 Ways]
No more unsightly images with these trimming tips
Key notes
- Downloading images online sometimes comes with unneeded edges that need to be chopped off.
- We discovered easy ways to crop your image with the help of Windows 11 programs and other third-party apps.
- Keep reading to find out how to go about it.
So you have the perfect picture but want to shave off the edges or bring it more to focus. Well, Windows 11 gives you endless options to crop an image to precision with its built-in tools.
The process is pretty straightforward and shouldn’t take too much of your time, as you shall see below.
How do I crop an image in Windows 11?
1. By using the Snipping Tool
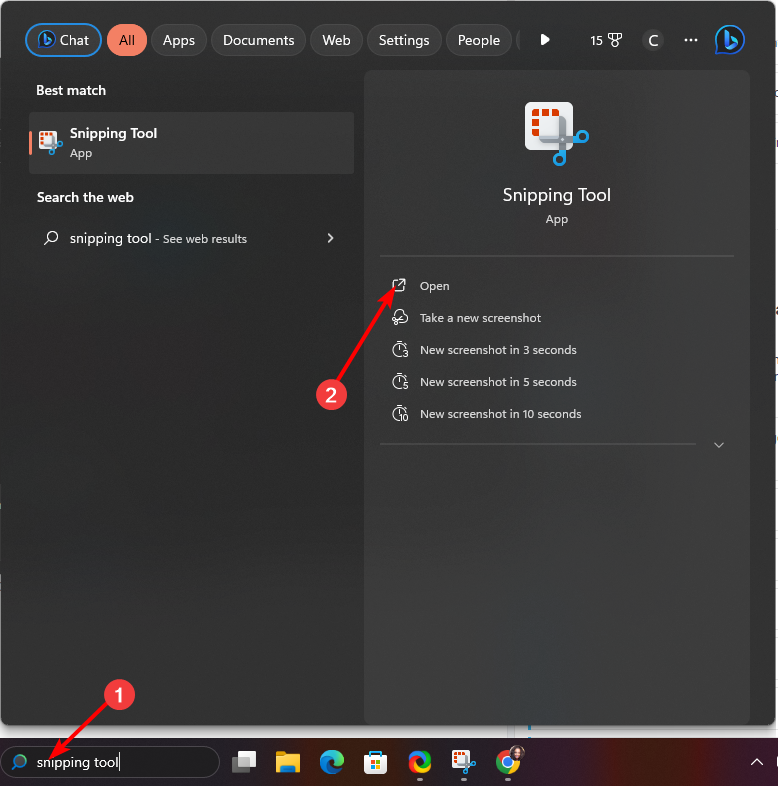
- Click on the Search bar, type Snipping Tool, and click Open.
- Next, click on the three ellipses at the top right corner and select Open file.
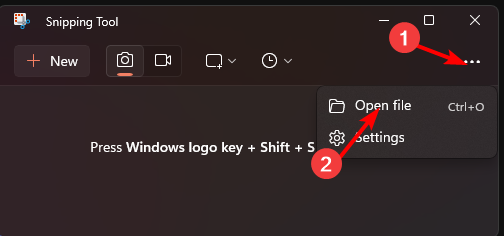
- Select a folder containing the image you wish to crop.
- Click on the crop icon, then drag the box to your preferred crop size.
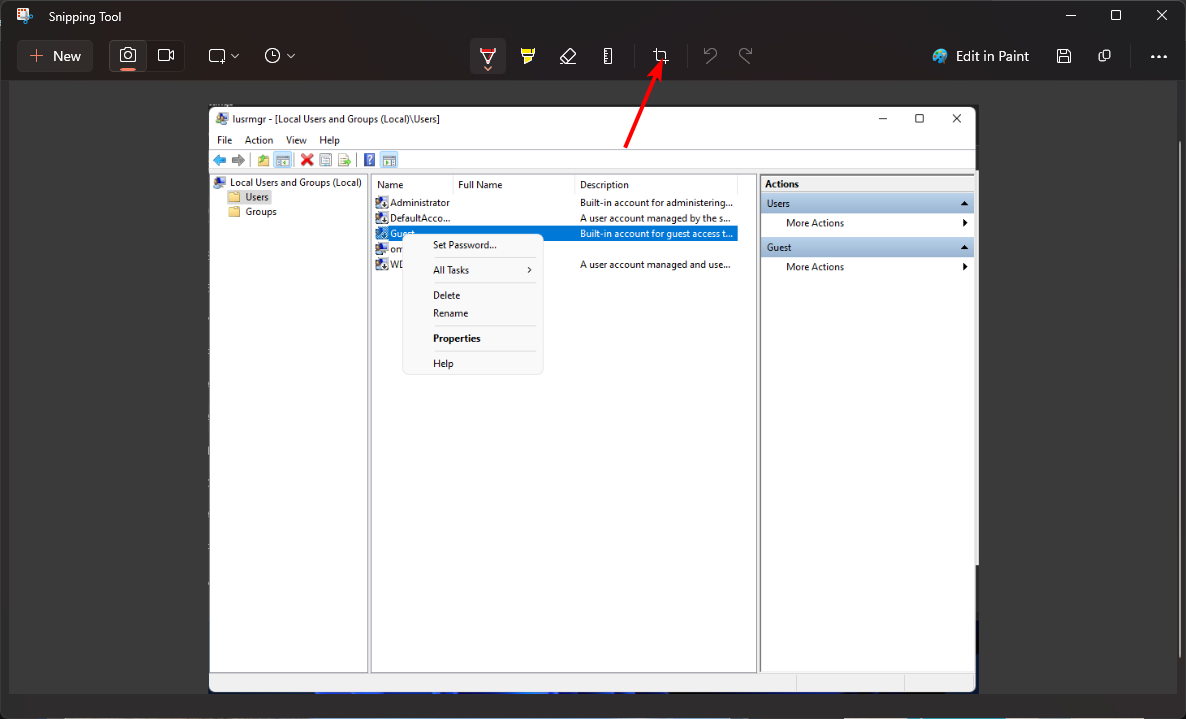
- Hit the tick icon when done.

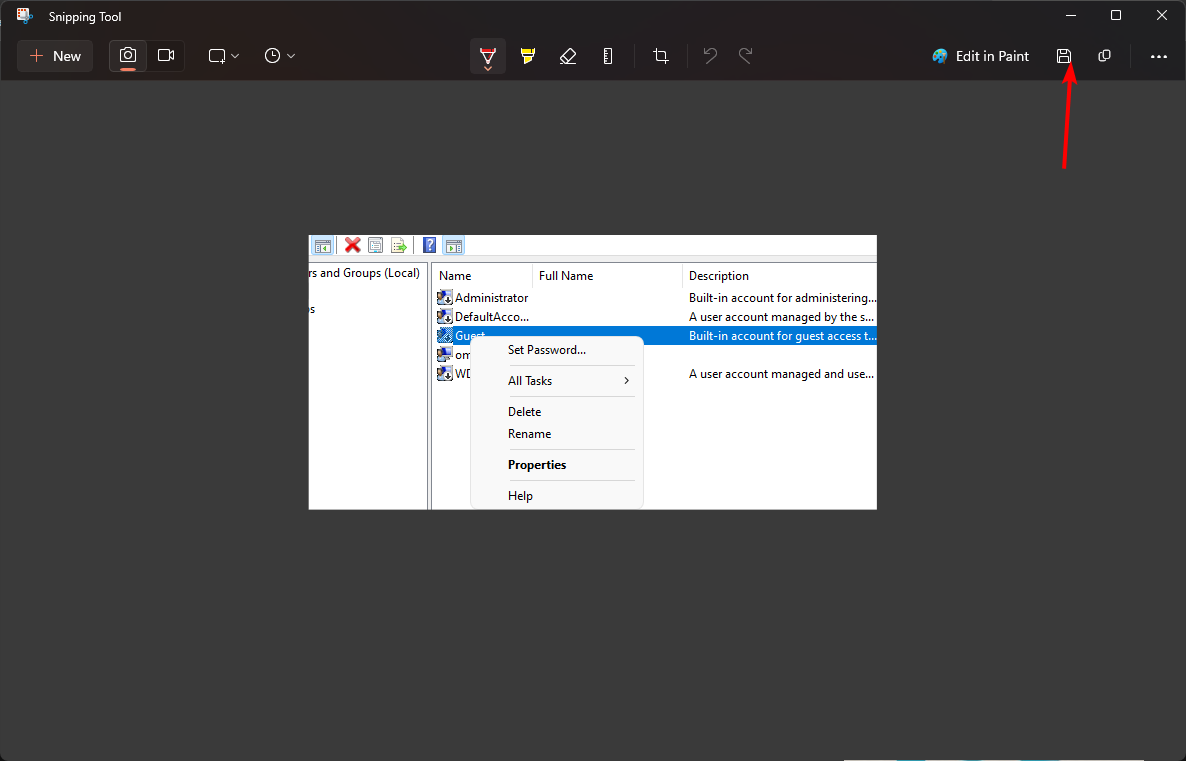
- Hit the Save as icon to keep an original of the file.
If these steps seem too lengthy, you’ll be happy to know that the Windows + Shift + S keys shortcut combination will achieve the same results. You just have to open your image first.
2. By using the Photos app
- Click on the Search bar, type Photos, and click Open.
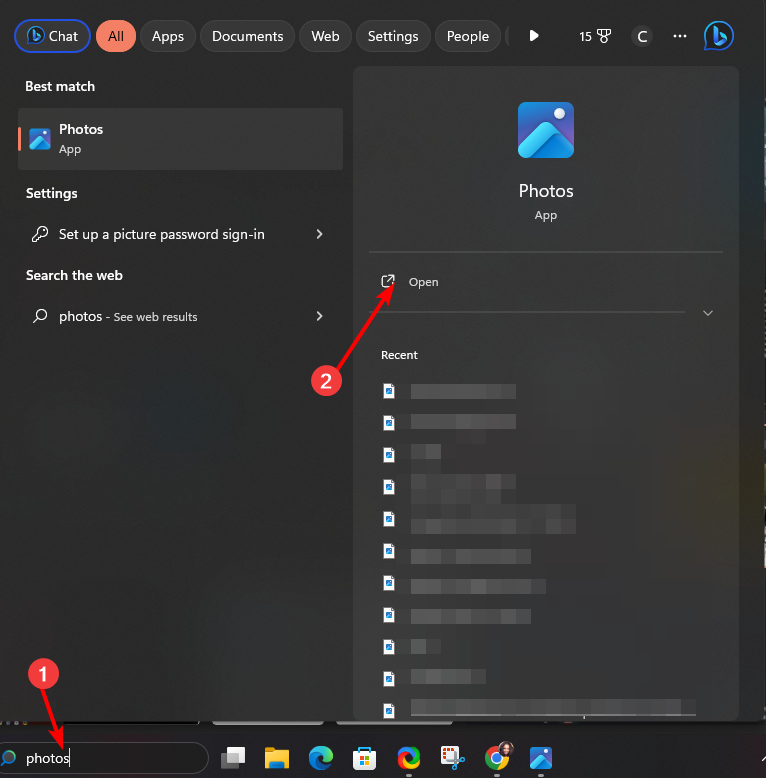
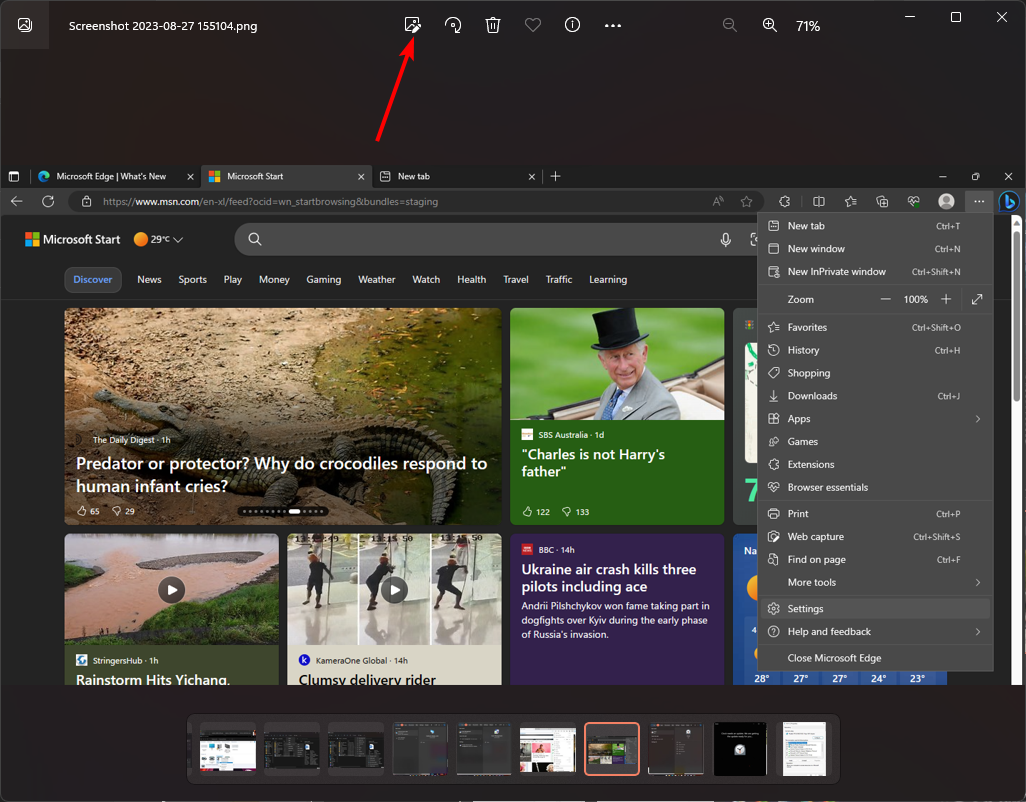
- Double-click on the image you wish to crop and click on the Edit image icon.
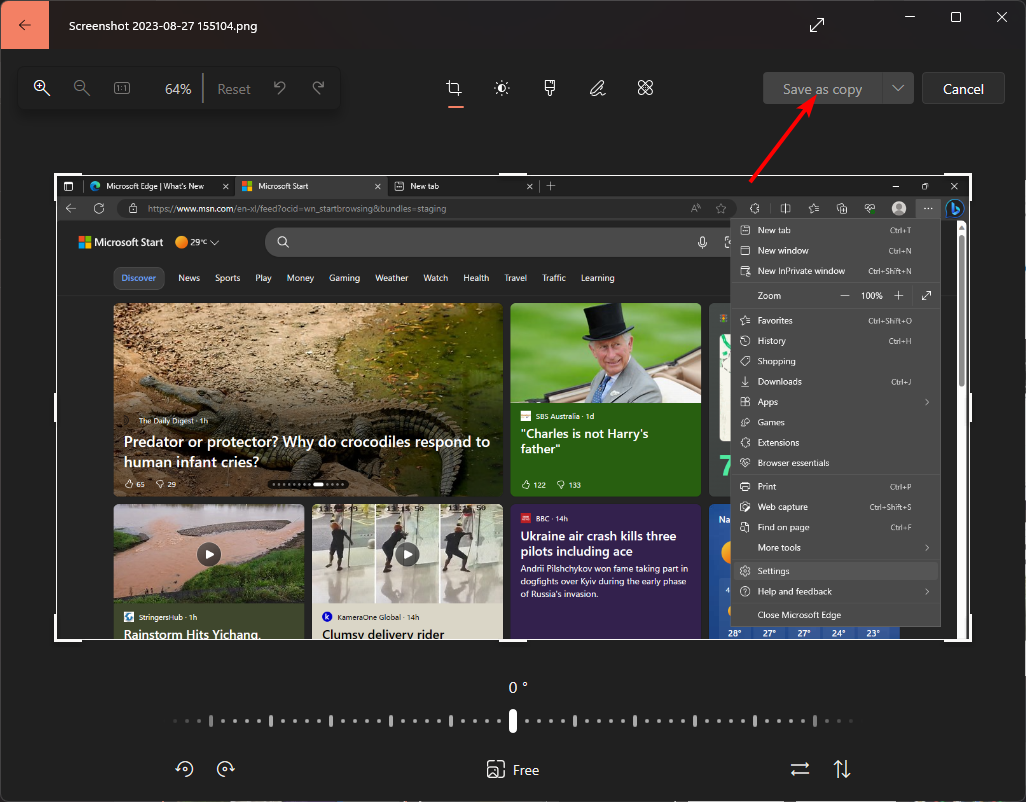
- Click on the crop icon, drag the box to desired crop size then hit Save as copy.
3. By using the Paint app
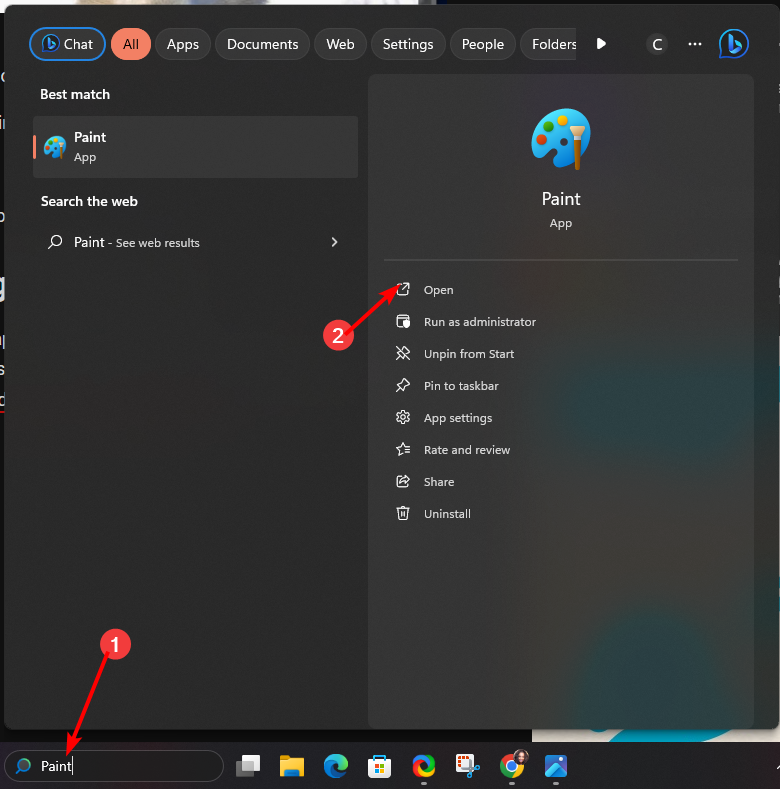
- Click on the Search bar, type Paint, and click Open.
- Navigate to File>Open, then select the image you wish to crop.

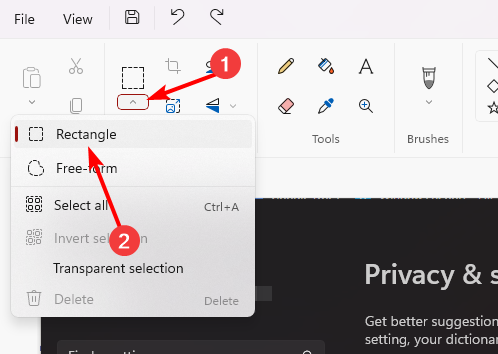
- Go to the image tab, click on the rectangular icon, and in the drop-down menu select Rectangle.
- Crop your image to your desired size, then hit the crop icon or click CTRL + Shift + X.

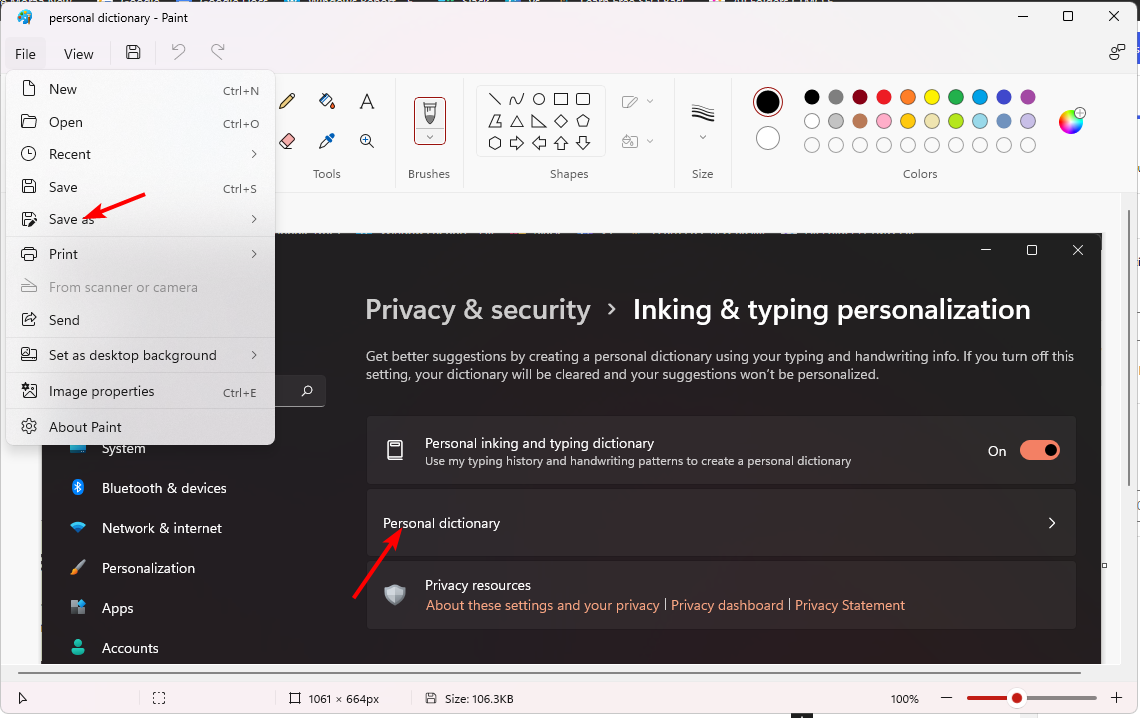
- Click on File, select Save as, and give your cropped image a name.
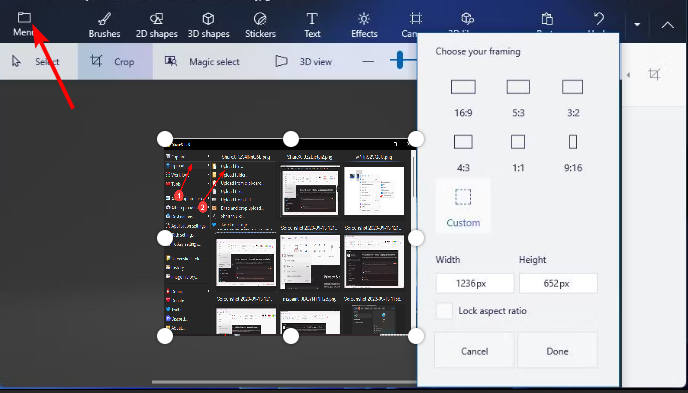
4. By using the Paint 3D app
- Hit the Windows + E keys to open File Explorer.
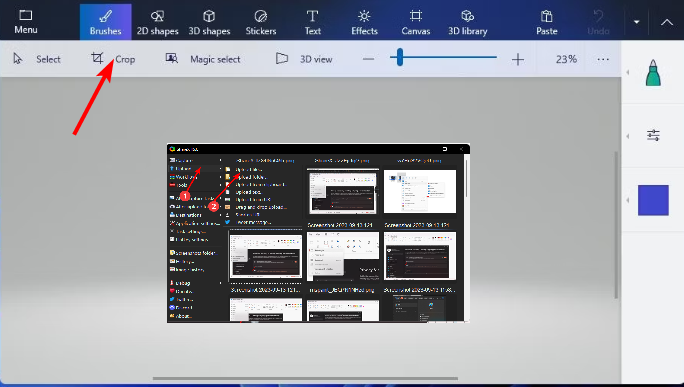
- Locate the image you wish to crop, right-click on it, and select Open with>Paint 3D.
- Click the crop icon and adjust the area to get your desired size.
- Hit Done when finished.
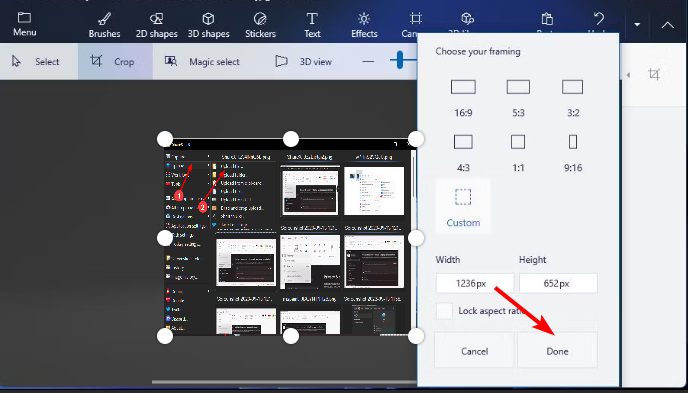
- Click on Menu, select Save as, and give your cropped image a new name.
Paint 3D is similar to the Paint app only with advanced features.
5. By using the Print Screen feature
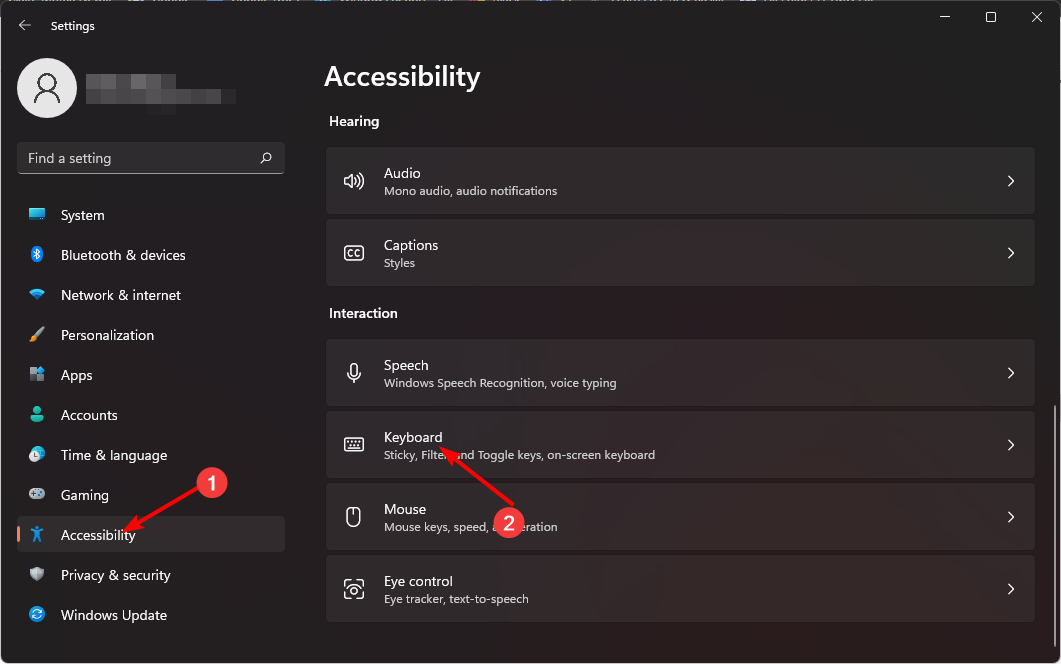
- Hit the Windows key and click on Settings.
- Click on Accessibility, then select Keyboard.
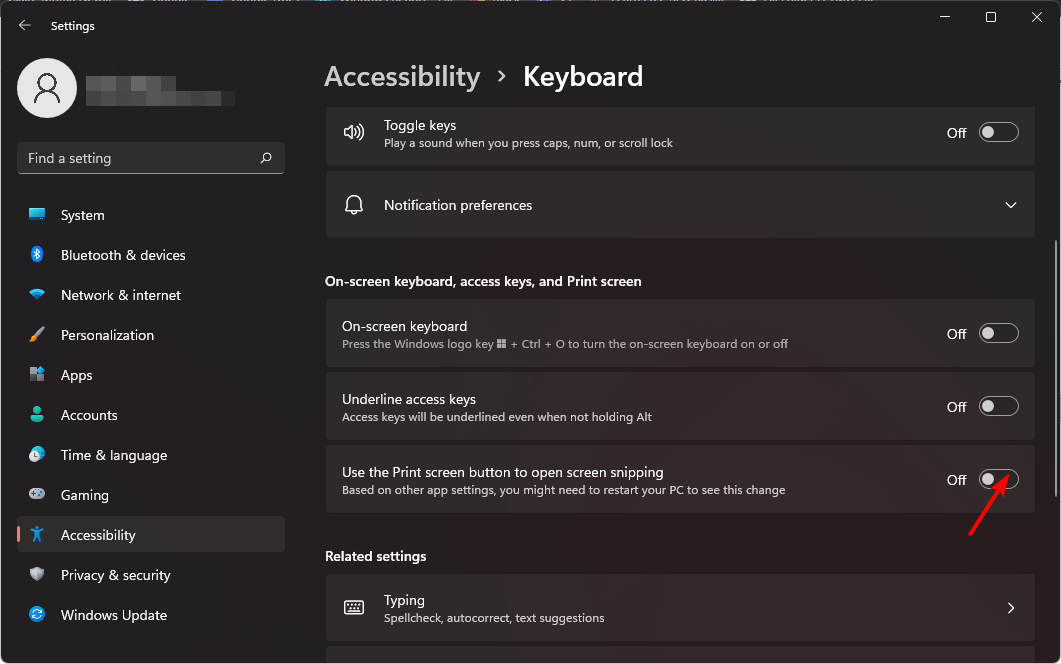
- Toggle on the Use the print screen button to open screen snipping option and restart your PC.
- Hit the Windows + E keys to open File Explorer, locate the image you wish to crop, then double-click to open.
- Next, hit the PrtScSysRq button on your keyboard to crop your image.
What are some alternatives to cropping pictures on Windows 11?
1. Clipchamp
- Download the Clipchamp app from the Microsoft Store if you haven’t already.
- Hit the Windows + E keys to open File Explorer, locate the image you wish to crop, and drag and drop it to Clipchamp.
- Select the fit-to-frame or freehand-crop option.
- Once satisfied with your cropped image, click on the tick on the left of your image to effect the changes.
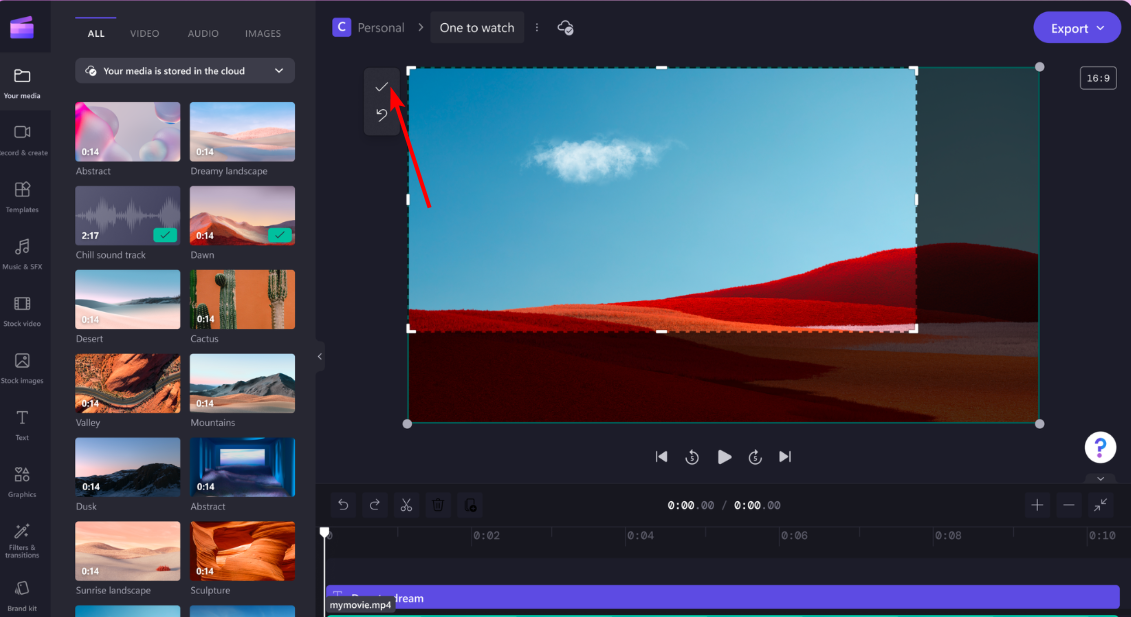
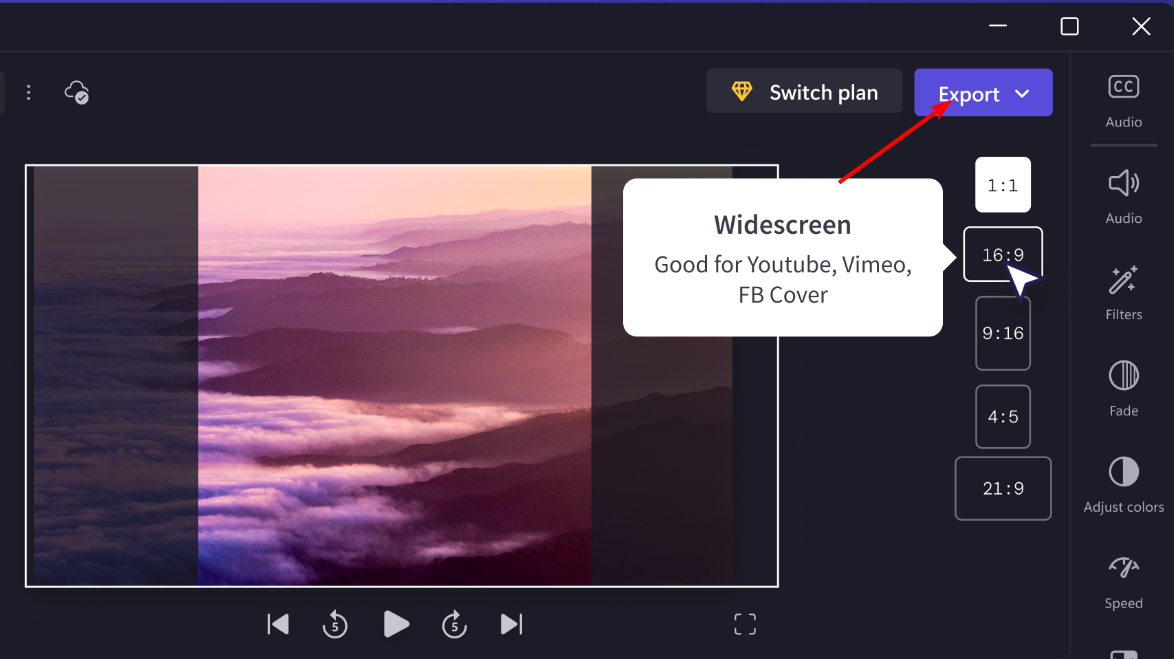
- To save your image, click on Export.
Another advantage of using Clipchamp is that you can also crop videos on Windows 11, so you don’t have to download separate apps for these tasks.
2. IrfanView
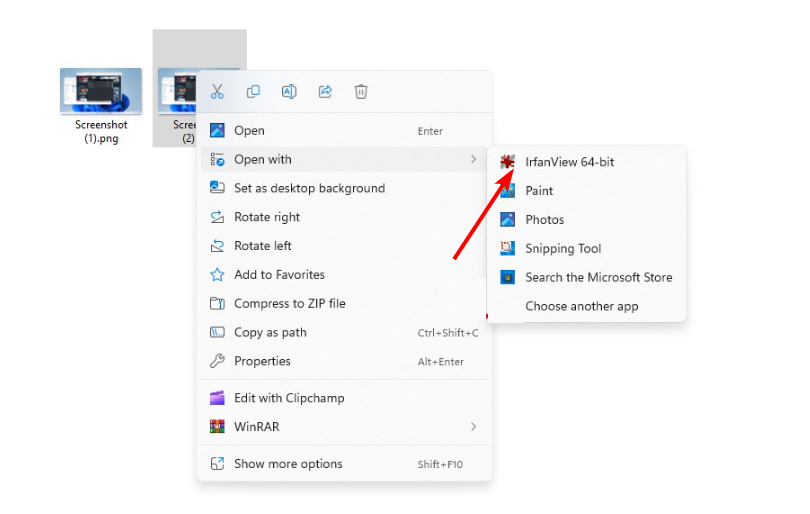
- Go to your Microsoft Store and download IrfanView.
- Hit the Windows + E keys to open File Explorer, locate the image you wish to crop, select Open with then choose IrfanView.
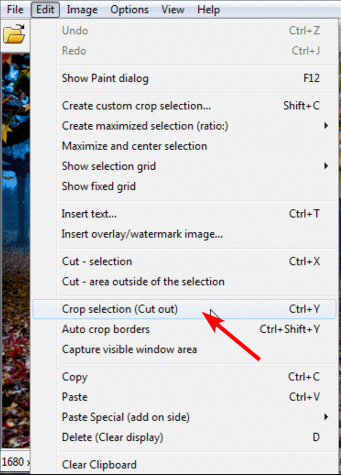
- Click on Edit, then select Crop selection (Cut out).
- Adjust the selection area to your desired crop size then hit File>Save as.
Learn the essentials in this guide to IrfanView as an image editor before you start cropping.
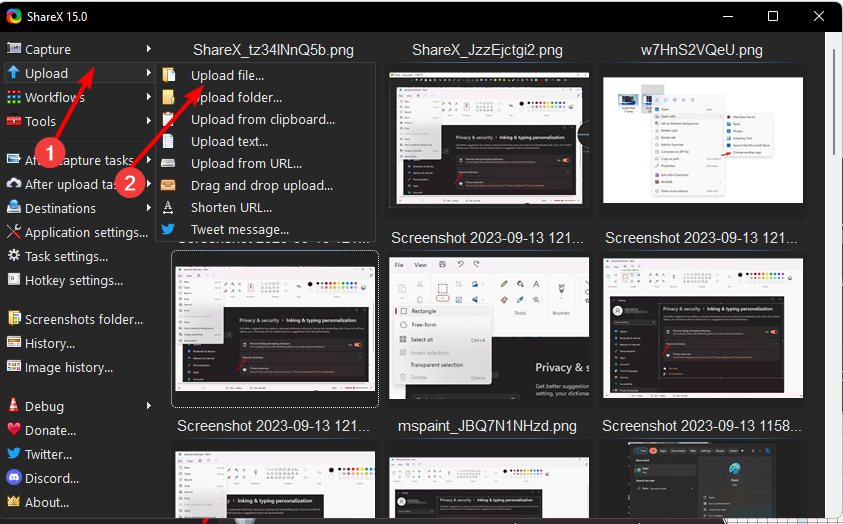
3. ShareX
- Download the ShareX app from the Microsoft Store.
- Click on the Upload>Upload file and select the image you wish to crop.
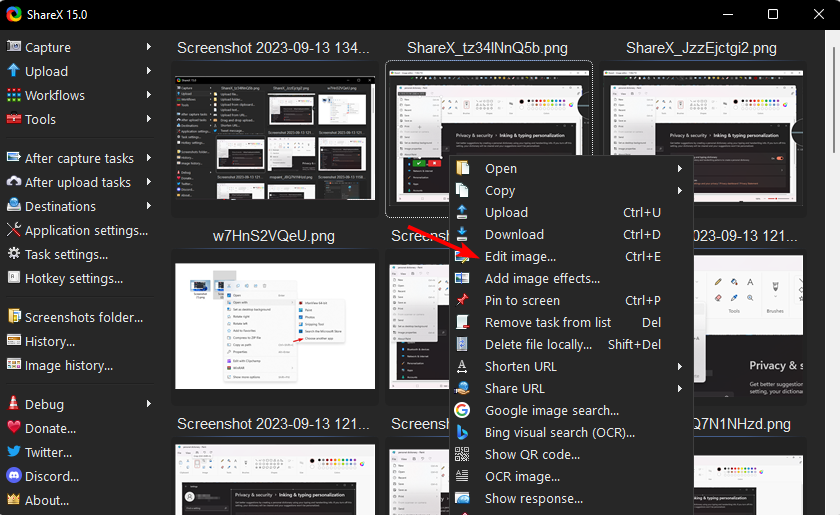
- Right-click on the image and select Edit image.
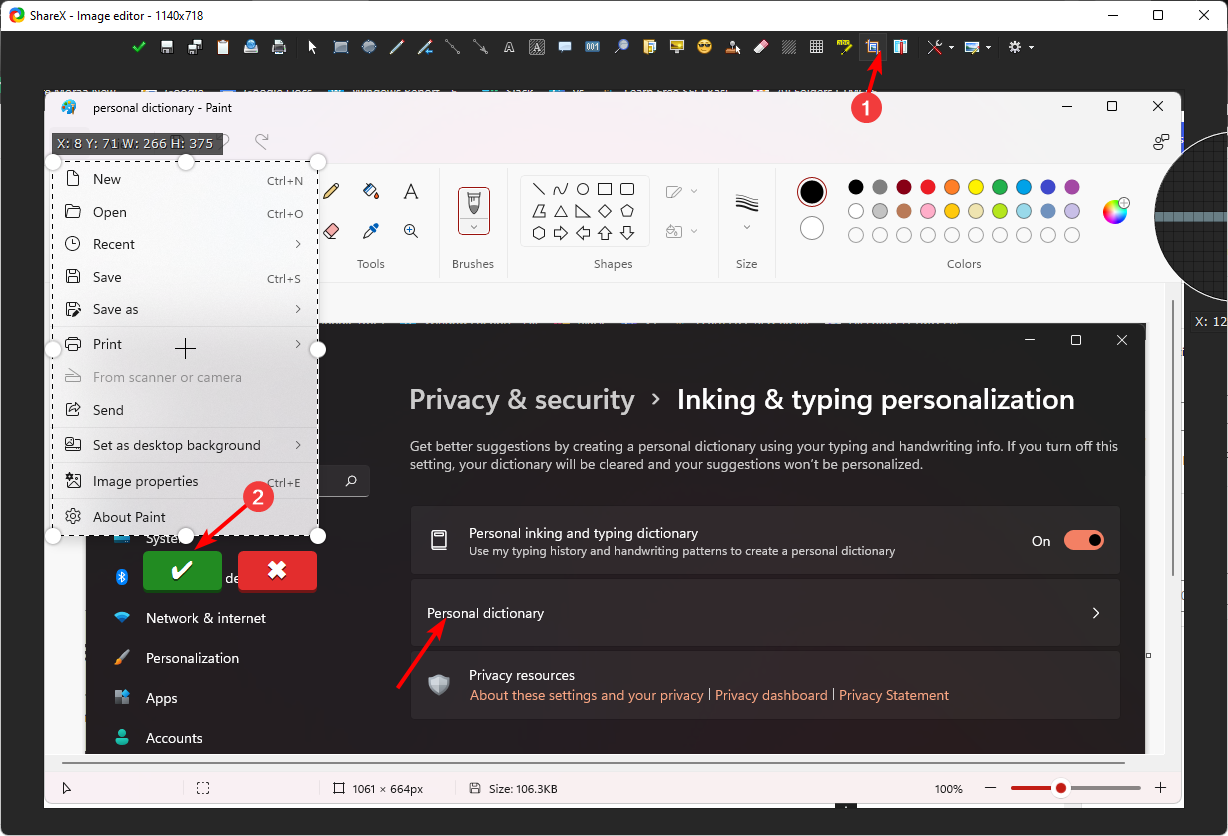
- Click on the crop icon and adjust the rectangle to your desired crop size, then hit the green tick.
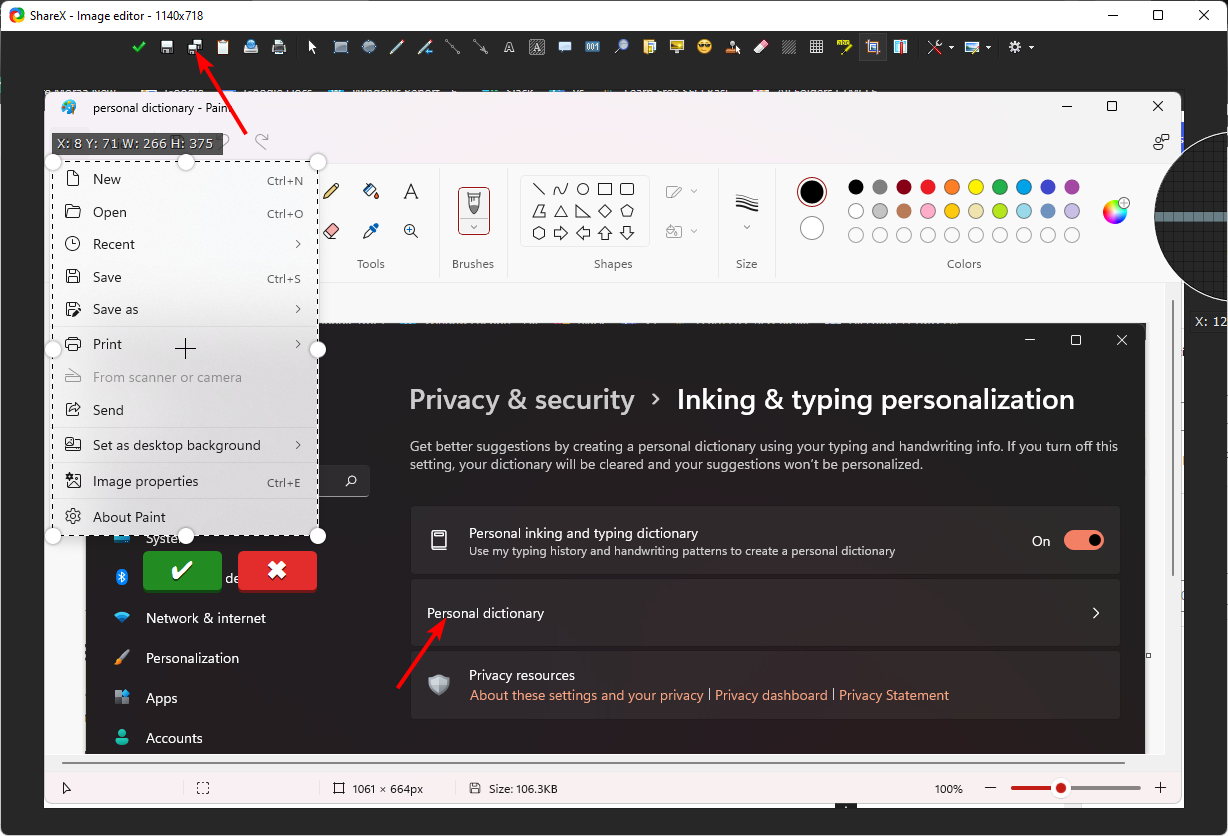
- Hit the Save as icon and rename your image.
Aside from the built-in tools availed by Windows 11, you can also get other third-party image editors that are lightweight and have advanced features you may need. For instance, when cropping images with GIMP, you can use various methods to achieve the same results.
If you’re more into advanced editors, you can explore the Fotor editor, which comes with AI features and other tools. Further, where cropping may fail to get rid of unwanted elements, you can use Generative Erase.
And that’s all there is to it. Whether your image needs to be cropped before you upload it, or are you just looking for a way to make changes in-house without needing expensive software, Windows gives you access to easy-to-use image editing programs.
Hopefully, you’ve put to use one of the above methods and can crop your images with ease. Let us know your preferred program to crop your images in the comments below.
Read our disclosure page to find out how can you help Windows Report sustain the editorial team. Read more


Improve this guide


User forum
1 messages