3 Easy Ways to Crop in GIMP
Learn to edit your images like a pro using the GIMP software
3 min. read
Updated on
Read our disclosure page to find out how can you help Windows Report sustain the editorial team Read more
Key notes
- When it comes to free image editors, GIMP is one of the best options out there.
- GIMP can do all image editing tasks, and in today’s article, we’re going to show you how to crop images in GIMP.
- The tool has multiple built-in tools with which you can crop, depending on your preferences.

GIMP is a great image editing software; as such, it has all the standard features of other image editing tools.
Speaking of which, in today’s article, we will show you how to crop images in GIMP. After reading this guide, you can crop images like a pro.
How do I crop an image in GIMP?
1. Use the Rectangular Select Tool
- Open the image that you want to edit in GIMP.
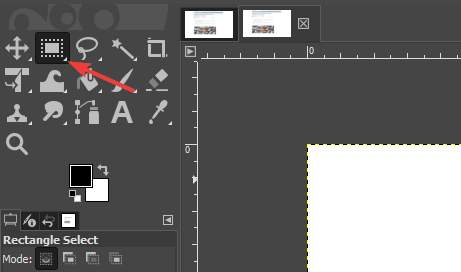
- Click on Rectangle Select Tool. You can also just press the R button on your keyboard.
- Now select the area that you want to crop.
- You can click the corner boxes to resize and move your selection.
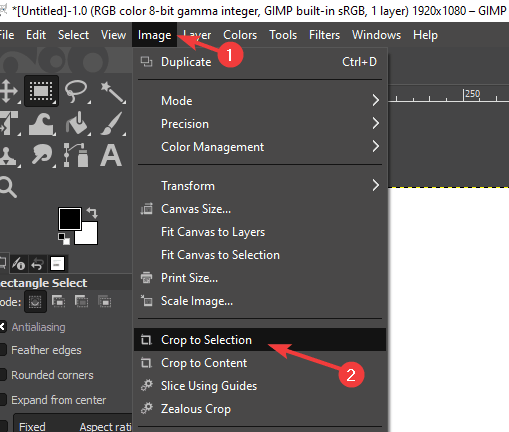
- Now go to the Image menu and select Crop to Selection.
- Your image will now get cropped.
This method is pretty simple, but it also offers some advanced features while selecting. To change the selecting options, do the following:
- Click the Rectangle Select Tool.
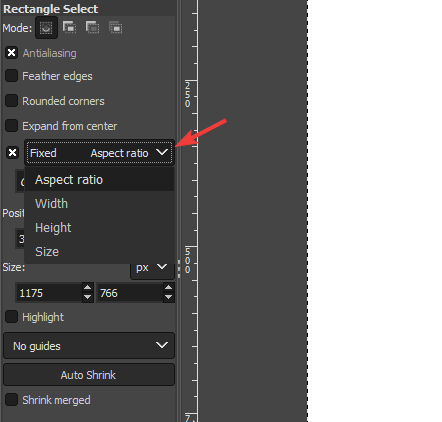
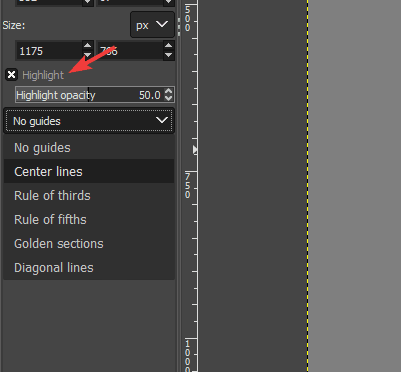
- You’ll now notice a Rectangle Select Here you can change various settings, but we’ll briefly mention the most useful ones:
- Fixed-size: By using this option you can select fixed width, height, aspect ratio, or even size for your selection. This is incredibly useful if you need to crop an image at a specific size.
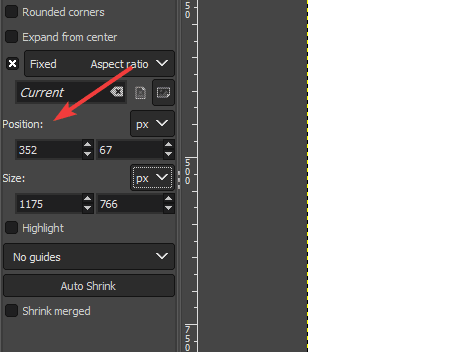
- Position and size: You can manually set the position of the selection or its size in px or any other unit.
- Highlight and guides: With these features, you can highlight your selection and make it easier to crop the image. You can also choose several different selection guides.
- Fixed-size: By using this option you can select fixed width, height, aspect ratio, or even size for your selection. This is incredibly useful if you need to crop an image at a specific size.
2. Use the Crop tool
1. Open GIMP.
2. Now click on File > Open and select the image that you want to edit.
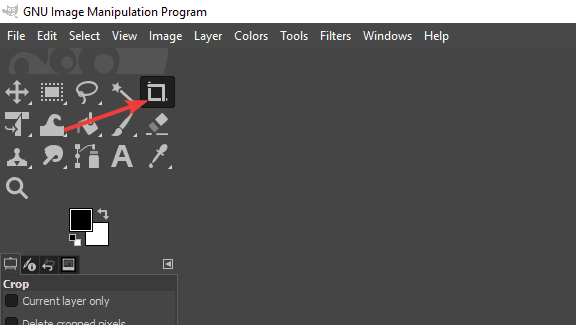
3. Click on the Crop tool from the toolbar. You can also use the Shift + C shortcut.
4. Choose the area that you want to crop. If needed, move and resize your selection.
5. Press Enter to crop your selection.
Another method to crop in GIMP is via the built-in crop tool. It allows you to easily select an area to crop and perform the action within a few clicks.
Moreover, the crop tool has a few unique features that you can apply while editing your image in GIMP:
- Current layer only: By checking this feature you can only crop the image on the current layer. Other layers won’t be affected.
- Delete cropped pixels: This feature will delete non-locked layer data.
- Allow growing: Using this feature you can actually expand the canvas if needed.
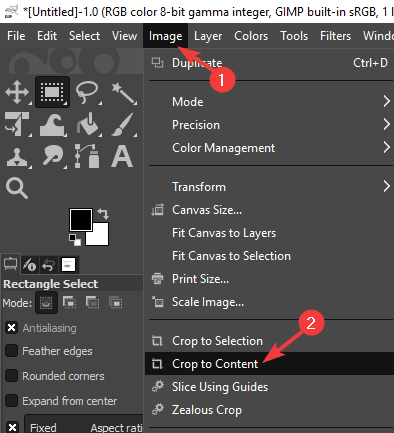
3. Use Crop to Content and Zealous Crop
- Open the image that you want to crop.
- Go to Image > Crop to Content.
- Your image will be automatically cropped.
Using this feature, you’ll remove empty space larger than your image. You can also use the Zealous Crop feature that works almost the same, but it removes empty space around and between the image.
Cropping in GIMP is incredibly simple, and you can do it using these three different methods. In our opinion, cropping with the Crop tool is the best option because it’s the fastest and offers the most features.
If you’re not a fan of GIMP, you can always crop images using built-in Windows 11 tools or any other free image editing software.
Let us know if you found this article helpful, and write down any comments you might have in the comments section below.

