How to Create Or Change A Custom Paper Size in Windows 11?
You can either use Microsoft Office or Control Panel
3 min. read
Updated on
Read our disclosure page to find out how can you help Windows Report sustain the editorial team Read more
Key notes
- You need to use Microsoft Office or Control panel to create a custom paper size on Windows 11.
- This guide will discuss all the methods with step-by-step instructions.
If you want to get a printout of your documents but the printer is not configured to use an incorrect paper size, the results will not be desirable.
To fix this, you need to change the paper size. It is a simple process and can be done in a few steps.
This guide will discuss methods to create or change custom paper sizes on Windows 11. Let’s get started!
How can I create or change a custom paper size on Windows 11?
1. Use the Microsoft Office
1.1 Create a custom paper size
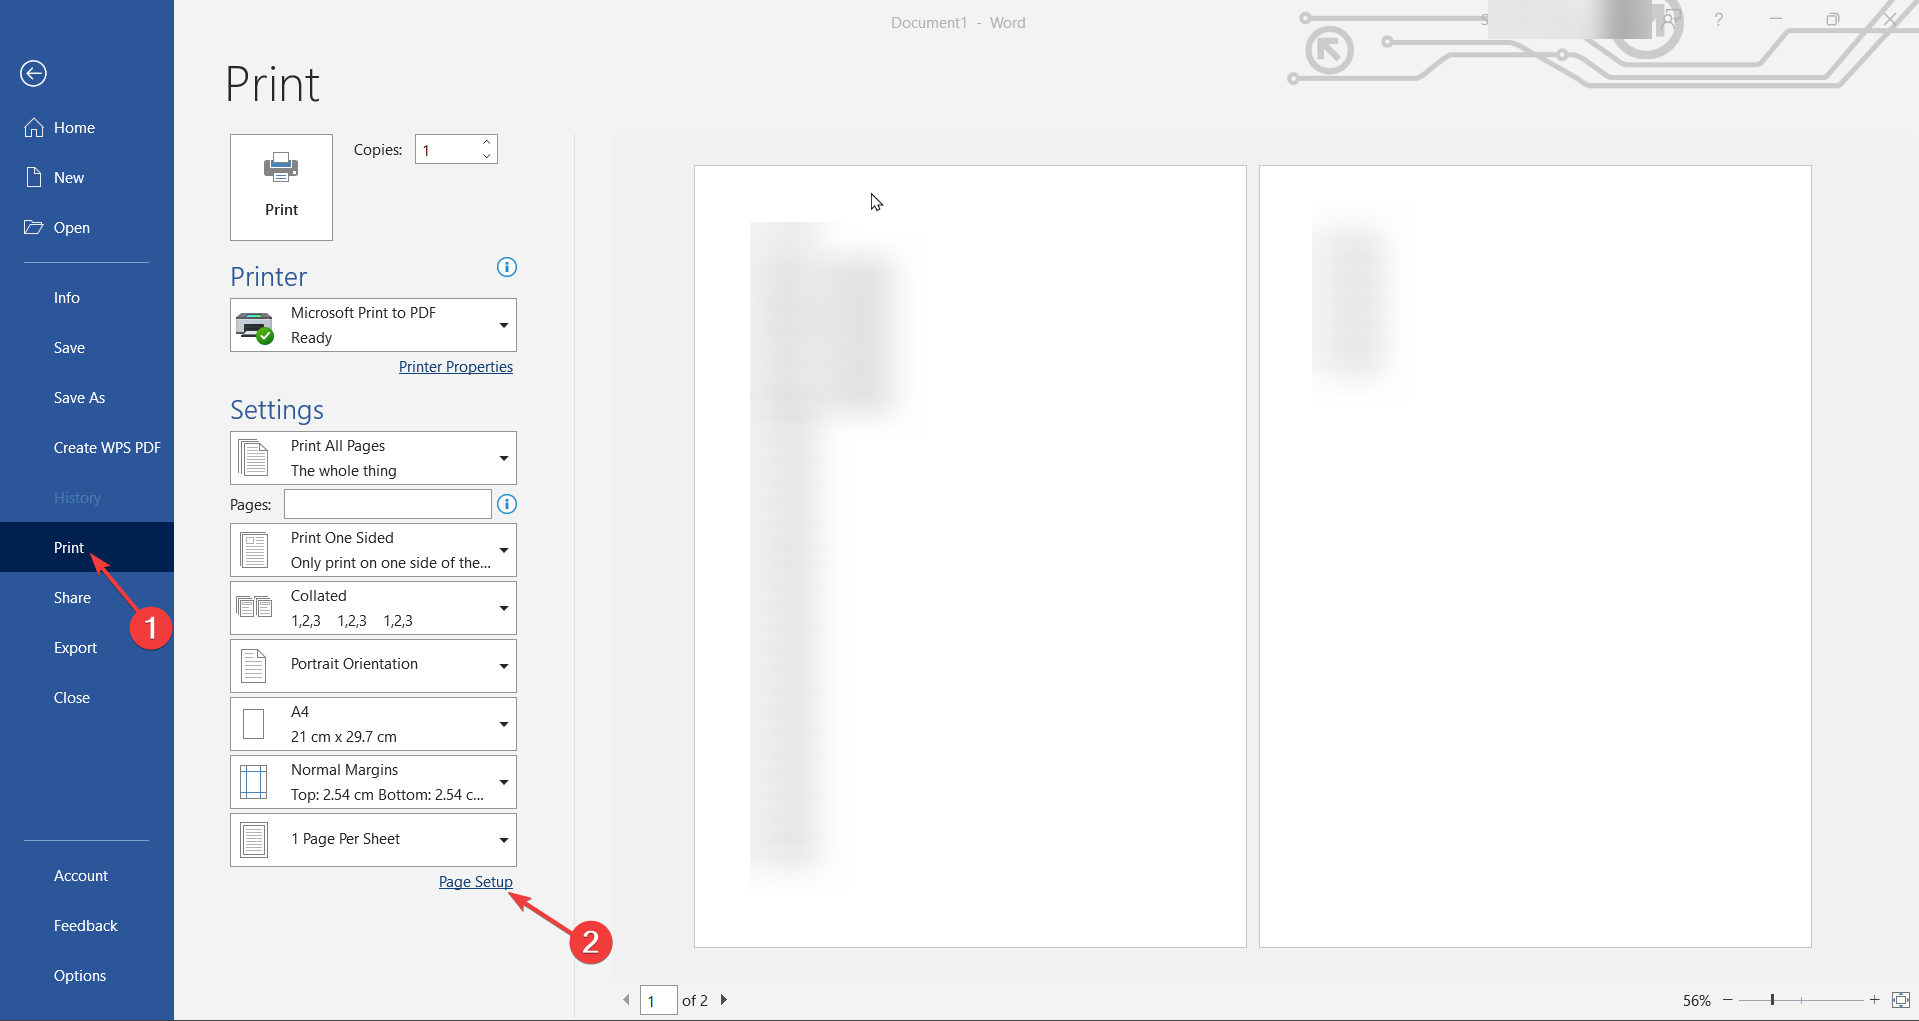
- Click on the File menu.
- Now select Print, and click Page Setup.
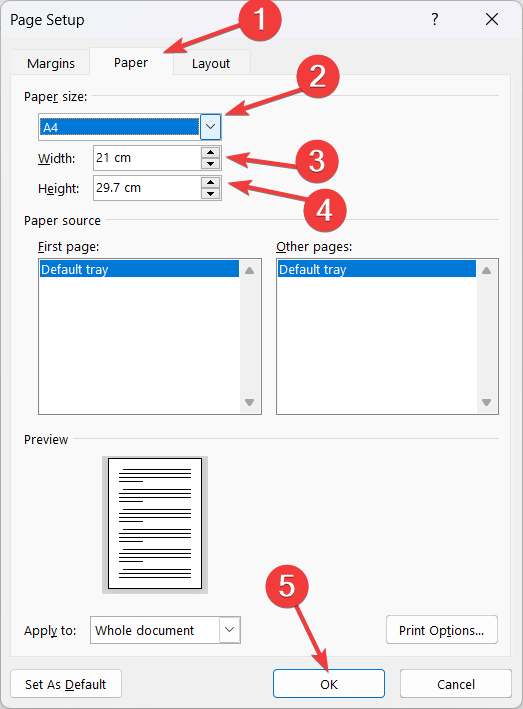
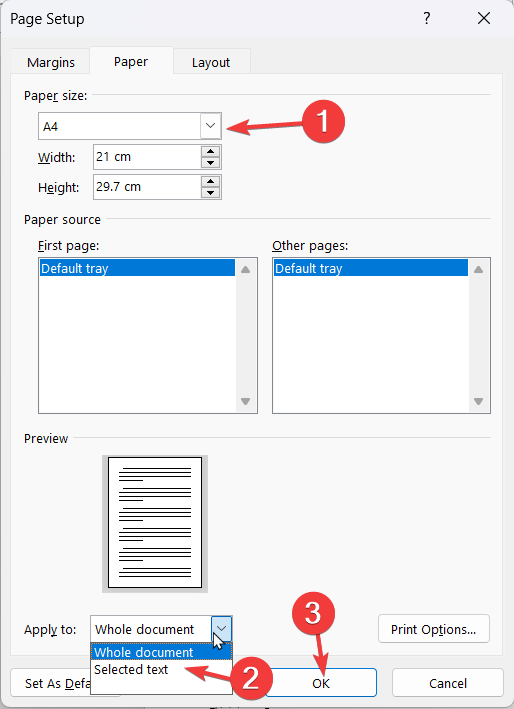
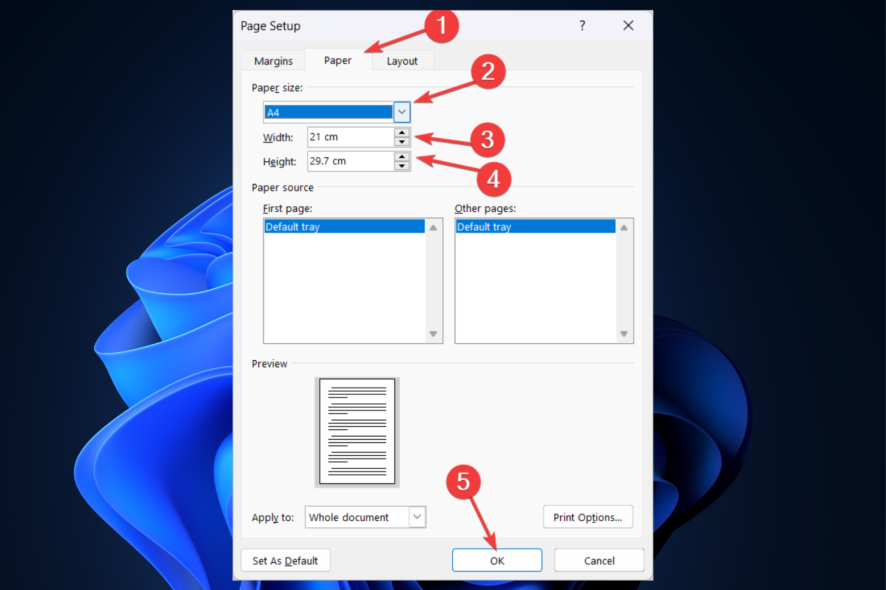
- In the Page Setup window, go to the Paper tab, and for Paper size, select page size from the dropdown.
- Choose the Width and Height.
- Switch to Layout and Margins one by one and make changes accordingly.
- Now click OK.
1.2 Choose the paper size for a particular page
- Open the document. Select the text on the document you want to change.
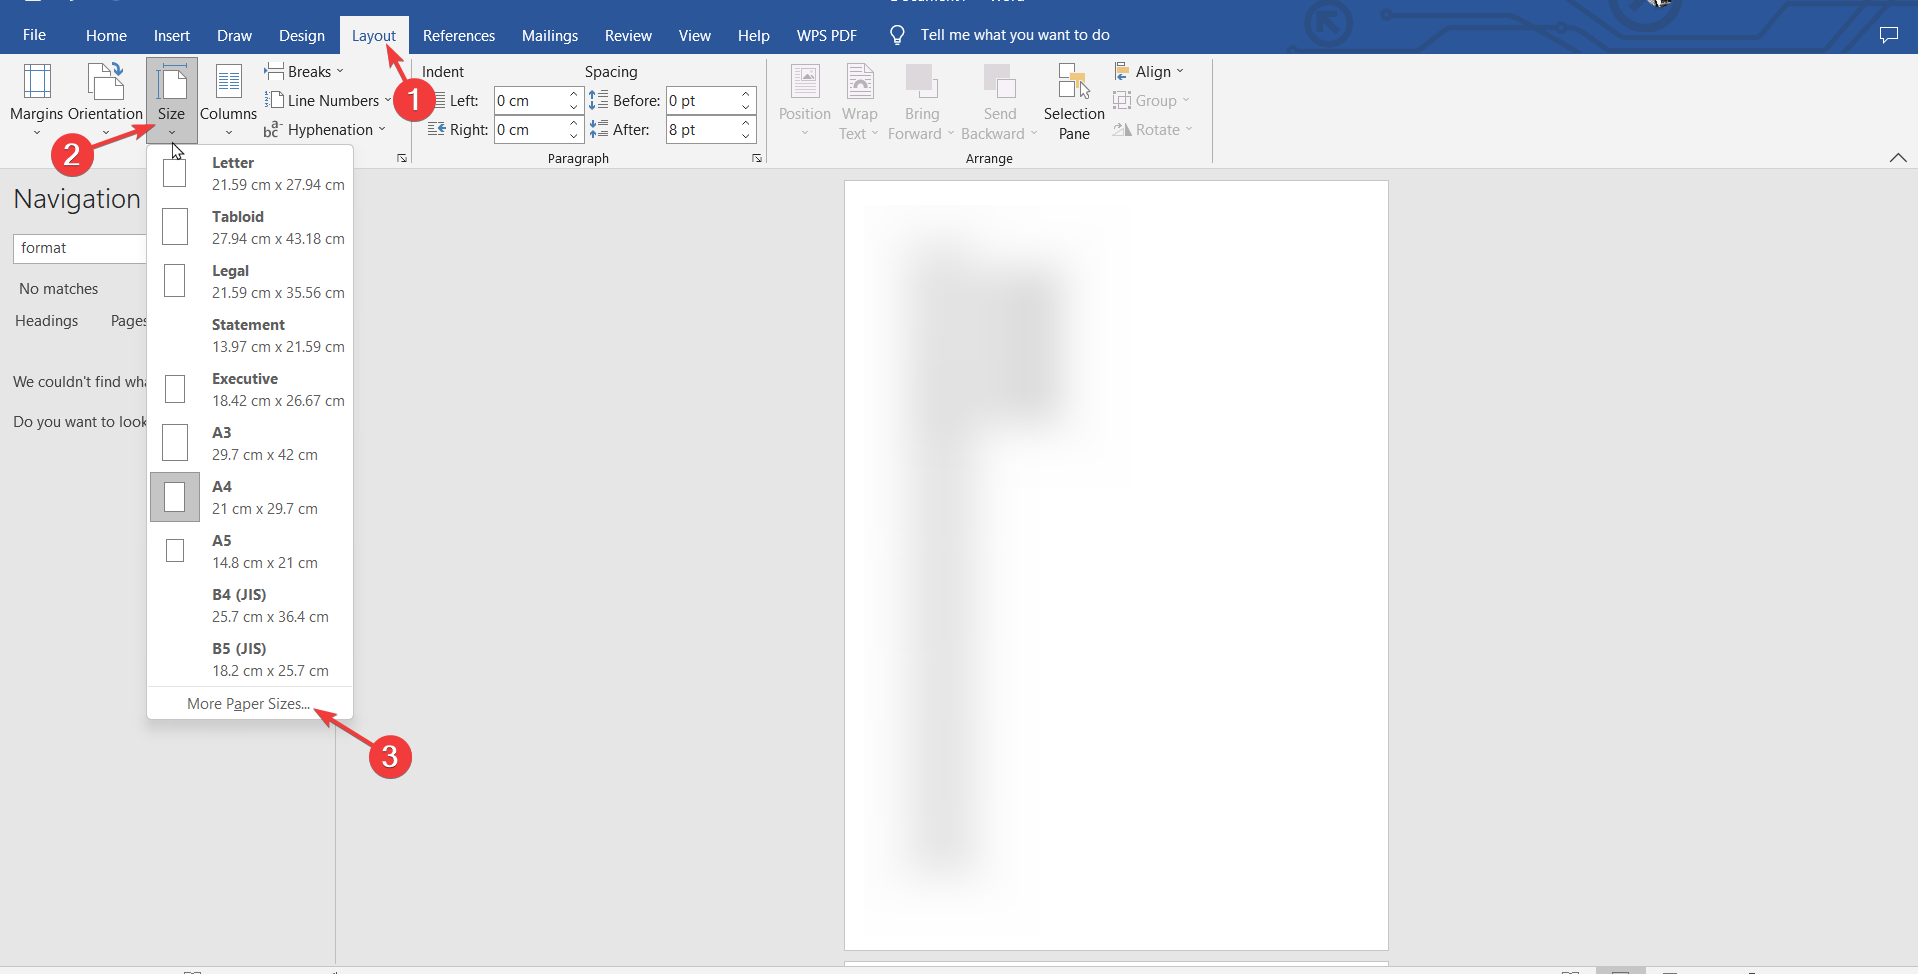
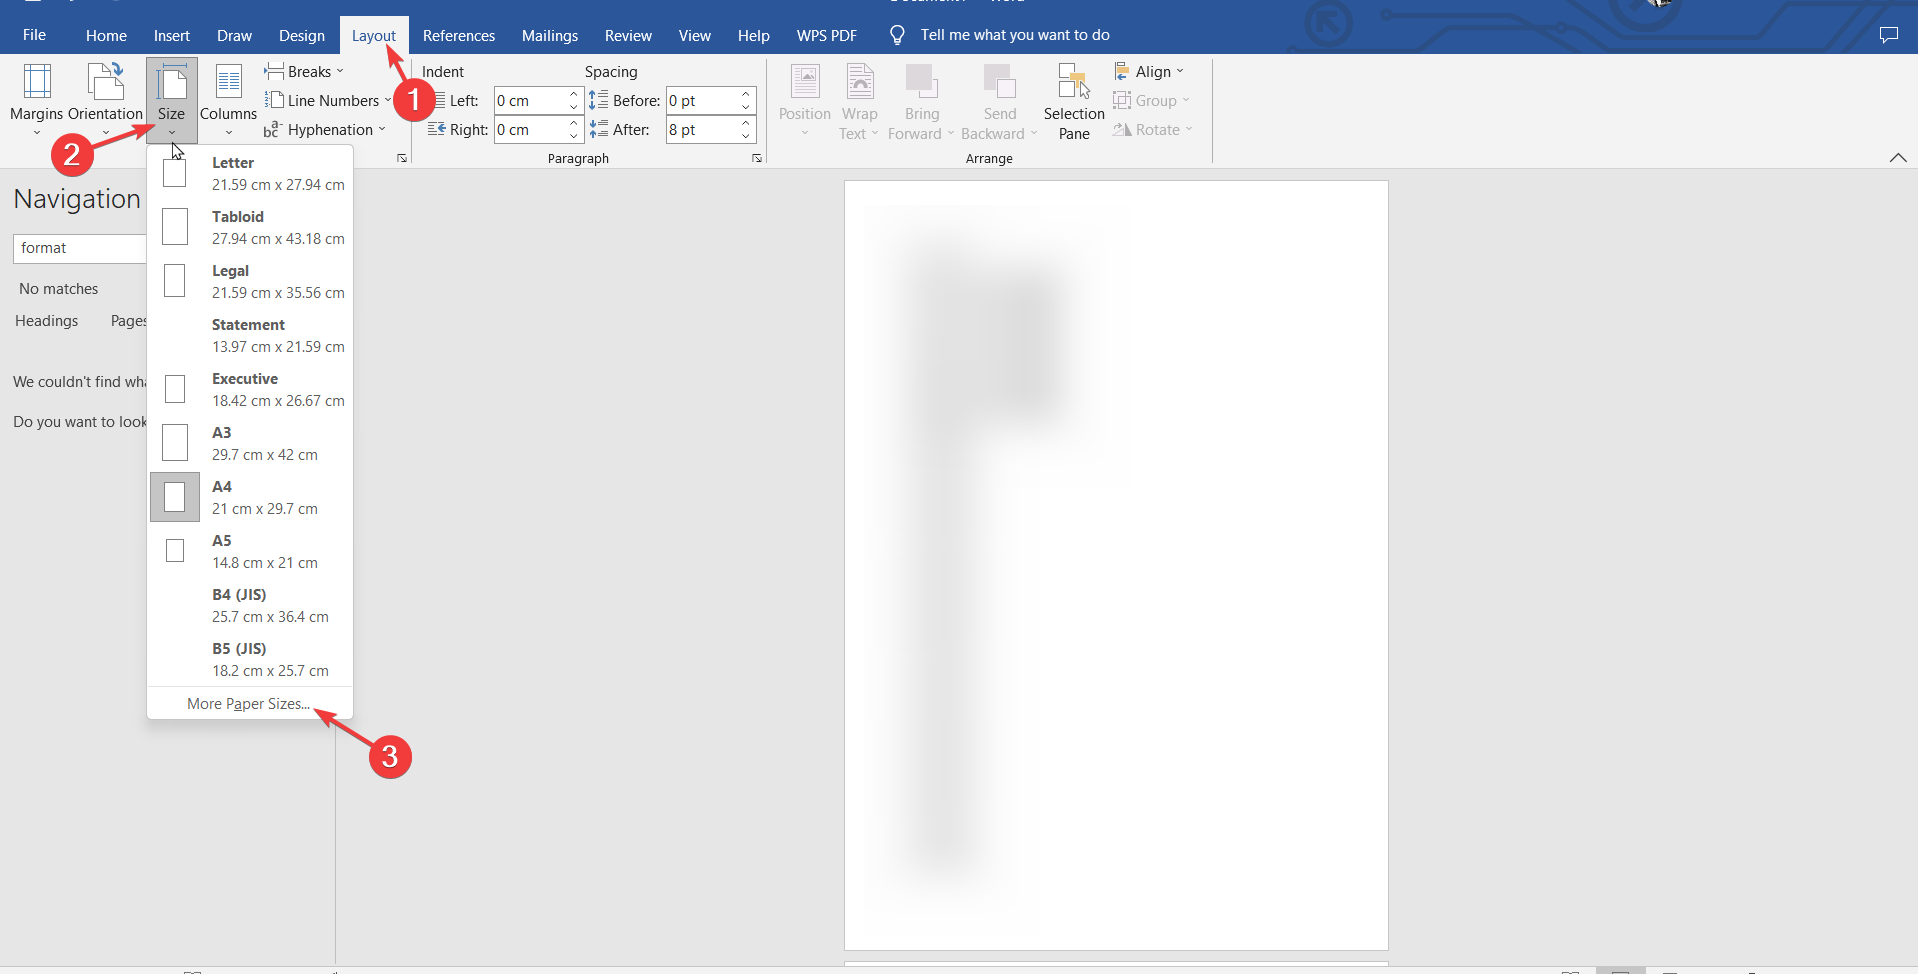
- Go to the Layout menu, under Page Setup, and click Size.
- Choose the paper size from the recent list or click More Paper Sizes.
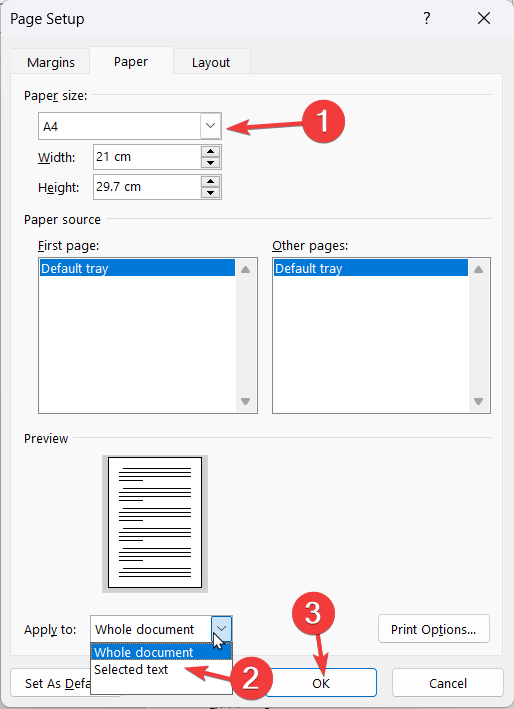
- Select the paper size from the dropdown.
- Next, navigate to Apply to choose Selected text from the dropdown list.
- Click OK.
1.3 Choose the paper size for a section
- Select the section of the document. Then, on the View menu, click Print Layout.
- To display nonprinting characters, go to the Home tab and click the button on the Show all nonprinting characters.
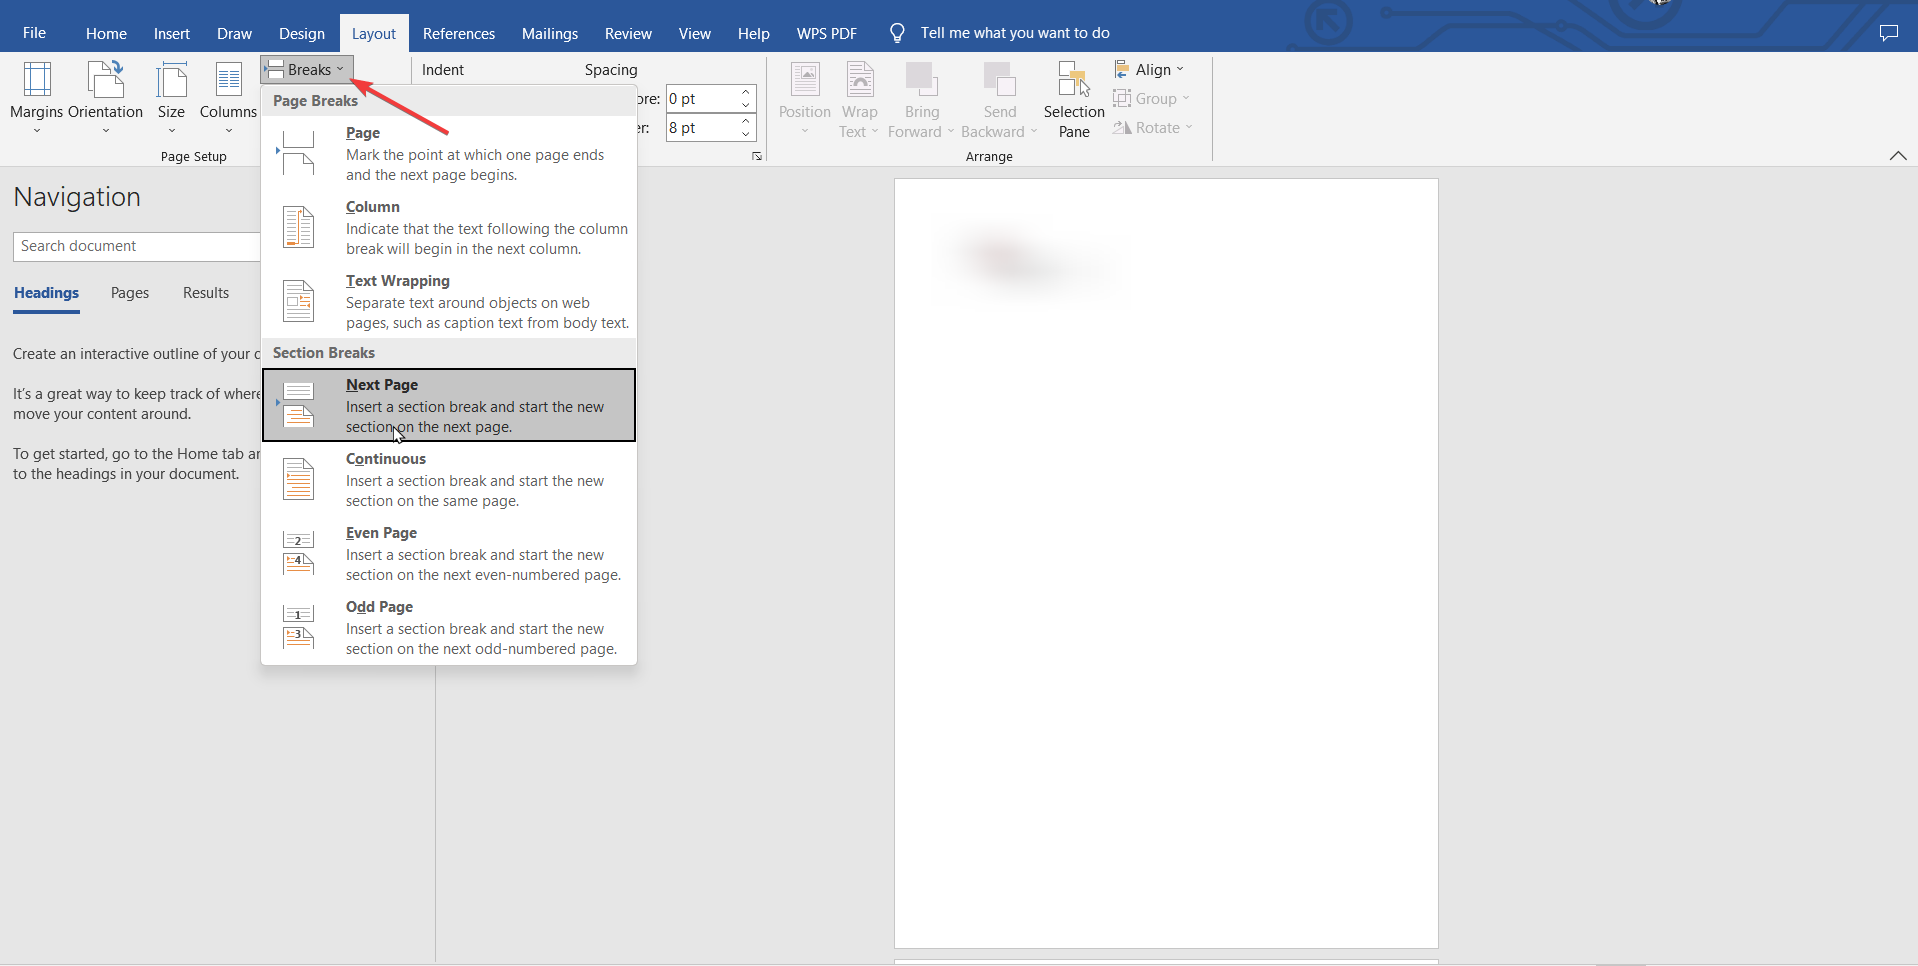
- Go to the Layout menu, click Breaks, and select Section break for the section you want to change.
- Now under Page Setup, click Size.
- Click More Paper Sizes to open the Page Setup properties.
- Choose the custom size or the paper size from the list.
- Now go to Apply to option, and choose Selected text from the dropdown.
- Click OK.
1.4 Choose the default paper size for new documents
- Go to the File menu.
- Click Print, then click Page Setup.
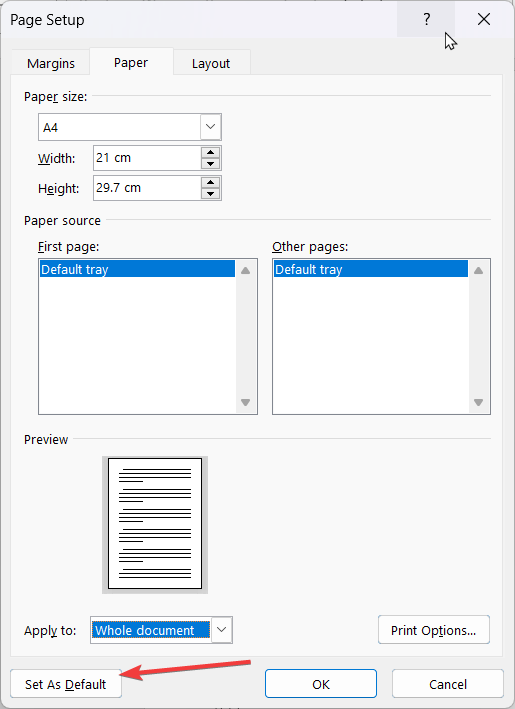
- Go to Set As Default.
- Click Yes.
2. Use the Control Panel
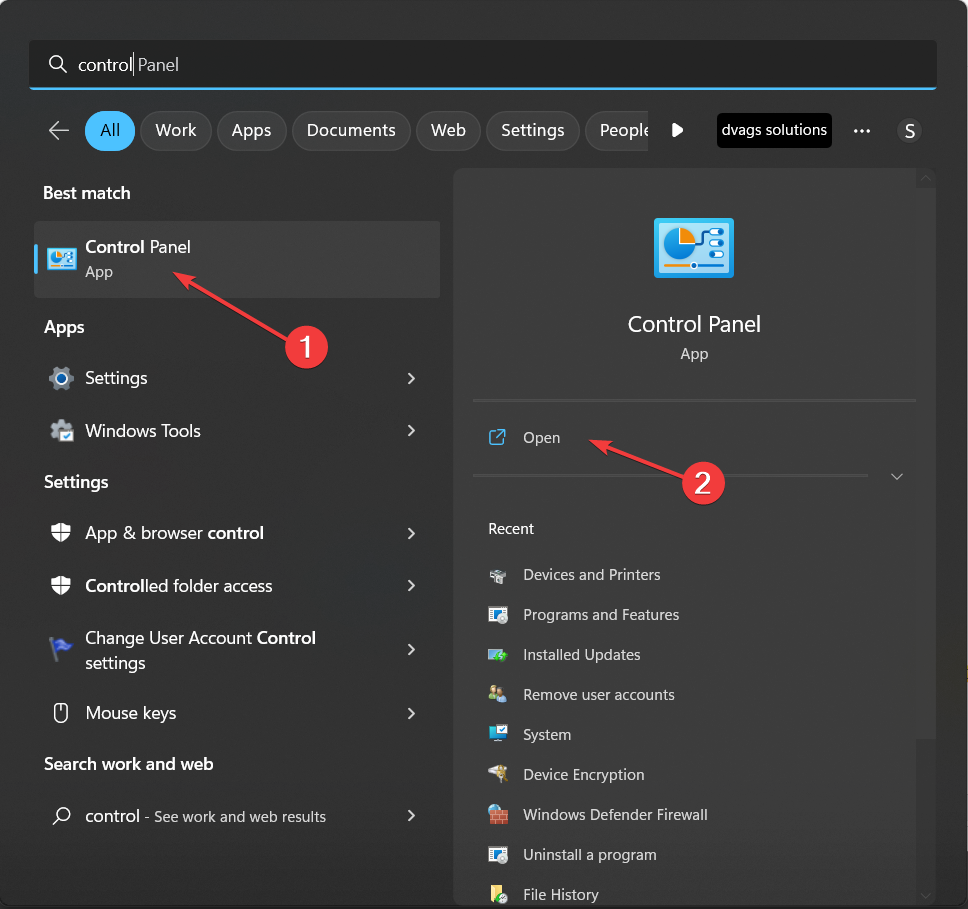
- Press the Windows key, type Control Panel, and click Open.
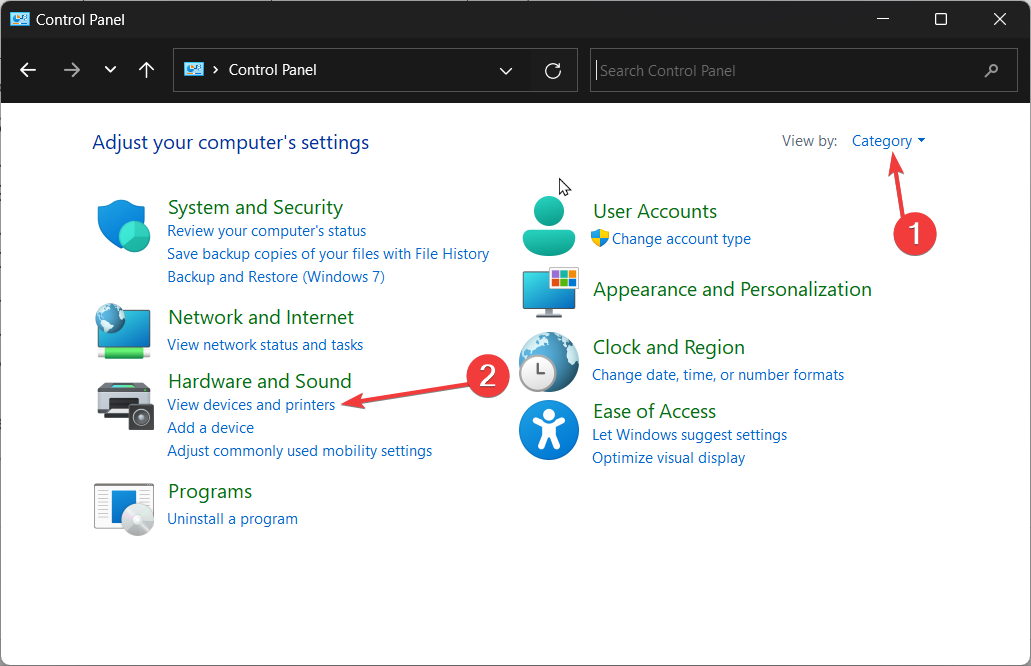
- Select View by and choose Category.
- Under Hardware and Sound, click View devices and printers.
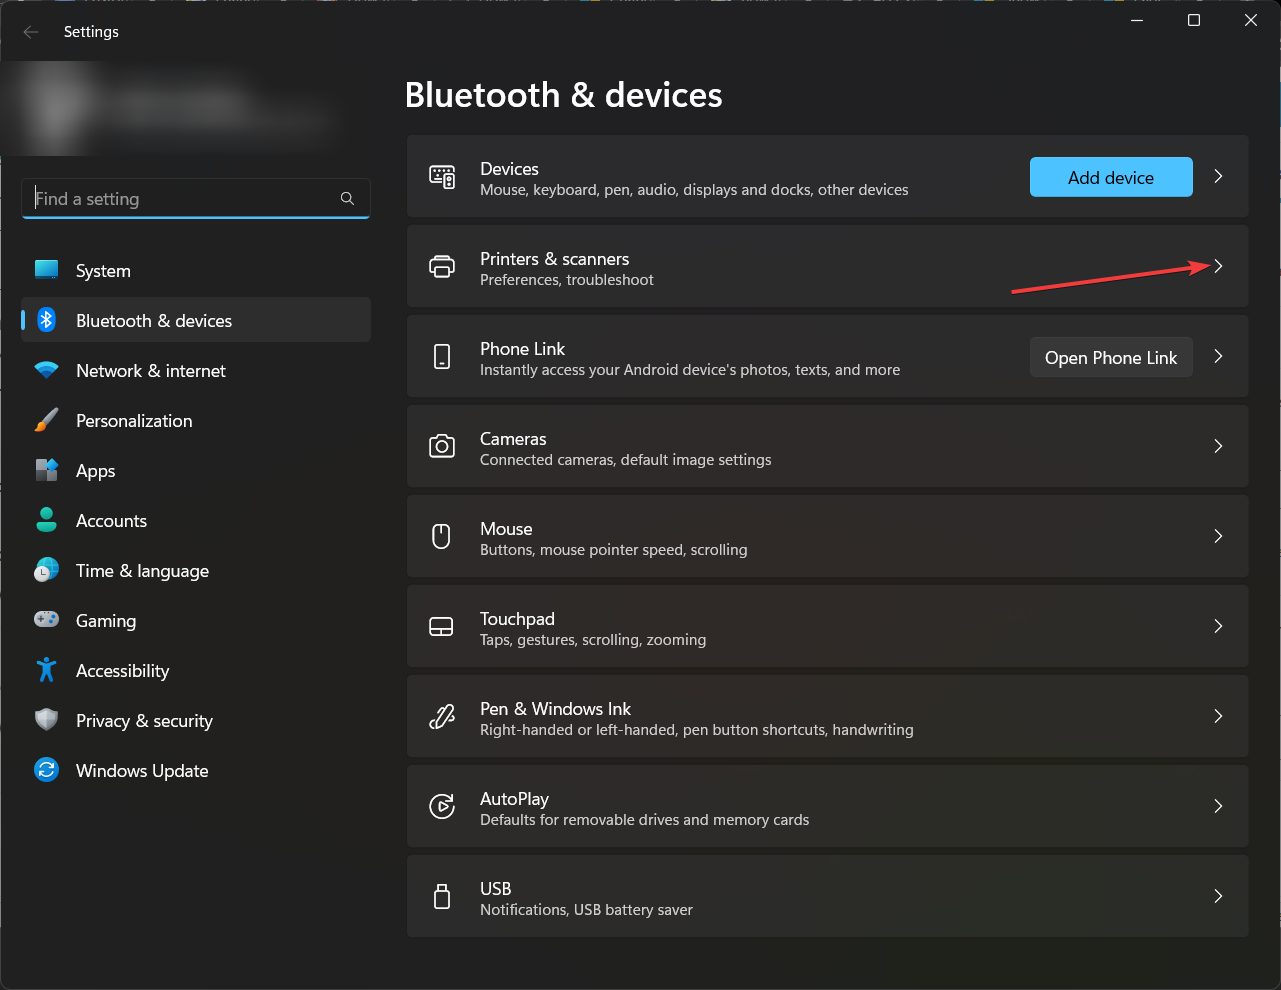
- Choose Printers & Scanners.
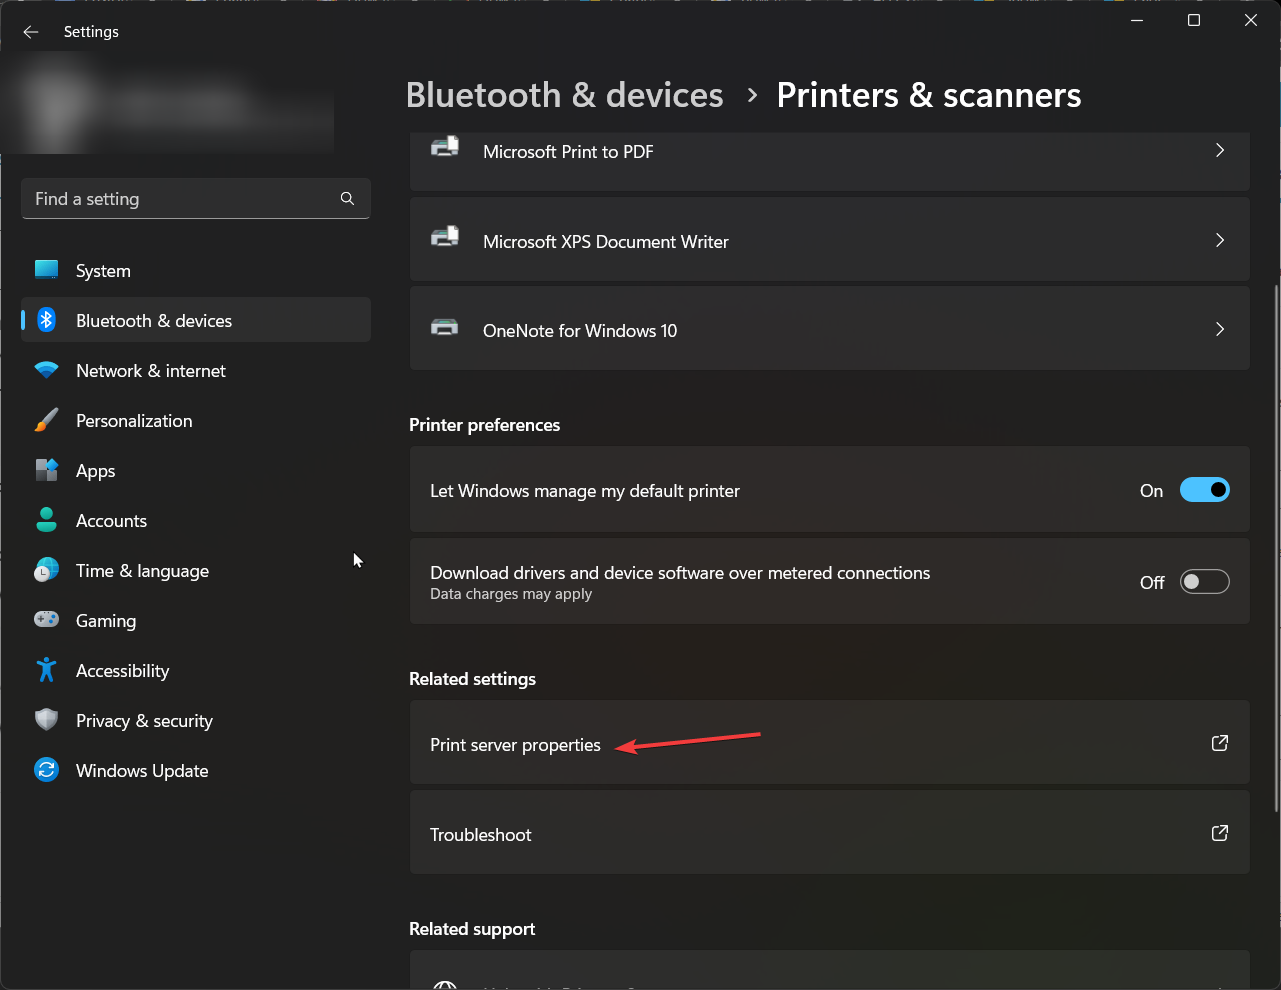
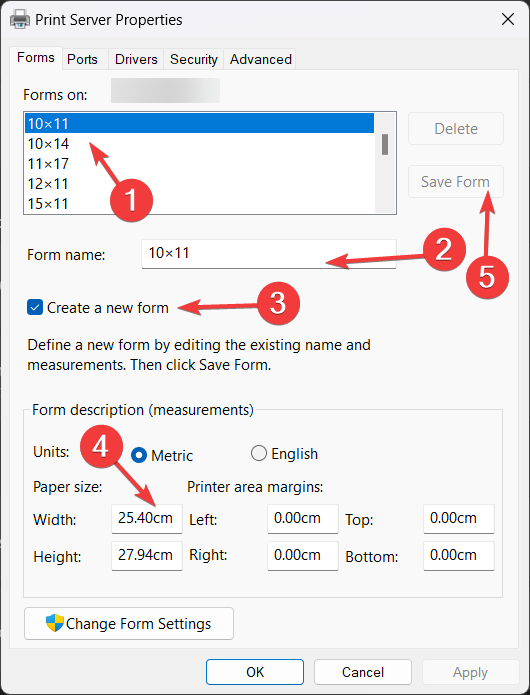
- Go to Print Server Properties.
- Under Forms on, select the paper size dimensions.
- Choose the Form name and put a checkmark on Create a new form.
- Under Paper size, select the Height and Width.
- Under Margin, edit the Left, Right, Top, and Bottom fields.
- Now choose Save From and close the window.
So, these are methods that you can use to create custom paper sizes on Windows 11. Try them and let us know which worked for you in the comments below.


