Dell SupportAssist Cannot Connect to the Internet: How to Fix it
Use a VPN to bypass server issues
6 min. read
Published on
Read our disclosure page to find out how can you help Windows Report sustain the editorial team. Read more

Dell SupportAssist requires an internet connection to diagnose your device’s problems so when it cannot connect, it’s most likely an outdated app, misconfigured network settings or an overzealous antivirus blocking the connection.
You can restart your system, switch to an Ethernet cable or another connection if available to establish if it’s your connection but if all these checkout and Dell SupportAssist cannot connect to the Internet, try the following.
What can I do if Dell SupportAssist cannot connect to the Internet?
1. Check for connection errors
1.1 Run the Network adapter troubleshooter
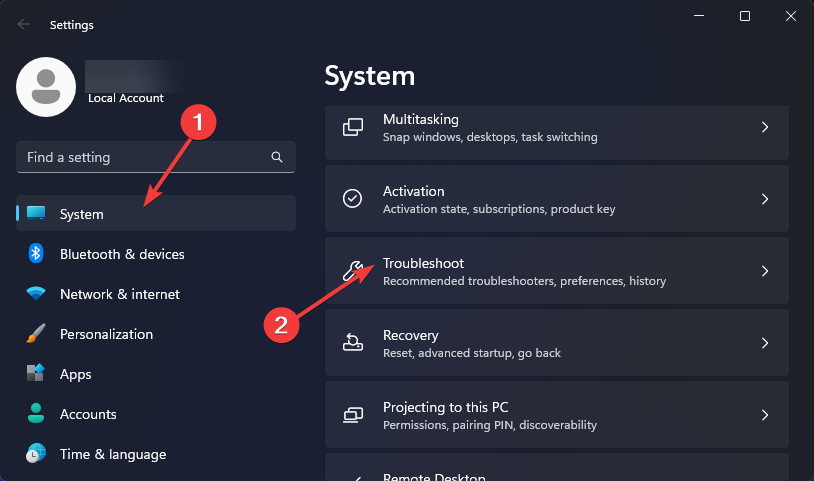
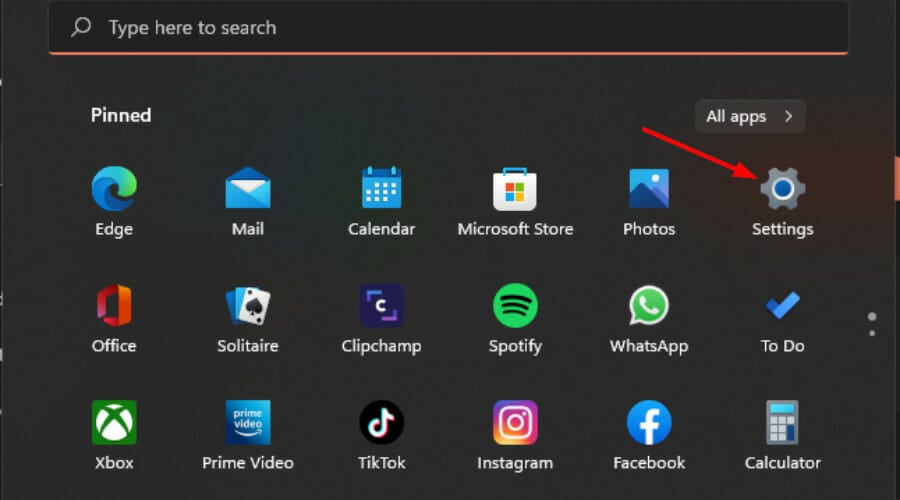
- Hit the Windows key and click on Settings.
- Click on System, then select Troubleshoot.
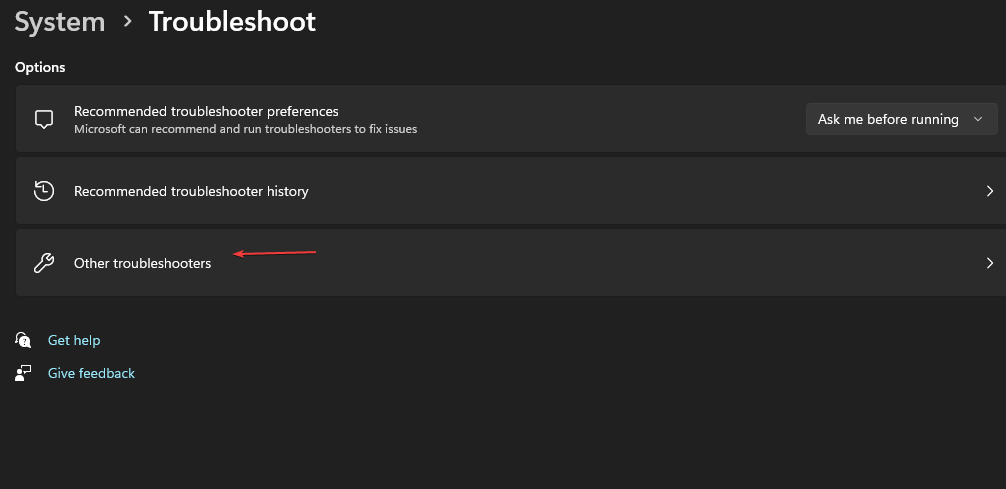
- Select Other troubleshooters.
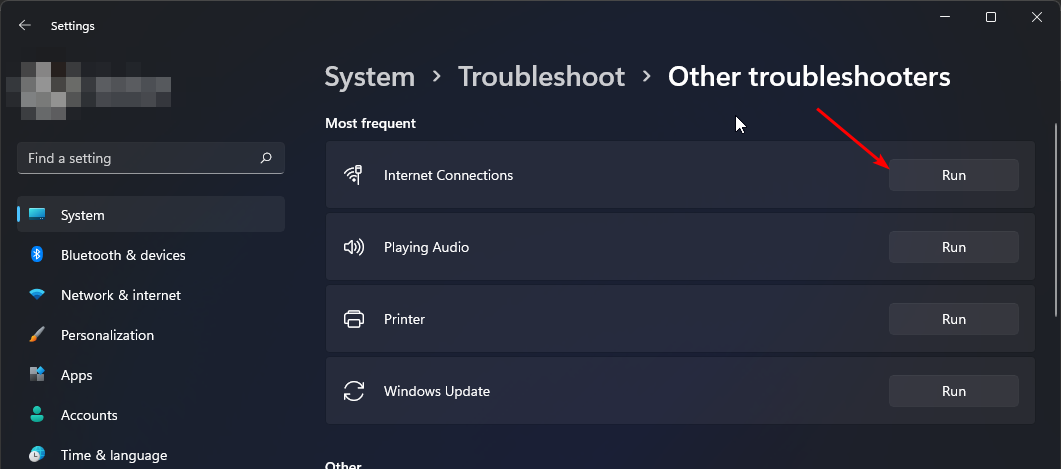
- Locate the Network Adapter troubleshooter and click on the Run button next to it.
1.2 Run the Internet Connections troubleshooter
- Hit the Windows key and click on Settings.
- Go to System, and click Troubleshoot.
- Now click Other troubleshooters.
- Locate Internet connections, and click Run.
- Follow the onscreen prompts to complete the process.
1.3. Update your Network driver
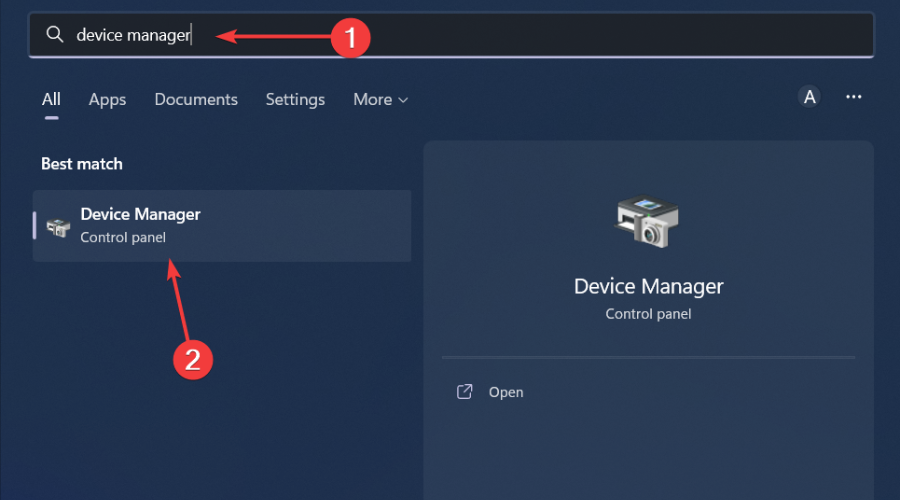
- Hit the Windows key, type Device Manager in the search bar, and click Open.
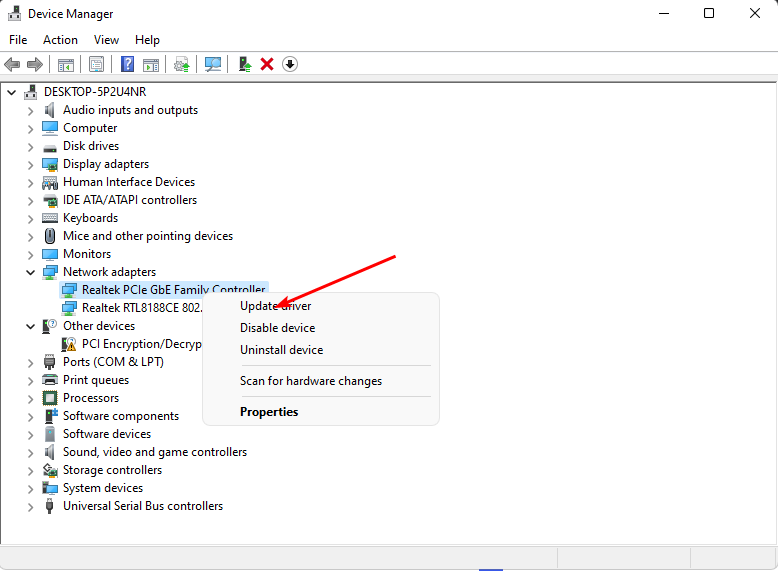
- Navigate to your Network adapter, right-click on it, and select Update driver.
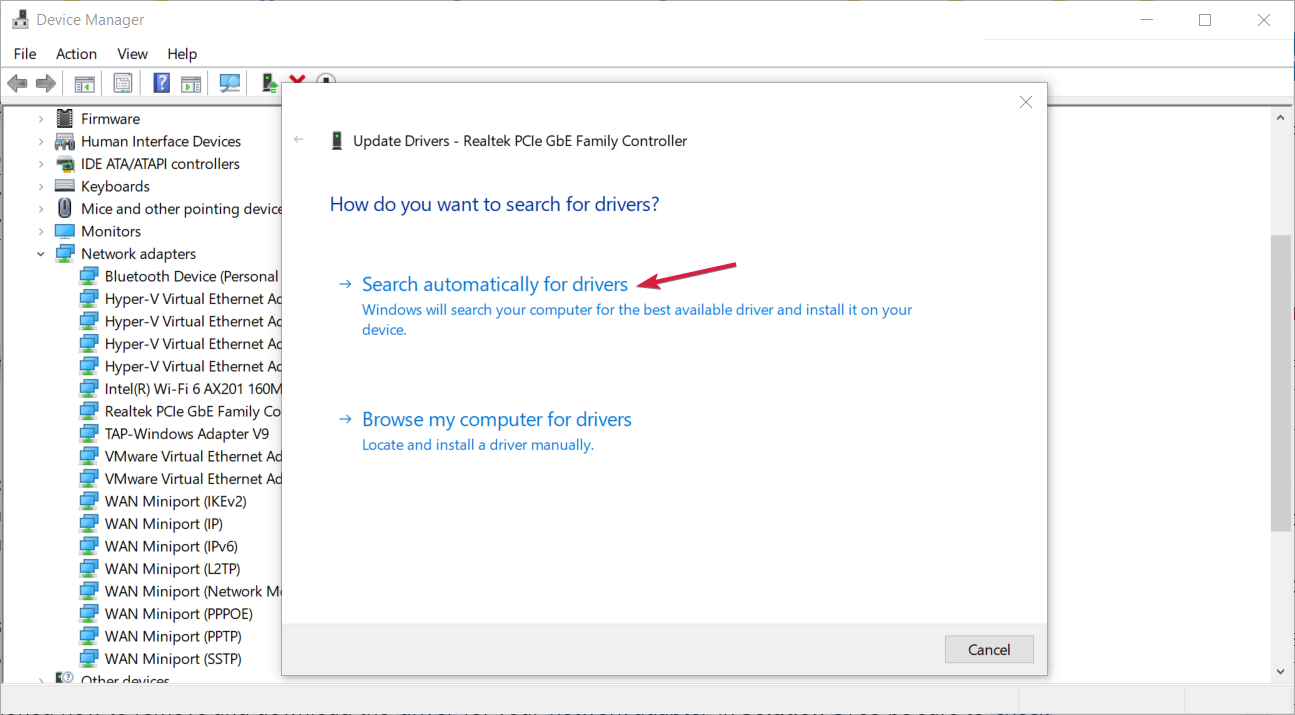
- Select Search automatically for updated drivers.
1.4 Perform a Network reset
- Hit the Windows key and click on Settings.
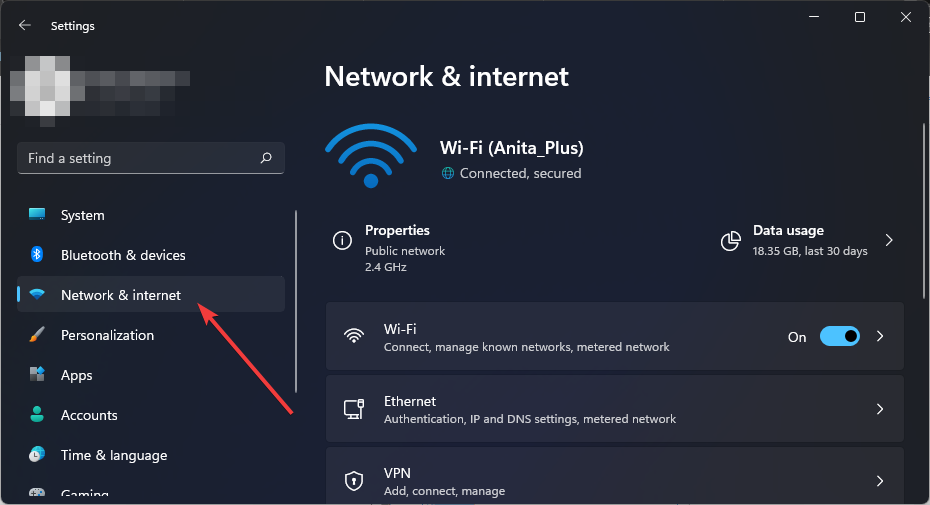
- Navigate to Network & internet.
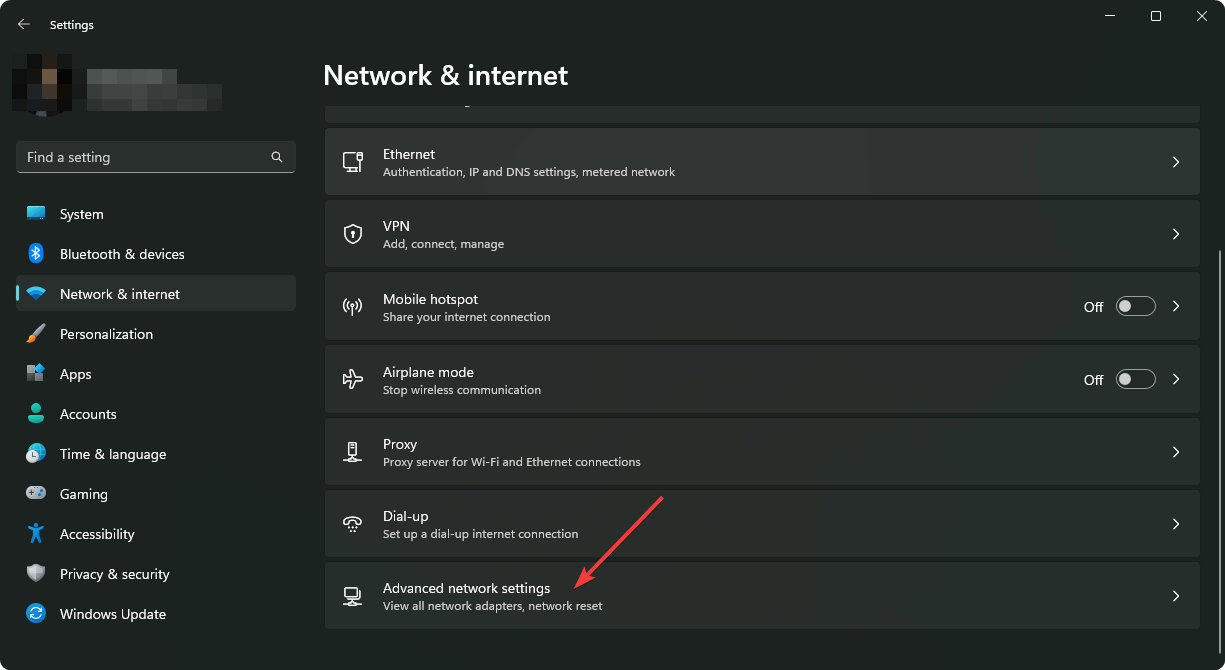
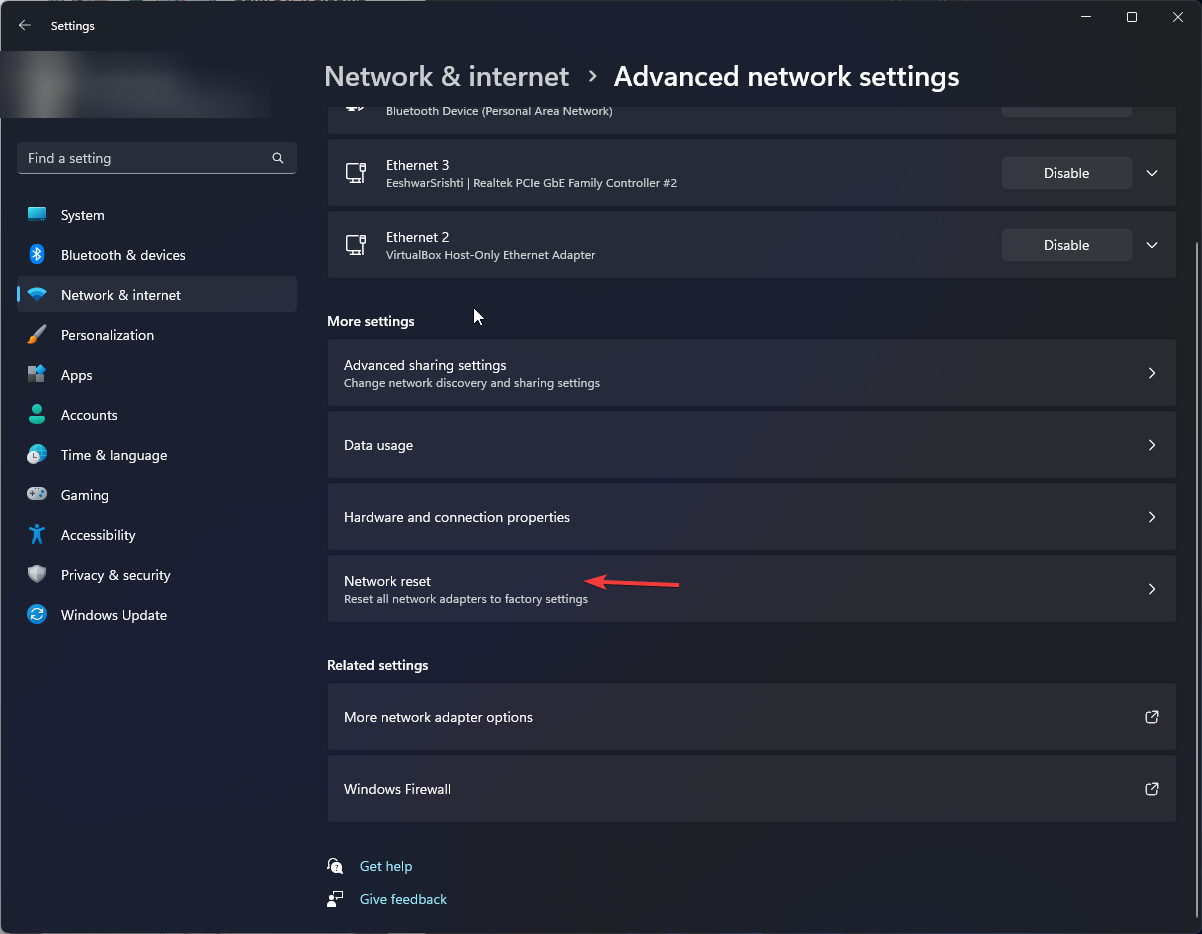
- Select Advanced network settings.
- Click on Network reset.
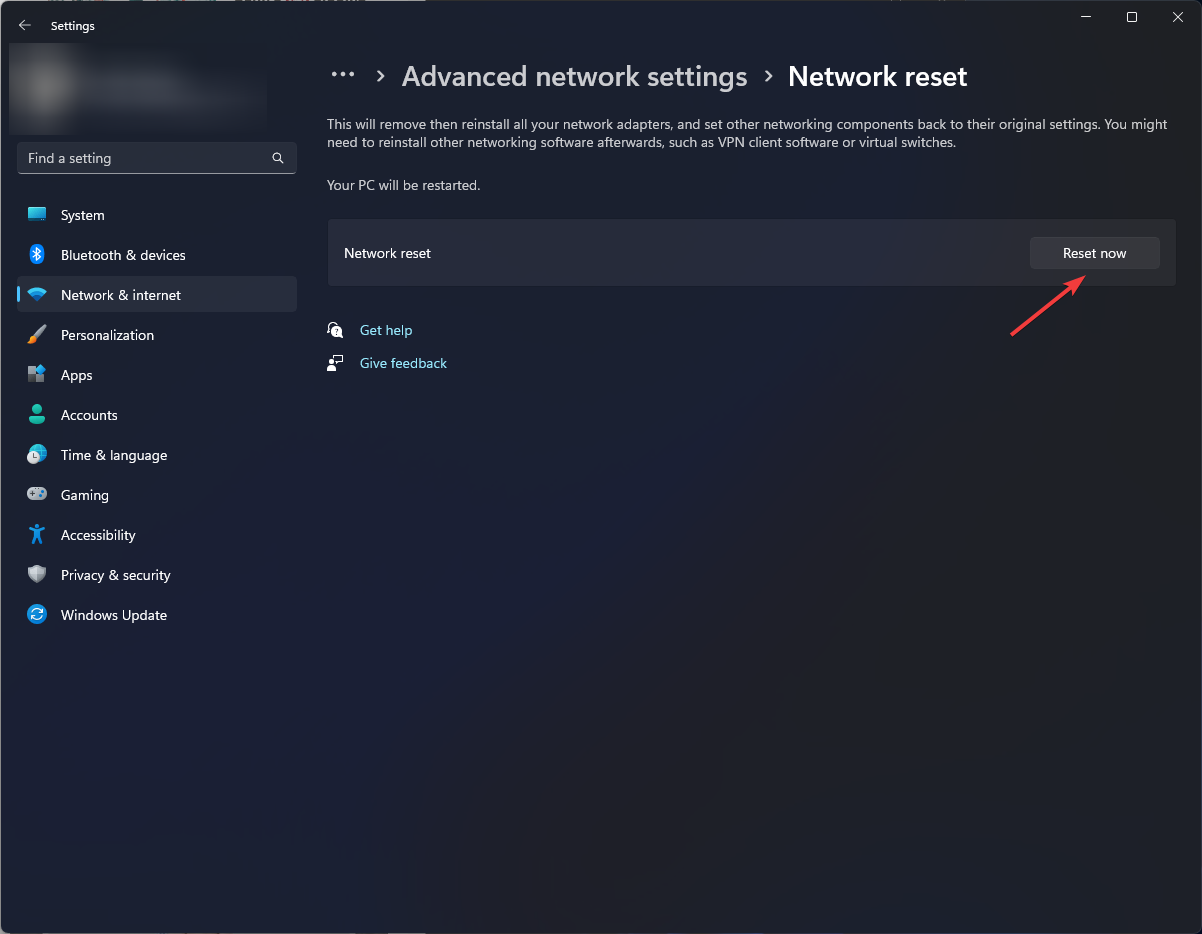
- Next, hit the Reset now button.
2. Configure SupportAssist to connect via the Internet
- Launch your Dell SupportAssist app from your desktop.
- Click on the Settings icon at the top right upper corner then select Internet
- Next, click on Internet connection (proxy)>Connect Directly.
- Click on Save, exit the app then relaunch and see if it connects to the Internet.
3. Temporarily disable Windows Firewall and run as admin
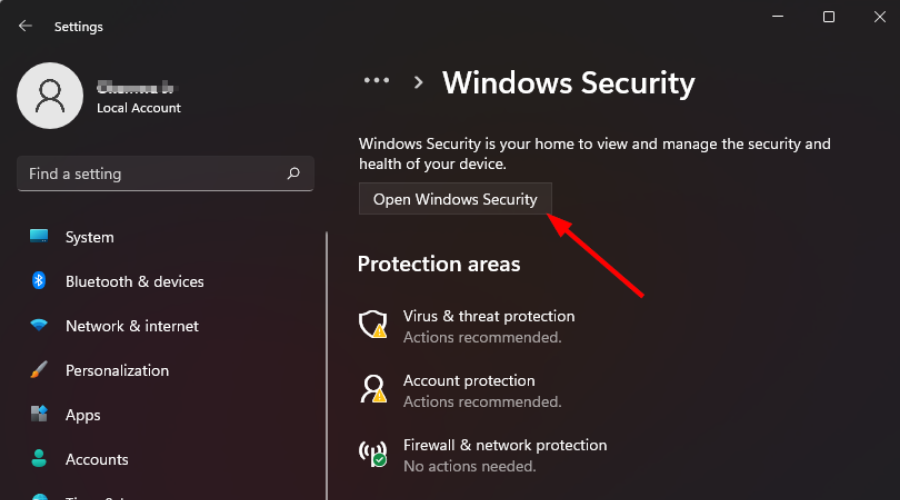
- Hit the Windows key and click on Settings.
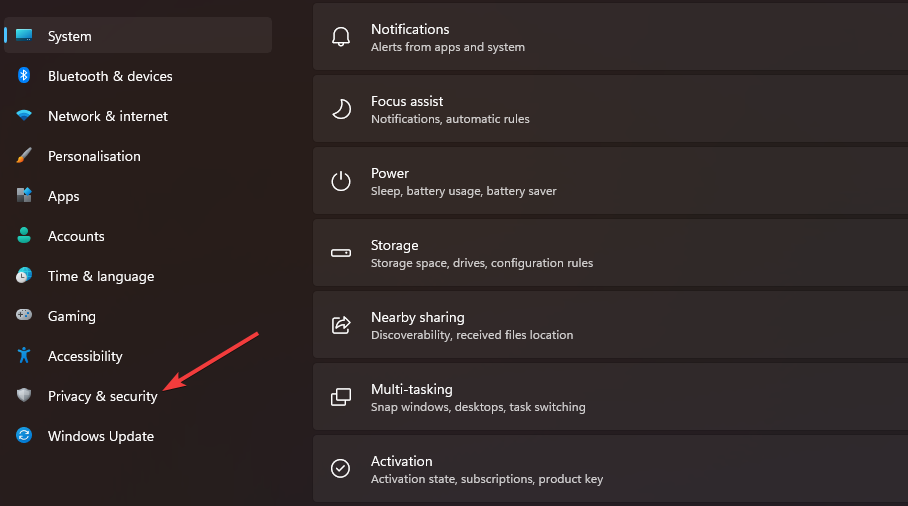
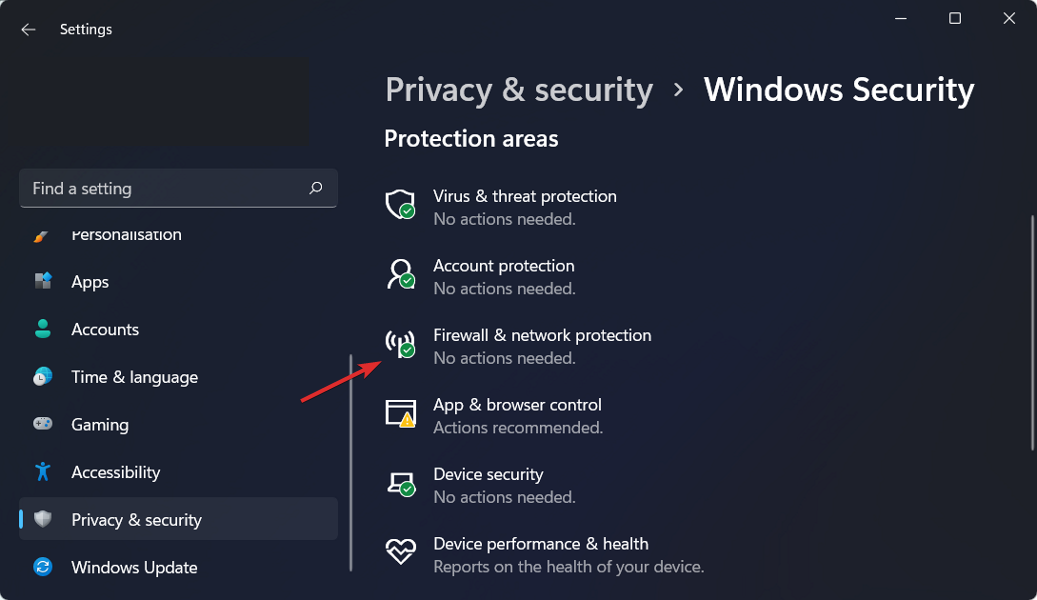
- Select Privacy & security.
- Click on Open Windows Security.
- Select Firewall & network protection.
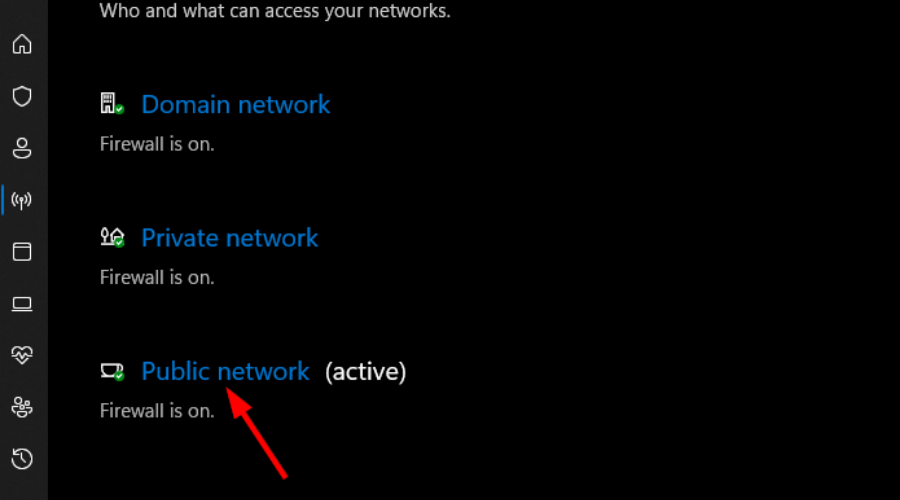
- Click on Public network.
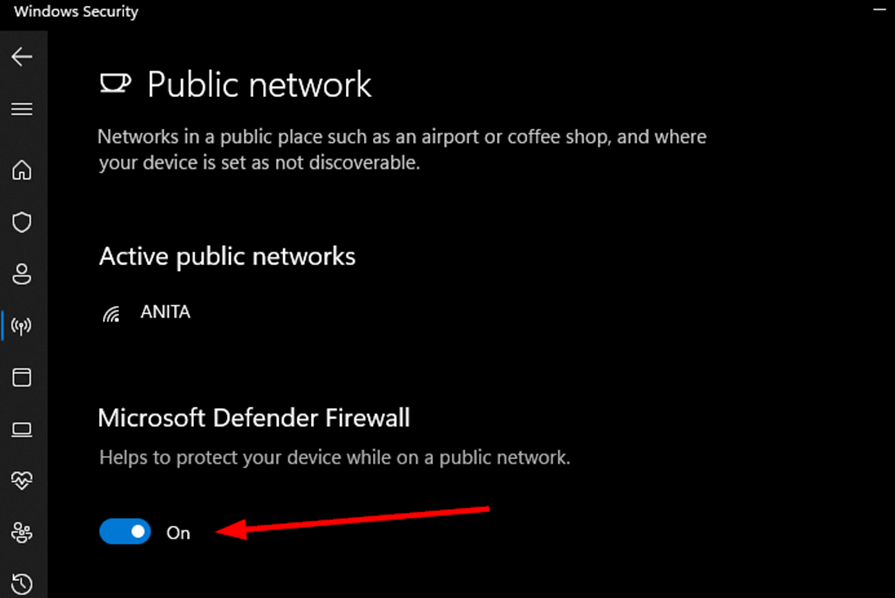
- Next, toggle Microsoft Defender Firewall off.
- Navigate to Dell SupportAssist, right-click on the program’s icon, select Properties on the menu and click on Shortcut.
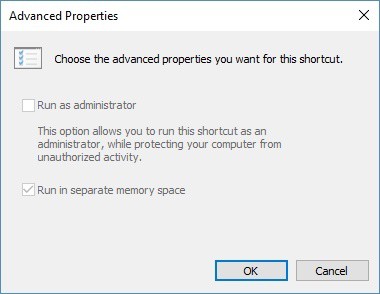
- Next, click on Advanced.
- Select the box that says Run As Administrator and click on Apply.
- Try launching Dell SupportAssist and see if it connects to the internet.
Some antivirus programs can block connections especially if they misclassify Dell SupportAssist as a potential threat. Such strict firewall settings can prevent the application from accessing the internet.
4. Use a VPN
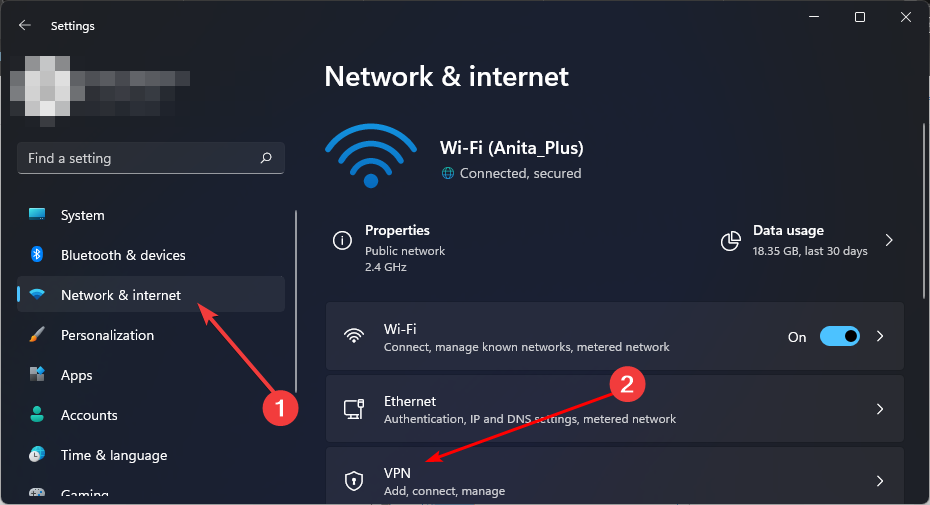
- Press the Windows key and select Settings.
- Next, select Network & internet and click on VPN in the right-side menu.
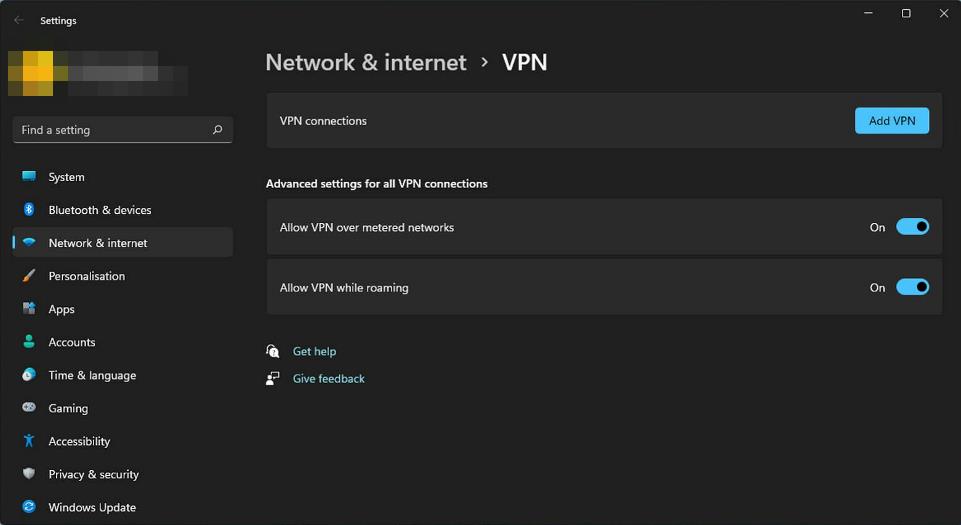
- Click on Add VPN and follow the prompts to enable it.
- Try connecting the Dell SupportAssist app to the internet and see if the error persists.
Using a VPN reroutes your connection to another server so if yours had a configuration issue that prevents communication with the Dell servers, this restriction will be lifted.
Dedicated VPN software can offer you more options for the type of connection you want to establish, hence it might be a better option than the native Windows VPN. ExpressVPN is a professional VPN tool, so you might want to try it out if you have problems with the default VPN.
5. Restart Dell services
- Press Windows + S to open the Search menu, type Services in the text field, and click on the relevant search result.
- Locate all the Dell services here (listed together in alphabetical order), and double-click on one.
- Select Disabled from the Startup type dropdown menu, and then click on the Stop button.
- If a confirmation prompt pops up saying that another linked Dell service(s) will stop, click Yes to proceed since we anyway are disabling these later.
- Finally, click Apply and OK to save the changes.
- Similarly, disable the other Dell services that are currently running.
- Now repeat the same process but this time, click on Automatic as the Startup type.
6. Disable Fast startup
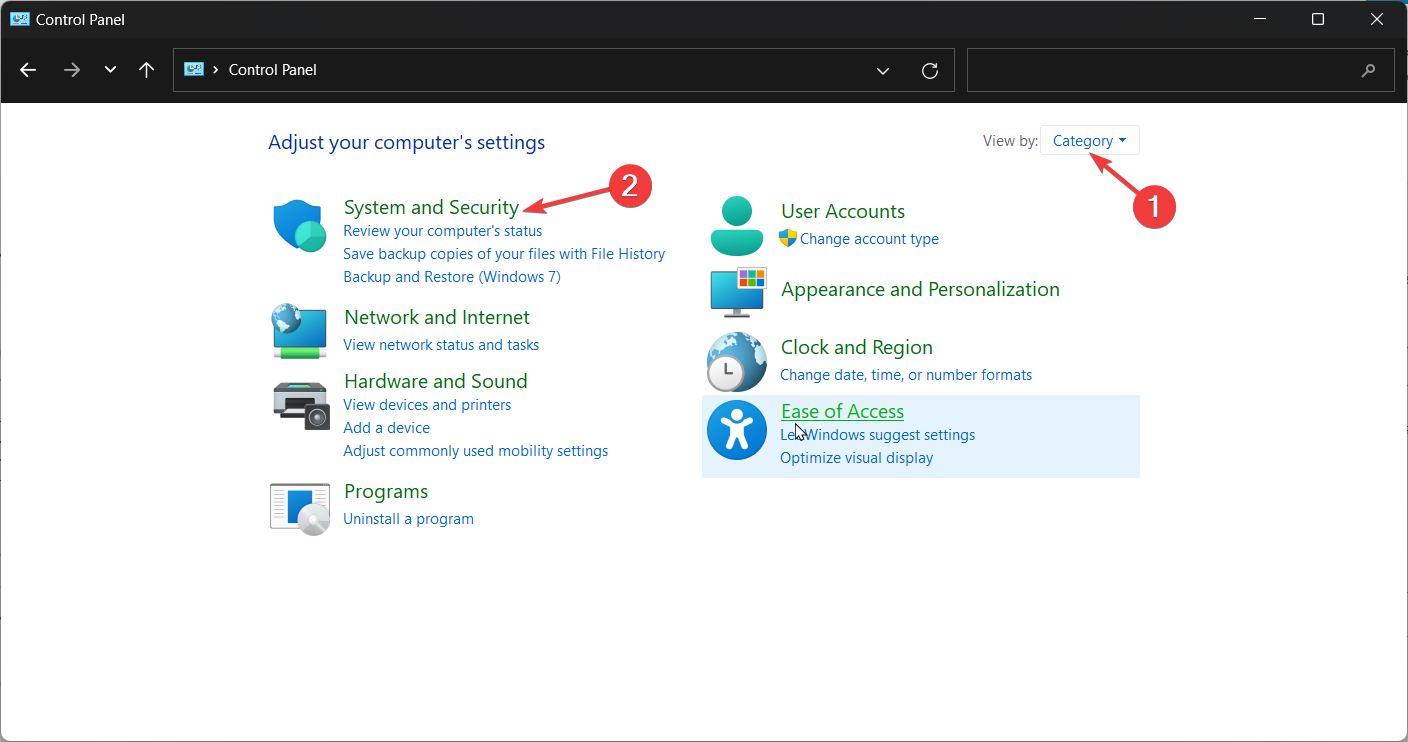
- Hit the Windows key, type Control Panel in the search bar, and click Open.
- Click on System and Security.
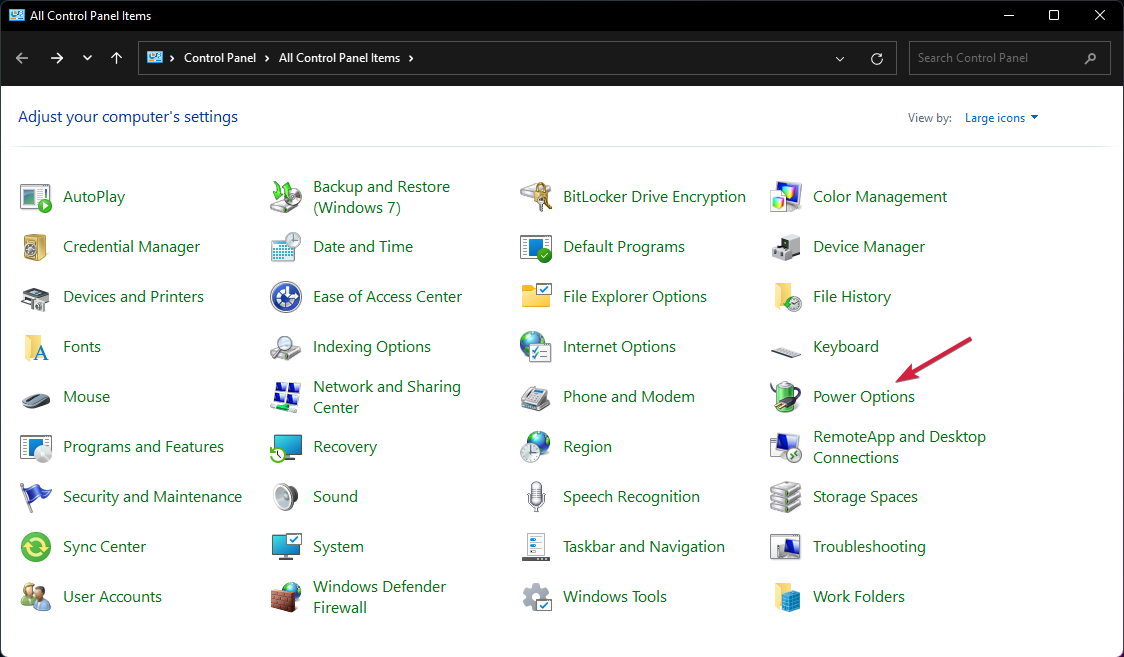
- Next, select Power Options.
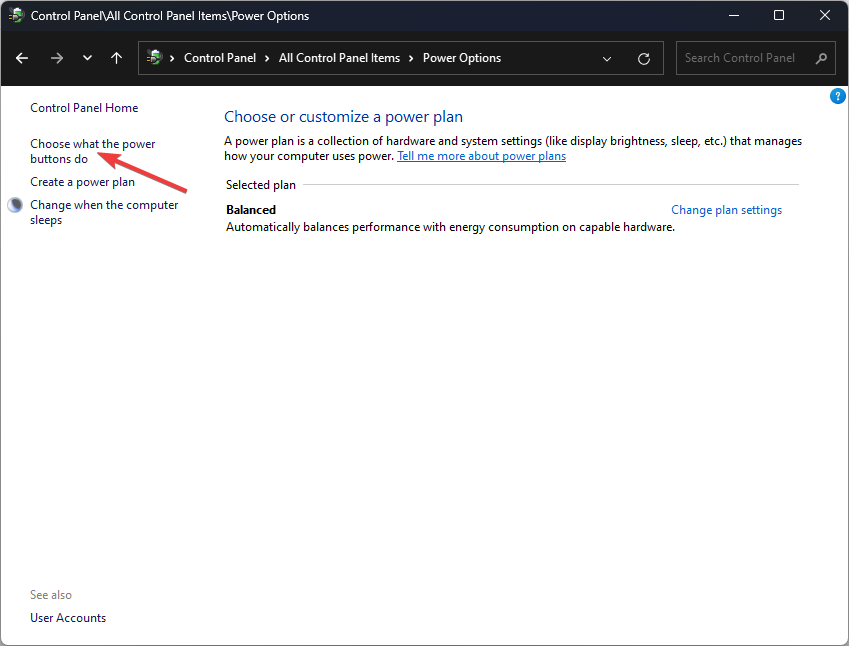
- Click on Choose what the power buttons do from the list of options on the left.
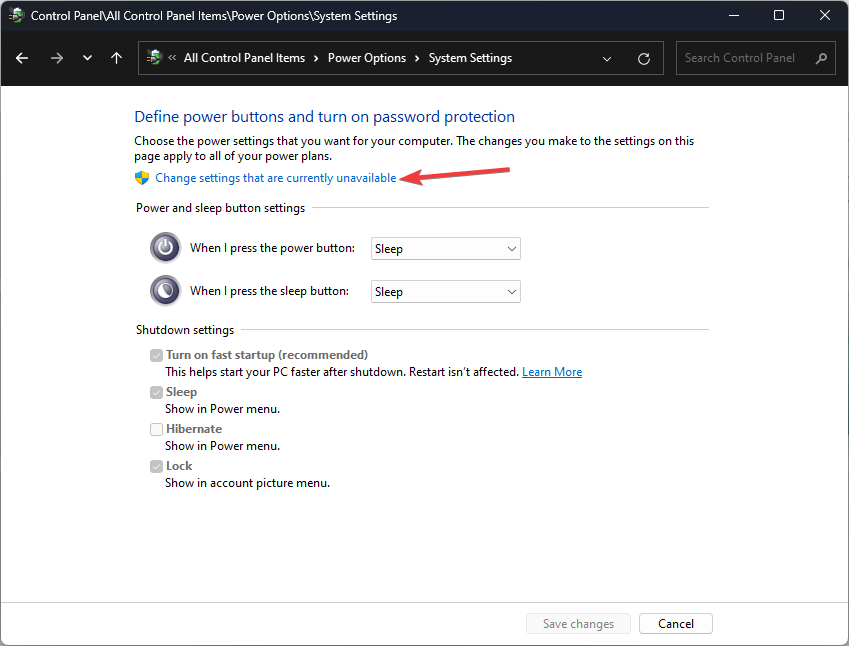
- Select Change settings that are currently unavailable.
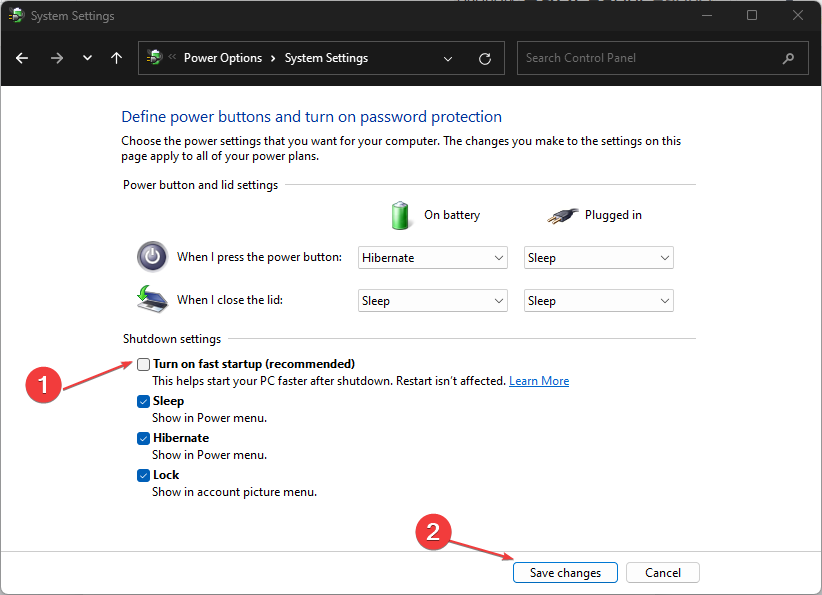
- Now, untick the checkbox for Turn on fast startup and then click on Save changes.
7. Reinstall the Dell SupportAssist app
- Press Windows + R to open Run, type appwiz.cpl in the text field, and hit Enter.
- Select Dell SupportAssist from the list of apps, and then click Uninstall.
- Click Yes in the confirmation prompt and follow the on-screen instructions to complete the uninstall process.
- Similarly, uninstall the Dell SupportAssist Remediation and Dell Power Manager Service apps as well.
- Go to Dell’s official website, and click on SupportAssist for Home PCs if your computer is not a part of any organization.
- Click on the Download Now button to get Dell SupportAssist 64-bit for Windows 11.
- Head to the Downloads folder and run the SupportAssistInstaller.exe file then click Yes in the UAC prompt.
- Follow the on-screen instructions to complete the process.
While you may try all these, it doesn’t guarantee your Dell SupportAssist will connect to the internet. Sometimes, it has nothing to do with your device–it’s just Dell SupportAssist that’s not working. Other times, it will be a Dell SupportAssist blank screen.
You can wait it out or contact the Dell support team for further assistance. In the meantime, consider trying other diagnostic software especially built-in programs that do not require an internet connection to function.
If you have any additional thoughts or comments, drop us a line below.












User forum
0 messages