How to Permanently Disable BitLocker on Windows 11
Learn to get rid of this tool for good
6 min. read
Updated on
Read our disclosure page to find out how can you help Windows Report sustain the editorial team Read more
Key notes
- BitLocker Drive Encryption is an encrypted available on non-Home versions of Windows 11.
- It allows you to encrypt certain sections and drivers of your computer for added security.
- Knowing how to use this tool will optimize your usage of your Windows 11 PC.
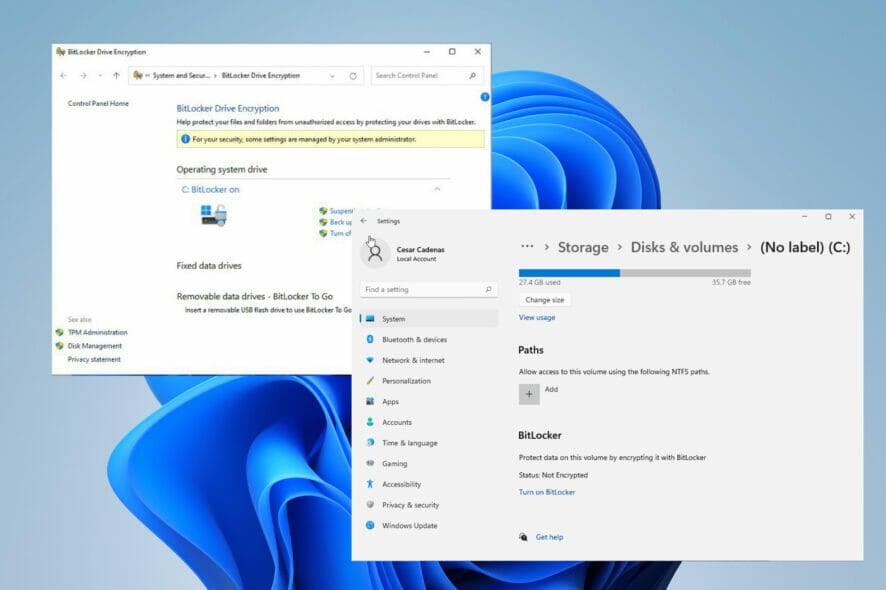
BitLocker Drive Encryption is an encryption tool that is available on a variety of Windows computers. It’s a full volume encryption tool which means that it only protects a section of your computer rather than the whole thing. If it protected the whole drive, it would be known as full disk encryption.
As a feature, it integrates with your computer and makes sure your data is kept safe from being lost or stolen. According to Microsoft, it’s best used in conjunction with Trusted Platform Module (TPM) 1.2 or later. And as it turns out Windows 11 utilizes TPM 2.0 for a high level of security.
How can I use Bitlocker on Windows 11?
To use Bitlocker, your Windows 11 computer must meet certain requirements. One, Bitlocker is only available on Windows 11 Pro, Enterprise, and Education. It is not available on Home. You can go check if you have Bitlocker available by going to the System and Security section of the Control Panel.
There should be a section for Bitlocker in the Control Panel. If it’s not there, then you can’t use the feature. Also, TPM 2.0 must be supported on your Windows 11 computer. If you did a clean installation of the OS, then you have TPM 2.0 enabled and don’t have to worry about a thing.
This guide will show you multiple ways how to disable Bitlocker on your Windows 11 computer. The multiple ways are there to help you in case one method doesn’t work for whatever reason. Some fixes are as simple as opening the Settings menu and disabling there or bringing up the Command prompt.
How do I disable Bitlocker on Windows 11?
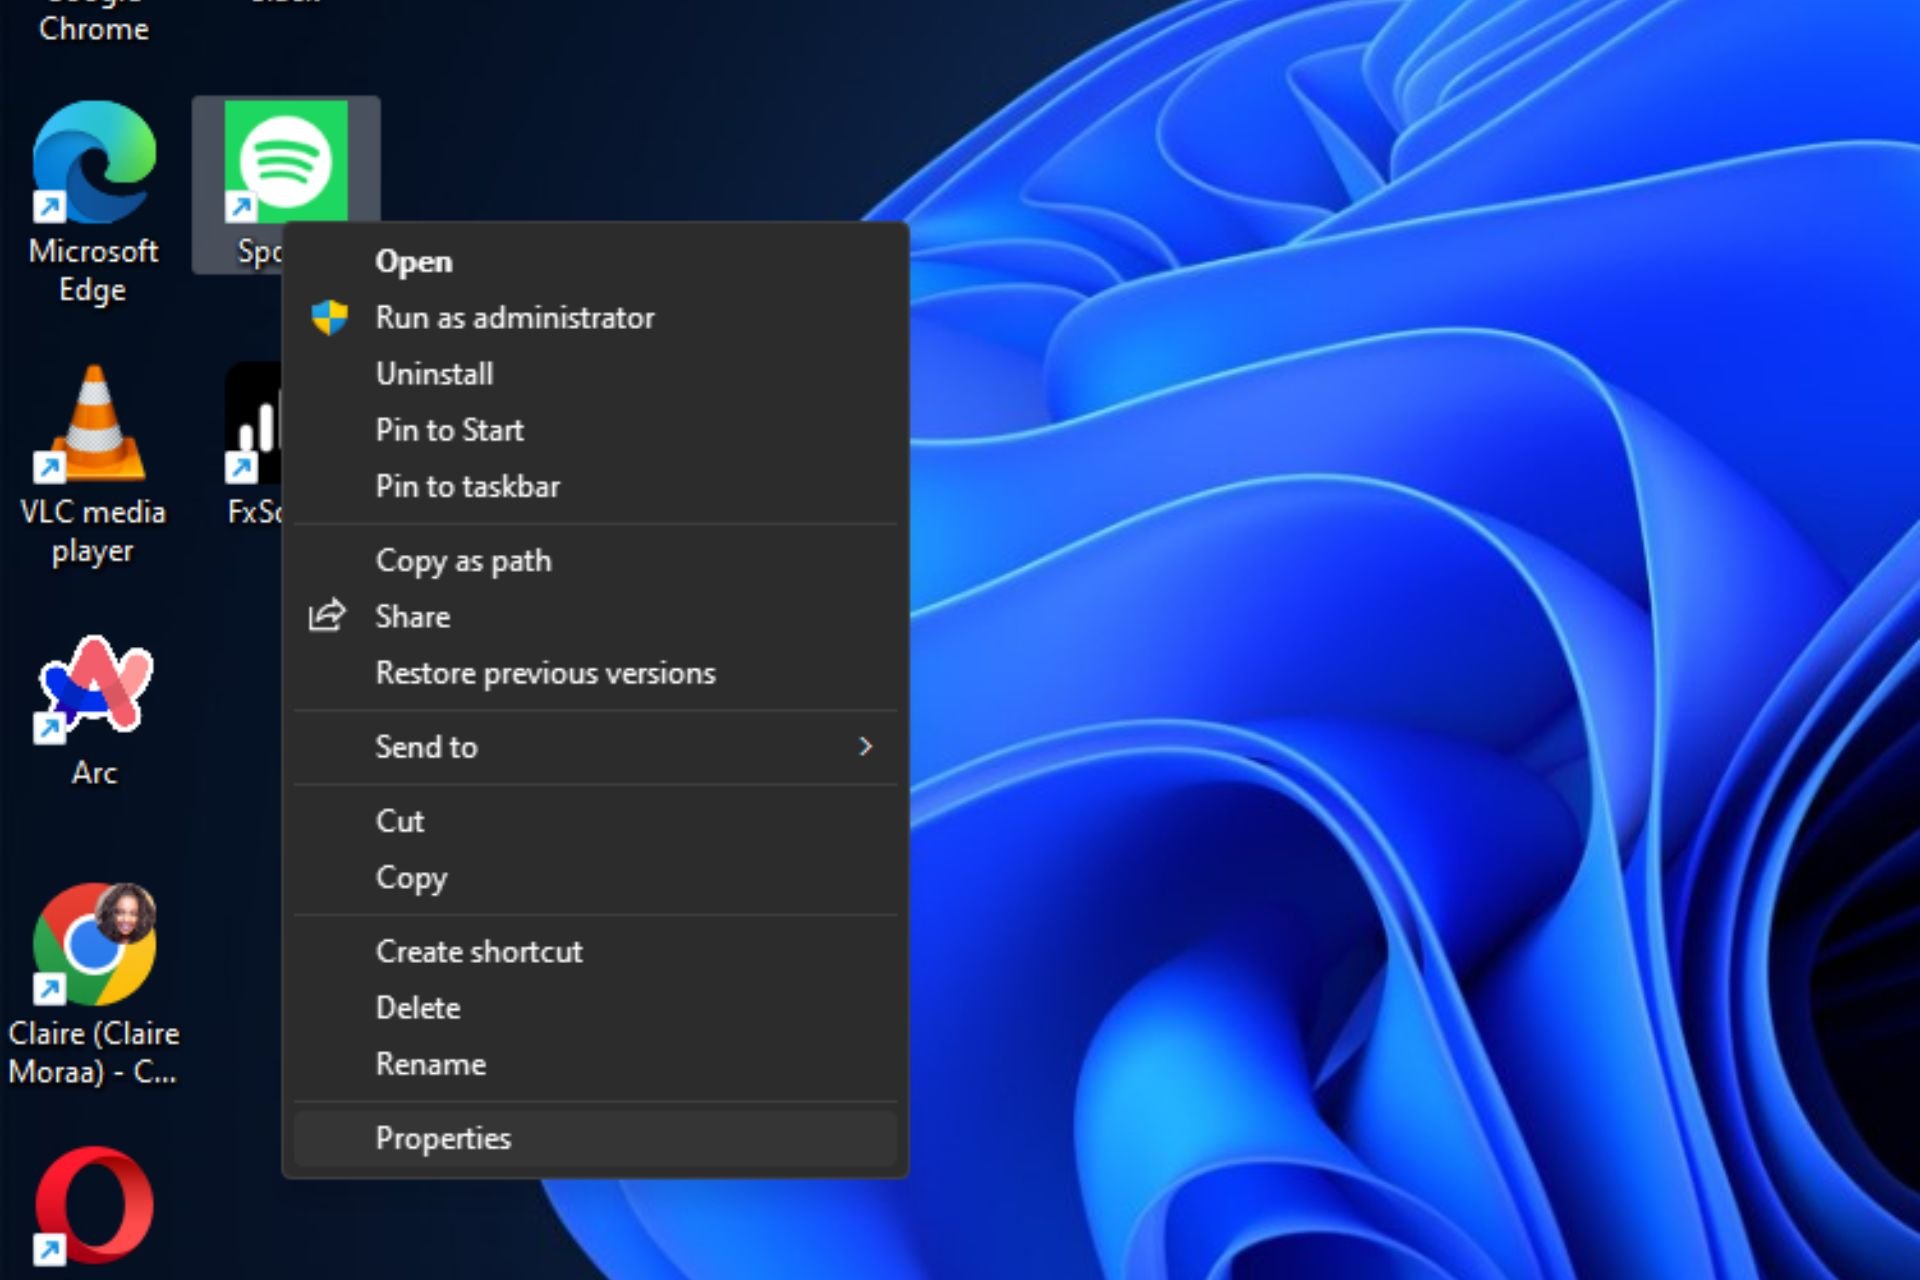
1. Disabling from the Context Menu
- Open the File Explorer and click on This PC.
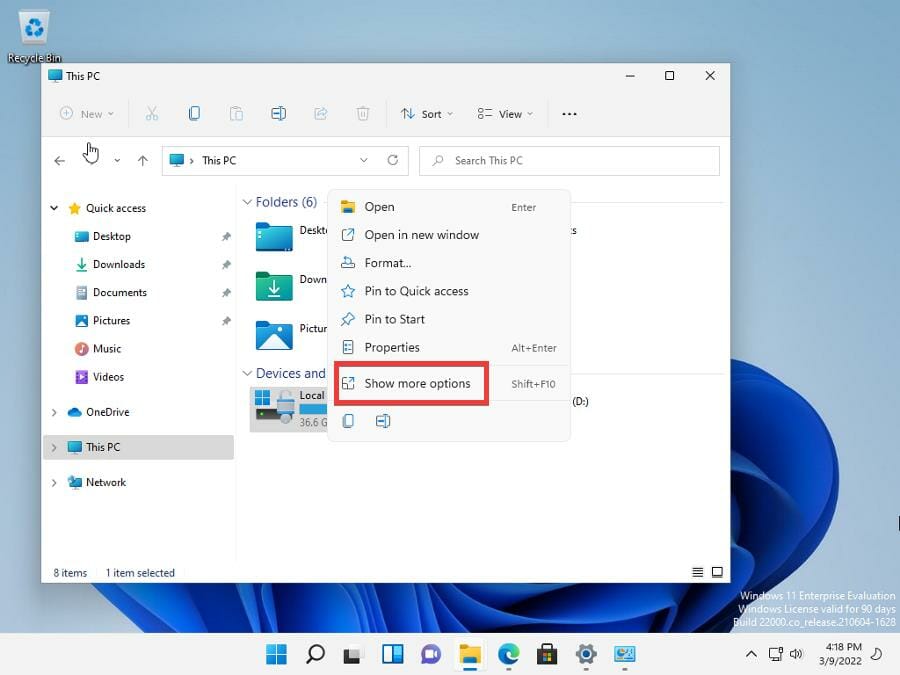
- Right-click the encrypted drive.
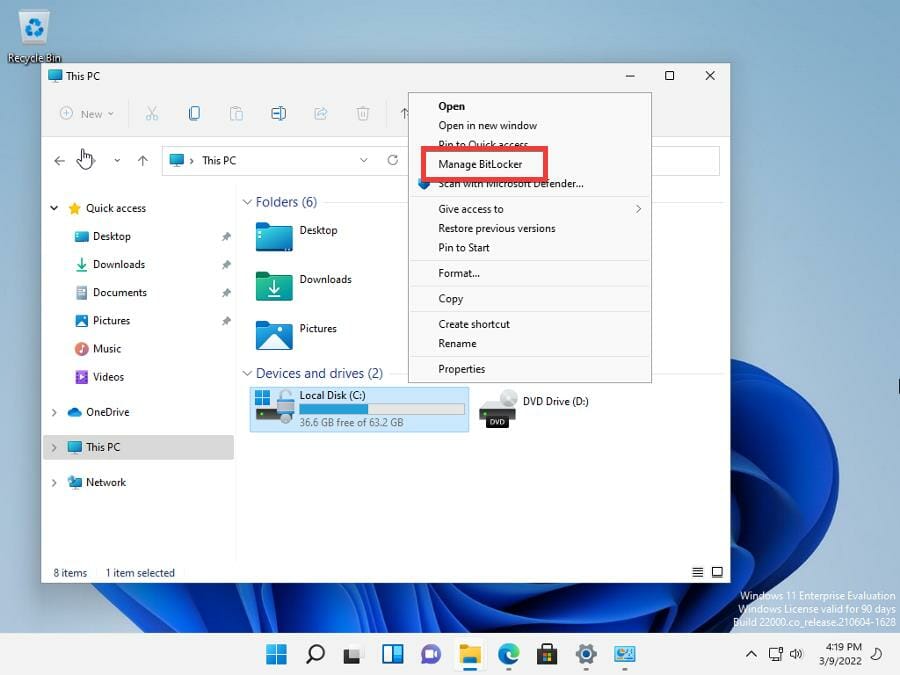
- Turn off Bitlocker or Manage Bitlocker should appear on the new menu. If it doesn’t, click Show more options.
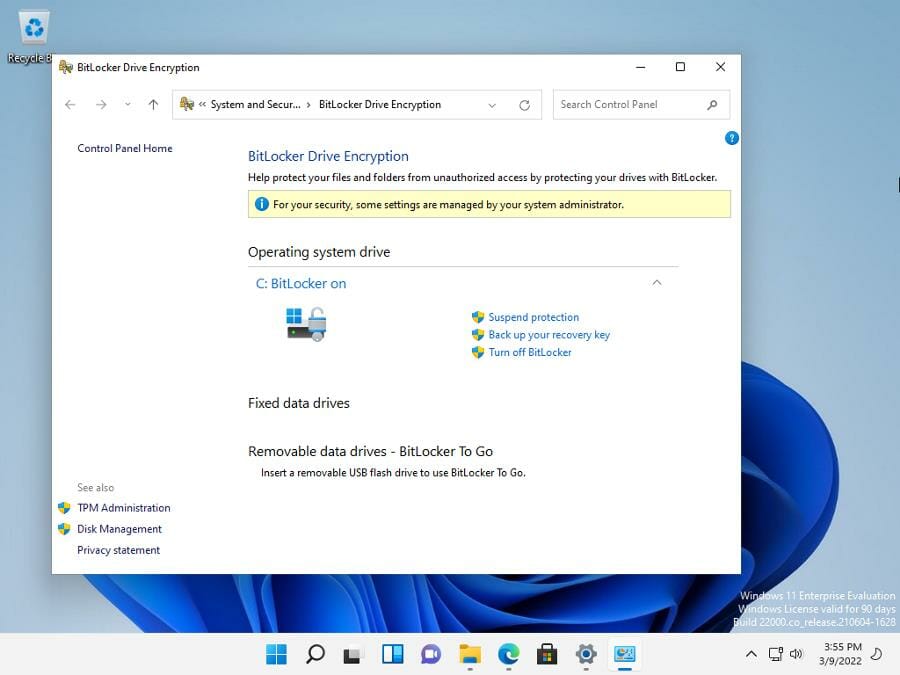
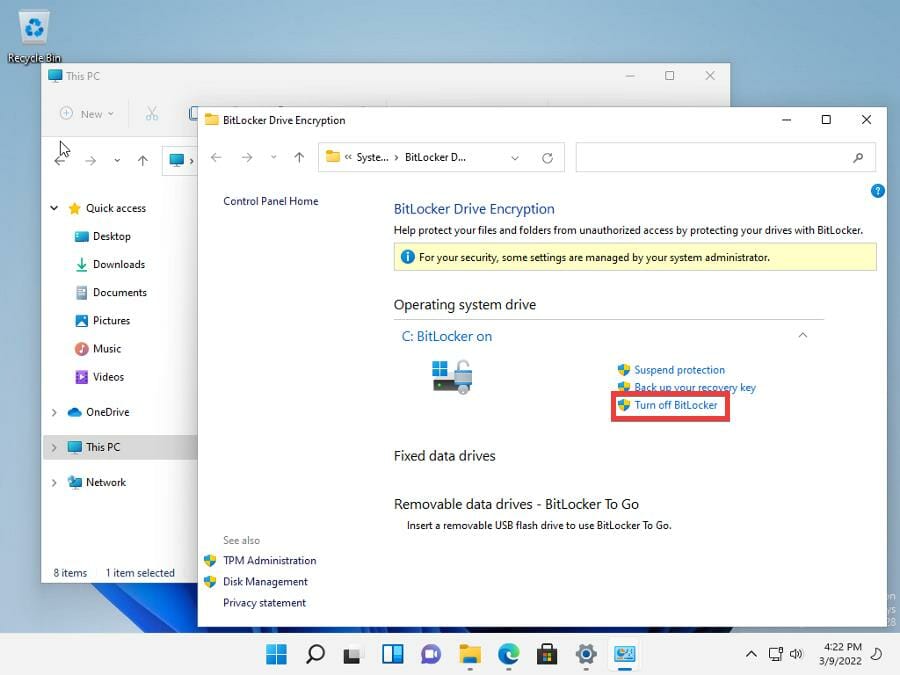
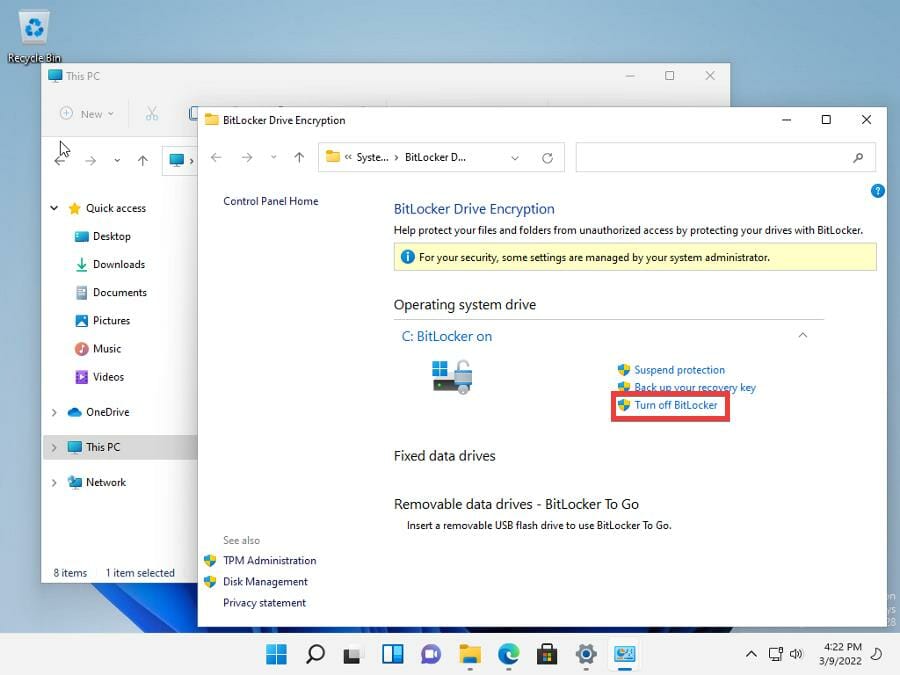
- Click Manage BitLocker to bring up the BitLocker Drive Encyption menu.
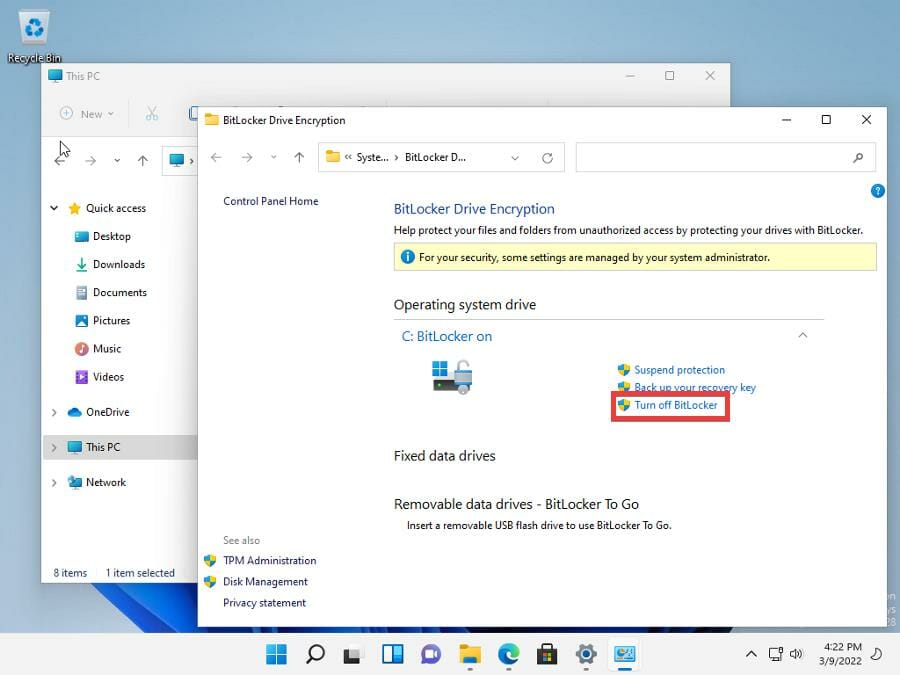
- In this new menu, click Turn off BitLocker.
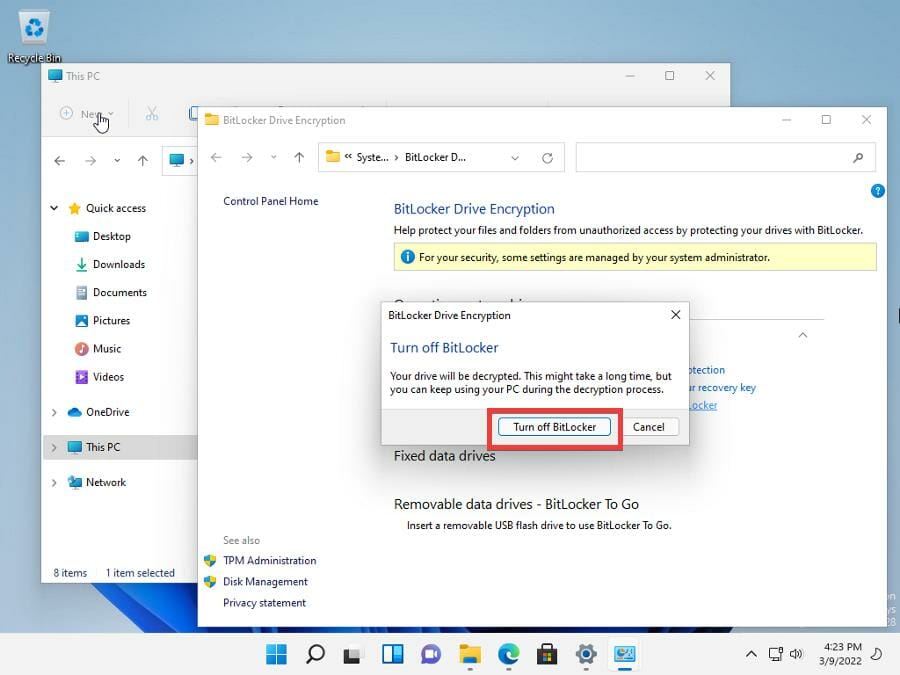
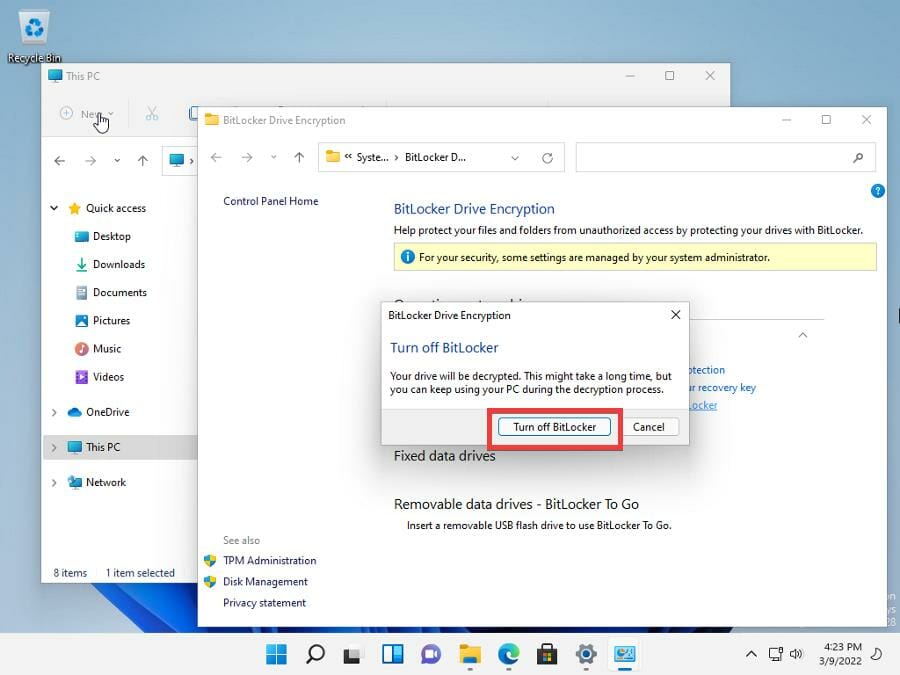
- A small window will appear telling you that the drive will be decrypted. It may take a while depending on the driver’s size.
- Click Turn off BitLocker.
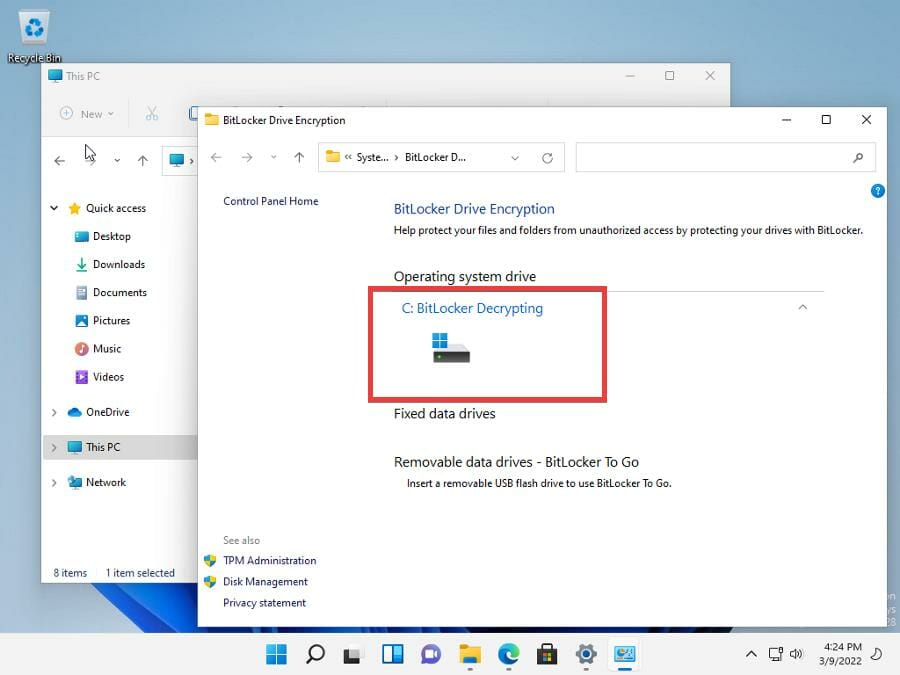
- Give your computer time to decrypt the drive. To give you an idea of how long it took, it took BitLocker 10 minutes to decrypt in this example.
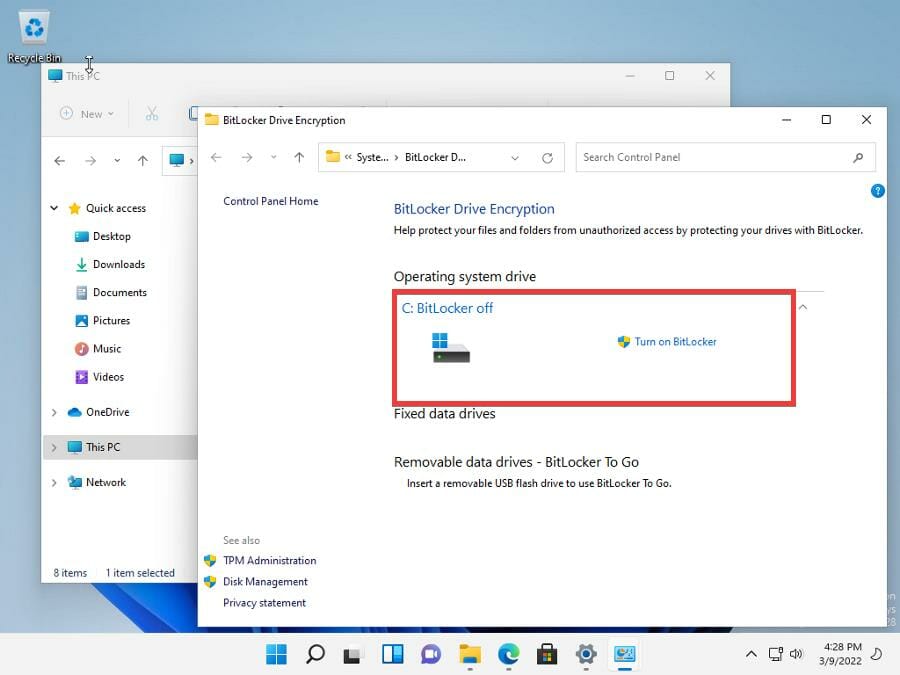
- Once done, the BitLocker Drive Encryption menu will state that the feature has been turned off.
2. Disabling via BitLocker Manager
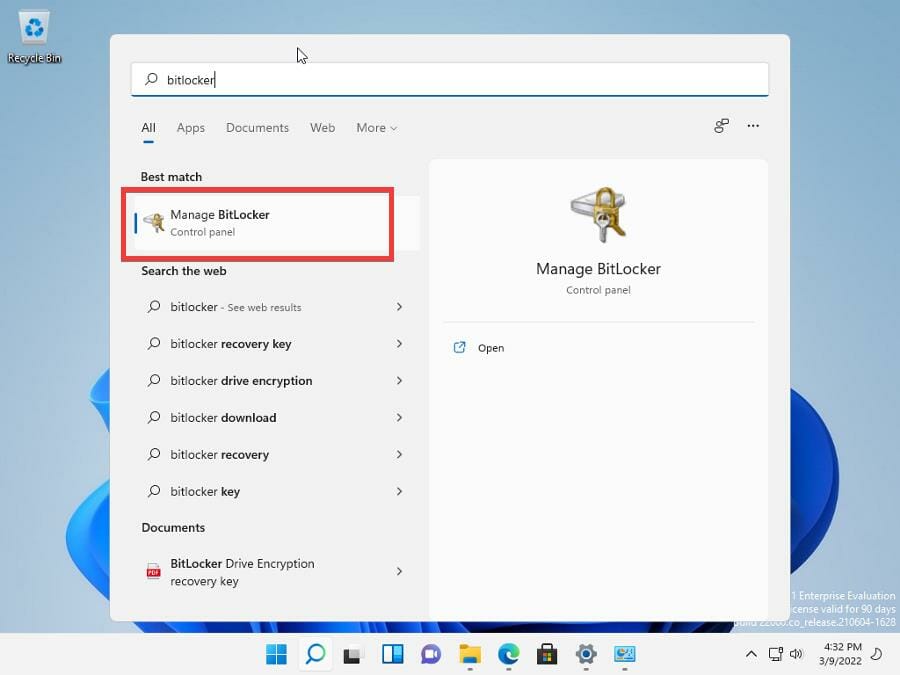
- Click the magnifying glass icon to bring up the Search bar.
- In the Search bar, type in “bitlocker.”
- Click Manage BitLocker when it appears.
- The Manager BitLocker is exactly the same as the BitLocker Drive Encryption menu from the previous section.
- Click Turn off Bitlocker on the right.
- Like before, click the Turn off Bitlocker button and give the app some time to decrypt. Depending on the size, it may take a long time.
3. Disabling through the Settings menu
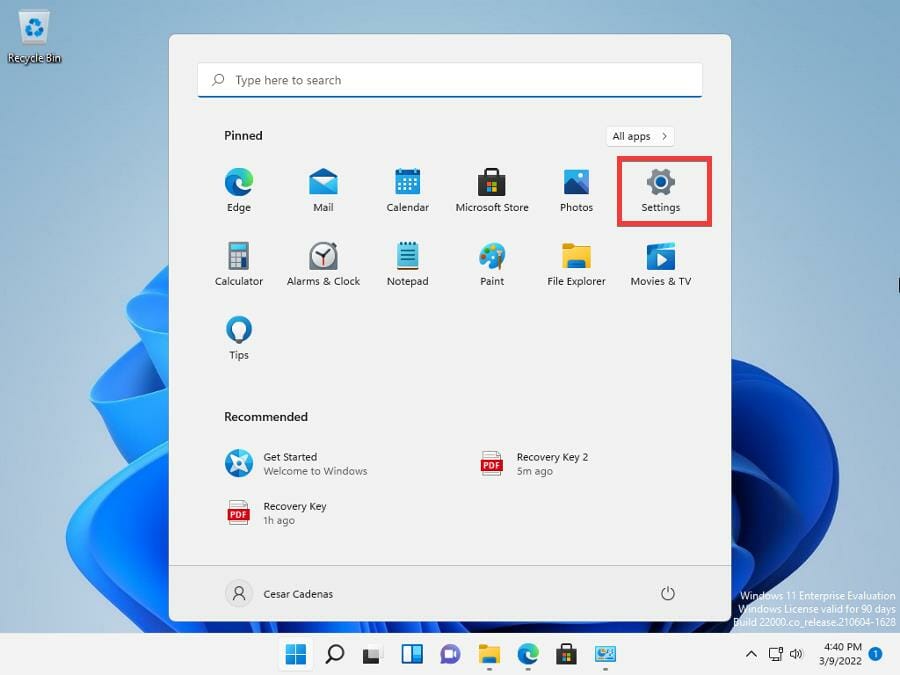
- Click on the Start menu.
- Click the Settings icon.
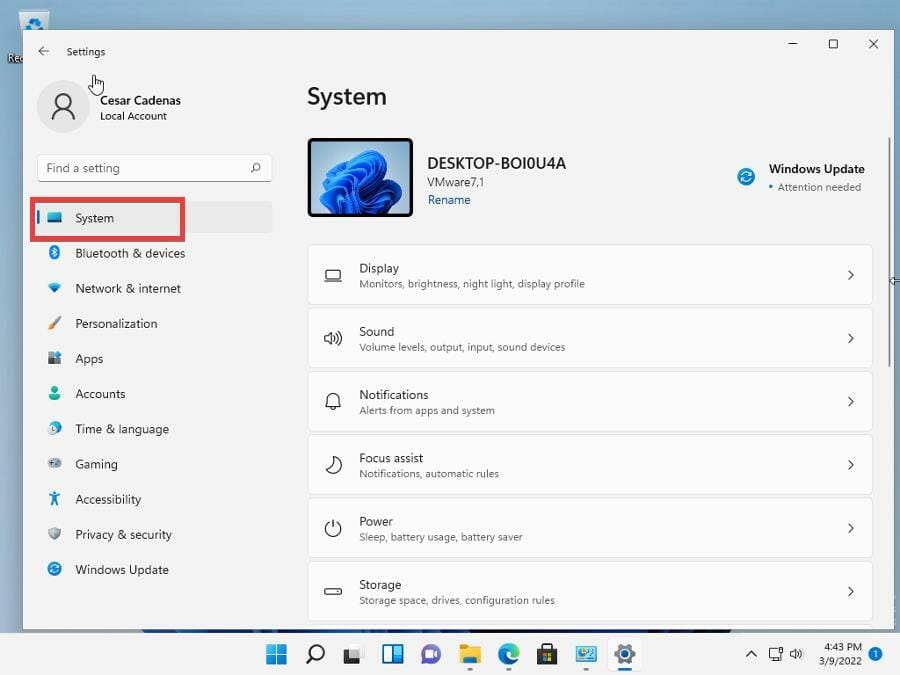
- In the Settings menu, stay on the System tab.
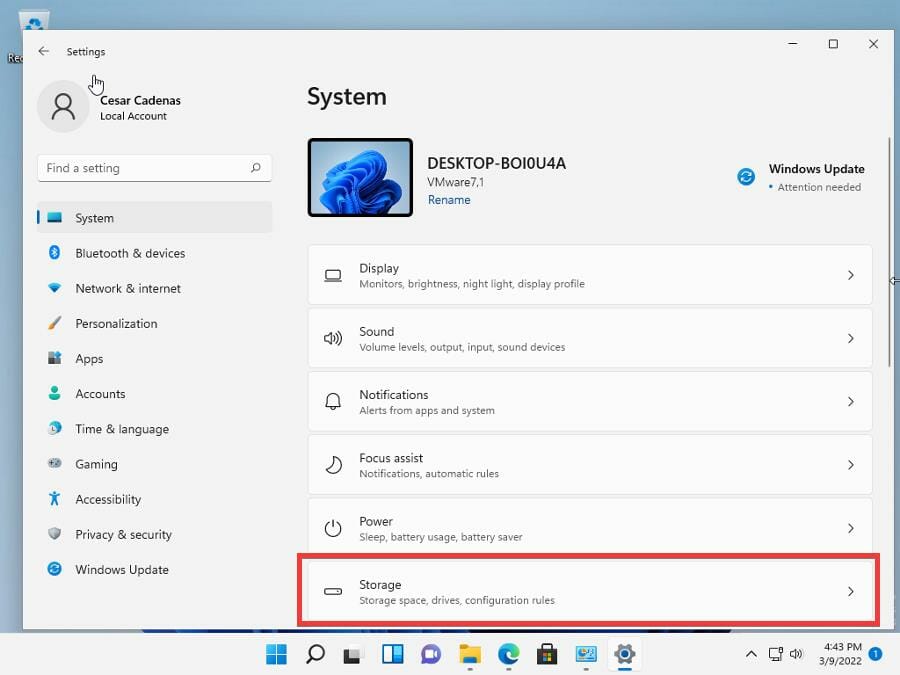
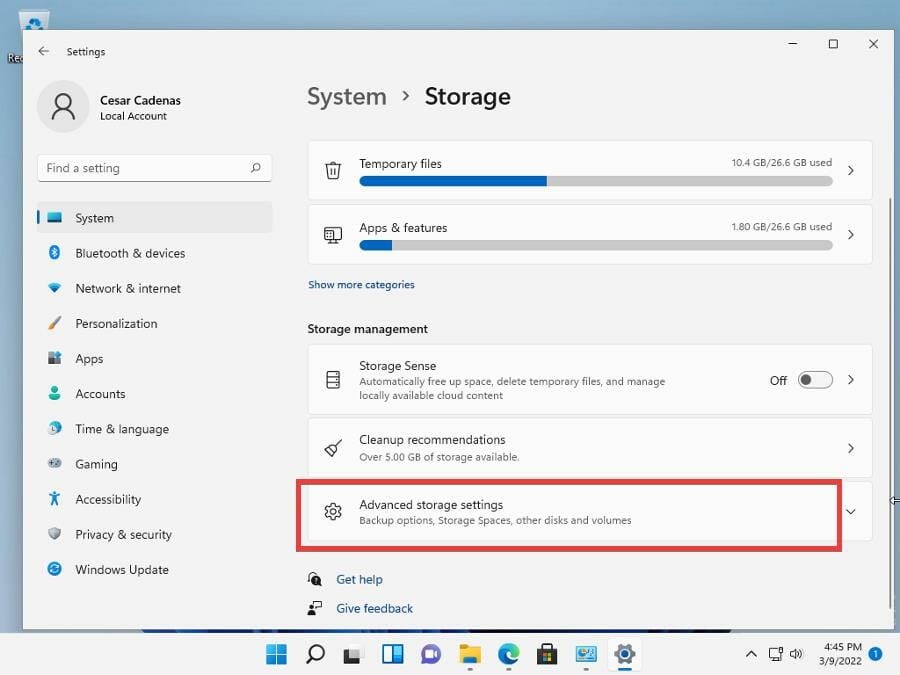
- Click the Storage tab.
- Scroll down and click Advanced storage settings.
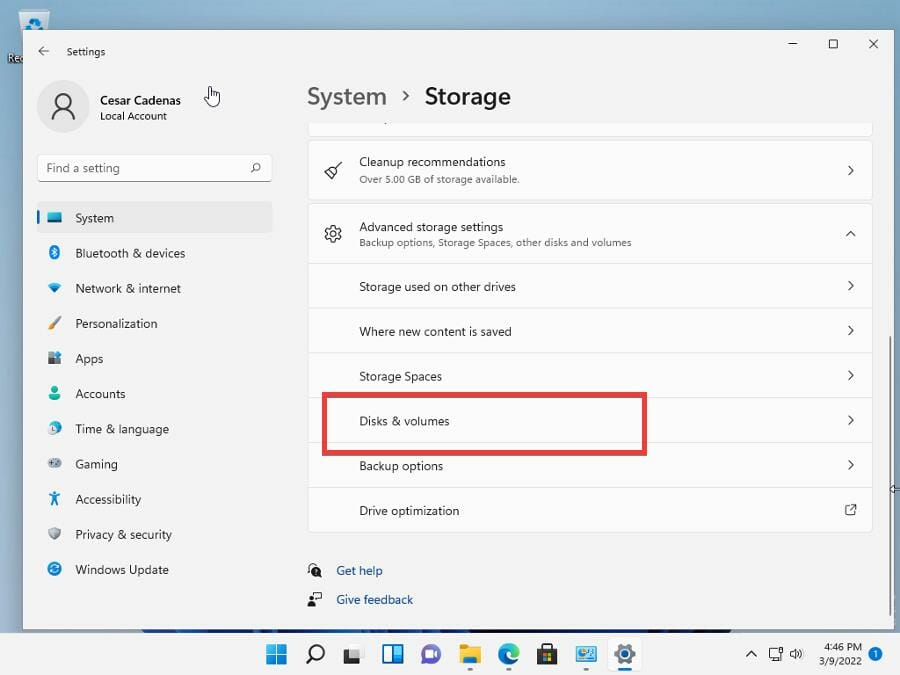
- In this new drop down menu, click Disk & volumes.
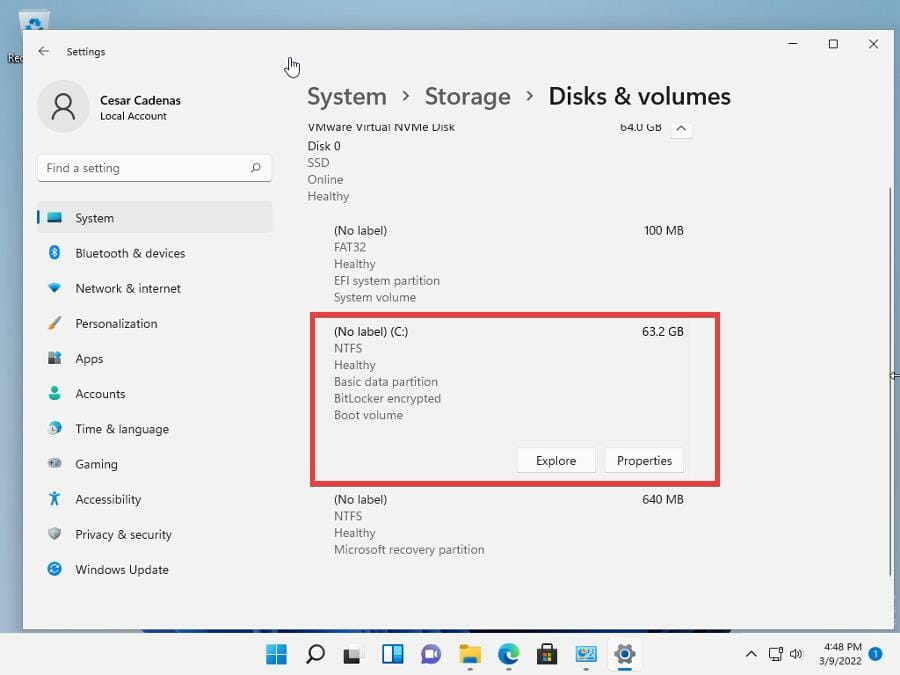
- Click the drive that is encrypted. In this guide, the drive is C:.
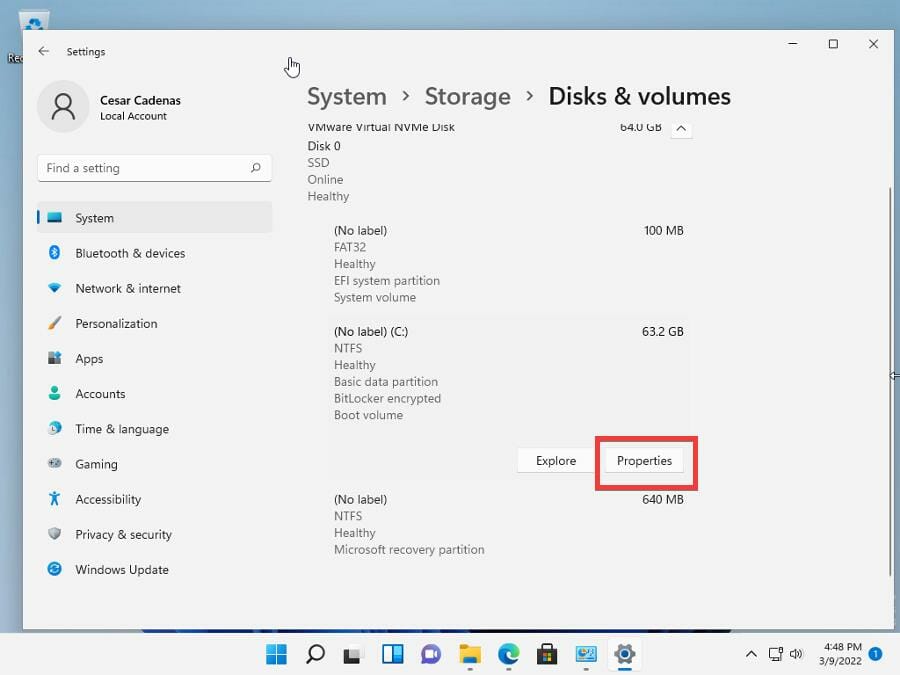
- Click the Properties button.
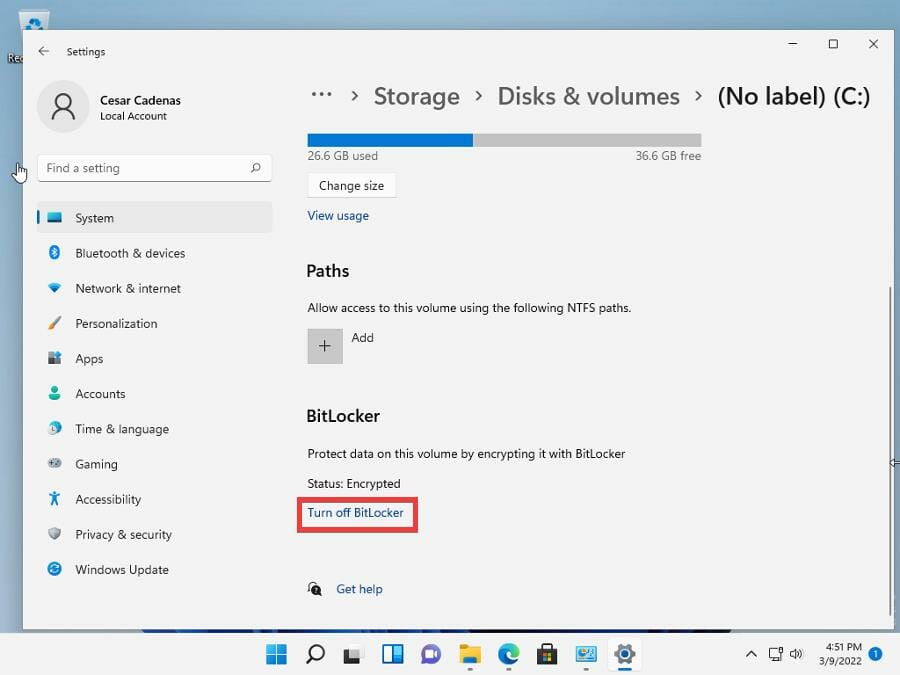
- Scroll down until you see the Bitlocker section.
- Click Turn off BitLocker.
- Clicking that link takes you to the BitLocker Drive Encryption menu.
- Click Turn off BitLocker.
- Click the Turn off BitLocker button in the small window that appears. Give the software some time to decrypt the drive.
4. Disabling via the Command Prompt
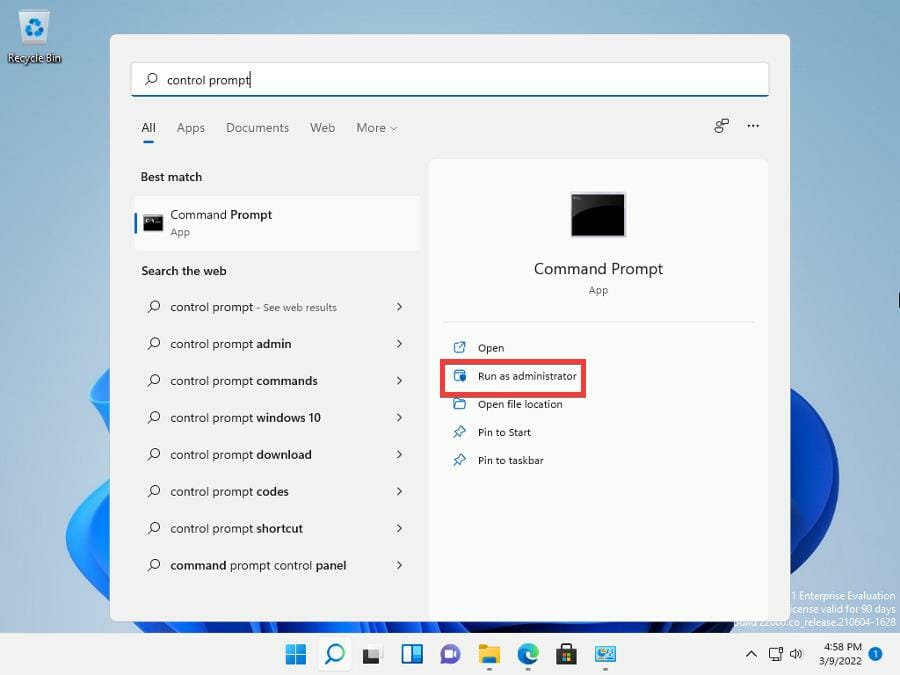
- Bring up the search bar by clicking on the magnifying glass icon.
- Type in “Command Prompt”.
- Click Run as administrator.
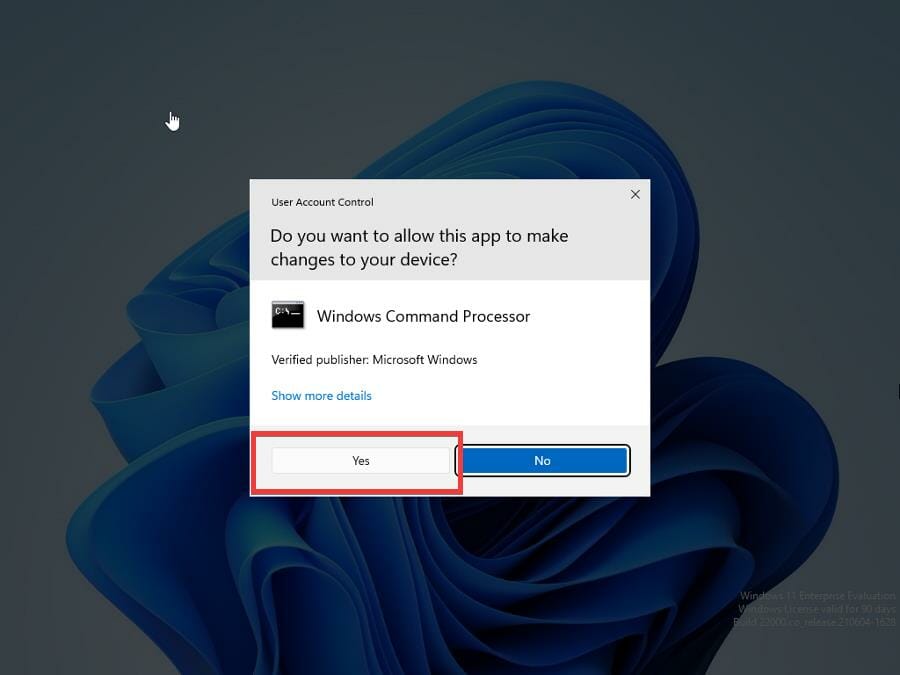
- A window will appear asking if you want to make changes. Select Yes.
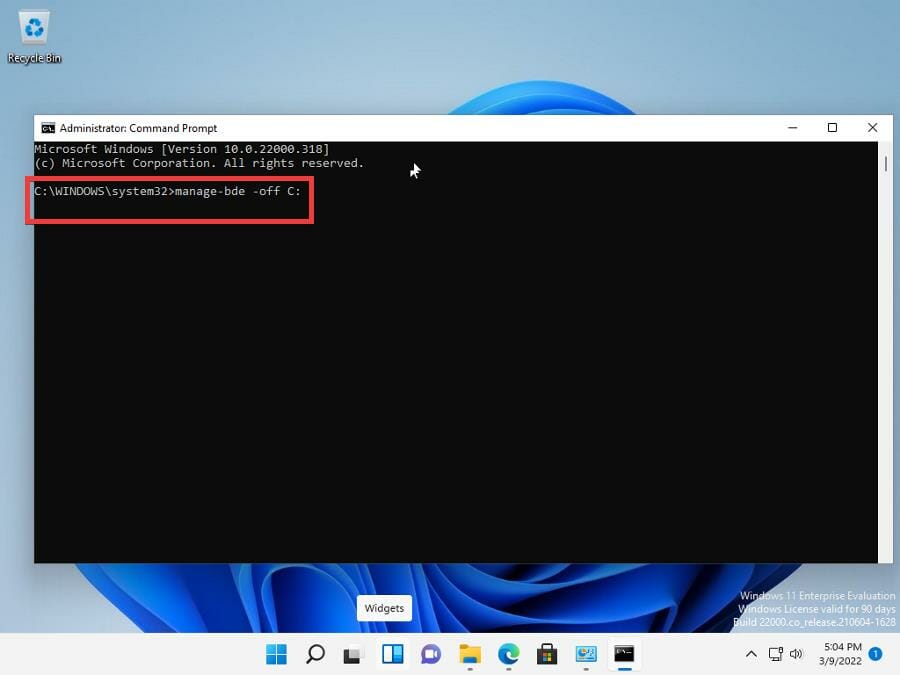
- In the Command Prompt, type in manage-bde -off <drive letter>:. Where it states “<driver letter>”, write in your drive’s letter, which in this example, is ‘C’.
- Hit Enter on your keyboad.
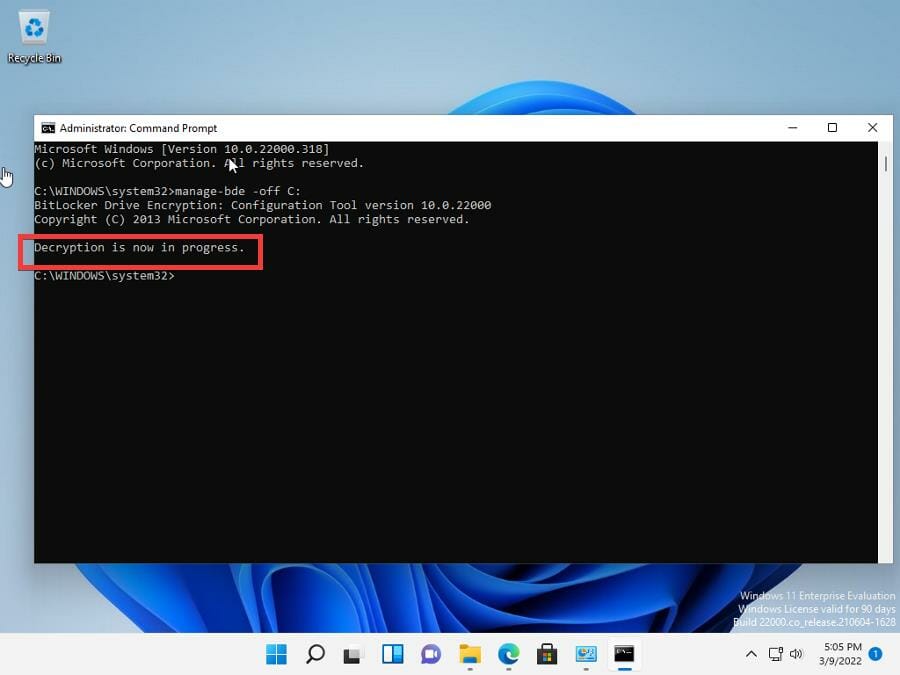
- A message will appear that decryption is underway. This will remove the Bitlocker encryption.
- Like before, give BitLocker some time to decrypt fully. The time it takes to decrypt is contingent on the drive’s total size.
As you decrypt, you will be putting your computer’s drive at risk from online threats. For this, it’s recommended you download some antivirus software to protect you.
⇒ Get ESET HOME Security Essential
5. Disabling via PowerShell
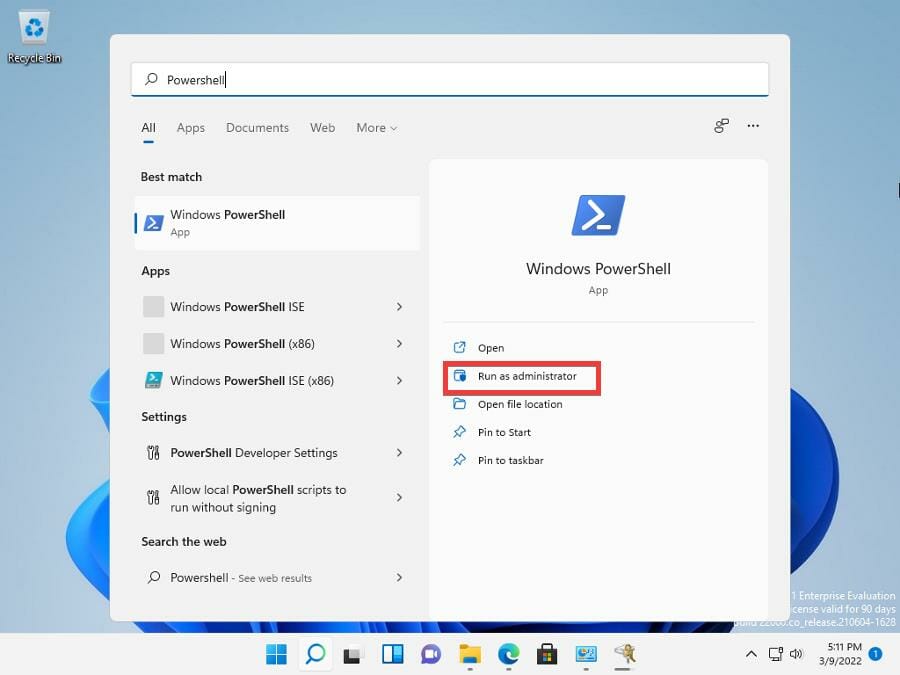
- Bring up the search bar by clicking the magnifying glass icon.
- Type in Windows PowerShell.
- Click Run as administrator.
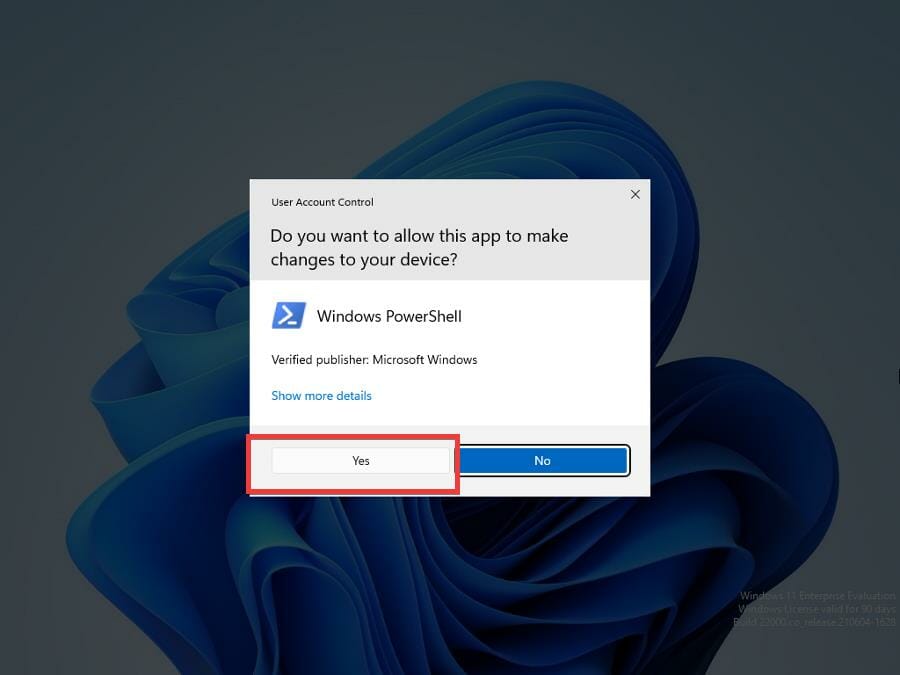
- A window will appear asking you if want to make changes. Select Yes.
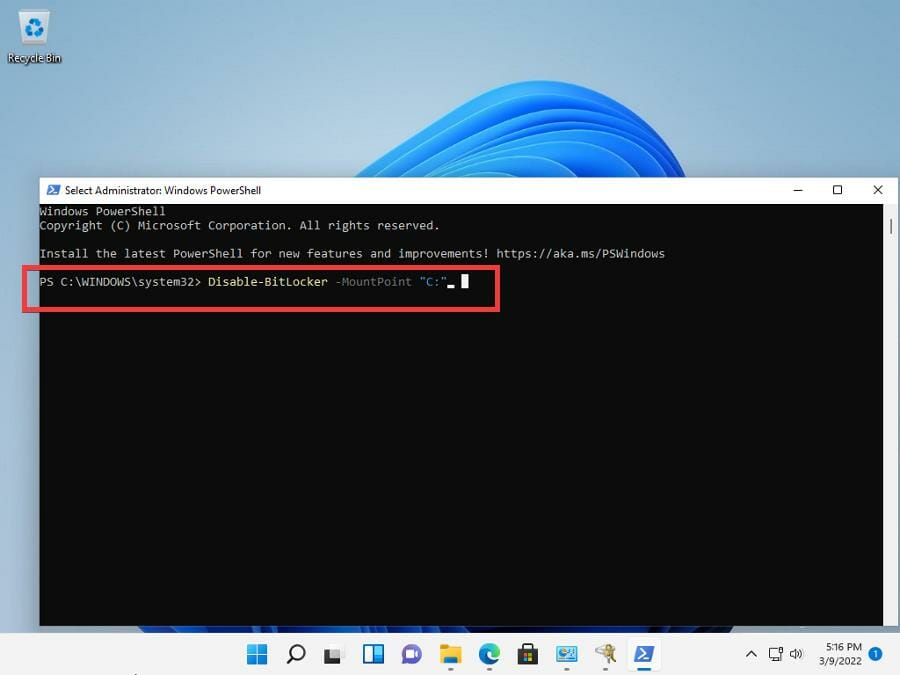
- In PowerShell, type in this command: Disable-BitLocker -MountPoint "<driver letter>:" Just like for the Command Prompt, enter your drive’s letter (‘C’ in this case) in where it says ‘<driver letter>’.
- Hit Enter on your keyboard.
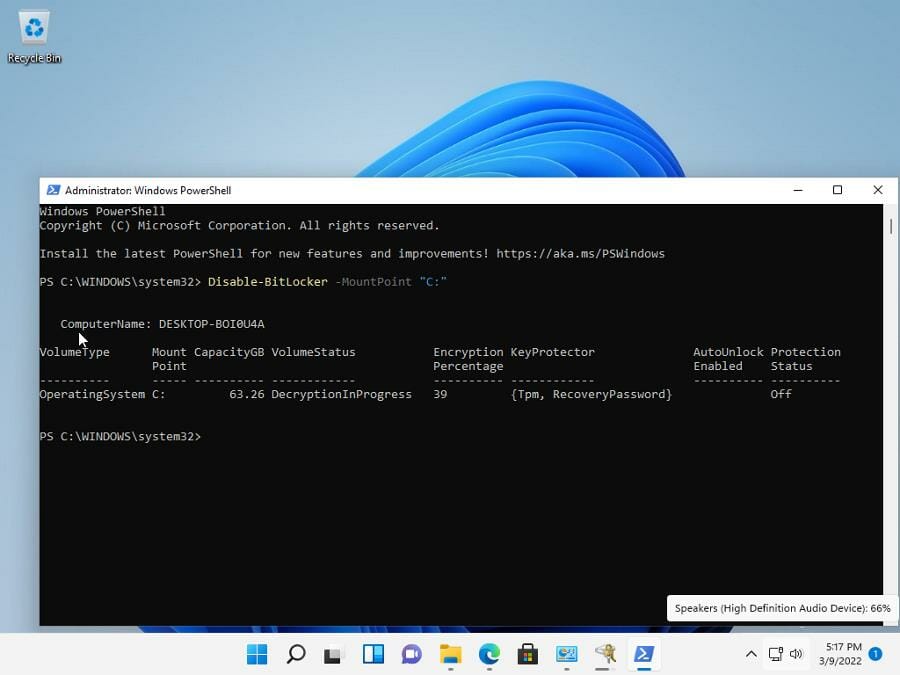
- PowerShell will show that BitLocker decryption is in progress. Give it some time to finish. Depending on the drive’s size, it may take a while.
What can I do if an error appears on BitLocker?
Occasionally, you may run into a few errors when using BitLocker. A common problem that appears is BitLocker failing to decrypt. In some cases, this could be because the software is taking an unusually long time to complete. Other times, the failure could be because your computer is behind on updates.
People have also had issues with BitLocker failing to encrypt. When this happens, you may need to open the Command Prompt and clear out the partition or change the security settings in Windows 11 BIOS. Other fixes involve circumventing TPM on your computer with the Local Group Policy Editor.
Another helpful fix you should know about is how to deal with BitLocker constantly asking for a password. Constantly bugging for the password doesn’t debilitate the app, but it can be pretty annoying to deal with if it happens all the time. You’ll probably have to turn on the auto-lock feature on BitLocker.
Feel free to leave a comment below if you have any questions on other types of Windows 11 software and apps. Also, leave comments about guides that you’d like to see or information on other Windows 11 features or guides like this, for Home versions or others.

