How to Enable or Disable Bitlocker Auto Unlock on Windows 11
Put an end to password prompts with this auto-unlock feature
Key notes
- BitLocker supports automatic unlocking and can be useful for devices not continuously connected to the internet.
- The feature is however limited to newer hardware with the latest version of TPM.
- Keep reading to find out how you can disable or enable auto-unlock for your device.

Enabling BitLocker on a computer is relatively easy. Once enabled, the computer will require you to enter a password or insert an encryption key when you restart the computer. But is this something that we always want?
If it happens occasionally, it’s okay, but if you frequently have to input your password, it can get tiresome. Luckily, you can use Microsoft’s Bitlocker Auto Unlock feature to automatically unlock your PC during startup without entering your password, and here’s how to go about it.
So why enable or disable Bitlocker Auto Unlock? If it’s a personal computer, you do not need to key in your password anytime you boot your PC because it slows down the login process. It also comes in handy if you easily forget your passwords.
On the downside, you introduce security risks because it gives access to unauthorized persons. They don’t have to authenticate their information first and will be able to access anything on your PC.
How do I turn on or off Bitlocker auto unlock on Windows 11?
1. By using the Control Panel
- Hit the Windows key, type Control Panel in the search bar, and click Open.

- Select System and Security, then click on Bitlocker Drive Encryption.

- Find the drive you wish to enable/disable auto-unlock and click on Turn on auto-unlock/Turn off auto-unlock.

Note: This feature requires administrator privileges on each encrypted drive to be set up before using auto-unlock.
2. By using the Command prompt
- Hit the Windows key, type cmd in the search bar, and click Run as administrator.

- Type the following command and hit Enter. Remember to replace F with the actual drive letter you wish to auto-unlock:
manage-bde -autounlock -enable <F>: - To disable, type in this command and hit Enter:
manage-bde -autounlock -disable <F>:
3. By using the PowerShell command
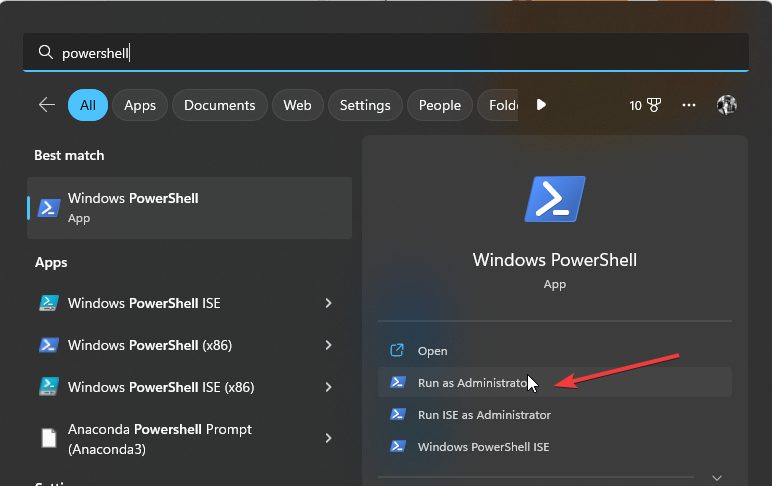
- Hit the Windows key, type PowerShell in the search bar, and click Run as administrator.
- Type in the following command and hit Enter. Remember to replace F with the actual drive letter you wish to auto-unlock:
Enable-BitLockerAutoUnlock -MountPoint "<F>:" - To disable, type in this command and hit Enter:
Disable-BitLockerAutoUnlock -MountPoint "<F>:"
If it’s a removable data drive, once you insert it and are entering in your login credentials, ensure to also check the Automatically unlock on this PC box and repeat the same when you want to disable it.
How does Bitlocker auto-unlock work?
The BitLocker auto-unlock feature allows users to automatically unlock their encrypted drive on a computer where they have logged on at least once before by using the same Microsoft account on the same device.
This allows users to bypass having to enter their PIN or password whenever they want to access their encrypted drive if they use only one device. This feature only works on systems with a Trusted Platform Module (TPM) version 2.0 and above.
As a precaution, we recommend enabling this feature for non-operating system drives and others that do not contain sensitive information.
Hopefully, this article has taught you how to enable or disable Bitlocker Auto Unlock on a Windows 11 device. If the steps seem too cumbersome, perhaps unlocking your BitLocker without a password or recovery key may be of interest to you.
Better yet, you can disable BitLocker altogether if you’ve ascertained there are no risks of unauthorized access to your PC or your hard drive being stolen. And if you have trouble turning off your BitLocker, don’t hesitate to check out our helpful guide.
Be sure to check out our Device Encryption vs BitLocker review to explore the differences.
Have you enabled or disabled the auto-unlock feature on BitLocker? What are your reasons for your stand? We’d love your input on this topic, so share your response in the comment section.
Read our disclosure page to find out how can you help Windows Report sustain the editorial team. Read more


Improve this guide


User forum
0 messages