How To Disable NLA Remotely & Locally? Easy Ways
You can turn it off using the Registry Editor or PowerShell
3 min. read
Updated on
Read our disclosure page to find out how can you help Windows Report sustain the editorial team Read more
Key notes
- It would be best if you disabled it when your Windows won’t let you establish a connection to a remote device due to NLA.
- Here, we will discuss some popular ways to disable it safely on remote or local computers.
NLA (Network Level Authentication) is an authentication tool that prompts to input credentials before accessing a remote computer.
It provides you with extra security while establishing a remote connection. However, if you want to disable NLA, you are at the right place.
Here in this guide, we will discuss some of the easiest ways to disable it in no time. Let’s get started!
How to disable NLA on a remote computer?
Before moving to the actual steps to disable Network Level Authentication, make sure you go through these checks:
- Administrative access to the machine for which you are attempting to disable NLA.
- Connection to the computer remotely or physical access to the machine, depending on whether you are trying to disable NLA remotely or locally.
- A Remote Desktop client is installed on your local machine and the IP address or hostname of the device you are trying to connect to.
- Need to have access to the system’s desktop environment.
- Should know primary Windows navigation and locate and access the relevant settings and options in the Windows operating system.
1. Using the Registry Editor
 Tip
Tip
If anything goes wrong, on Registry Editor, click File, and then Import. Choose this .reg file to restore the registry entries.
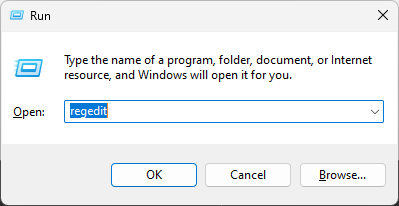
- Press Windows + R to open the Run window.
- Type Regedit and press Ctrl + Shift + Enter to open Registry Editor with admin rights.
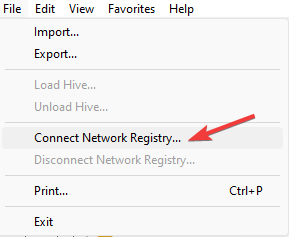
- Go to File, then click Connect Network Registry.
- Enter the remote computer name and click OK.
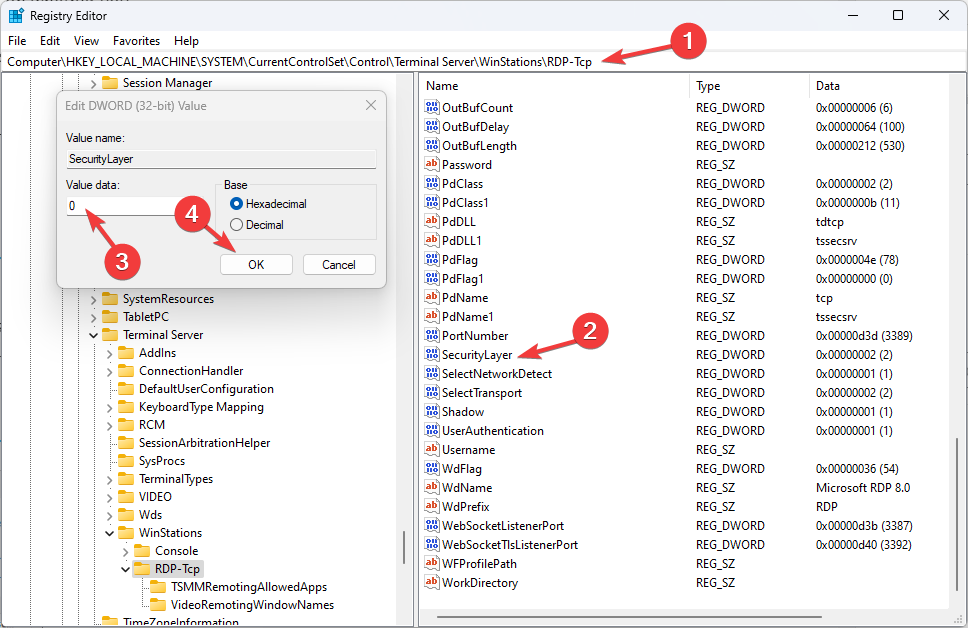
- Follow this path:
HKEY_LOCAL_MACHINE\SYSTEM\CurrentControlSet\Control\Terminal Server\WinStations\RDP-Tcp - Go to the DWORD SecurityLayer, double-click on it, and change the Value data to 0.
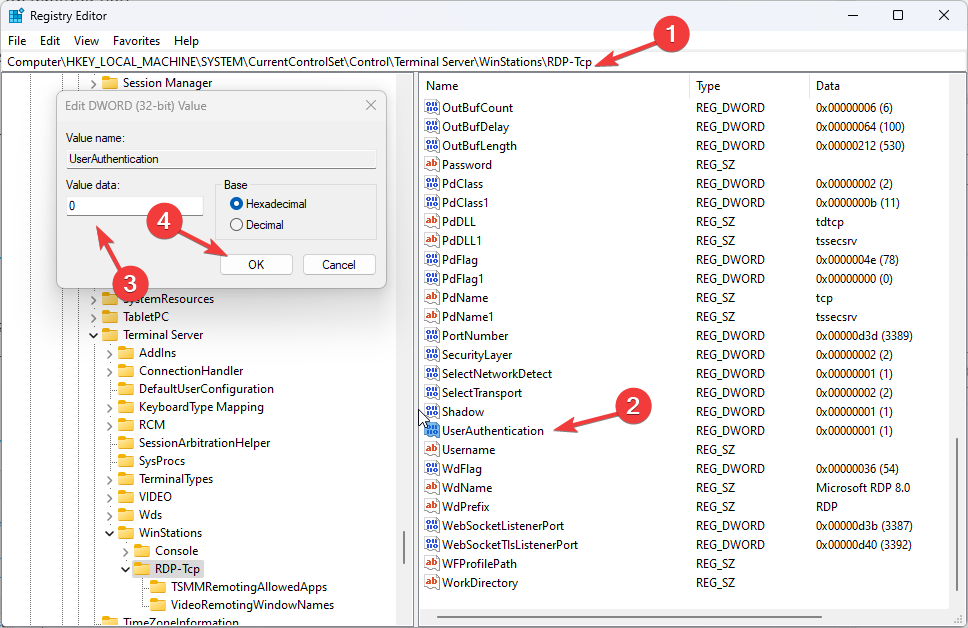
- Also, locate and double-click UserAuthentication and change the Value data to 0.
2. Use the Windows PowerShell
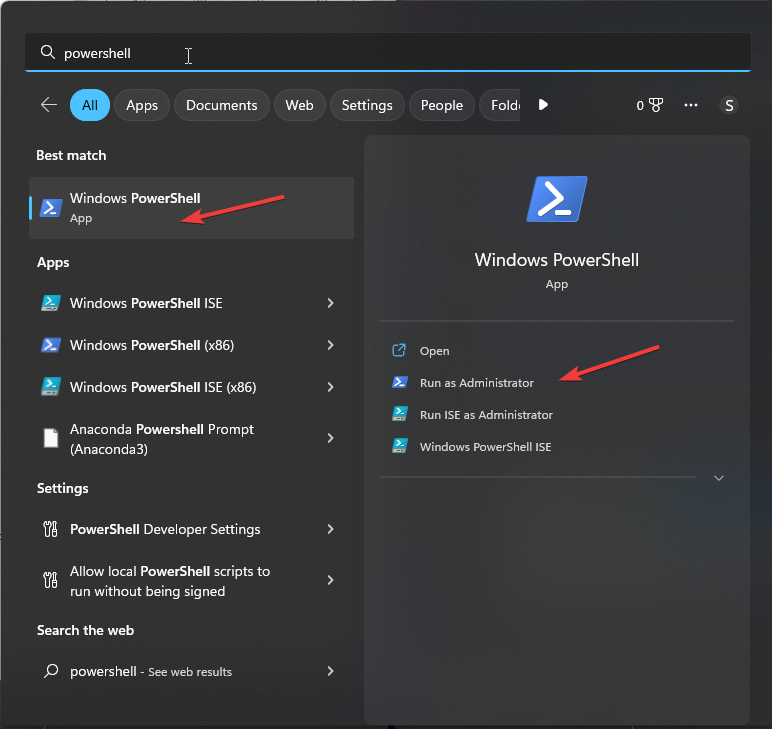
- Press the Windows key, type PowerShell, and click Run as administrator.
- Copy and paste the following command and replace the Target-Machine-Name with your device’s name, and press Enter:
$TargetServer = "Server_with_NLA_Enabled"(Get-WmiObject -class "Win32_TSGeneralSetting" -Namespace root\cimv2\terminalservices -ComputerName $TargetServer -Filter "TerminalName='RDP-tcp'").SetUserAuthenticationRequired(0) - Once the process is complete, restart the computer.
How do I turn off NLA on the local computer?
1. Use the Group Policy Editor
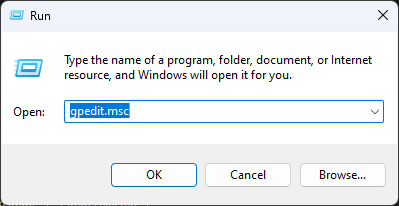
- Press Windows + R to open the Run box.
- Type gpedit.msc and press Enter to open the Group Policy Management Console.
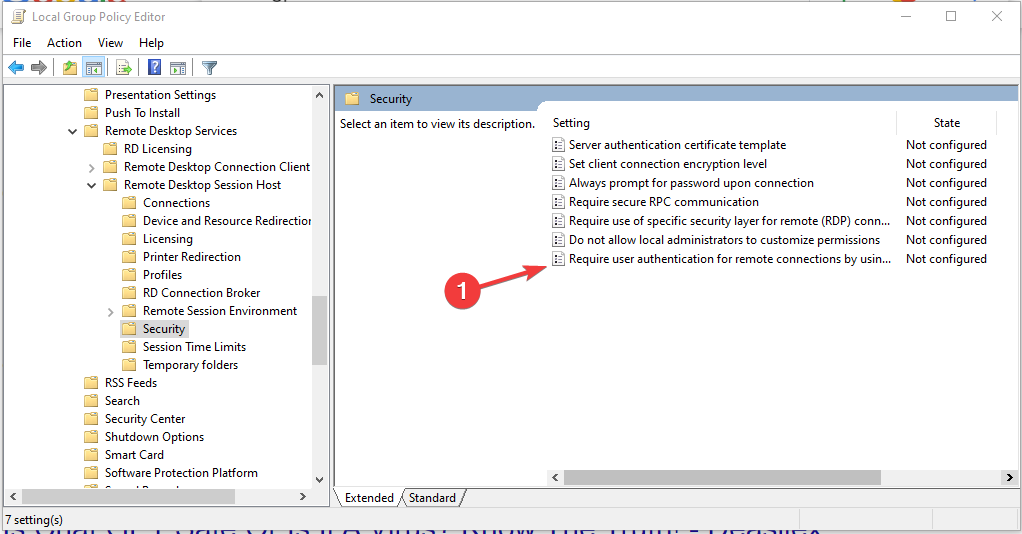
- Follow this path:
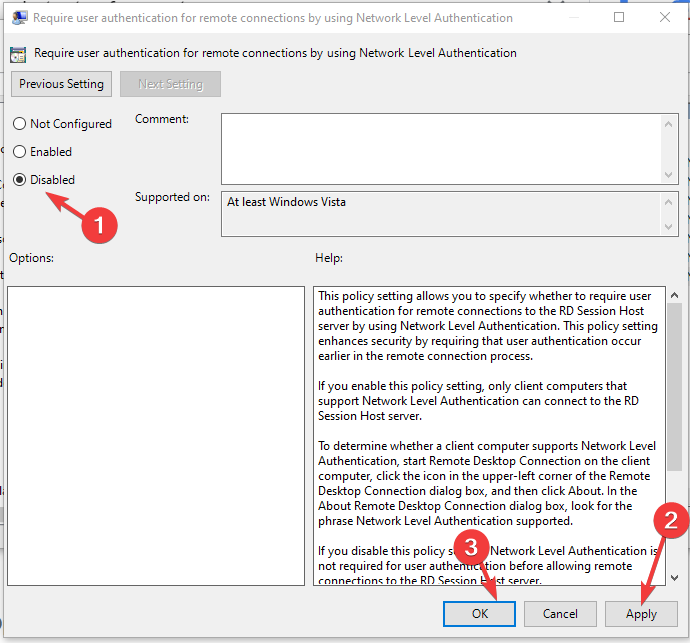
Computer Configuration\Administrative Templates\Windows Components\Remote Desktop Services\Remote Desktop Session Host\Security - Double-click Require user authentication for remote connections by using Network Level Authentication and place a checkmark next to Disabled.
- Click Apply and OK and restart your PC.
2. Use the PowerShell
- Press the Windows key, type PowerShell, and click Run as administrator.
- Copy and paste the following command and replace the Target-Machine-Name with your device’s name, and press Enter:
$TargetMachine = “Target-Machine-Name”(Get-WmiObject -class “Win32_TSGeneralSetting” -Namespace root\cimv2\terminalservices -ComputerName $TargetMachine -Filter “TerminalName=’RDP-tcp'”).SetUserAuthenticationRequired(0) - Please let the process get complete and restart your computer.
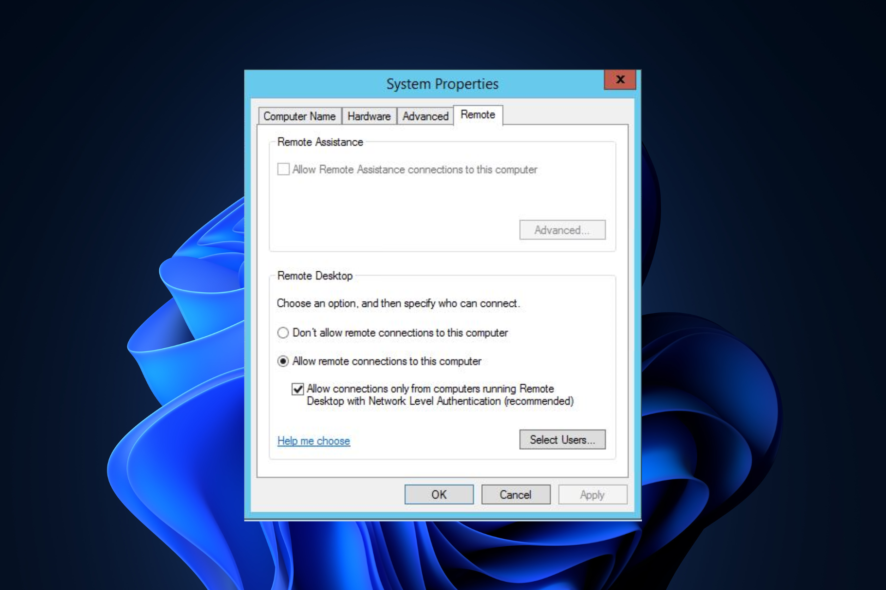
3. Use the System Properties
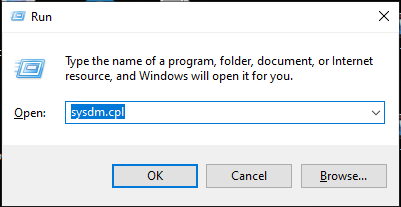
- Press Windows + R to open the Run window.
- Type sysdm.cpl and press Enter to open System Properties.
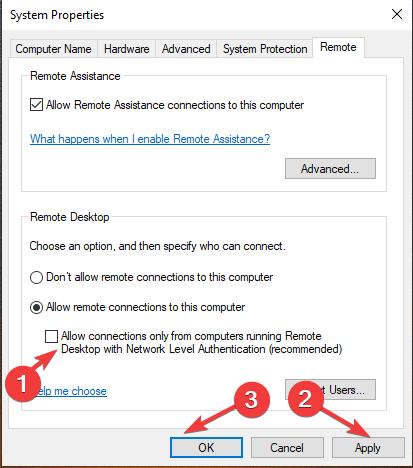
- Switch to the Remote tab, and remove the checkmark next to Allow connections only from computers running Remote Desktop with Network Level Authentication (recommended).
- Click Apply and OK.
So, these are methods that you can follow to disable NLA remotely and locally. Try them and let us know which way worked for you in the comments below.

