Can't Disable Palmcheck in Windows 11? Do This
Palmcheck sensitivity too high? Adjust it downwards

The Palmcheck feature in Windows 11 is designed to prevent accidental mouse clicks or taps when in tablet mode but it can also be very annoying hence the need to disable it.
We discovered users had trouble trying to turn it off so we compiled this report to help you through it.
How do I disable Palmcheck in Windows 11?
Begin with the following preliminary checks before any technical troubleshooting:
- Make sure you have administrative rights over your computer.
- Ensure your OS is up-to-date.
 NOTE
NOTE
1. Adjust the Touchpad sensitivity
- Hit the Windows key and click on Settings.
- Select Bluetooth and devices on the left then click on Touchpad on the right.

- Click on Taps and from the drop-down menu, change to High sensitivity or Most sensitive.

Depending on how the Palmcheck feature is behaving, adjusting its sensitivity levels can help manage the frequency at which the taps happen and hopefully with fewer interruptions.
2. Update your Touchpad drivers
- Press Windows + R to open Run, type devmgmt.msc in the text field, and hit Enter.
- Double-click on Mice and other pointing devices, right-click on the touchpad device and select Update driver.
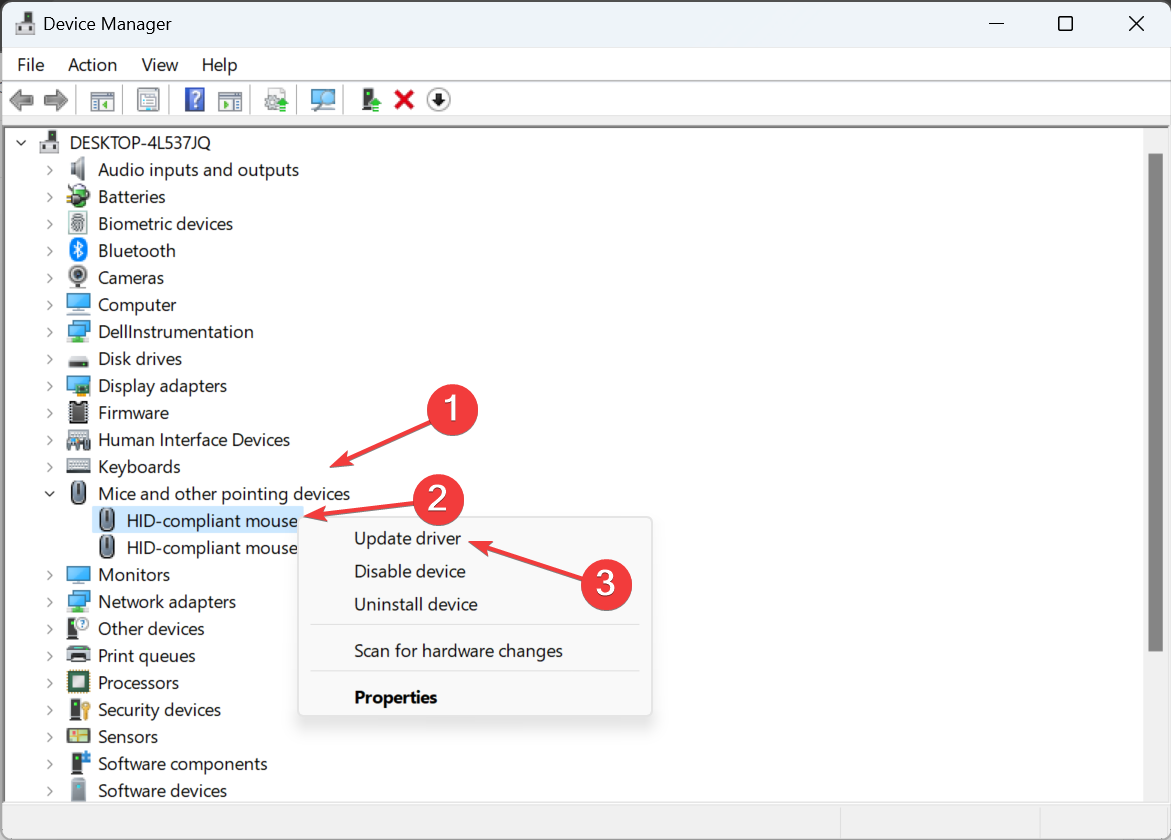
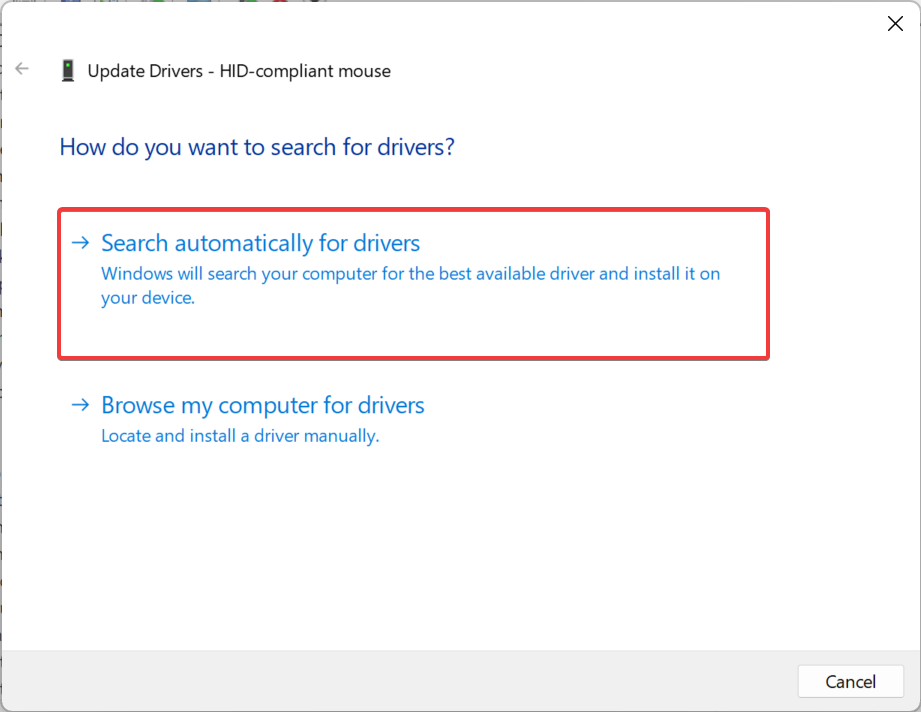
- Click on Search automatically for drivers and wait for Windows to install the best drivers available locally.
- Finally, restart the computer.
You may also be unable to locate the Touchpad drivers in Device Manager but with our expert article, they shouldn’t be too hard to find.
- Download and install Outbyte Driver Updater.
- Launch the software.
- Wait for the app to detect all faulty drivers.

- Now, it will show you all the malfunctioning drivers listed to select the ones to Update or Ignore.
- Click on Update & Apply Selected to download and install the newest versions.
- Restart your PC to ensure the applied changes.

Outbyte Driver Updater
Secure your Windows PC with Outbyte from various errors caused by problematic drivers.3. Reinstall your Touchpad drivers
- Press the Windows key, type Device Manager, and click Open.
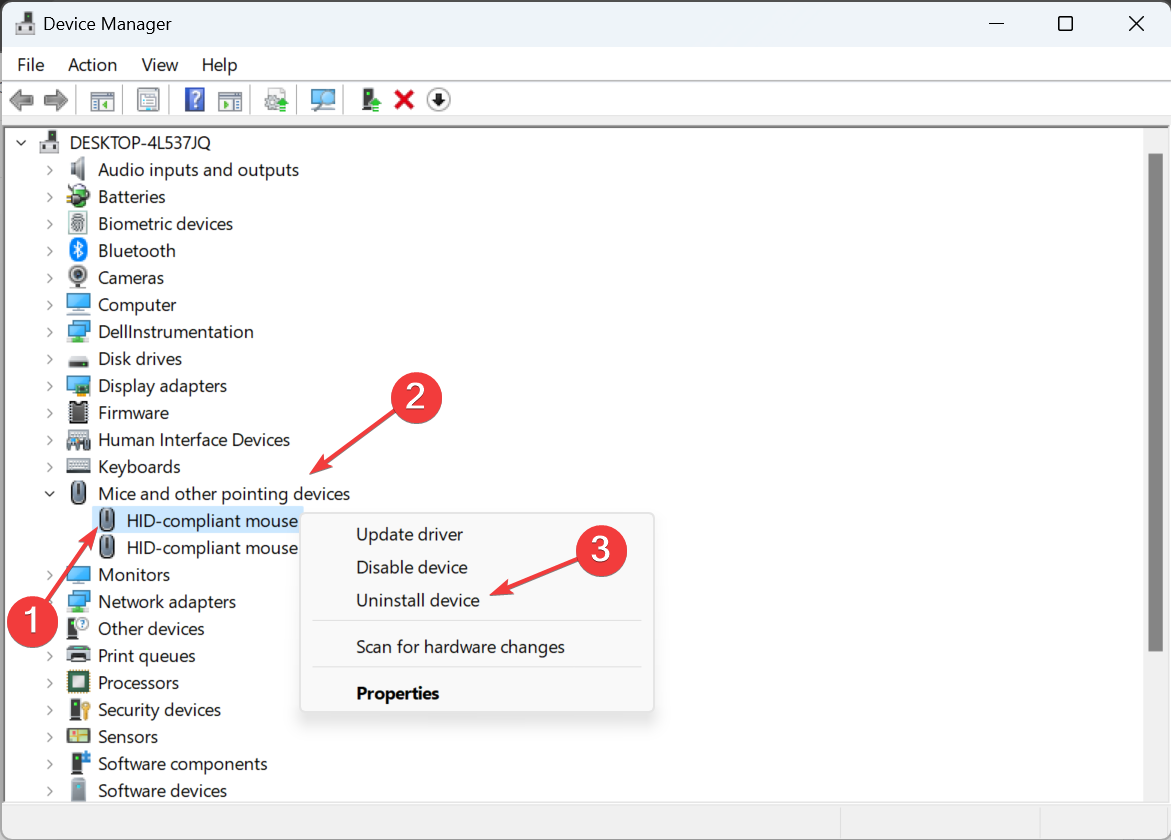
- Expand the Mice and other pointing devices entry, right-click on the touchpad, and select Uninstall device.
- Now, tick the checkbox for Attempt to remove the driver for this device if available, and click Uninstall.
- Once done, restart the computer, and Windows will automatically install a fresh copy.
4 Disable the Registry keys
4.1 Disable by Manufacturer
- Make a backup of your Registry or create a restore point to cushion your device from irrecoverable damage.
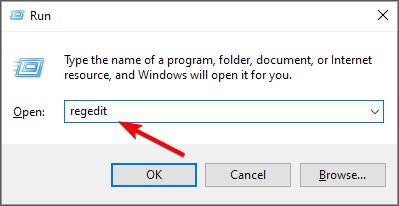
- Hit the Windows + R keys to open the Run command.
- Type regedit in the dialog box and hit Enter to open the Registry Editor.
- Navigate to the following location: (The path may differ slightly depending on your device’s manufacturer)
Computer\HKEY_CURRENT_USER\Software\Elantech\OtherSetting - On the right-hand pane, find DisableWhenType_Enable, double-click on it, and type 1 in the Value data entry.
- Restart your PC and see if Palmcheck has been disabled.
4.2 Disable AAP key
- Hit the Windows + R keys to open the Run command.
- Type regedit in the dialog box and hit Enter to open the Registry Editor.
- Navigate to the following location:
HKEY_LOCAL_MACHINE\Software\Microsoft\Windows\CurrentVersion\PrecisionTouchPad - On the right-hand pane, find AAPThreshold, double-click on it, and type 0 in the Value data entry.
- Restart your PC.
AAP stands for Accidental Activation Prevention which is a feature that suppresses accidental taps within a given window period.
This should be a last resort if all other steps fail. Consequently, you can always adjust the touchpad sensitivity settings to moderate if you still need to use the feature.
However, if it’s causing issues such as mouse lag, or the Touchpad keeps freezing, it’s best to get rid of it altogether. If your Synaptics Touchpad driver scroll is not working, PalmCheck is likely responsible, so consider disabling it.
That’s all we had for this article but we’re keen to hear any other solutions you may have. Drop us a comment down below with any additional solutions.
Read our disclosure page to find out how can you help Windows Report sustain the editorial team. Read more


Improve this guide


User forum
0 messages