How to Disable Touchpad when Mouse is Connected in Windows
The touchpad can cause your mouse to malfunction
Key notes
- Almost all laptops have a touchpad as their input device.
- However, many users tend to use a mouse on their laptop because using a mouse is much simpler than using a touchpad.
- You can set the touchpad to turn off from Settings, but if this doesn’t work, you can modify the registry as a last resort.

Almost all laptops have a touchpad as their input device, but many people use a mouse on their laptops because using a mouse is much simpler than using a touchpad.
Many users use a mouse on their laptop because it’s more comfortable, but certain problems can occur when a mouse is connected to a laptop.
In many cases, your touchpad will remain enabled, so while using touchpad gestures, you might accidentally touch it and move your pointer while you’re typing. This is a minor inconvenience, but several ways exist to fix this problem.
How do I turn off the touchpad when a mouse is connected in Windows 10?
1. Via Settings
1. Press Windows Key + I on your keyboard to open the Settings app.
2. Go to Devices.

3. Navigate to Mouse & touchpad. Here you will find the Leave touchpad on when a mouse is connected option. It should be checked by default.
4. Uncheck the box to turn this option off.
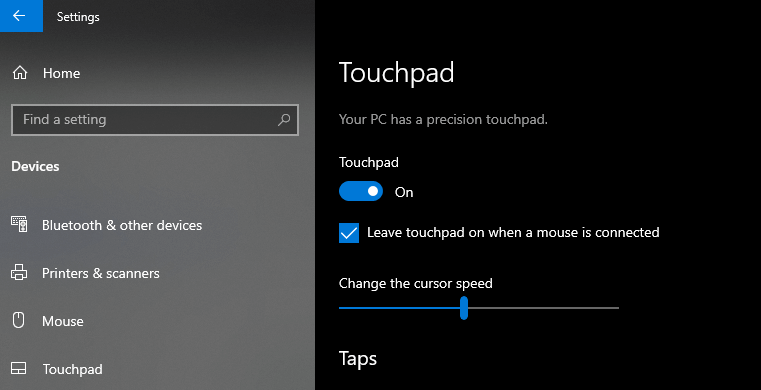
5. Now the touchpad will be disabled every time you have a mouse connected.
You can easily use the built-in Settings menu on your PC to disable the touchpad every time you have a mouse connected.
The touchpad is enabled by default, but you can change this setting from the Mouse & touchpad tab.
2. Check Mouse settings
- Press Windows Key + X to open the Win + X menu and select Control Panel from the list.
- When Control Panel opens, go to Hardware and Sound section and select Mouse.

- When the Mouse settings window opens, you should see the ELAN or Device Settings tab. Switch to it.
- Locate Disable internal pointing device when external USB pointing device is attached option and enable it.
- Click Apply and OK to save changes.
One way to fix a touchpad problem on Windows 10 is to change your mouse settings. Sometimes touchpad drivers add their own settings to mouse settings, so you should be able to disable the touchpad right from there.
3. Edit your registry
This solution works with Synaptics touchpads, so if your laptop has one, you might want to try it.
By performing this solution you should be able to see the option to disable the touchpad when you connect a mouse in your Mouse settings.
Keep in mind that modifying your registry can lead to system instability, therefore we suggest that you create a backup of your registry in case anything goes wrong. To make changes to your registry, do the following:
- Press Windows Key + R and enter regedit. Press Enter or click OK.

- When Registry Editor opens, go to the HKEY_LOCAL_MACHINESOFTWARESynapticsSynTPEnh key in the left pane.
- In the right pane, right-click the empty space and choose New > DWORD (32-bit Value).

- Enter DisableIntPDFeature as the name of the new DWORD and double click it to open its properties.
- Select the Hexadecimal option and change the Value data to 33. Click OK.
- Close Registry Editor and restart your PC.
After making these changes in the registry, you should see the option to disable your touchpad in Mouse settings.
4. Install the latest drivers
Sometimes, the option to disable the touchpad when the mouse is connected isn’t available unless you have the latest drivers.
To fix this problem, simply visit your laptop manufacturer’s website and download the latest drivers touchpad drivers for your laptop.
After downloading the latest drivers, uninstall your current driver by following these steps:
- Press Windows Key + X and select Device Manager from the list.

- When Device Manager opens, locate your Touchpad driver, right-click it and choose Uninstall.

- If available, select Delete the driver software for this device and click OK.
- After the driver is removed, restart your PC.
- When your PC restarts, install the latest touchpad driver and check if that fixes the problem.
4.1 Update drivers automatically
If you don’t want to install the touchpad drivers yourself, there’s a great tool that will do that for you.
Using specialized software will help you update drivers automatically and prevent PC damage caused by installing the wrong driver versions. After several tests, our team concluded this is the best automated solution.
It works with all versions of Windows and makes upgrading drivers a breeze because PC HelpSoft Driver Updater may be set to detect outdated drivers automatically.
⇒ Get PC HelpSoft Driver Updater
5. Disable the touchpad with the Smart Gesture app
If you use an ASUS laptop, you can disable your touchpad through the Smart Gesture app. To do that, follow these simple steps:
- Locate the Smart Gesture app and run it. Smart Gesture application should be available from your Taskbar, so you can easily access it from there.
- Go to the Mouse Detection tab and check Disable Touchpad when mouse is plugged in option.
- Save changes and check if the problem is resolved.
6. Use the keyboard shortcut
If you can’t find the option to automatically disable the touchpad, you could try using a keyboard shortcut to disable it manually. For ASUS laptops, the keyboard shortcut should be FN + F9, but it might be different on your laptop. Therefore, you might want to check your laptop’s instruction manual.
7. Tweak the Registry
Some users reported that there’s no option to disable their touchpad in the mouse settings, but you can circumvent this problem by editing your registry. To do that, follow these steps:
- Open Registry Editor and go to HKEY_CURRENT_USER > Software > Elantech > Othersetting > DisableWhenDetectUSBMouse key in the left pane.
- Change the value from 0 to 1 and close Registry Editor.
After making those changes, your touchpad will now be disabled every time you connect a mouse to your laptop. Even though this option isn’t available, you can still enable it by following these steps. We have to mention that this solution applies only if you’re using the ELAN touchpad.
8. Reinstall ASUS Smart Gesture
According to users, you can fix this problem simply by reinstalling the ASUS Smart Gesture software. First, you need to remove the software from your PC. Then, navigate to the ASUS website, download the latest version of ASUS Smart Gesture, and install it.
After that, you should be able to turn off the touchpad without problems when a mouse is detected. Some users also suggest downloading and installing the ATK package, so you might want to try that as well.
Having the touchpad and mouse enabled simultaneously can be problematic, but you can easily disable the touchpad when you connect your mouse simply by using one of our solutions.
Read our disclosure page to find out how can you help Windows Report sustain the editorial team. Read more


Improve this guide


User forum
0 messages