Turn Off UAC For a Specific Program on Windows 11 [How to]
Disabling UAC for a single application isn't simple
Key notes
- By default, you can’t disable UAC for a specific program on Windows 11.
- You can circumvent this limitation by using Task Scheduler on your PC.

The UAC feature can be useful, but many users wonder if it can turn off UAC for a specific program on Windows 11.
While this is possible, it’s not as straightforward as many users think. However, this guide will show you how to do that, so keep reading.
Can I disable the UAC for one program?
Windows doesn’t allow you to disable UAC just for a single application. However, a workaround allows you to run an app and bypass UAC.
How do I disable UAC for specific applications in Windows 11?
Use Task Scheduler
- Go to Start, search for task scheduler in the Windows search bar, and click on the first result to open Task Scheduler.

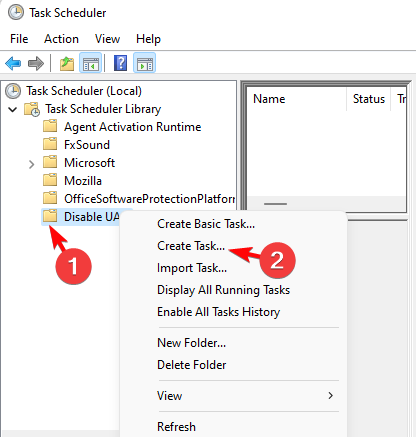
- Right-click on Task Scheduler Library on the left, and select New Folder.

- You can then rename it as, for example, Disable UAC and press OK.

- Next, expand Task Scheduler Library, right-click on the new folder, and select Create Task.
- In the Create Task window, name the task something like turn off UAC for quick access, go to Security Options below, and select Run with highest privileges.

- Now, next to Configure for, select Windows 11 (or the OS you are currently running) from the drop-down. Click OK.
- Press OK again in the next prompt to proceed. Next, under Actions, click on New.

- Now, in the New Action dialog, select Start a program in the Action field, and click on Browse. You must select the target app’s .exe file.

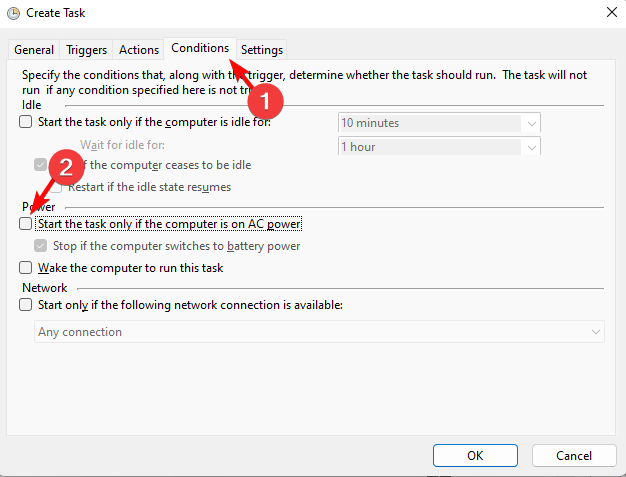
- If using a laptop, you must also go to the Conditions tab and deselect Start the task only if the computer is on AC power. Press OK.
- Now, show the desktop on your PC and then create a shortcut for the target app.
To undo the action, and re-enable UAC, delete the created task and the folder.
How do I permanently disable UAC?
1. Deactivate UAC with msconfig in Windows 11
- Press the Win + R keys to launch the Run console. Then type msconfig in the search bar and hit Enter to open the System Configuration window.

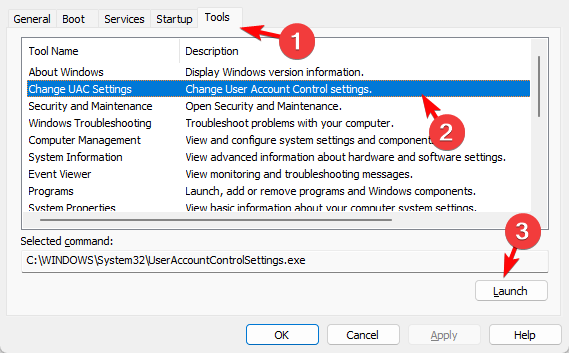
- Next, go to the Tools tab in the System Configuration window, select Change UAC Settings, and press Launch.
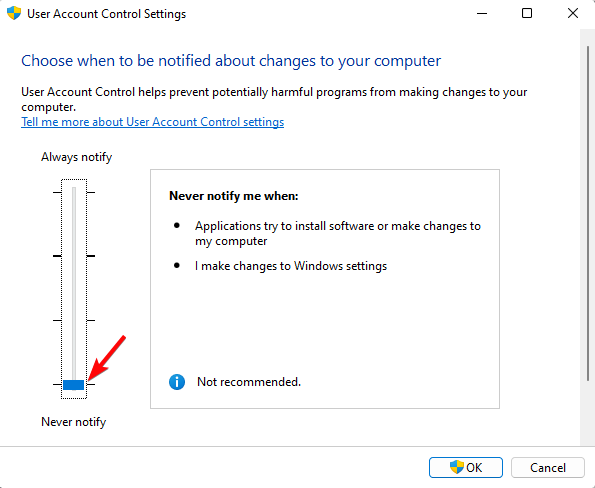
- This will open the User Account Control Settings window. Here, move the slider on the left to Never notify, and press OK to save the changes.
2. Disable UAC in the Windows 11 registry
- Press the Win + R shortcut keys to open the Run console, type regedit, and hit Enter to open the Registry Editor window.

- Next, navigate to the path below, and double-click on the EnableLUA DWORD.

- In the Edit DWORD (32-bit) Value dialogue, change the Value data from 1 to 0. Press OK.

Now, close the registry editor and restart your PC. The UAC settings should be disabled successfully now.
To enable the User Account Control Settings back again, follow the above instructions and change the value data from 0 to 1.
 NOTE
NOTE
What are the risks of disabling UAC?
By disabling UAC, all users on the computer will be able to make system changes and run any software.
In the worst-case scenario, if a user installs malicious software, it will have almost all privileges and it will be able to adjust PC settings without any restrictions.
You can also get This app can’t be activated when UAC is disabled message if you choose to disable this feature.
As you can see, while it’s impossible to turn off UAC for a specific program on Windows 11, there are other workarounds you can use.
Before you leave, don’t forget to check our guide on Do you want to allow this app to make changes message.
Let us know in the comments box below for any other User Account Control settings queries.
Read our disclosure page to find out how can you help Windows Report sustain the editorial team. Read more


Improve this guide


User forum
1 messages