Fix: Do You Want to Allow This App to Make Changes?
The UAC alert box is a Windows Security Feature

Windows includes the User Account Control (UAC) that notifies you when a program or setting is about to make administrator changes to your PC. This feature is accompanied by a prompt that reads: Do you want to allow this app to make changes to your device?
This prompt serves as a protection medium to keep it in check. It also allows you to control whether the program will be able to make the change. However, some users are complaining of getting this prompt unnecessarily and sometimes with no option to accept it.
If you keep getting the message unnecessarily, you can disable UAC, among other fixes in the next section of this guide.
How do I fix Do you want to allow this app to make changes to your device message?
1. Disable the UAC dialog box via User Account Control Settings
1. Press the Windows key, type control, and select Control Panel.

2. Select User Accounts from the list.

3. Now, click the User Accounts option.

4. Go to Change User Account Control settings.

5. Now drag the bar slider to Never notify.

6. Press the OK button to apply the selected setting.
7. Click Yes on the UAC window that opens.
You can configure the User Account Control settings to get rid of the do you want to allow this app to make changes to your device pop-up in Windows 11.
This can be quickly done through the built-in Control Panel menu.
2. Set up a desktop shortcut that opens the program with elevated privileges
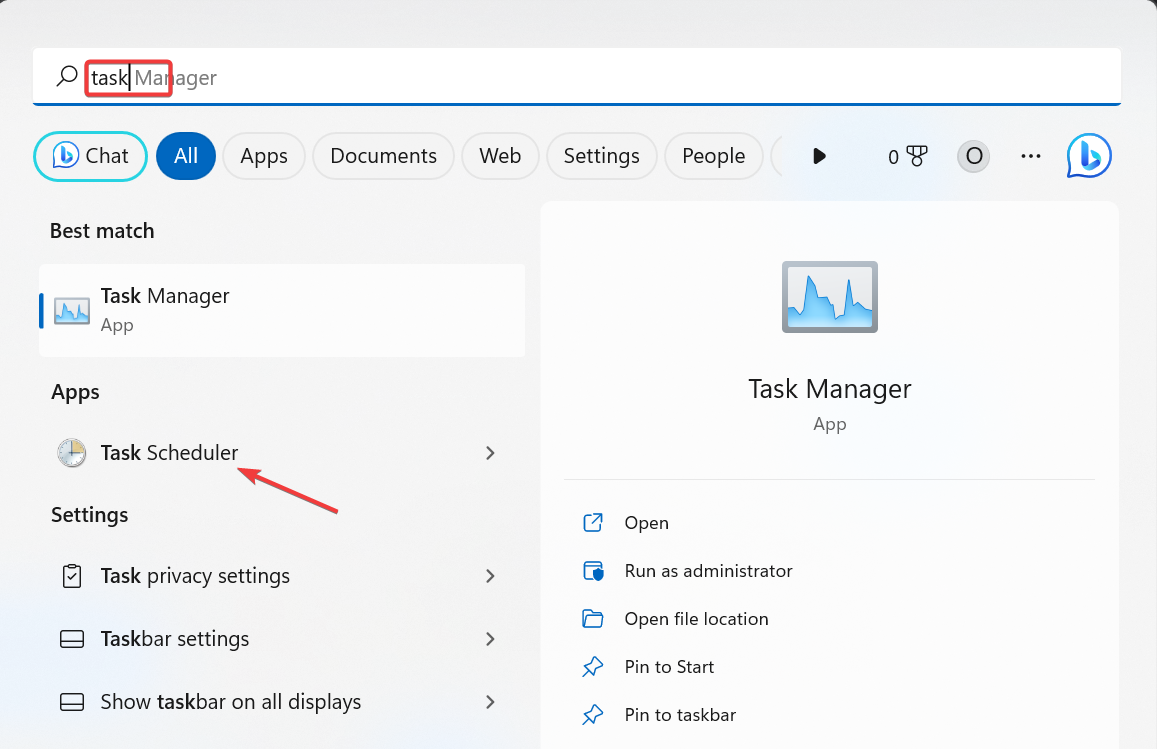
- Press the Windows key, type task, and select the Task Scheduler option.
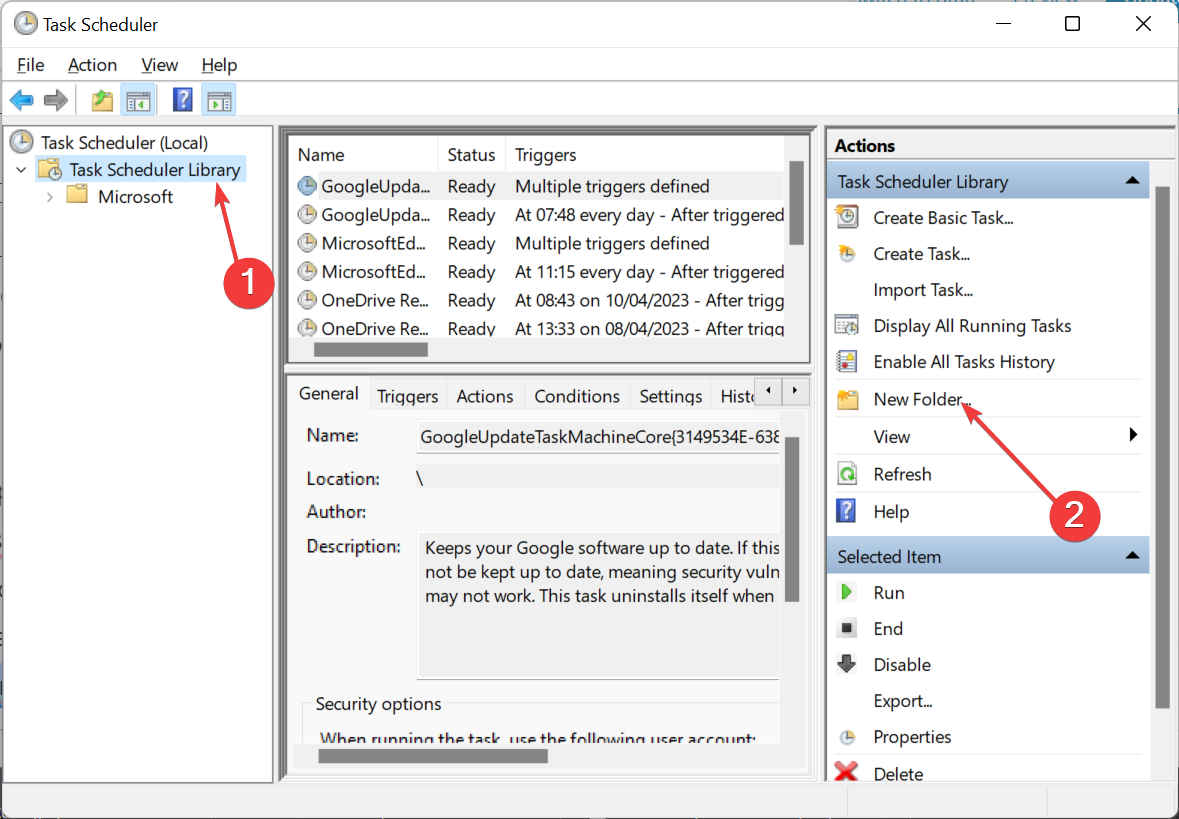
- Click the Task Scheduler Library folder on the left and select New Folder.
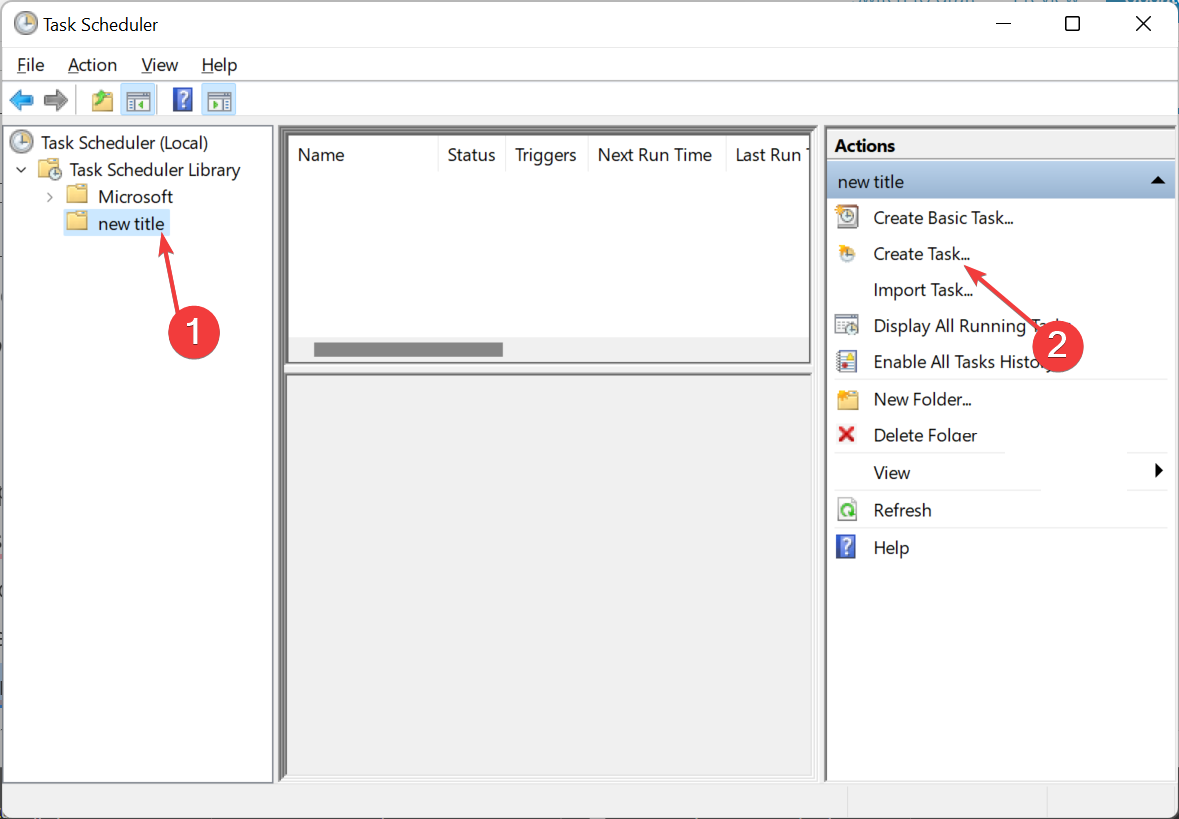
- Now, give the new folder a title and click on it.
- Click on Create Task.
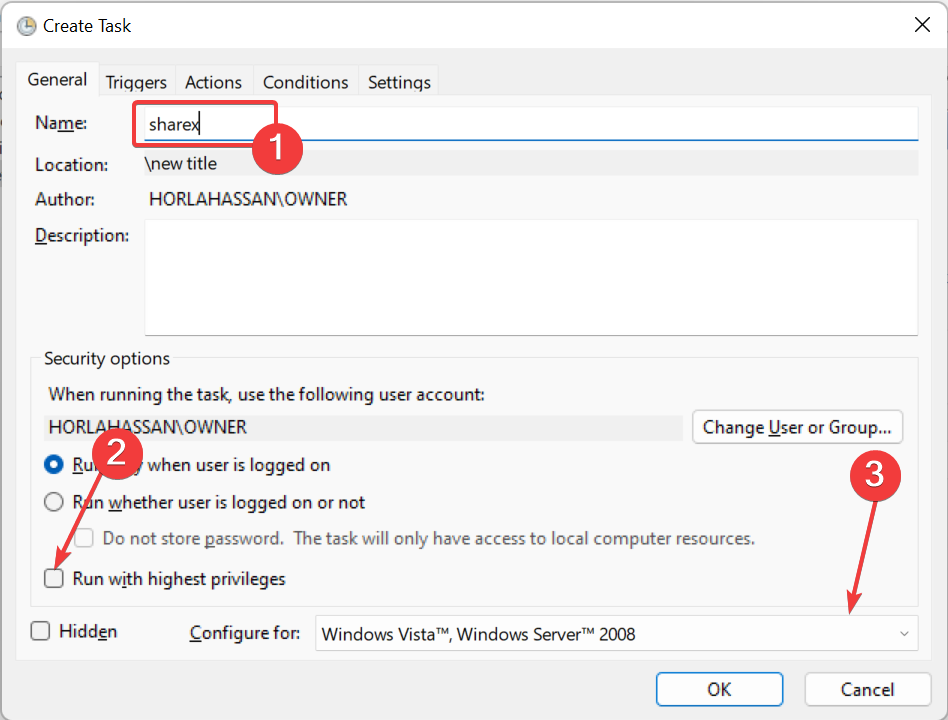
- Next, enter the title of the program you need to open with elevated privileges in the Name box.
- Select the Run with highest privileges option on the General tab.
- Now, select your PC’s platform from the Configure for dropdown menu.
- Click the Actions tab and select New.
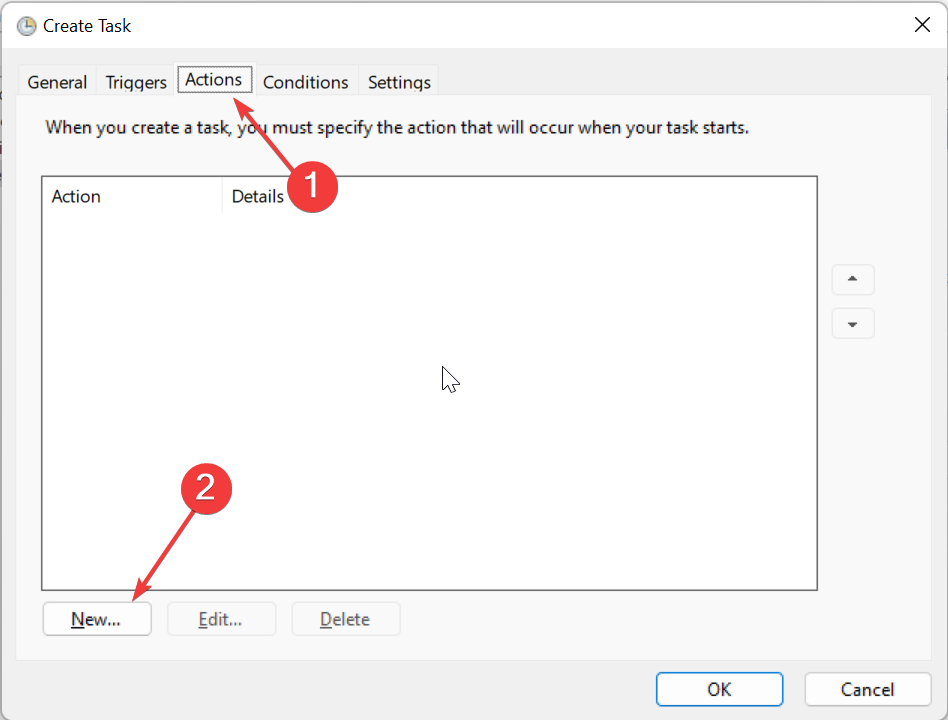
- From here, select Start a program from the Action dropdown menu and click the Browse button to select the program for the task to open.
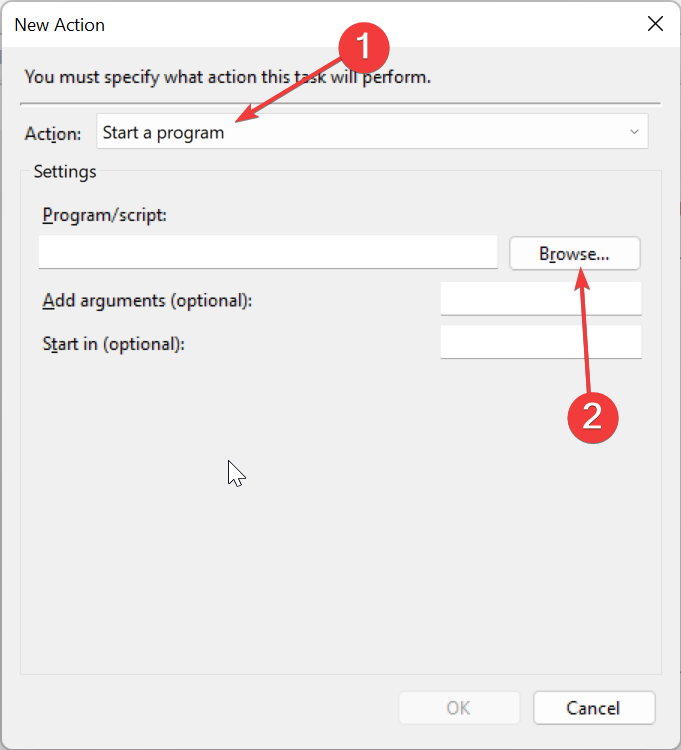
- Next, click the OK button on the New Action and Create Task windows, respectively.
- Now, you should see the task listed in the new folder you set up. Select the task and press the Run button on the right of the window to check that it works.
- Press the End button to close the program.
- From here, right-click your desktop and select New > Shortcut
- Enter schtasks /run /TN “folder\filename” in the text box. Replace the folder with the Task Scheduler Library subfolder title you set up, and replace the filename with the actual task title (as entered in the General tab).
- Press the Next button to input a shortcut title.
- Finally, click the Finish button to add the new shortcut to your desktop.
While switching off the UAC is a quick way to eliminate the do you want to allow this app to make changes to your device pop-up on Genshin Impact, with the only option being No, it comes with a huge risk
However, with an exception list, you can leave the account control settings on while excluding certain programs.
3. Bypass the UAC using the Trust Shortcut
- Download the UAC Trust Shortcut app.
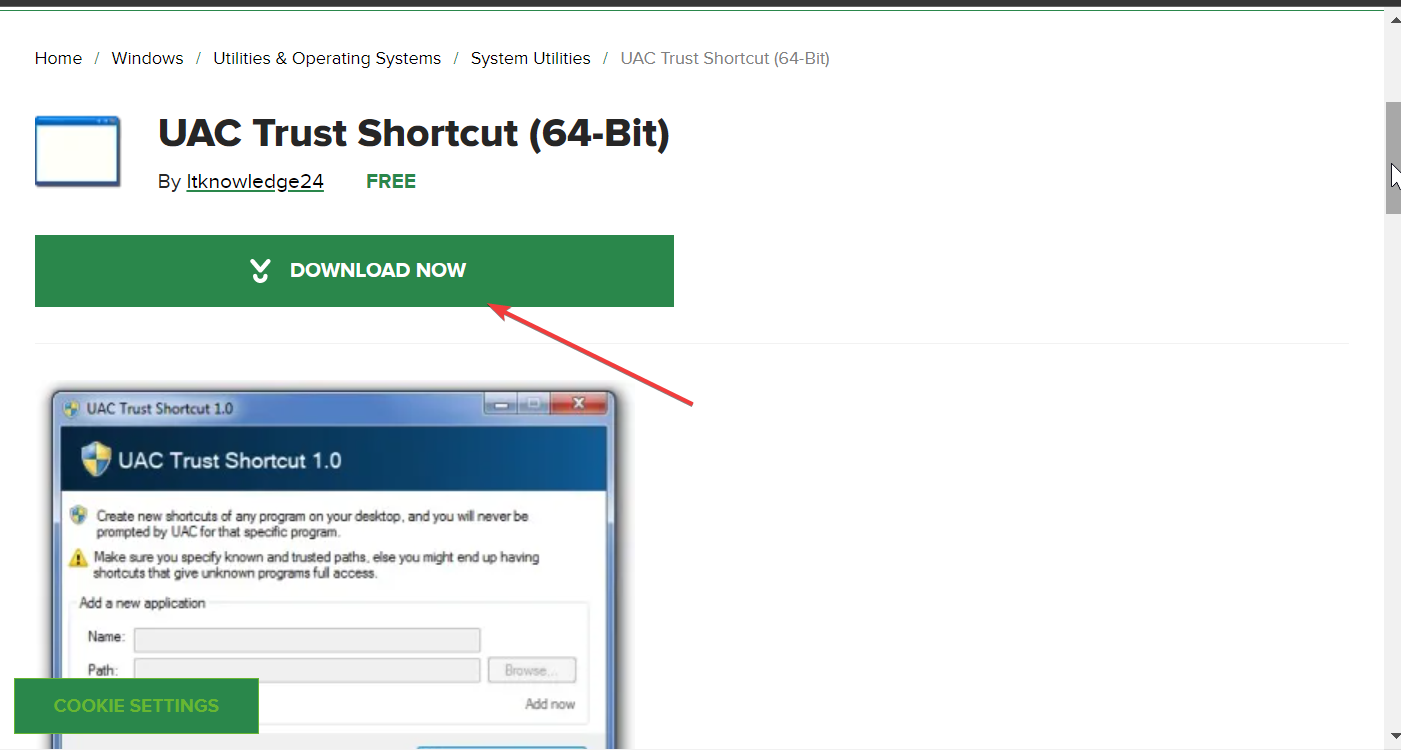
- Extract the content of the zipped file and run the installation folder.

- Now, right-click its system tray icon and select Open UAC Trust.
- Click the Add another program button (and click Yes on the UAC dialog window).
- Enter the software’s title in the first text box.
- Now, click the Browse button and select the software to open.
- Click Add now to add the new software shortcut to the desktop. Then you can select that new shortcut to open the program without a UAC confirmation dialog box.
- You also need to select Start service on the UAC Trust Shortcut system tray icon’s context menu for the new software shortcuts to bypass the UAC.
If you feel solution two above is too lengthy in eliminating the do you want to allow this app to make changes to your device pop-up on Windows 10 or 11, you can use software to reduce the steps considerably, as shown above.
With this, we can conclude this guide on eliminating the do you want to allow this app to make changes to your device pop-up. To keep your PC’s security level high, we recommend leaving the prompt active but creating exceptions for trusted apps.
If you want to how to disable the UAC dialog box alert on Windows 10. check our detailed guide to do it quickly.
Feel free to let us know in the comments below if you encounter any problems applying the fixes above.
Read our disclosure page to find out how can you help Windows Report sustain the editorial team. Read more


Improve this guide


User forum
4 messages