How to Divide Hard Disk Space in Windows 11 [Simplest Way]
All steps to divide the disk space Windows 11 explained
3 min. read
Updated on
Read our disclosure page to find out how can you help Windows Report sustain the editorial team. Read more
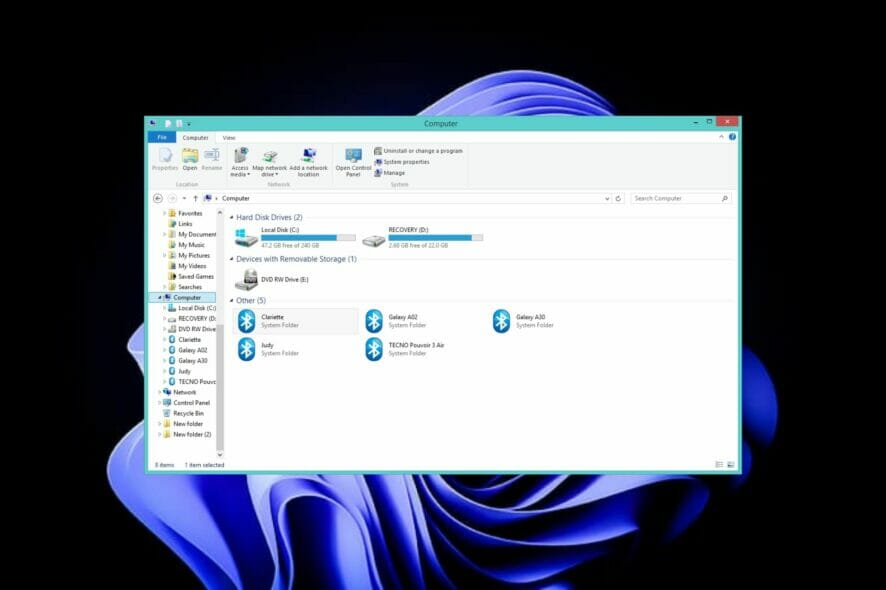
In this piece, we’ll show you how to divide your hard disk space on a Windows 11 PC. This practice will help keep your data organized and even protect your system against a crash.
Windows 11 is known for its high space requirements so it is better to organize your drives to allow you to allocate space accordingly.
When you create multiple partitions on your hard drive, it’s easier to manage your files and back up your data. So, if you’re interested in creating a D drive in Windows 11, keep reading:
How do I split my hard drive space?
1. Use the Disk Management tool
1. Hit the Windows + X keys to open the Quick Access menu, then select Disk Management.
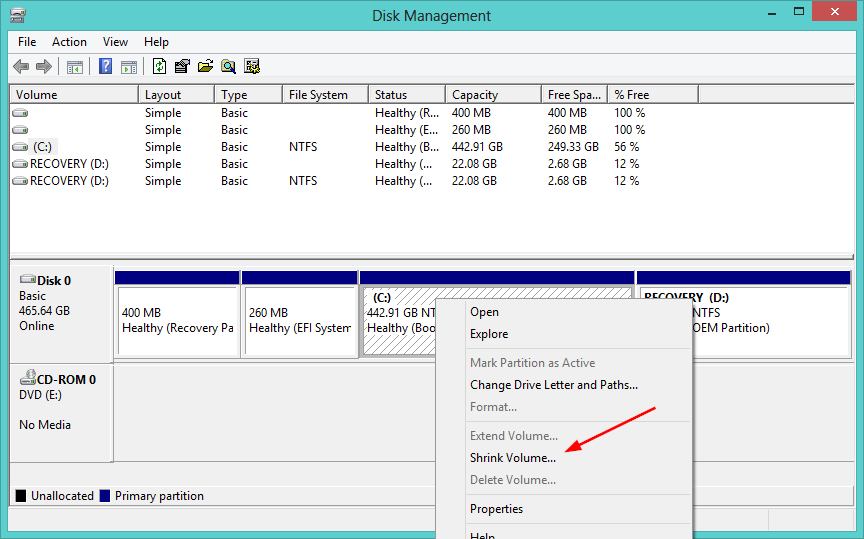
2. Select the disk you want to create partitions from, right-click on it, and select Shrink Volume.
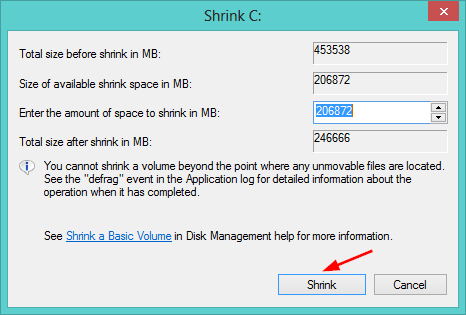
3. In the next window, select how much space you wish to assign to the new partition and click on Shrink. You will now have unallocated space.
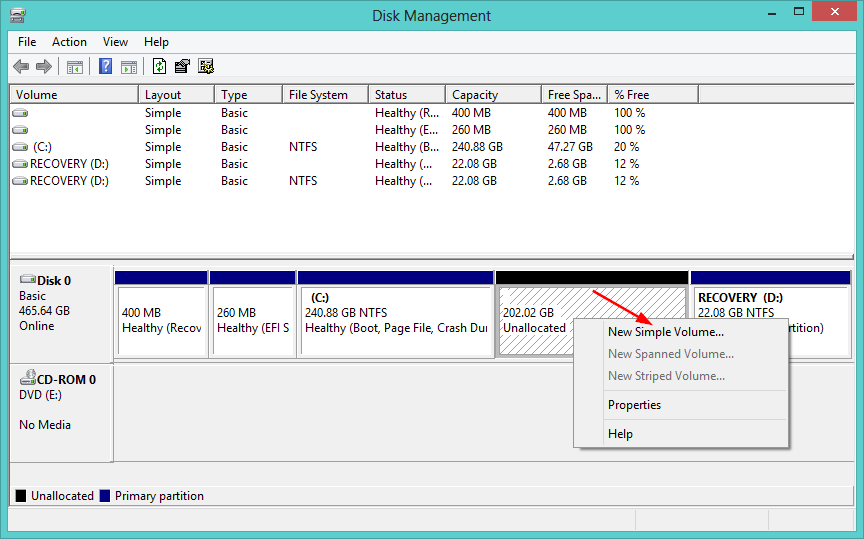
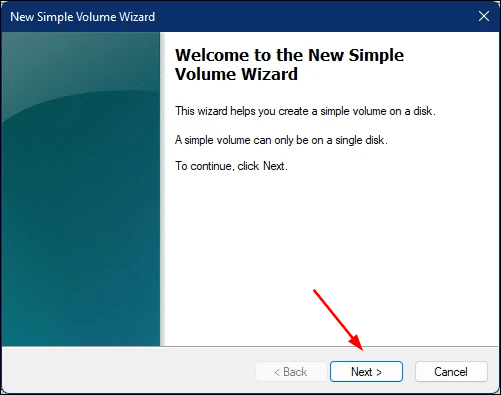
4. Right-click on it and select New Simple Volume to launch the New Simple Volume Wizard.
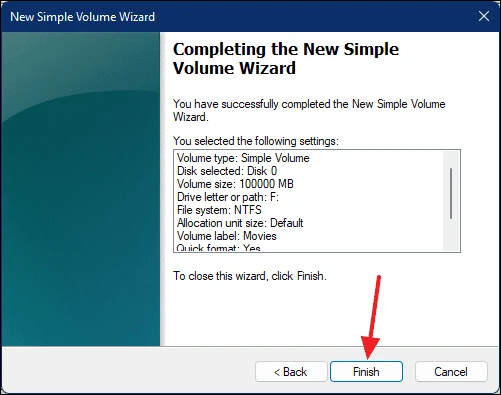
5. Continue pressing Next on the consecutive windows and assign a name to the new drive.
6. Click Finish.
A quick and handy method to create new partitions on your hard disk is via your Windows 11’s built-in Disk Management tool.
The tool is free and easy to use and allows you to divide your disk space however you like. Simply follow the volume wizard and the process will be done in no time.
Can I delete a Windows 11 partition to create another?
Yes, you can delete a partition to create another. Deleting it will erase all of its contents, so make sure you have transferred the files that you want to keep elsewhere before deleting. Once you have deleted the drive, the space will be available for use as part of other partitions.
To delete a drive, follow the steps below:
- Press Windows + X keys simultaneously and select Disk Management.
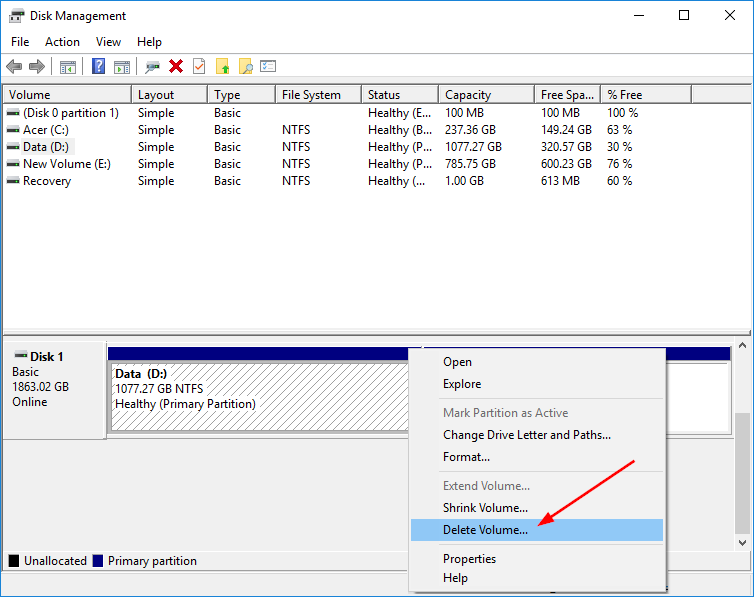
- Select the drive you wish to delete, right-click on it and click Delete Volume.
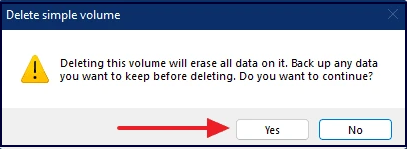
- Click Yes to confirm the deletion.
- There will now be unallocated space and you can follow the steps above to assign it a new name.
Why do I need to divide my Windows 11 hard disk drive?
You can divide your hard drive in Windows for a lot of different reasons (it’s not just about creating more space):
- Staying organized: the most common reason to do this is that you want to keep different parts of your computer separate from each other.
- Security: each partition is treated like a separate physical hard drive by the operating system, so it helps you to logically organize your data and make optimum utilization of the available space.
You may wonder how many partitions are sufficient for your hard disk. It is recommended that you organize your space in terms of your OS files, software and programs, and finally your files and folders.
Wrapping up
We hope with the help of this guide, you have been able to divide your hard disk space into more useful partitions to help you stay organized.
Remember to back up all your files before you shrink or delete any drives. Also, check out our article on what to do if Windows 11 requires more free space to avoid performance issues.
In case you’re interested in command line tools for disk management, don’t miss our new what is fdisk guide to learn more about it.
Let us know how many partitions you have divided your hard disk space into and what you use them for in the comment section below.


User forum
1 messages