Dual Boot Windows 10 and 11: How to Properly Set it Up
Key notes
- If you’re looking to try the latest OS on your computer, it's time to dual boot Windows 10 and Windows 11.
- To achieve your goal, you just need to create a separate partition and install Windows 11 on it.
- Do not hesitate to join the Insider Program and upgrade to Windows 11 right away.

Windows 11 is here and many are eager to try it out, and if you want to know more about it, be sure of the fact that the new OS has a lot to offer.
In that regard, we prepared an in-depth comparison in our Windows 11 vs Windows 10 article, so be sure to check it for more information.
If you’re looking to try Windows 11 on your PC, in today’s guide we’re going to show you how to properly dual boot Windows 10 and Windows 11, so let’s get started.
How can I dual boot Windows 10 and Windows 11?
1. Prepare a special partition for Windows 11
- Press Windows Key + X and select Disk Management.

- Locate the drive that has extra free space. You’ll need about 50GB of free space, but more couldn’t hurt, especially if you plan to install additional apps.
- Once you locate that drive, right-click it and choose Shrink Volume.

- In the Enter the amount of space to shrink in MB field enter 50000 or more. Now click the Shrink button.

- Now you should see Unallocated space in Disk Manager. Right-click the Unallocated space and choose New Simple Volume.

- When the wizard opens, click on Next.

- Set Simple volume size in MB to the equal to the Maximum disk space in MB and click Next.

- Select the drive letter that you want to use for this drive and press Next to proceed.

- Set the label for the new partition and click on Next.

- Click the Finish button.

Now you should have a new partition available on your system. Up next, we’ll use this partition to install Windows 11 on it.
2. Create installation media
- Connect a USB flash drive to your PC. You’ll need at least an 8GB drive, but 16GB would be better.
- Download the Windows Media Creation tool and run it.

- Select Create installation media (USB flash drive, DVD, or ISO file) for another PC and click on Next.

- Make sure that the settings are correct. If not, uncheck Use the recommended options for this PC and change the settings accordingly.
- Select USB flash drive and click Next.

- Wait for the process to finish. This could take a while depending on your download speed, so be patient.
Once the process is finished, you can install Windows 10 on the partition that you created in the previous section.
3. Boot from the USB flash drive and install Windows on the new partition
- Access BIOS. You can usually do that by pressing the Del key while your system boots, but some motherboards use a different key.
- Once you enter BIOS, go to the Boot section.
- Set your USB flash drive as the first boot device.
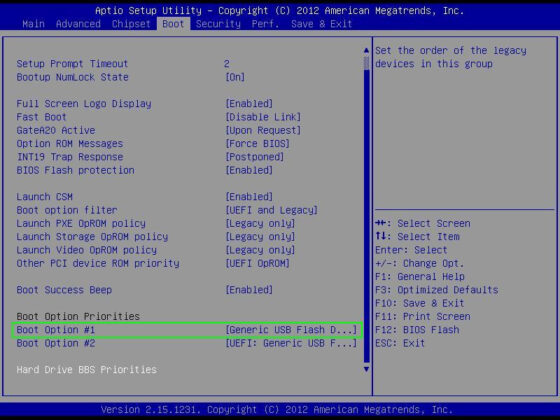
- Save changes.
- When your computer starts booting, you’ll be asked to press any key to boot from the USB flash drive, so be sure to do that.
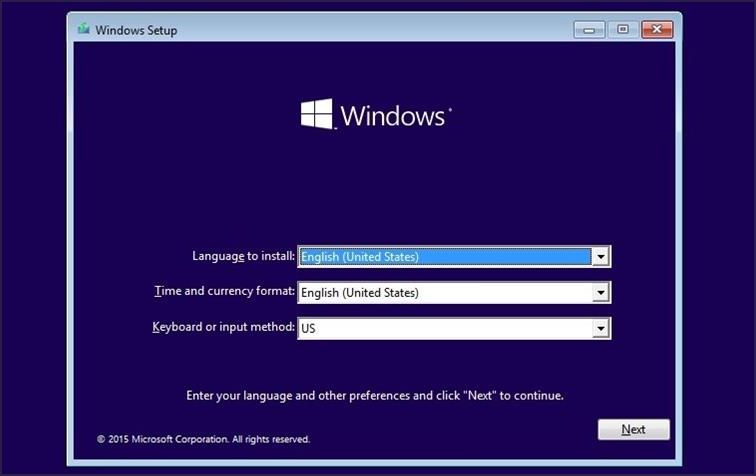
- Select the desired language and click on Next.
- Click on Install now.

- Select the version of Windows that you want to install and click on Next. It’s best to use the same version that you already have installed.
- Accept the terms of service and click Next.

- Select Custom: Install Windows only (advanced).

- Select the drive that you created. Drives aren’t labeled, but you should be able to find your drive based on its size. Make sure that you don’t select the drive that already has Windows 10 installed on it. Click Next.

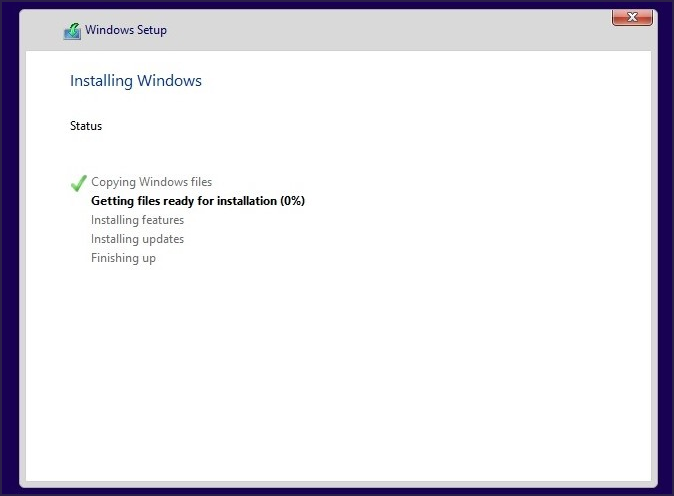
- Now, wait for the installation to finish.
- Once the installation is finished, you can go back to BIOS and select your hard drive as the default boot device.
Now you should have two versions of Windows 10 installed. The last step is to upgrade Windows 10 to Windows 11 technical preview.
You should also know that there’s a way to create a Windows 11 USB bootable USB drive, but this method might not be the most reliable.
4. Join the Insiders Preview and upgrade to Windows 11
- Boot to the version of Windows 10 that you just installed. You can do that by selecting it from the boot menu.
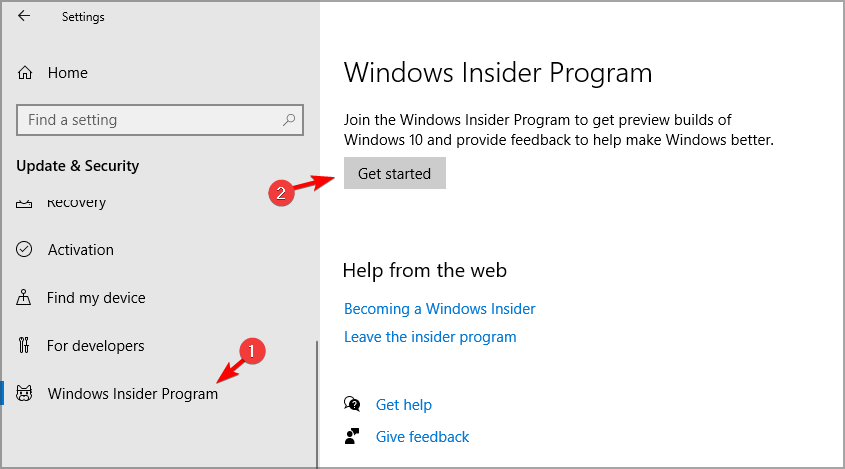
- Once Windows 10 starts, go to the Settings app and select Update & Security.

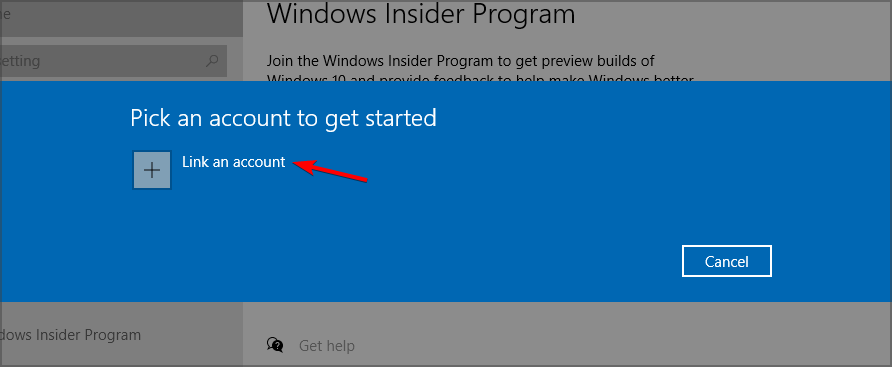
- In the left pane, select Windows Insider Program and click on Get Started.
- Click on Link an account and select your user account.
- Now select Dev Channel and click on Confirm.
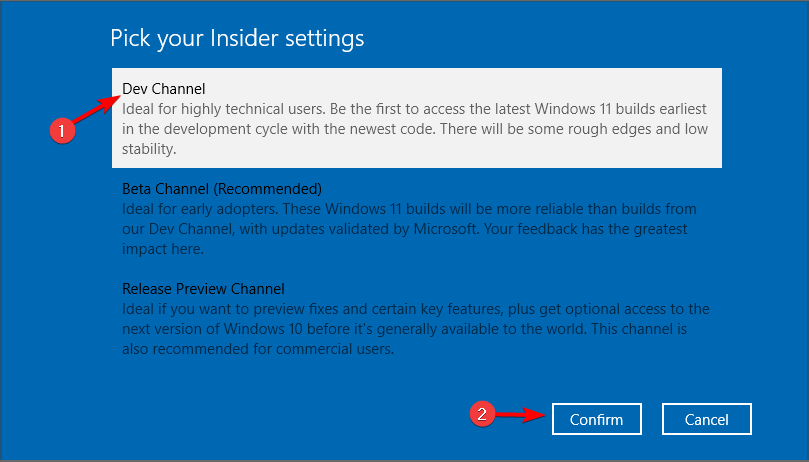
- Read the privacy statement and click on Confirm.
- Click on Restart Now.
- Once your PC restarts, select the same version of Windows that you did in Step 1.
- Open the Settings app, go to the Update & Security and click Check for updates.
- Windows 11 update should now start downloading.
- Once the update is downloaded, restart your PC to install it.
If you need more information, make sure to check our guide on how to download Windows 11 properly.
After that, you’ll have dual boot for Windows 10 and Windows 11 enabled. Simply select the Windows 11 on the boot screen to boot to it and that’s it. Keep in mind that you’ll have to do this every time your computer starts.
What are the pros and cons of dual booting?
Dual-booting is great since it uses less hardware power than running a virtual machine. By dual booting, you can focus all your hardware resources on a single operating system and get better performance.
This is especially important if your PC barely matches the minimum Windows 11 hardware requirements. By using dual boot, you’ll be able to enjoy the other operating system natively, without relying on the virtual environment.
It’s worth mentioning that it has a few drawbacks, most notably in multitasking and switching between operating systems.
There’s no quick way to do that. You simply need to restart your PC, and then select the operating system that you want to use.
You’ll have to do this every time you want to switch to a different OS, and if you tend to switch frequently, this process might feel tedious after a while.
Dual-booting also requires a lot of storage space, so you’ll have to take away some space from one of your available partitions and assign that space to a new partition.
How can I set the default operating system when dual booting?
- Press Windows Key + R and enter msconfig. Press Enter or click OK.
- Now go to the Boot section.
- Select the operating system that you want to make default. Click on Set as default option. Now click Apply and OK to save changes.
After making these changes, your PC will boot automatically to the selected operating system. If you want to learn more about this tool, we suggest that you check out our System Configuration guide.
Which is better, virtual machine or dual boot?
This depends solely on the user’s needs, but in most cases, dual booting is a better option since it uses fewer hardware resources, so you can dual boot two operating systems even on low-end PCs.
Virtual machines require a lot more hardware power since you’ll be running an operating system inside of your current one, so if you don’t have enough hardware power, you might encounter performance issues.
On the other hand, using a virtual machine is more secure, since all malware threats and potential issues are contained within that virtual machine.
Moreover, if you need to quickly switch between operating systems, or you need to work on both of them simultaneously, a virtual machine is a superior choice.
If you want, you can always run Windows 11 on a virtual machine inside of Windows 10 or any other operating system.
As you can see, to dual boot Windows 10 and Windows 11 you first need to create a separate partition and install Windows 11 on it.
Since the Windows 11 ISO still isn’t officially available, the only way to do that is to install another Windows 10 and then upgrade it to Windows 11.
We hope that you found this guide informative and that you managed to successfully boot Windows 11 alongside Windows 10 on your PC.
Read our disclosure page to find out how can you help Windows Report sustain the editorial team. Read more


Improve this guide


User forum
1 messages