What is Dw20.exe & How to Disable It?
You can disable it using Registry Editor
Key notes
- The dw20.exe process is associated with Microsoft Windows Error Reporting (WER).
- When an application crashes or encounters an error, it gathers data about the problem and sends it to Microsoft for analysis.
If you have encountered the dw20.exe process in the Task Manager and want to know about it, this guide can help!
In this guide, we will explore dw20.exe in more detail, understand its purpose, and discuss the steps you can take to disable Dw20.exe if necessary.
What is dw20.exe?
Dw20.exe is an executable file that runs in the background and is associated with the Windows Error Reporting (WER) feature in Microsoft Windows operating systems.
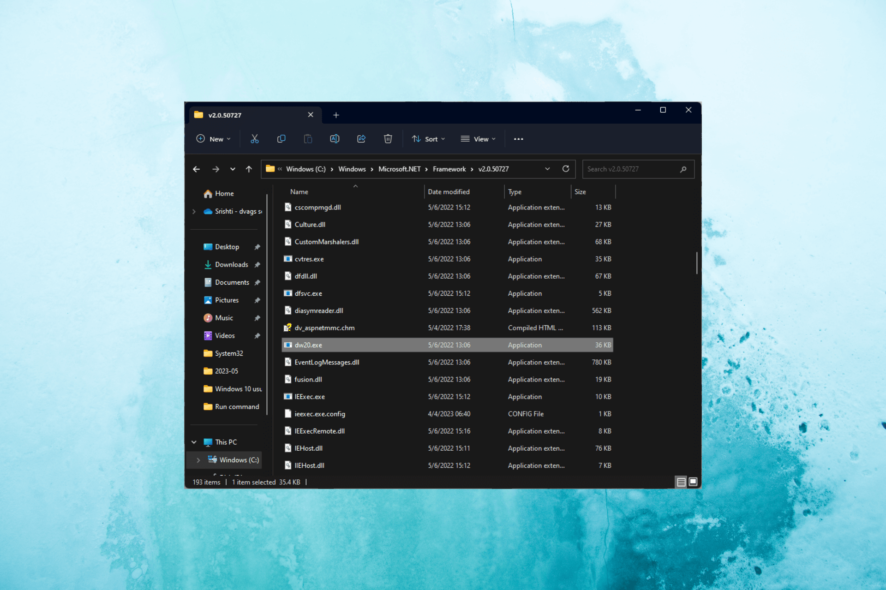
It is usually located in the following folder: C:\Windows\Microsoft.NET\Framework\v2.0.50727
Whenever an application crashes or experiences an error, it becomes active and collects data about the issue, including information about the software, system configuration, and the error itself. This data is then sent to Microsoft for analysis.
While dw20.exe serves a vital purpose in helping Microsoft address software issues, the file may be an easy target to disguise viruses or malware.
So, if you didn’t install Microsoft Office or some of the software from the suite, you shouldn’t see the dw20 process running on your PC. If you don’t have Office installed, that’s a pretty clear sign that the dw20.exe running is actually a harmful piece of software.
Also, if you find the process somewhere other than the location mentioned above, you can run a deep scan using an antivirus tool to remove it and proceed with the solutions below.
What can I do to disable dw20.exe?
1. Use the Task Manager
- Press Ctrl + Shift + Esc to open the Task Manager.
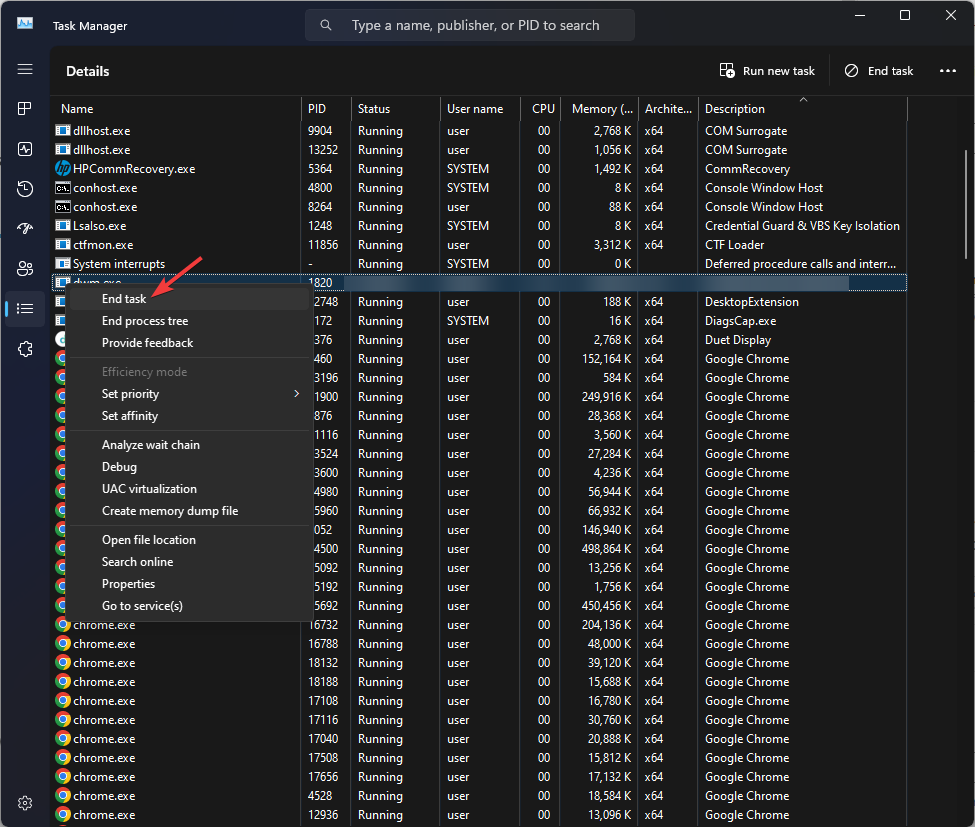
- Go to the Processes or Details tab, locate and right-click dw20.exe and click End task.
2. Use the Services app
- Press Windows + R to open the Run dialog box.

- Type services.msc and click OK to open the Services app.
- Locate and double-click Windows Error Reporting Service to open Properties.
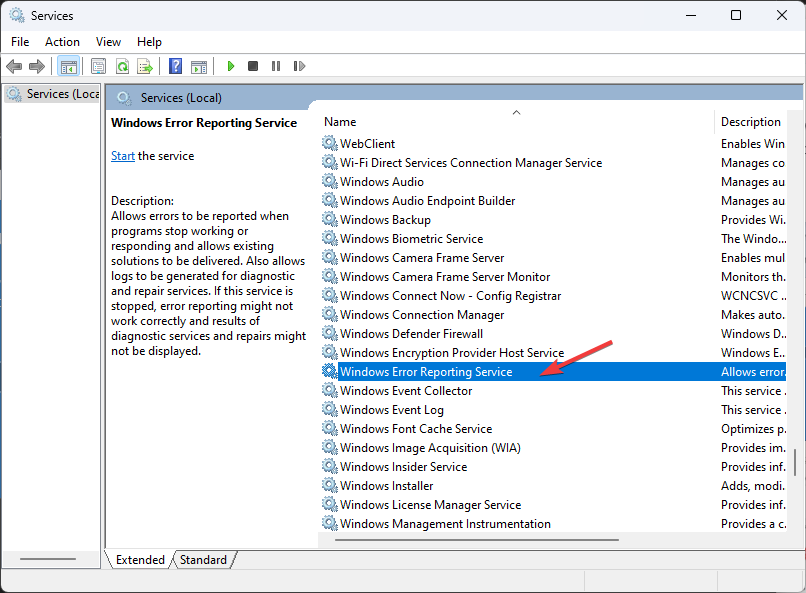
- For the Startup type, select Disabled from the dropdown list.

- Click Apply, then OK.
3. Use the Group Policy Editor
- Press Windows + R to open the Run window.
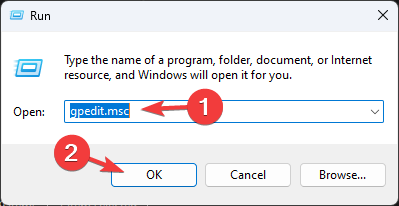
- Type gpedit.msc and click OK to open the Group Policy Editor.
- Navigate to this path:
Computer Configuration\Administrative Templates\Windows Components\Windows Error Reporting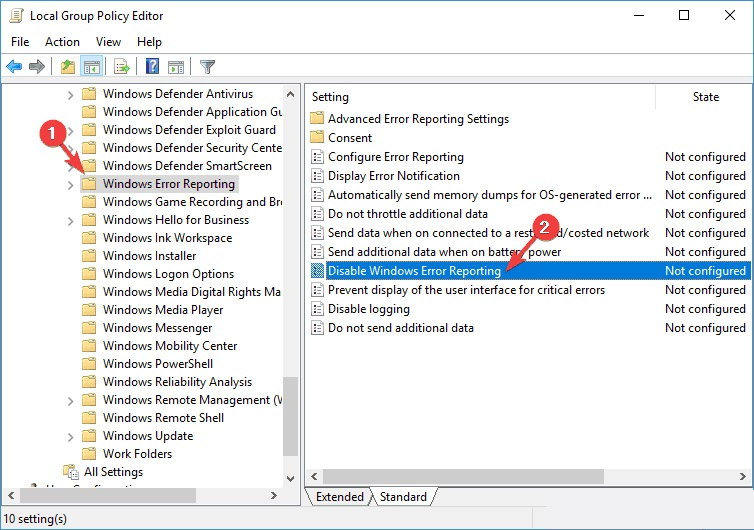
- Double-click Windows Error Reporting to open Properties.
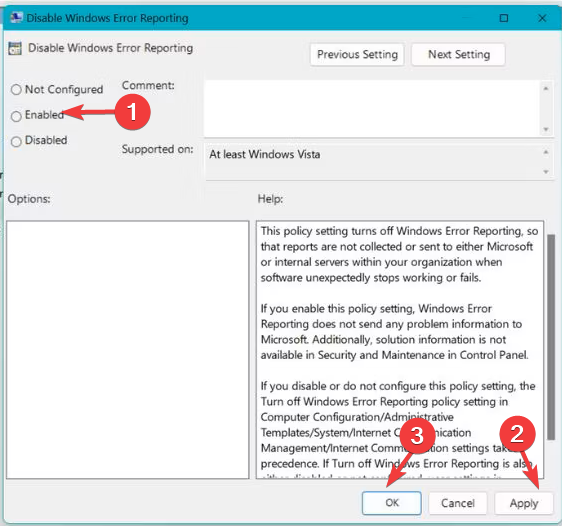
- Select the Enabled option and click Apply, then OK.
4. Modify the registry entry
- Press Windows + R to open the Run window.
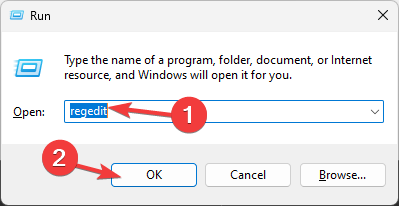
- Type regedit and click OK to open the Registry Editor.
- Navigate to this path:
Computer\HKEY_LOCAL_MACHINE\SOFTWARE\Microsoft\Windows\Windows Error Reporting - Right-click the right pane, choose New, then select DWORD (32-bit).

- Right-click the new DWORD and click Rename and name it Disabled.
- Now double-click the DWORD, set the Value data to 1, and select HexaDecimal, then click OK.
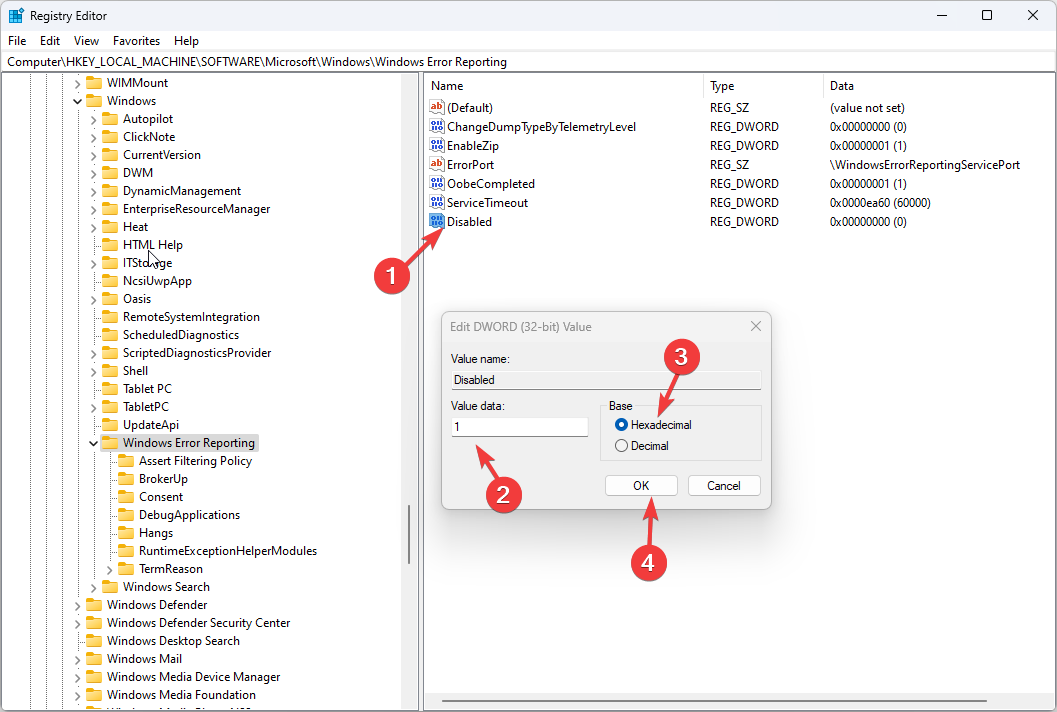
- Close the Registry Editor and reboot your computer to save the changes.
So, these are the methods to disable the dw20.exe if needed. If you have any questions or suggestions, feel free to mention them in the comments section below.
Read our disclosure page to find out how can you help Windows Report sustain the editorial team. Read more


Improve this guide


User forum
0 messages