DWM Has Crashed on Windows 11: How to Fix it
A loose GPU connection is usually the culprit

Sometimes you might get Your session was logged off because DWM crashed or dwm.exe stopped working. This problem can interfere with your everyday activities, so it’s important to fix it, and this guide is here to help you.
What is DWM error?
DWM error such as this one occurs if your GPU isn’t properly connected or configured or if there’s another issue with it.
What can I do if DWM has crashed on Windows 11?
Before trying anything else, check if your GPU is properly connected. If the power cable is loose or the GPU is hanging, tightly connect it and check if the issue is gone. Updating BIOS can also help.
1. Update graphics card driver
- Right-click the Windows icon and select Device Manager.

- Locate Display Adapters.
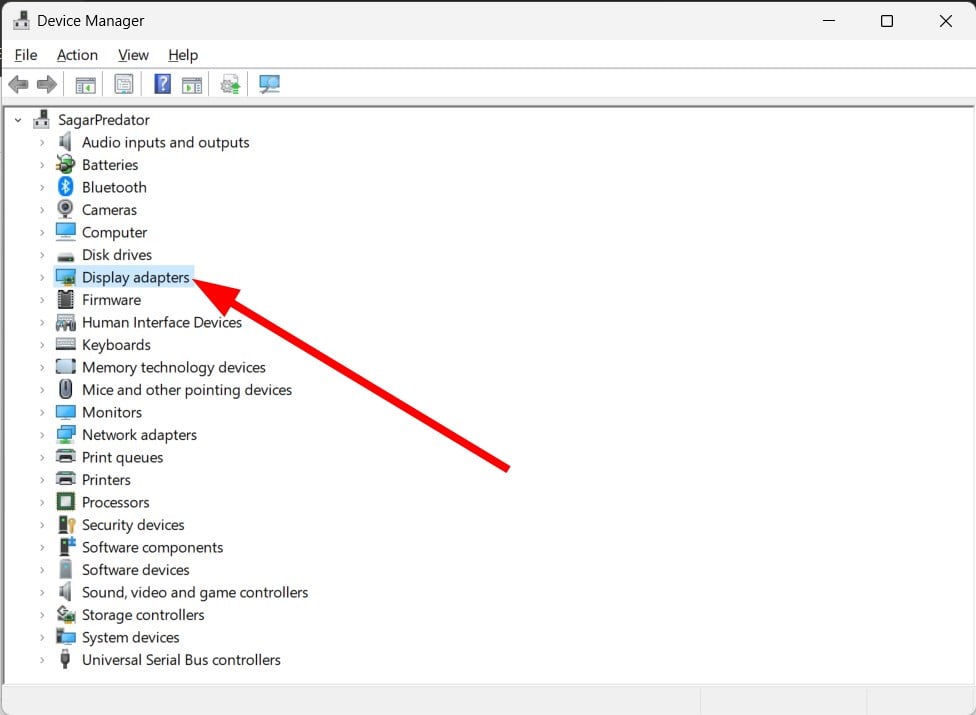
- Expand the list, right-click your display driver, and click Update.

- Select Search automatically for display drivers and wait for the process to complete.
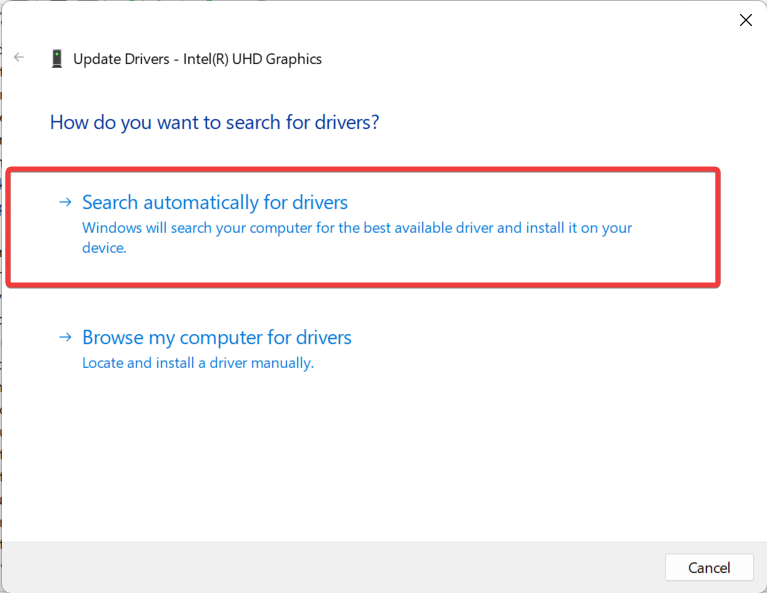
An outdated graphics driver can cause conflicts that lead to DWM crashes. Updating the drivers should fix the issue.
2. Adjust GPU settings in BIOS
- Restart your PC.
- While the PC boots, keep pressing F2 or Del to access BIOS.
- Next, navigate to Advanced.
- Locate PCIEX16 Slot Configuration and set it to Gen 4 or Gen 3.

- Save changes and restart your PC.
Keep in mind that the steps might be different depending on your motherboard model.
3. Disable Hardware accelerated GPU scheduling
- Open the Settings app.
- In the left pane, go to System, and then click Display.
- Next, select Graphics.
- In the Graphics settings, look for Hardware-accelerated GPU scheduling and disable it.

4. Reinstall Xbox app
- Press the Windows key + X and choose Terminal (Admin). Alternatively, run PowerShell as administrator.
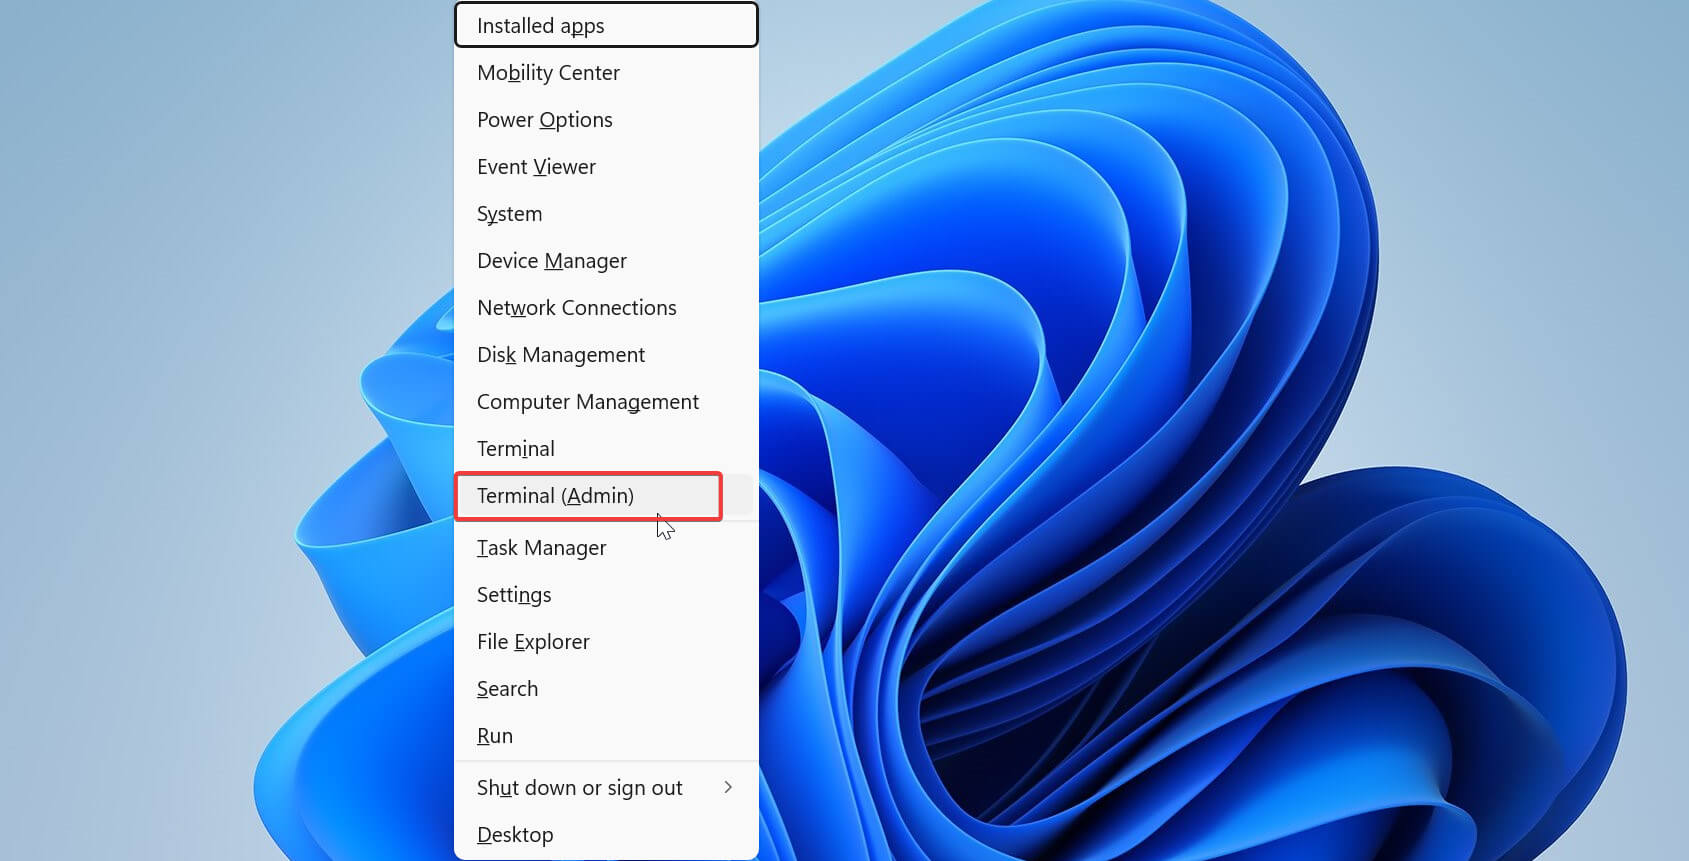
- Next run the following command:
Get-AppxPackage Microsoft.XboxGamingOverlay | Remove-AppxPackage - Check if the problem is resolved.
5. Adjust the system for the best performance
- Press the Windows + S on your keyboard, type View advanced system settings and then click on the most relevant result.

- Click on Settings next to the Performance section.

- Tick the Adjust for best performance button, then click Apply and OK on the bottom.

The Adjust for best performance option will make a set of changes to your OS for it to run smoother. If you don’t like them, you can go back by choosing Adjust for best appearance.
6. Delete the mdi264.dll
- Press Windows + I to open the Settings menu.
- Choose Recovery under the System panel.

- Now click on Restart next to the Advanced startup section.

- When your computer restarts, choose Troubleshoot, then go to Advanced options.

- Once you are in the Advanced options menu, click on Command Prompt and enter the following commands, then press Enter after each:
cd C: \Users\Your Name Here\App\Data\Local\Temp del mdi264.dll
Close Command Prompt and restart your computer after doing the above actions.
7. Run the SFC scan
- Press the Windows + S to open the Search bar.
- Type cmd and select run it as an administrator.

- Type or paste inside the window the following command and press Enter:
sfc /scannow
Wait for the process to finish (which may take some time) before restarting your computer.
You can also choose to use a specialized repair tool that will do all these steps automatically. These tools can scan your PC in-depth and find any impediment that slows down its performance. After that, they will replace each malfunctioning element with the latest update from its database.
8. Run DISM
- Press the Windows + S key to open the Search bar.
- Type cmd and click on the run as an administrator option.
- Type or paste in the following commands and press Enter after each to start the process:
DISM /online /Cleanup-Image / ScanHealth DISM /Online /Cleanup-Image /RestoreHealth
Sit down and wait for the procedure to finish. Please be aware that it may take up to ten minutes. After that, restart your computer to confirm that the changes have taken effect.
9. Disable Hardware acceleration
- Press the Windows + S key to open the Search bar, type regedit, and click on the most relevant result.

- Navigate to Software under HKEY_CURRENT_USER, then go to Microsoft, followed by Office16.0 and Common.

- Right-click the Common key and choose New, then Key from the menu.

- Enter Graphics as the name of the new key.

- Now right-click the Graphics key and select New, then DWORD(32-BIT) Value. Name the new value DisableHardwareAcceleration.

- Double click DisableHardwareAcceleration value and set its Value data to 1.

You must close the Registry Editor and restart your computer for the changes to take effect.
10. Disable problematic services
- Press the Windows + R to open the Run dialogue.
- Type services.msc, then press Enter or click the OK button.

- Disable Skype Updater, Google Update (update), and Google Update (gupdatem) services.
- Double-click on each service, one by one, change Startup type to Disabled and click Apply and OK to save changes.

Before closing the Services window, double-check that all of the services listed in Step 2 – Skype Updater, Google Update (update), and Google Update (gupdatem) have been turned off.
What does dwm.exe do?
Desktop Window Manager (dwm.exe) is a critical system process that aids explicitly in creating visual effects like transparent windows and taskbar thumbnails that you’ll see when using Windows.
The design of the user interface is logged into Windows memory when you start a new program, allowing the design to be developed.
Windows then manipulates the window designs to guarantee their visual effects are applied.
Is it necessary to have DWM?
Yes, the DWM.exe file is an essential Windows core system file and a component of Microsoft Windows. It is mainly responsible for elements including Windows Aero and other visual effects and personalization features like Windows Flip and Flip 3D.
Dwn.exe is an essential Windows 11 process, and many issues with it can occur, but we hope that you managed to fix DWM crash with a black screen and other issues.
To better understand what dwm.exe does, see our article on why you can’t kill DWM in Windows 11 any longer.
We recommend you review our article on dwm.exe issues in Windows 10 for additional information and potential solutions, as some of the approaches discussed here are also applicable in the new OS.
We also have a guide on Desktop Window Manager high memory usage, so don’t miss it.
If you have any further questions, please let us know in the comments section below, as well as which solution you found most compelling.
Read our disclosure page to find out how can you help Windows Report sustain the editorial team. Read more


Improve this guide


User forum
0 messages