How to Fix EasyAntiCheat.sys Blue Screen of Death
Reinstall Easy Anti Cheat to fix this issue
4 min. read
Updated on
Read our disclosure page to find out how can you help Windows Report sustain the editorial team. Read more
If you get a Blue Screen of Death (BSOD) from the EasyAntiCheat client, this guide is for you. Common causes of this include corruption, antivirus interference, corrupt system files, and outdated graphics drivers.
We’ll show you how to fix the issue and get your game running smoothly again.
What can I do to fix the EasyAntiCheat.sys blue screen error?
First, restart your PC. If the error persists, temporarily disable your antivirus and uninstall recent software. Still getting a BSOD? Follow the advanced steps below.
1. Delete/Repair EasyAntiCheat.sys file
1.1 Delete EasyAntiCheat.sys file
- Press Windows + E to open Windows Explorer.
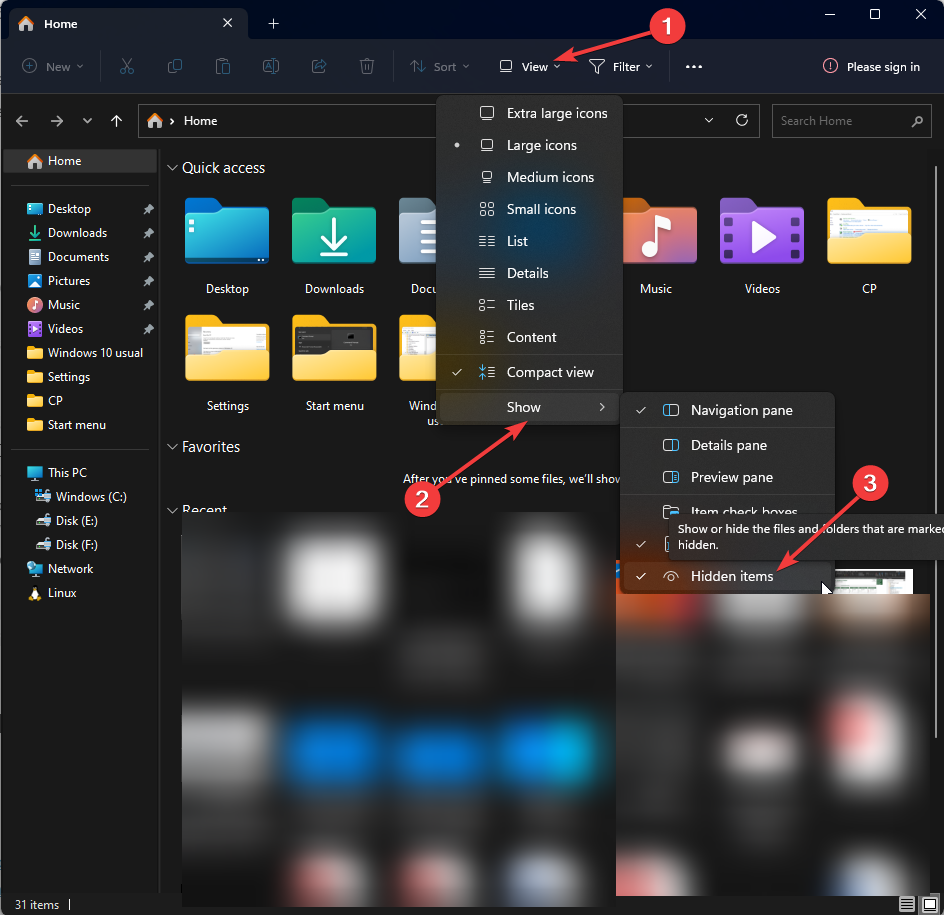
- Switch to the View tab, click Show more, and select Hidden Items.
- Now follow this path:
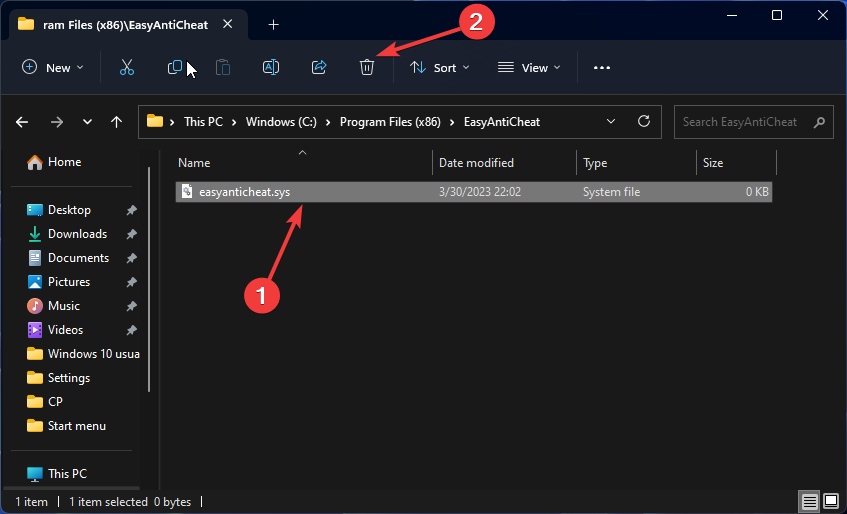
C:\Program Files(x86)\Easy Anti Cheat\easyanticheat.sys - Select the file and click the Delete icon.
- Close Windows Explorer.
1.2 Repair/Reinstall EasyAntiCheat Software
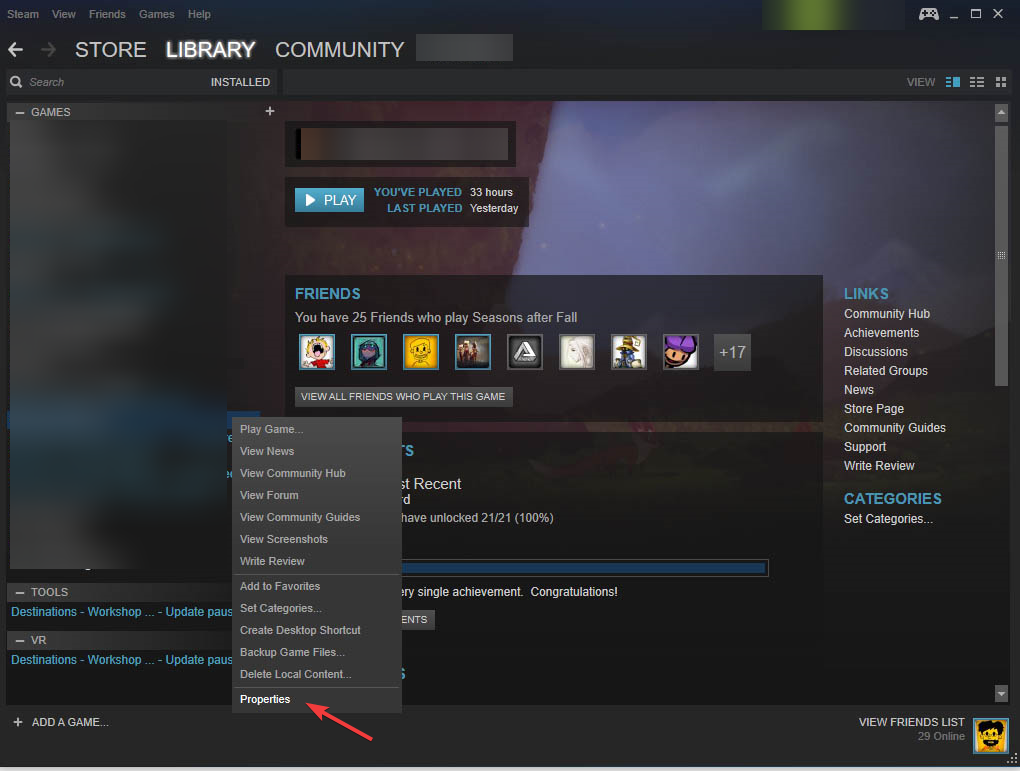
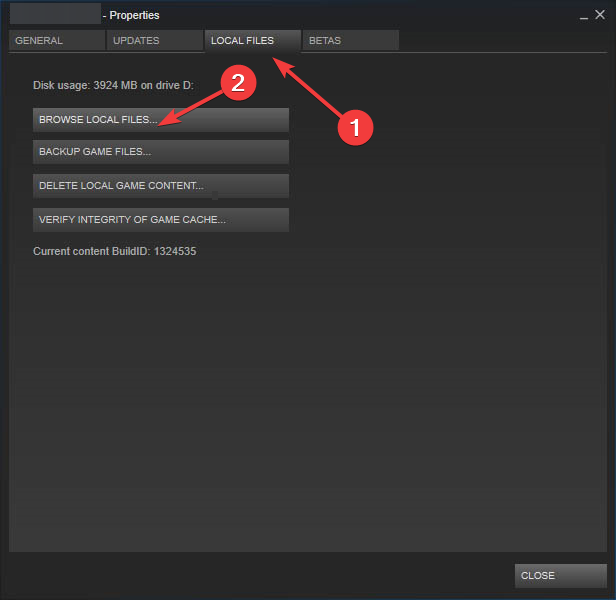
- Launch Steam. Go to the game, right-click it, and select Properties.
- Now go to the Local files tab, and click Browse Local Files.
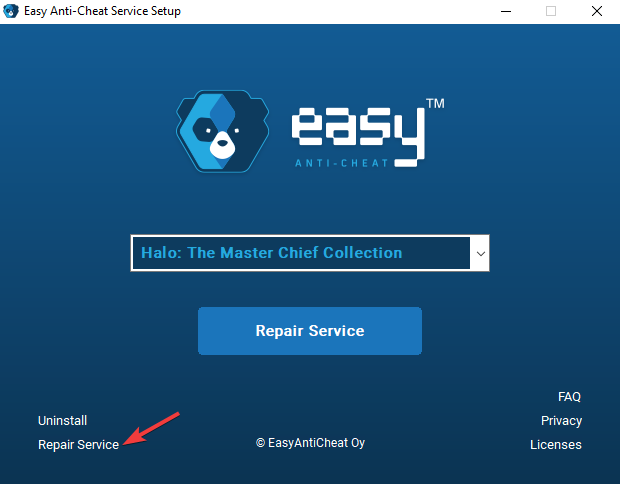
- Select, right-click EasyAntiCheat_Setup.exe, and click Run as administrator.
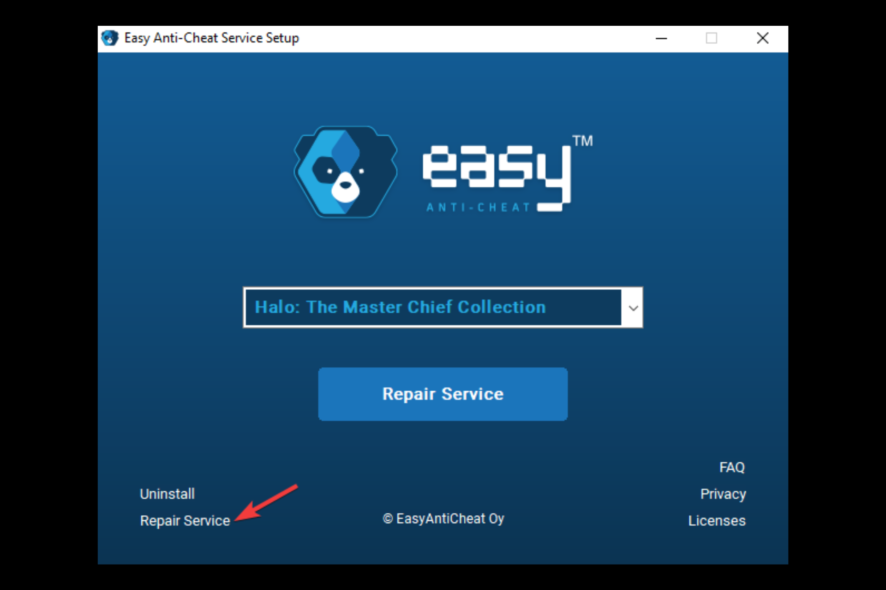
- Choose the game which crashed from the list and click Repair Service.
- Follow the onscreen instructions to complete the process.
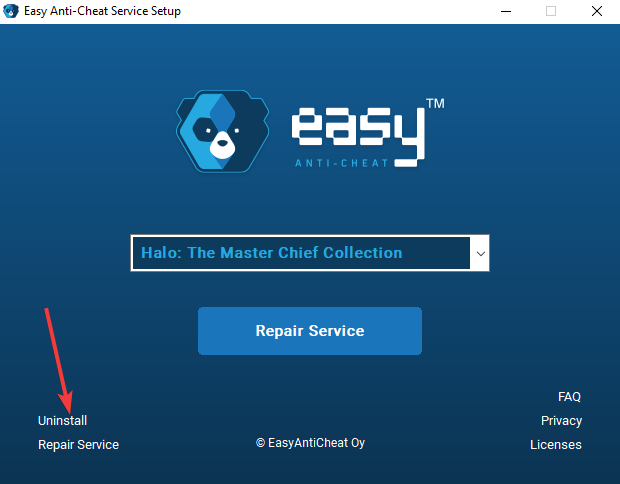
- If this didn’t help, repeat the same steps, and instead of Repair, select Uninstall.
- Now reinstall the game and check if it fixes the issue.
2. Use the Command Prompt
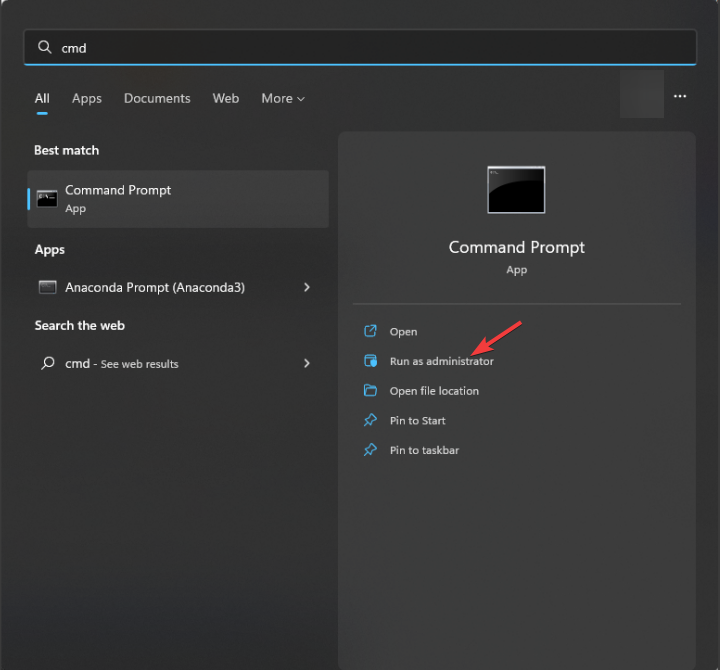
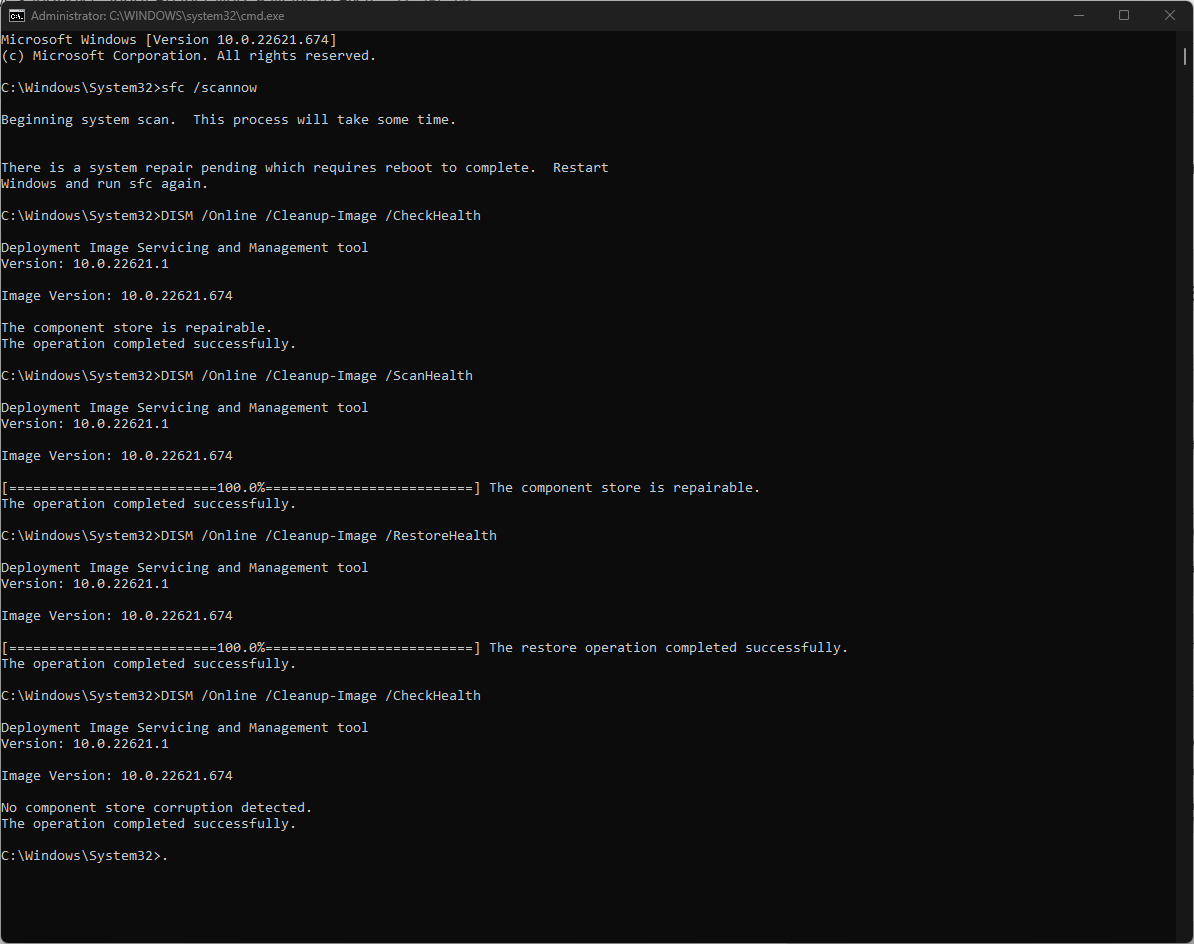
- Press the Windows key, type CMD, and click Run as administrator.
- Type the following command to repair system files and press Enter :
sfc/scannow - Copy and paste the following commands one by one to repair the Windows image, and press Enter after every command:
DISM /Online /Cleanup-Image /CheckHealthDISM /Online /Cleanup-Image /ScanHealthDISM /Online /Cleanup-Image /RestoreHealth - Restart your computer to let the changes take effect.
3. Run Disk Cleanup
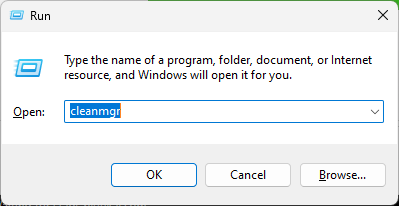
- Press Windows + R to open the Run console.
- Type cleanmgr and click OK to open Disk Cleanup.
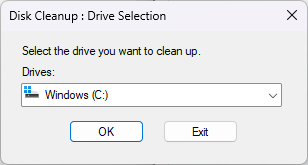
- Select C drive on the Disk Cleanup: Drive Selection and click OK.
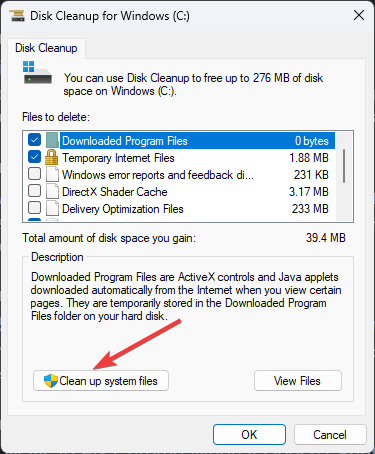
- Click Clean up system files.
- Again choose C drive in the Disk Cleanup: Drive Selection and click OK.
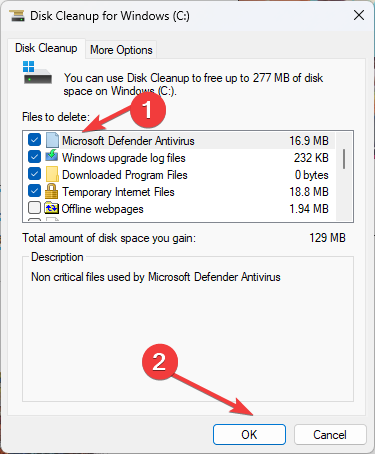
- Select all the files under Files to delete and click OK.
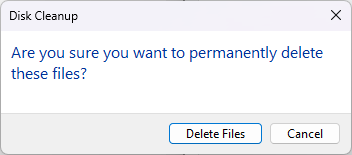
- Click Delete Files.
4. Run Windows memory diagnostic tool
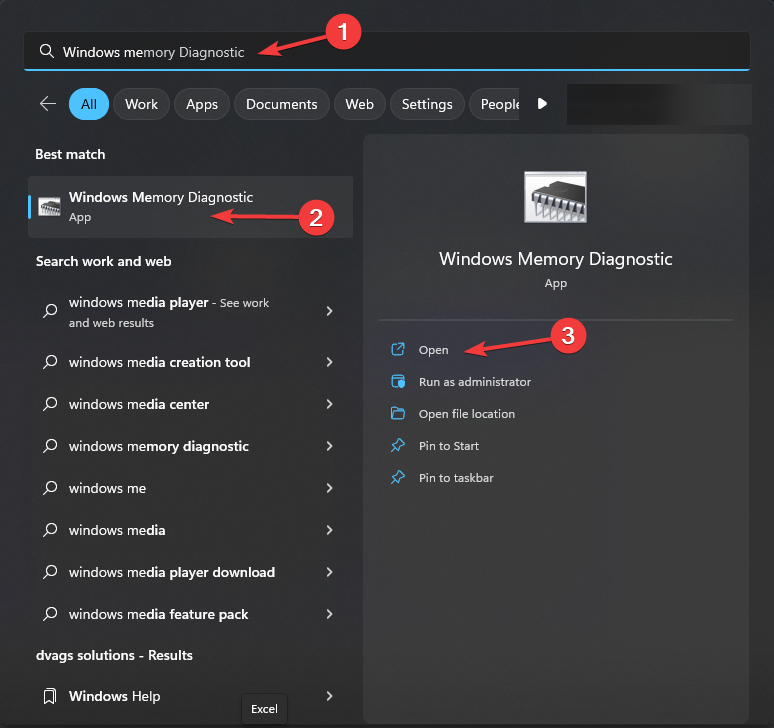
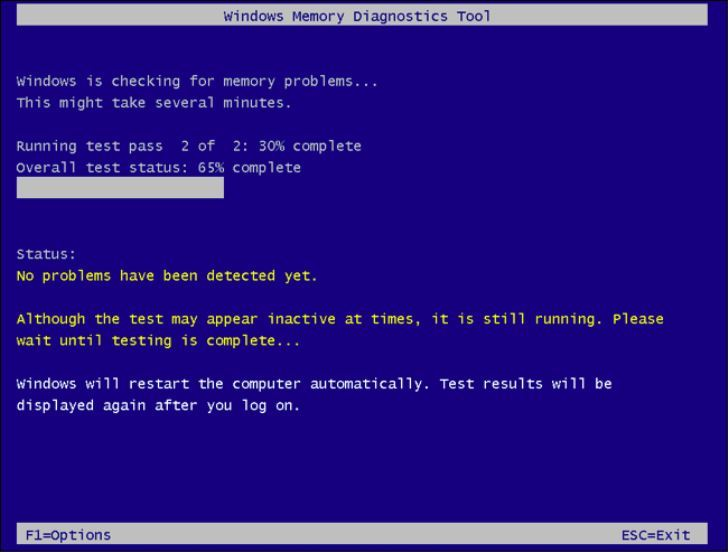
- Press the Windows key, type Windows Memory Diagnostic, and click Open.
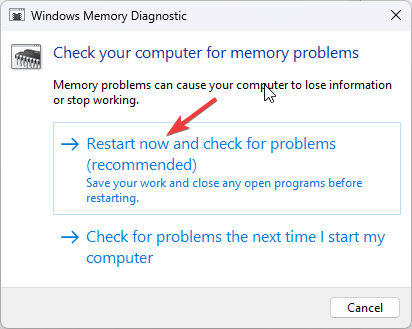
- Click Restart now and check for problems.
- The computer will restart and the tool will run the memory test.
- You can change the test options by pressing F1.
- Once the scan is complete, you can check for errors under Event Viewer.
5. Update the GPU drivers
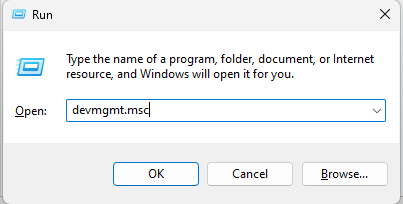
- Press Windows + R to open the Run dialog box.
- Type devmgmt.msc and click OK to open the Device Manager.
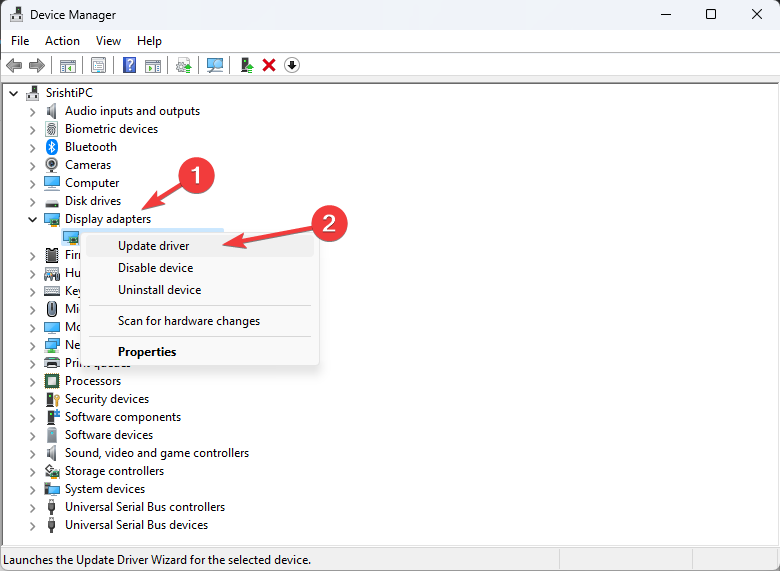
- Locate and double-click Display adapters.
- Right-click the graphics driver, and click Update driver.
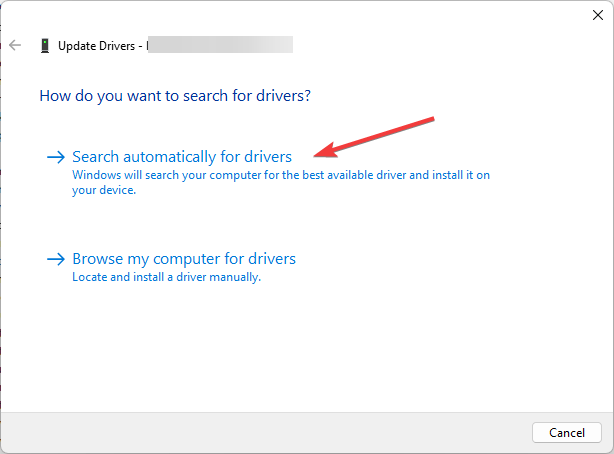
- Click Search automatically for drivers.
- Follow the onscreen instructions to complete the process.
In some cases, updating any drivers manually can be a tech-wise process and even cause BSoD issues due to problematic or incompatible driver versions.
Fortunately, there is a dedicated tool capable of finding the official drivers and updating them automatically on your PC.
⇒ Get PC HelpSoft Driver Updater
6. Run your computer in a clean boot environment
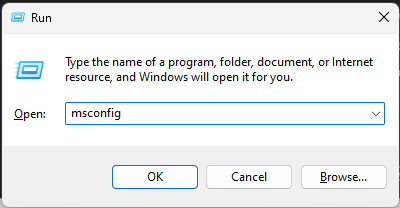
- Press Windows + R to open the Run dialog box.
- Type msconfig and click OK to open System Configuration.
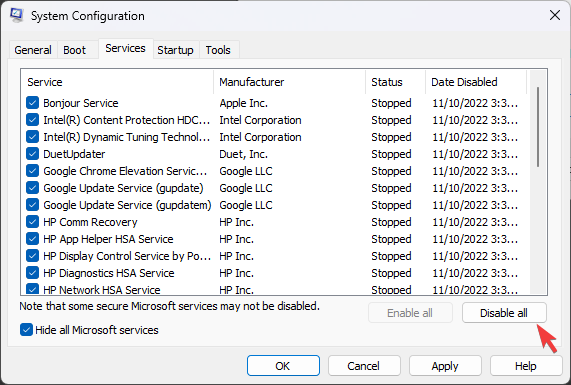
- Go to the Services tab, place a checkmark next to Hide all Microsoft Services, and click Disable all.
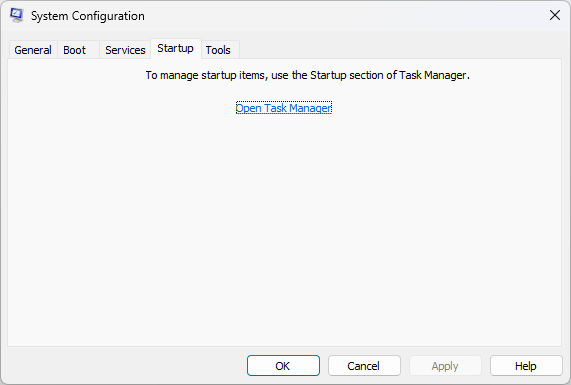
- Switch to the Startup tab, and click Open Task Manager.
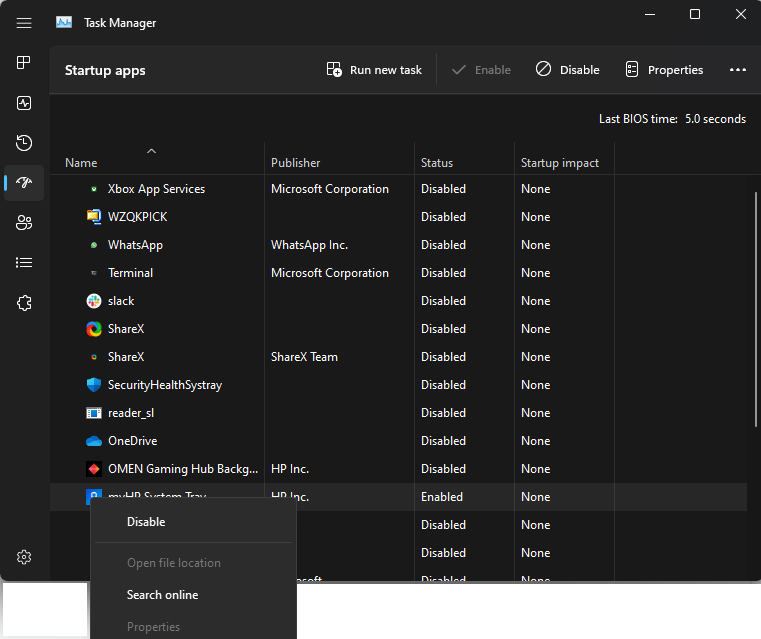
- Select all the Enabled items one by one and click Disable.
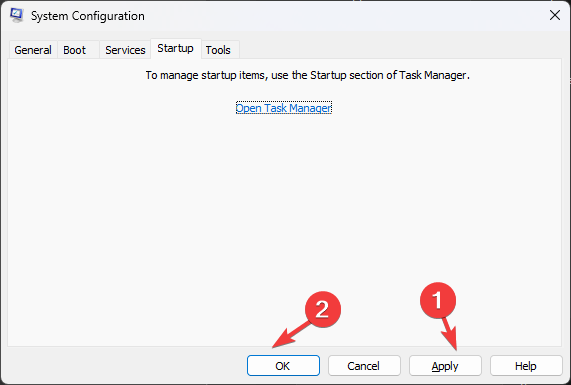
- Close Task Manager and click Apply, then OK.
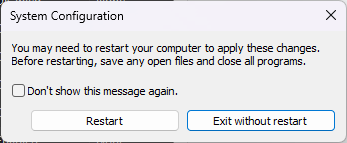
- Click Restart when prompted to save the changes.
7. Perform System Restore
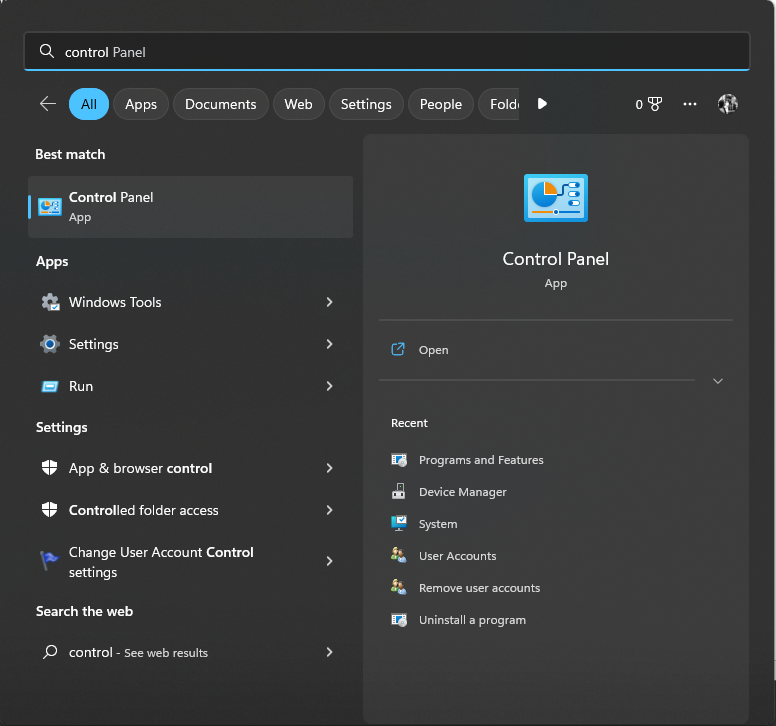
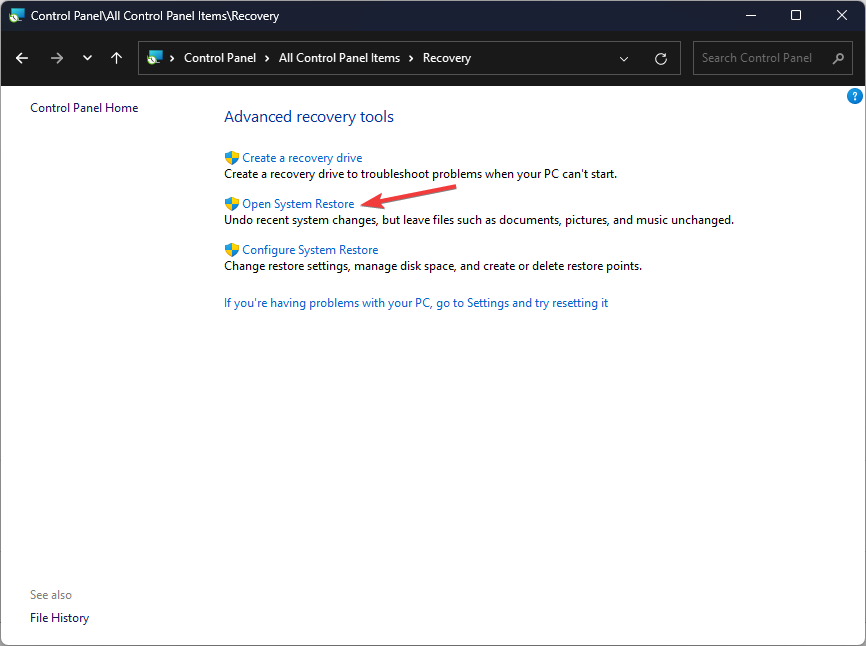
- Press the Windows key, type Control Panel, and click Open.
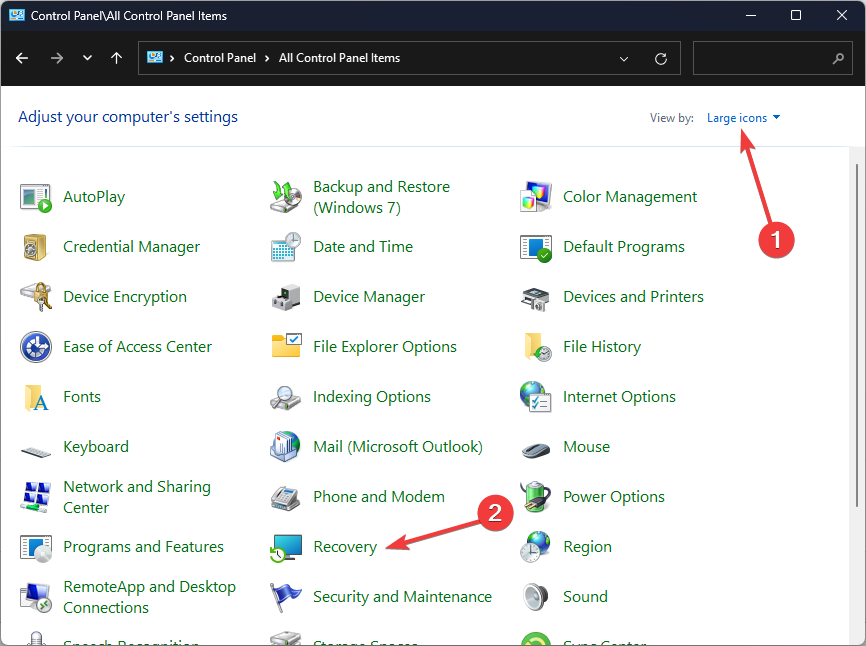
- Select View by as Large icons and click Recovery.
- Click Open System Restore.
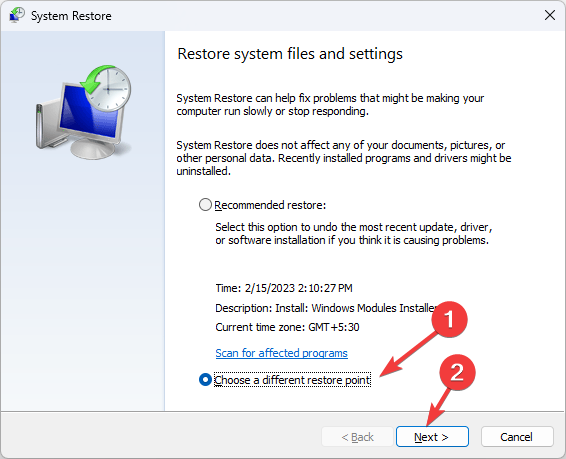
- On the System Restore window, select Choose a different restore point and click Next.
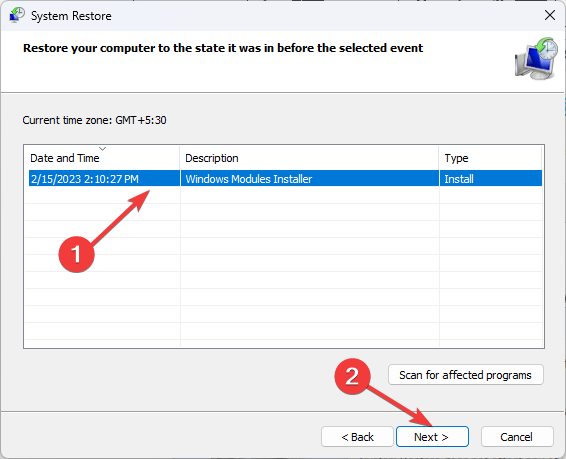
- Now select the restore point and click Next.
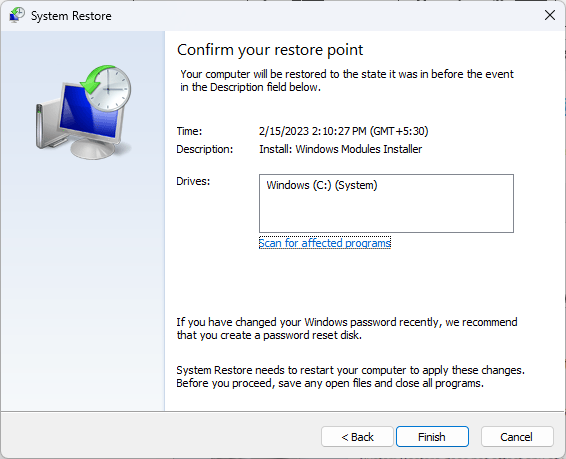
- Click Finish.
So, these are steps that you need to follow to fix EasyAntiCheat.sys BSOD error. If the BSoD is only on one game, check out our dedicated guide.
We also have a guide on Apex Legends Anti Cheat error, that is caused by this software, so don’t miss it.
If you have any other questions related to this blue screen of death, please mention them in the comments section below.



User forum
1 messages