ERROR_VC_DISCONNECTED [BSoD Fix]
First, reboot the client and server devices to quickly fix the issue
6 min. read
Published on
Read our disclosure page to find out how can you help Windows Report sustain the editorial team. Read more
The ERROR_VC_DISCONNECTED 240 (0xF0) with the error message “The session was canceled” appears when a problem with a Virtual Channel session in a remote desktop or virtual environment, such as Remote Desktop Protocol or VMware, Hyper-V, etc., occurs. This indicates that the connection was unexpectedly closed or terminated.
First, ensure both the client and server devices are on the same network or connection properly via VPN or remote access, then reboot them. If you are using a Virtual platform, check the resource allocation memory (CPU, memory, disk), look for session limits, and review the platform logs for issues and warnings related to connection errors.
How can I fix the ERROR_VC_DISCONNECTED issue?
1. Check RDP settings
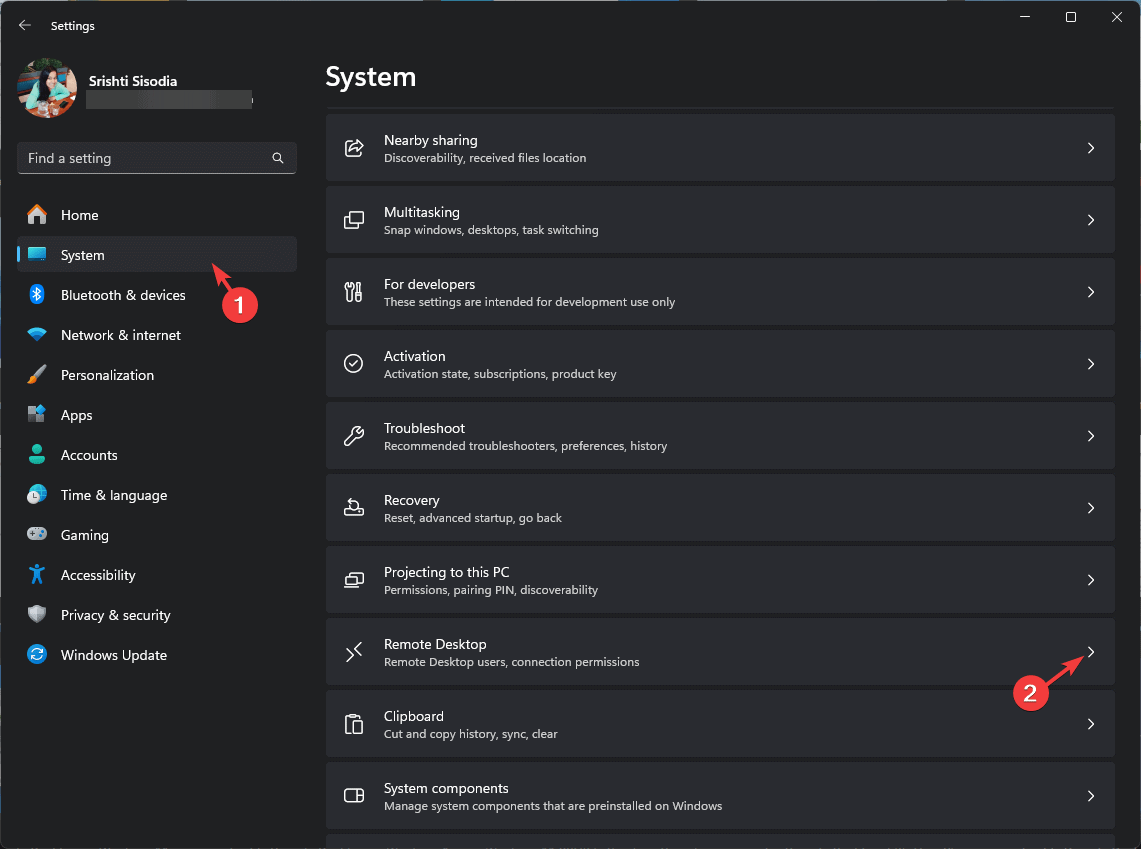
- Press Windows + I to open the Settings app.
- Go to System, then click Remote Desktop.
- Make sure the Remote Desktop option is toggled on.
- If it is not, enable it, then click Yes on the UAC prompt and click the Confirm button.
- Next, click the drop-down arrow next to the toggle switch and place a checkmark next to Require devices to use Network Authentication to connect (Recommended).
- Click Yes on the UAC prompt, then click Confirm.
2. Adjust the session timeouts
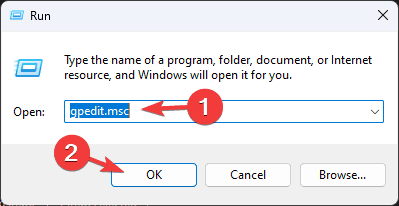
- Press Windows + R to open the Run window.
- Type gpedit.msc and click OK to open the Group Policy Editor.
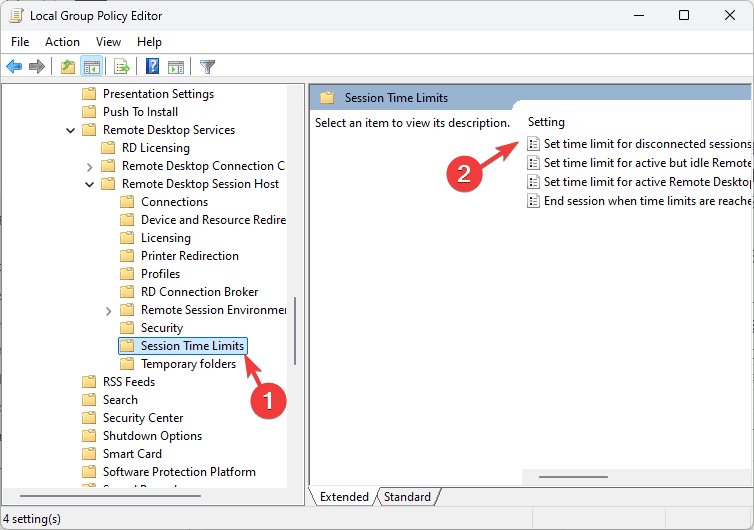
- Navigate to this path:
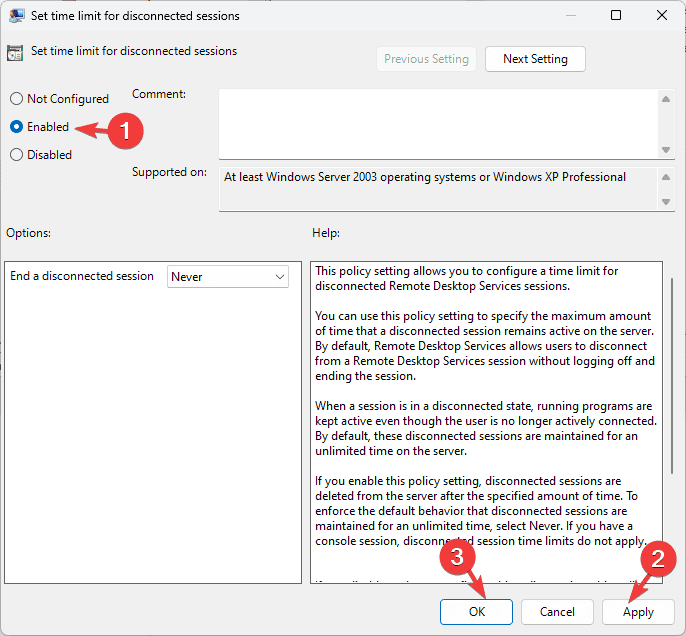
Computer Configuration \Administrative Templates\ Windows Components\ Remote Desktop Services\ Remote Desktop Session Host\Sessions Time Limits - On the right pane, you will see options to adjust the time limit for the sessions.
- Double-click any of the options and select Enabled/Disabled to make the changes according to your requirements. Then click Apply, OK, and restart your PC.
3. Update the network & graphics driver
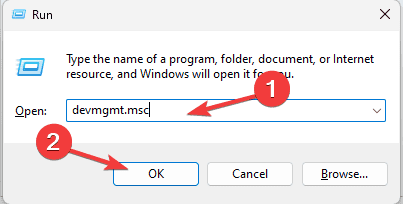
- Press Windows + R to open the Run window.
- Type devmgmt.msc and click OK to open the Device Manager window.
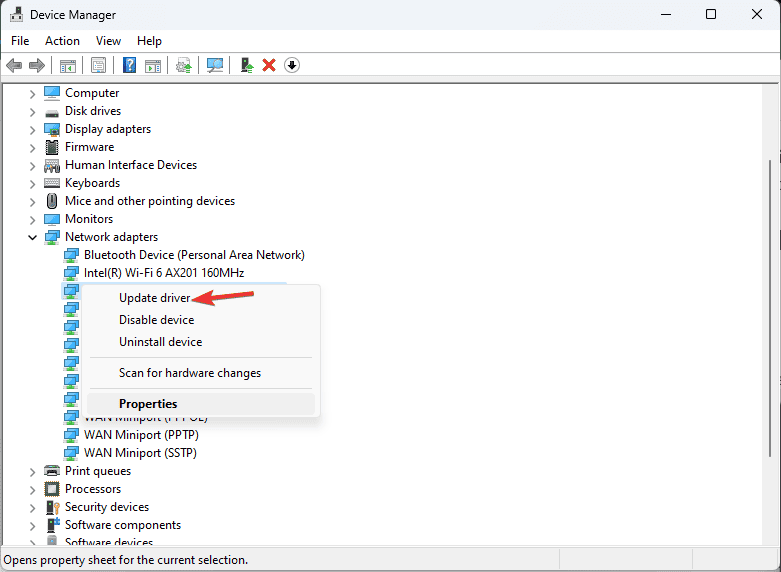
- Locate Network adapters, click it to expand, then right-click the driver and select Update driver from the context menu.
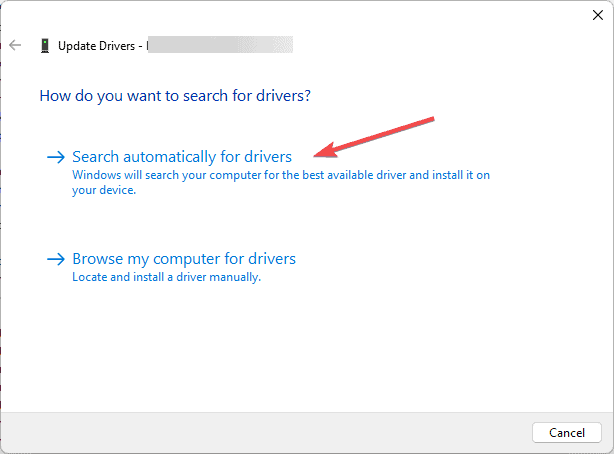
- Click Search automatically for drivers and follow the on-screen instructions to complete the process.
- Next, locate Display adapters and update the drive using the same steps. You need to follow these steps on both client and server machines.
If Windows cannot find your computer’s latest driver version, you can head to the manufacturer’s website and download and install it. Alternatively, to ensure all the drivers on your device are always up to date, we recommend getting a reliable driver updater tool.
4. View the Event logs
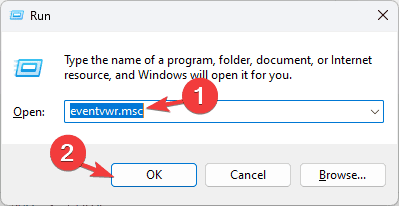
- Press Windows + R to open the Run window.
- Type eventvwr.msc and click OK to open the Event Viewer window.
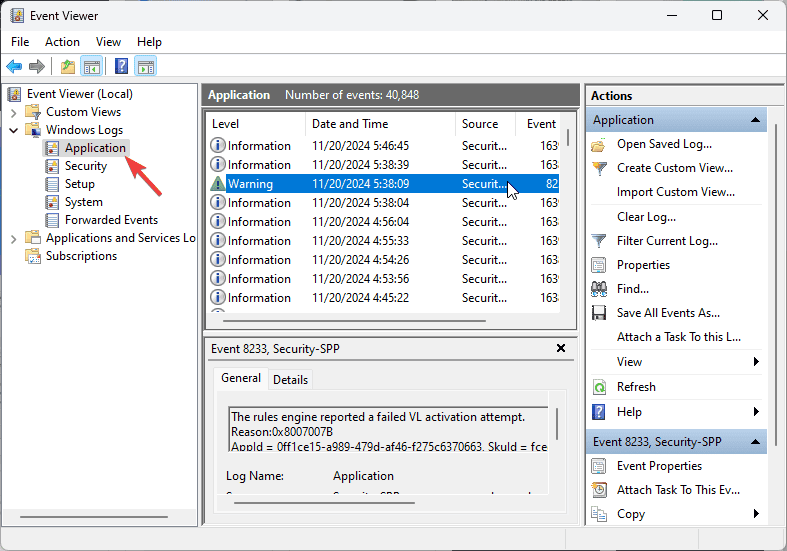
- Go to Windows Logs, then Application if there are app-related issues. However, go to System if the issues are related to System.
- To better understand the ERROR_VC_DISCONNECTED BSoD error, look for Event IDs like 56 or error codes related to Remote Desktop, Virtual Channels, or RDP.
5. Adjust Firewall settings
 NOTE
NOTE
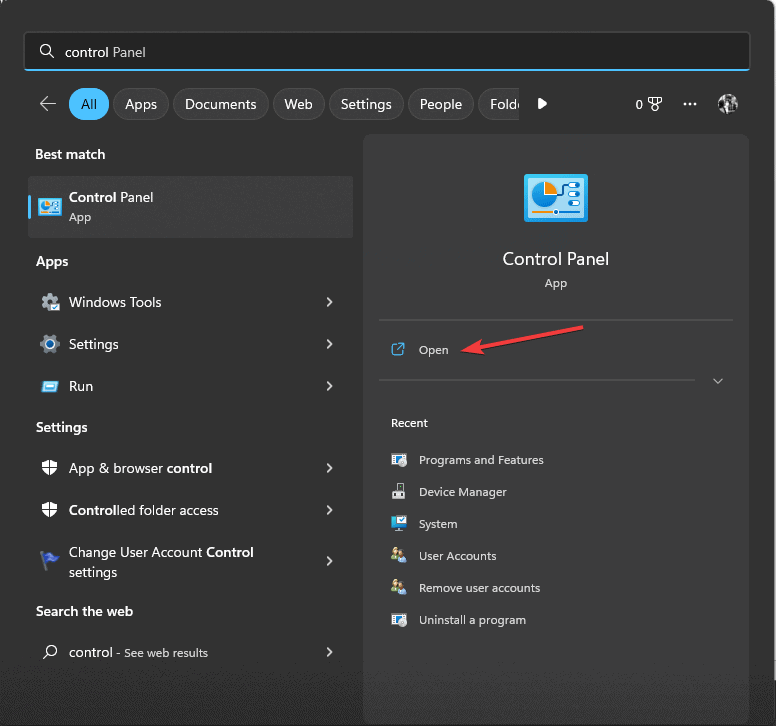
- Press the Windows key, type control panel in the search box, and click Open from the list of options.
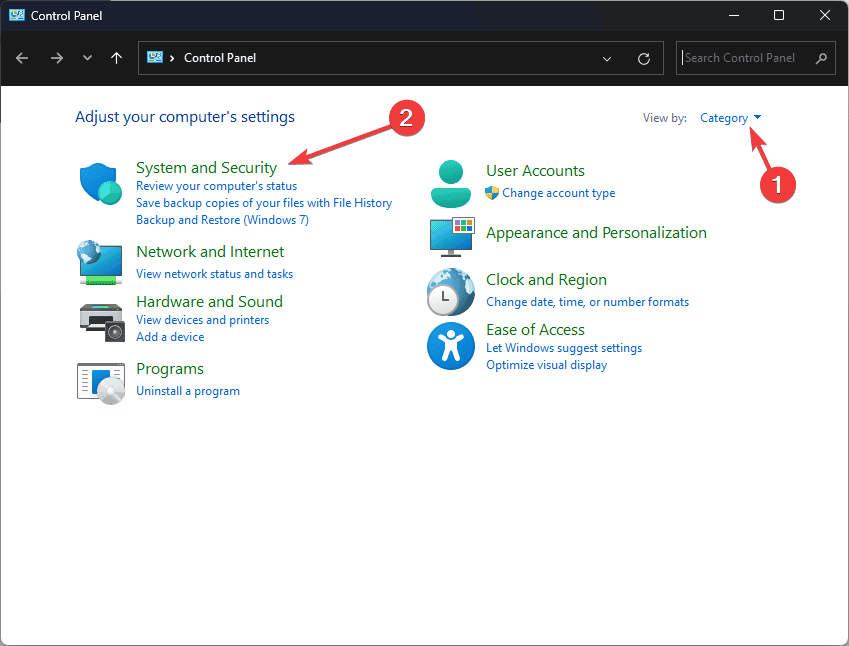
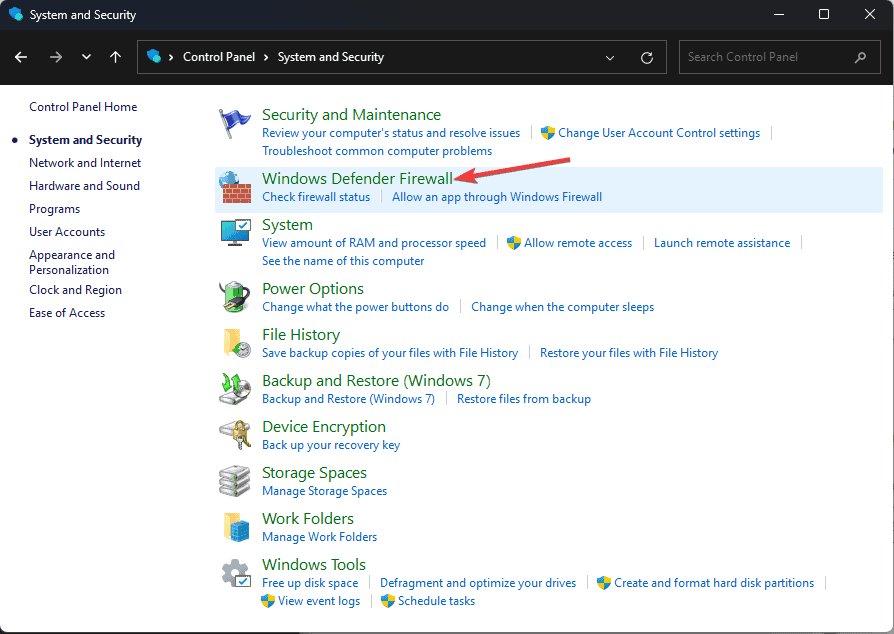
- Select Category for View by, then click System and Security.
- Click Windows Defender Firewall.
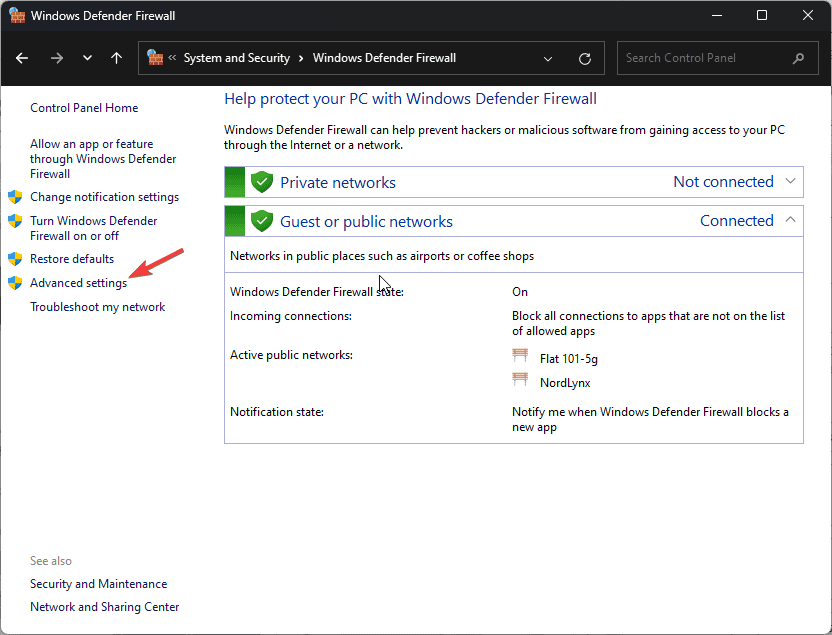
- From the left pane, click Advanced settings to launch the Windows Defender Firewall with Advanced Security window.
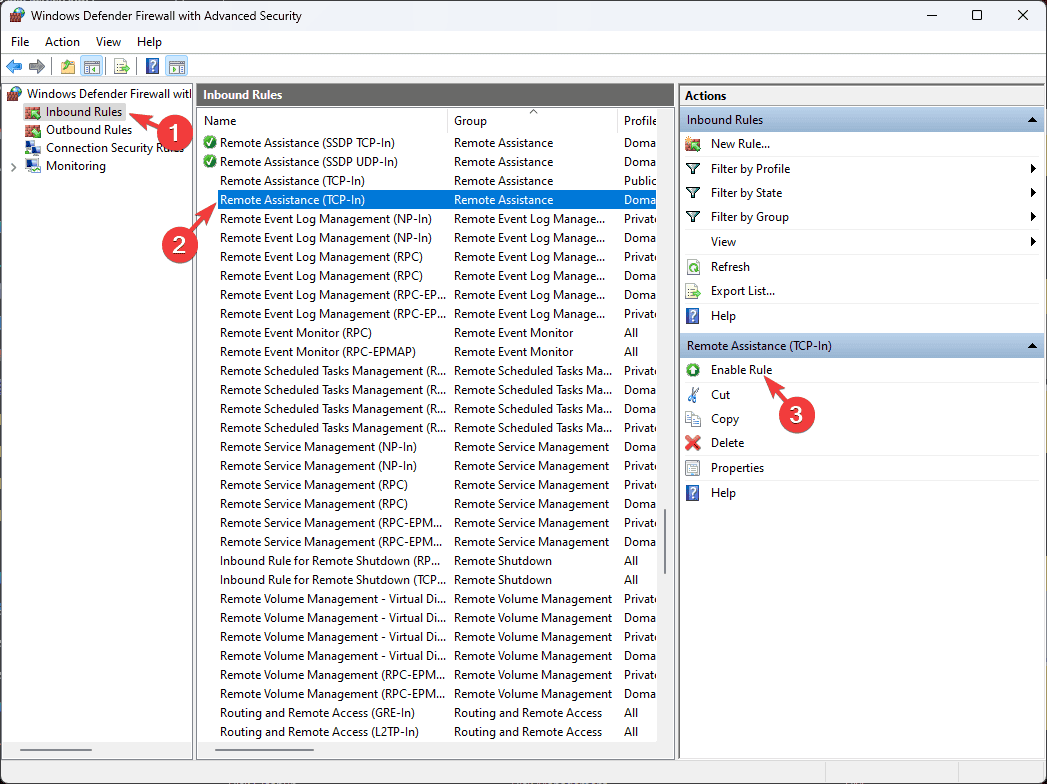
- Click Inbound Rules from the left pane.
- Look for the Remote Desktop (TCP-In) rule in the middle pane and ensure it allows RDP traffic on Port 3389.
- Select it and check if it is disabled. If so, click Enable Rule from the right pane.
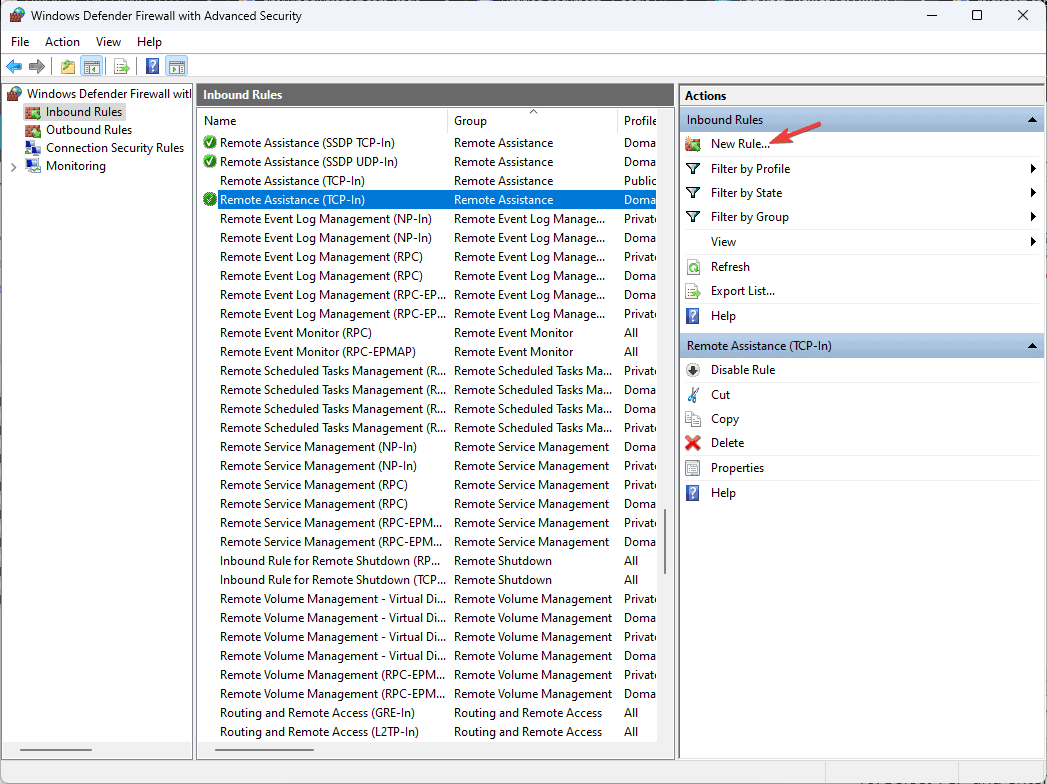
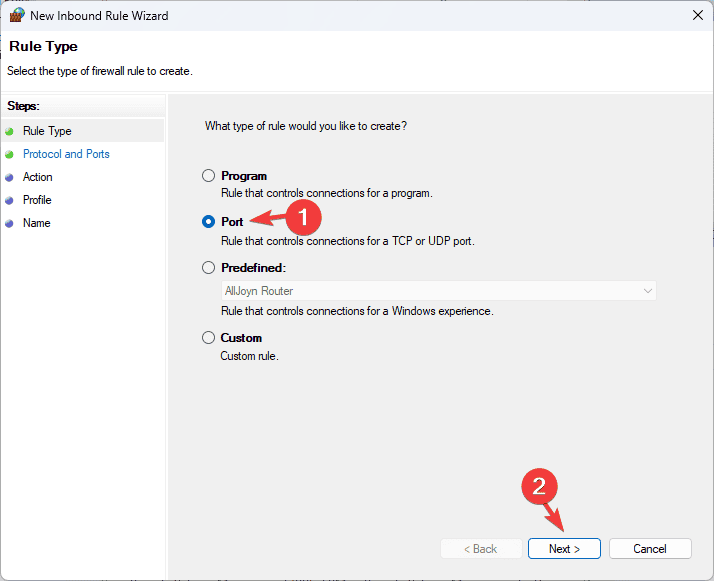
- If you don’t see the rule, click New Rule under Actions.
- Choose Port, then click Next.
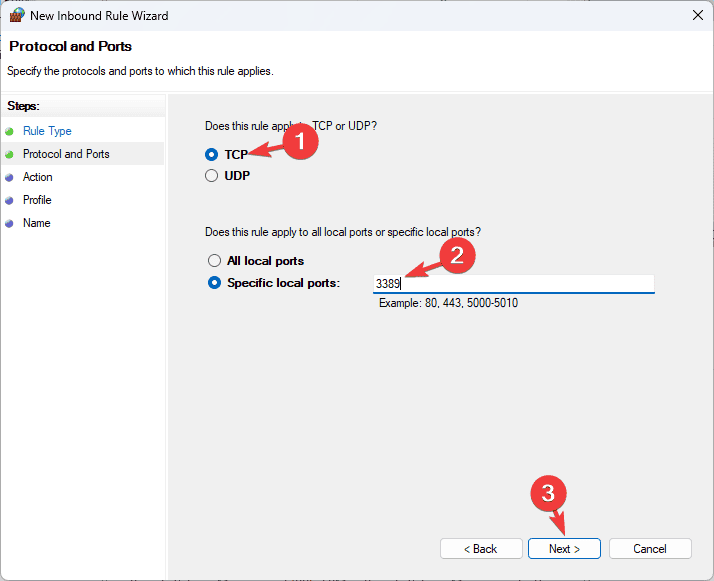
- Select TCP and enter 3389 for the port number, then click Next.
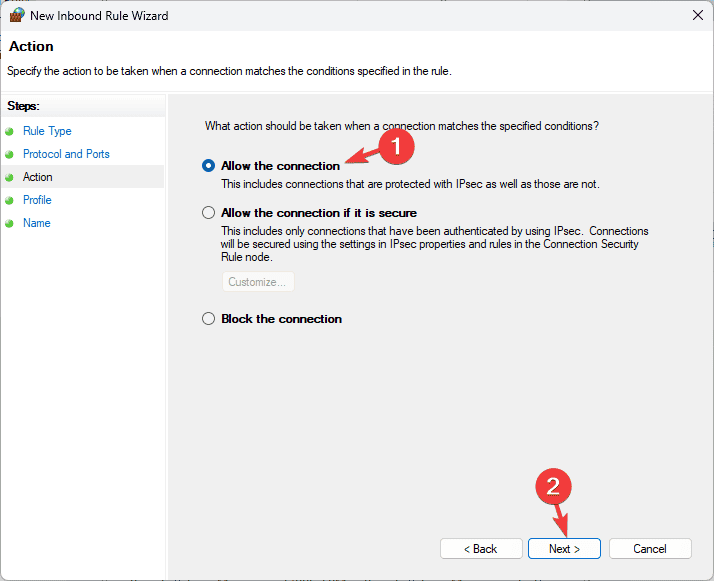
- Choose Allow the connection, and click Next.
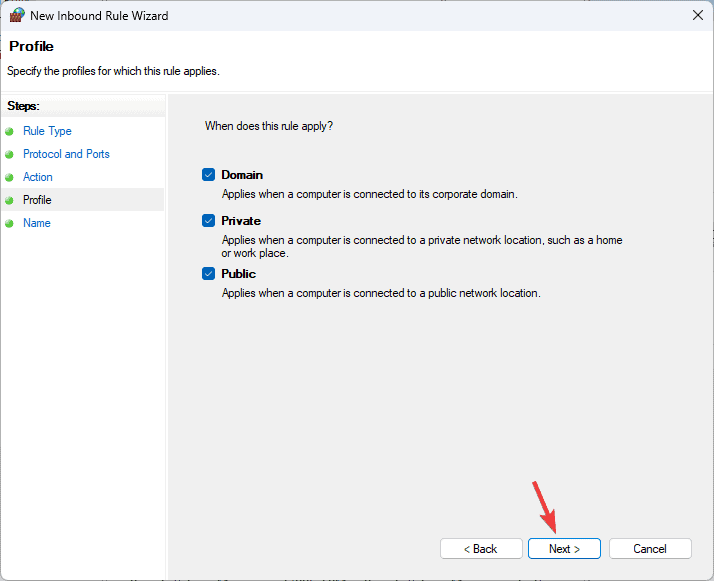
- Choose the profiles (Domain, Private, and Public) according to your network configuration, then click Next.
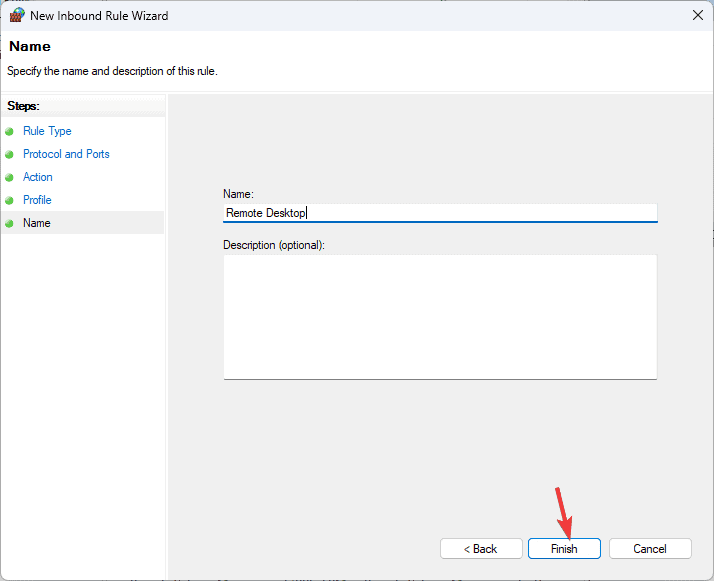
- Name the rule and click Finish.
6. Disable Windows Firewall temporarily
- Press the Windows key, type control panel in the search box, and click Open from the list of options.
- Select Category for View by, then click System and Security.
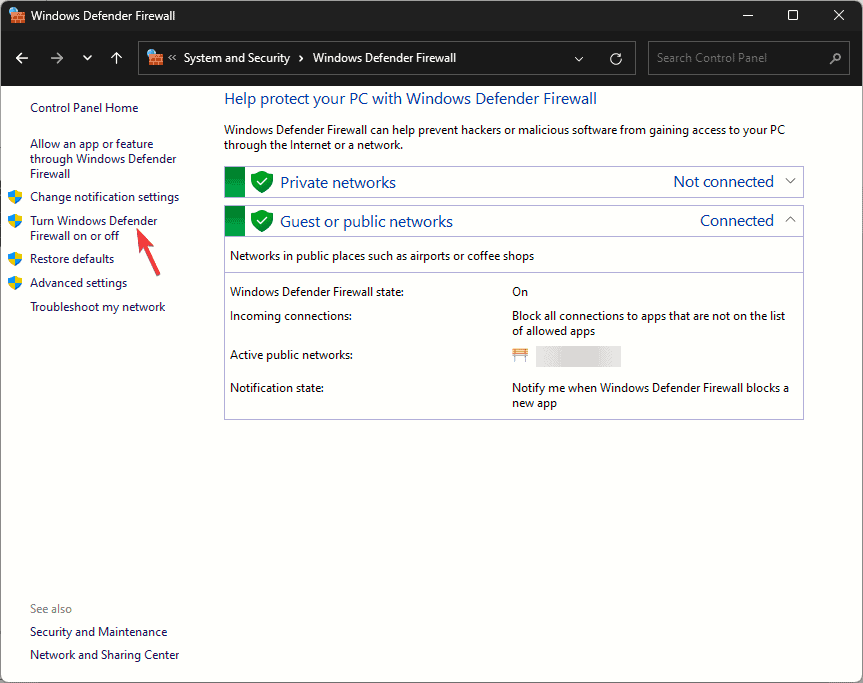
- Click Windows Defender Firewall.
- Select Turn Windows Defender Firewall on or off from the left pane.
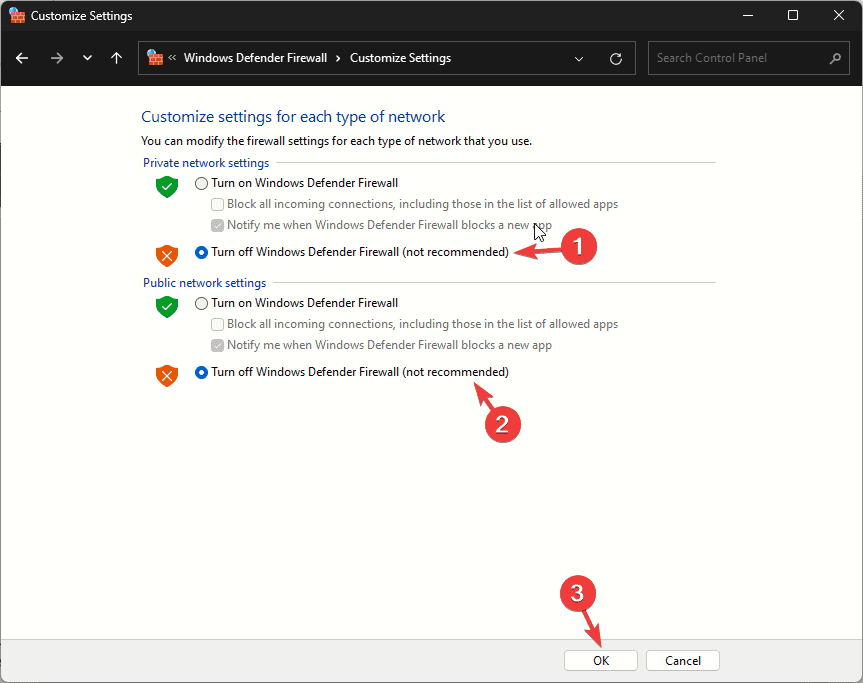
- Under Private network settings, and Public network settings, select Turn off Windows Defender Firewall (Not Recommended).
- Click OK.
Follow the same steps on both the client and server machines. If you use a third-party firewall or antivirus app, you can temporarily disable it, then check if you face the ERROR_VC_DISCONNECTED again.
7. Reconfigure or repair the RDP client
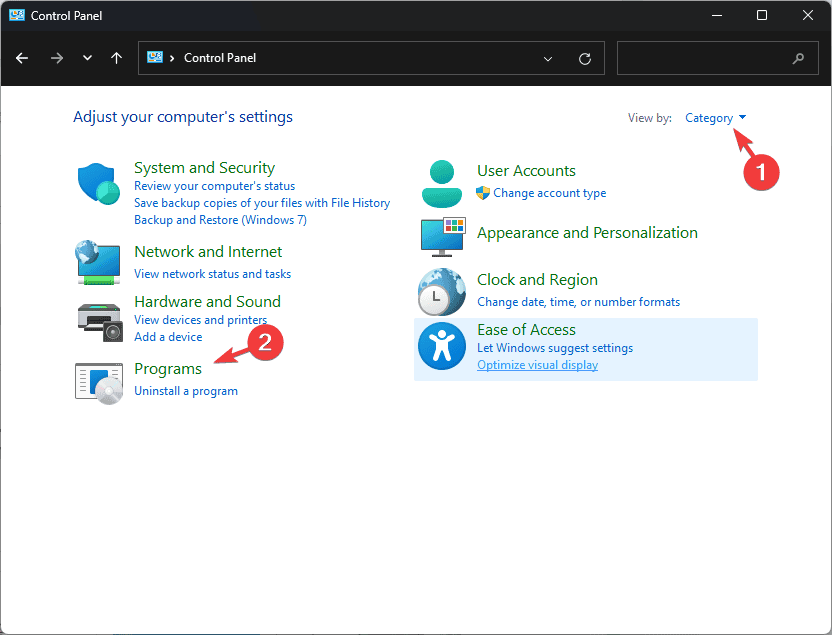
- Press the Windows key, type control panel in the search box, and click Open from the list of options.
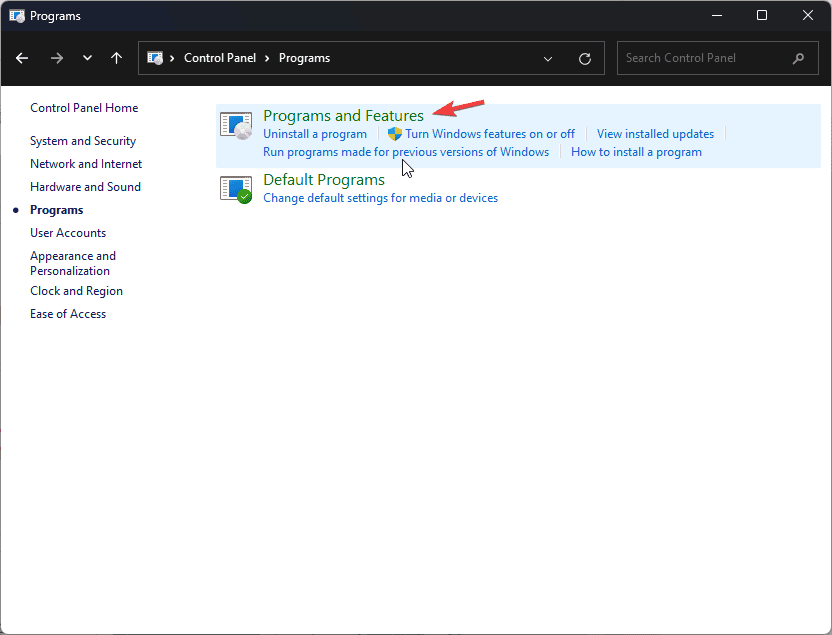
- Select Category for View by, then click Programs.
- Click Programs and Features.
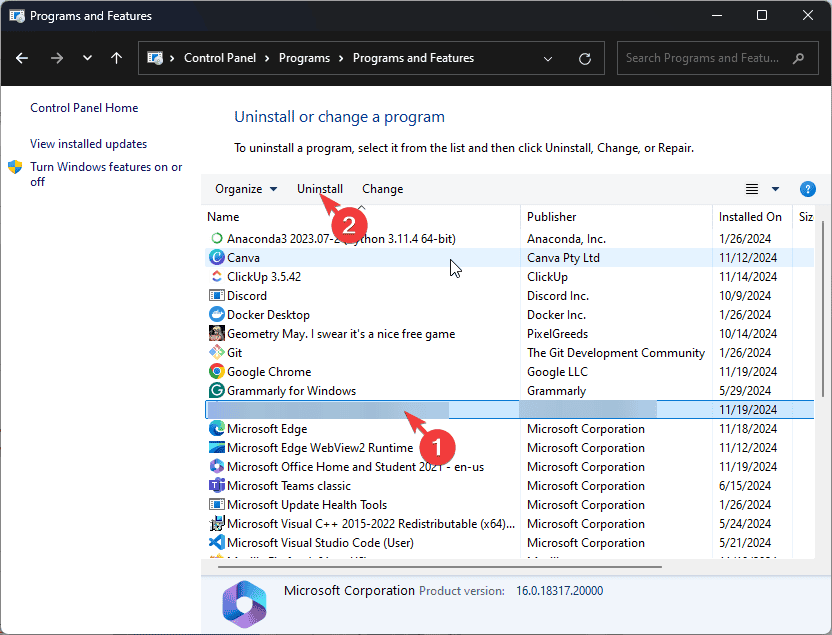
- Look for the Remote Desktop client app and select it, then click Uninstall.
- Once done, go to the Microsoft Store or the app’s official website to reinstall it.
8. Create a new user profile & initiate the RDP session
- Press Windows + I to open the Settings app.
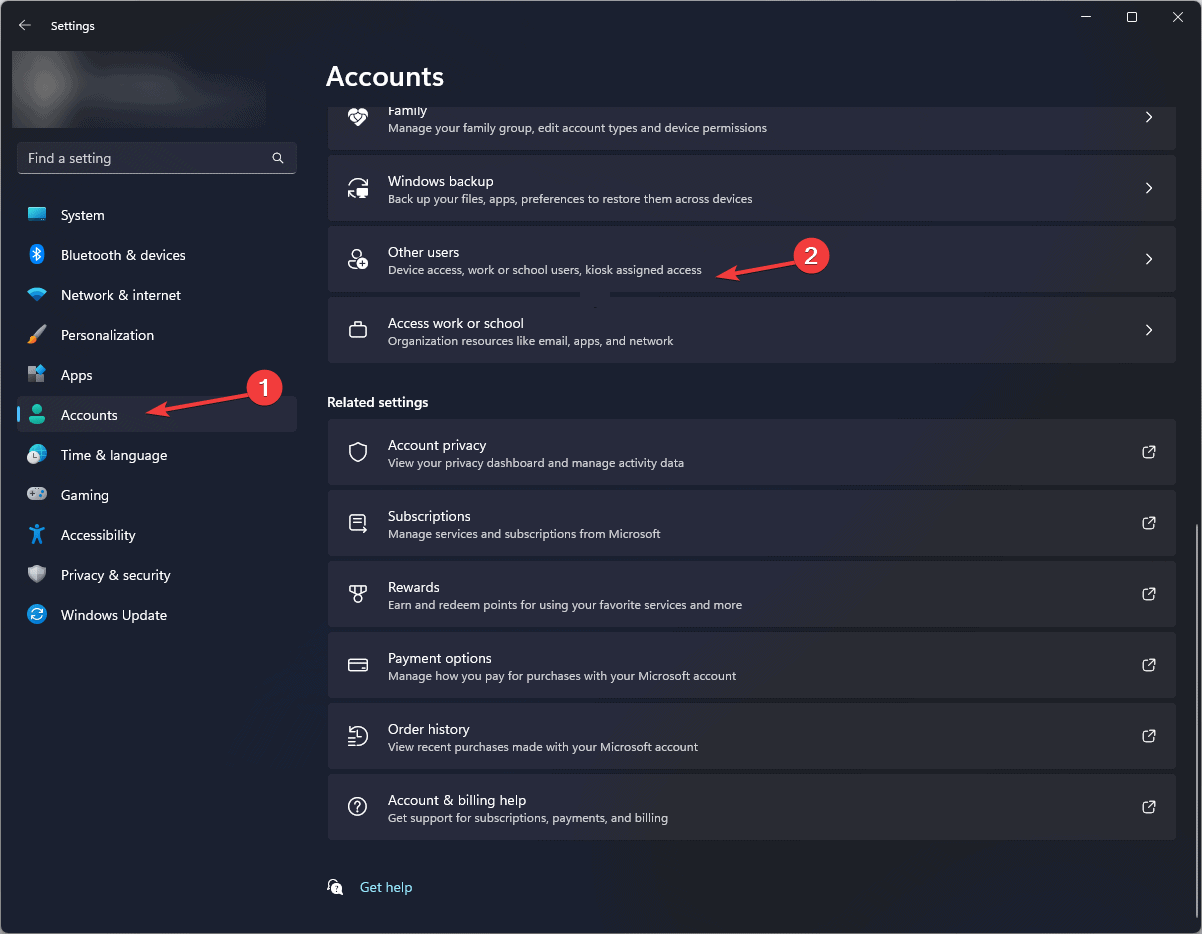
- Go to Accounts, and click Other users.
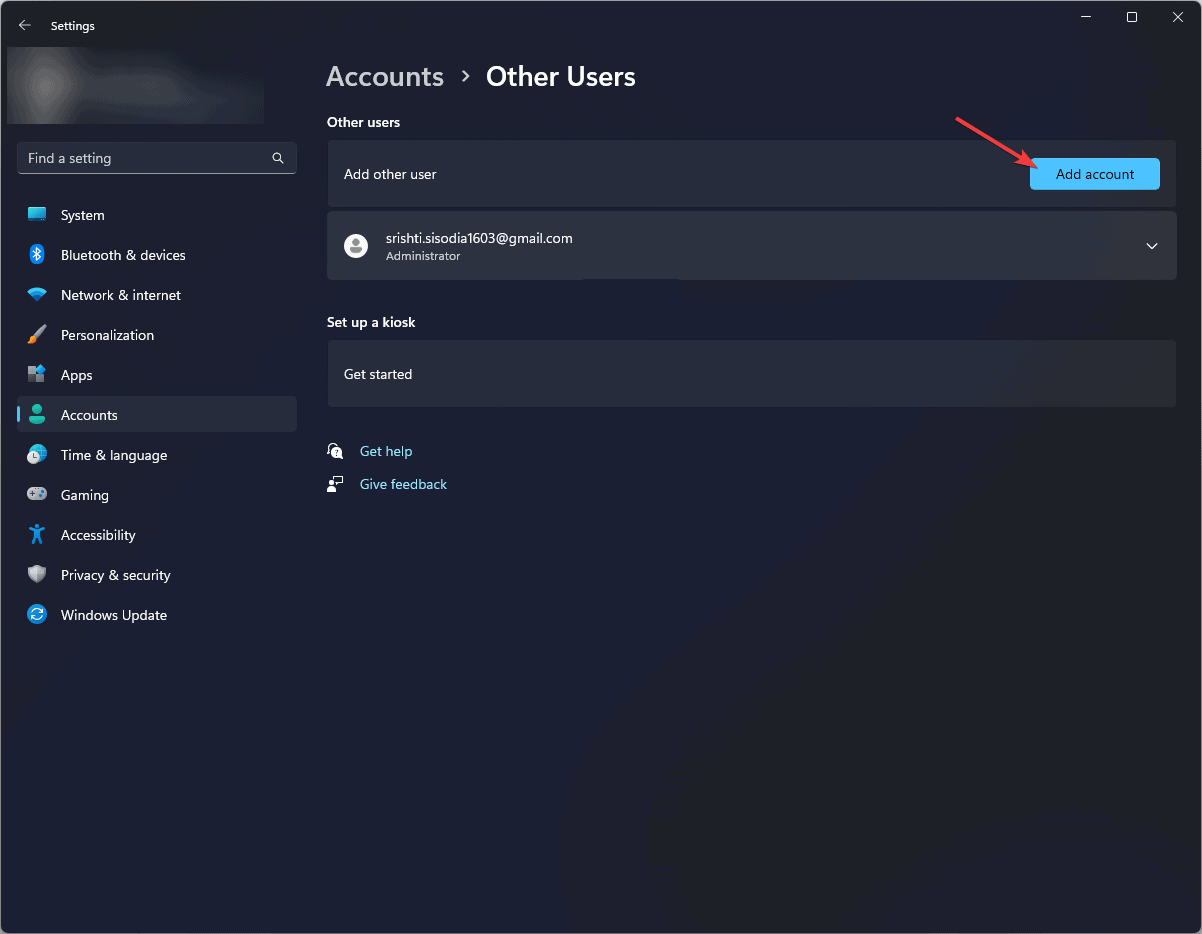
- Locate Add other user and select Add account.
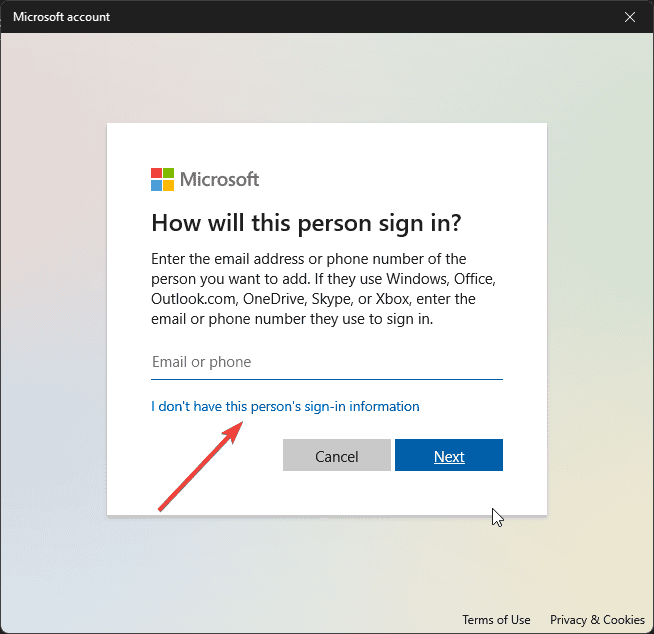
- On the following dialog box, select I don’t have this person’s sign-in information.
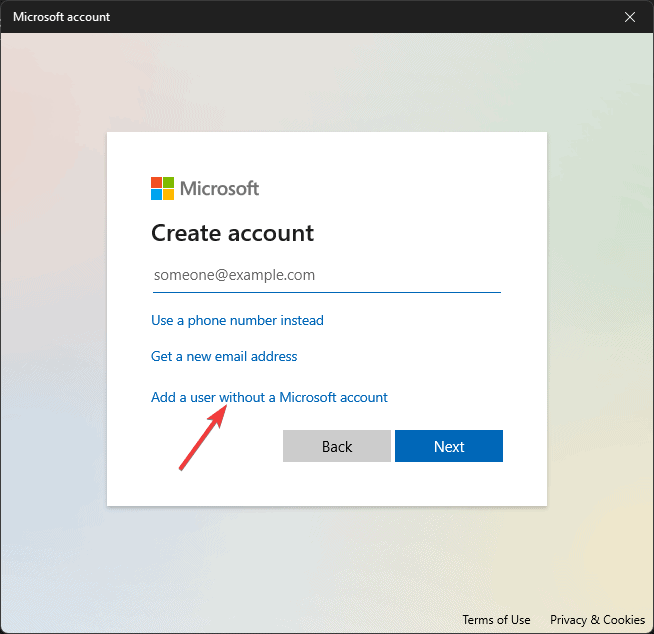
- Choose Add a user without a Microsoft account.
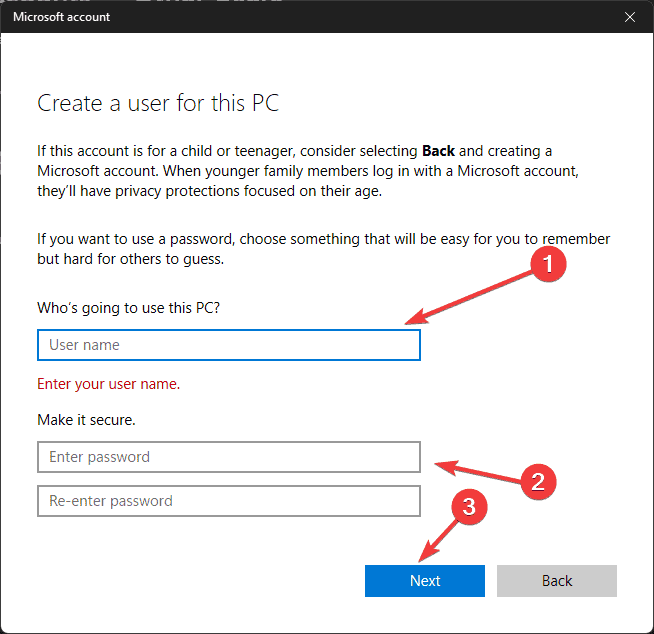
- Enter the username and password you want to use for the account, then click Next.
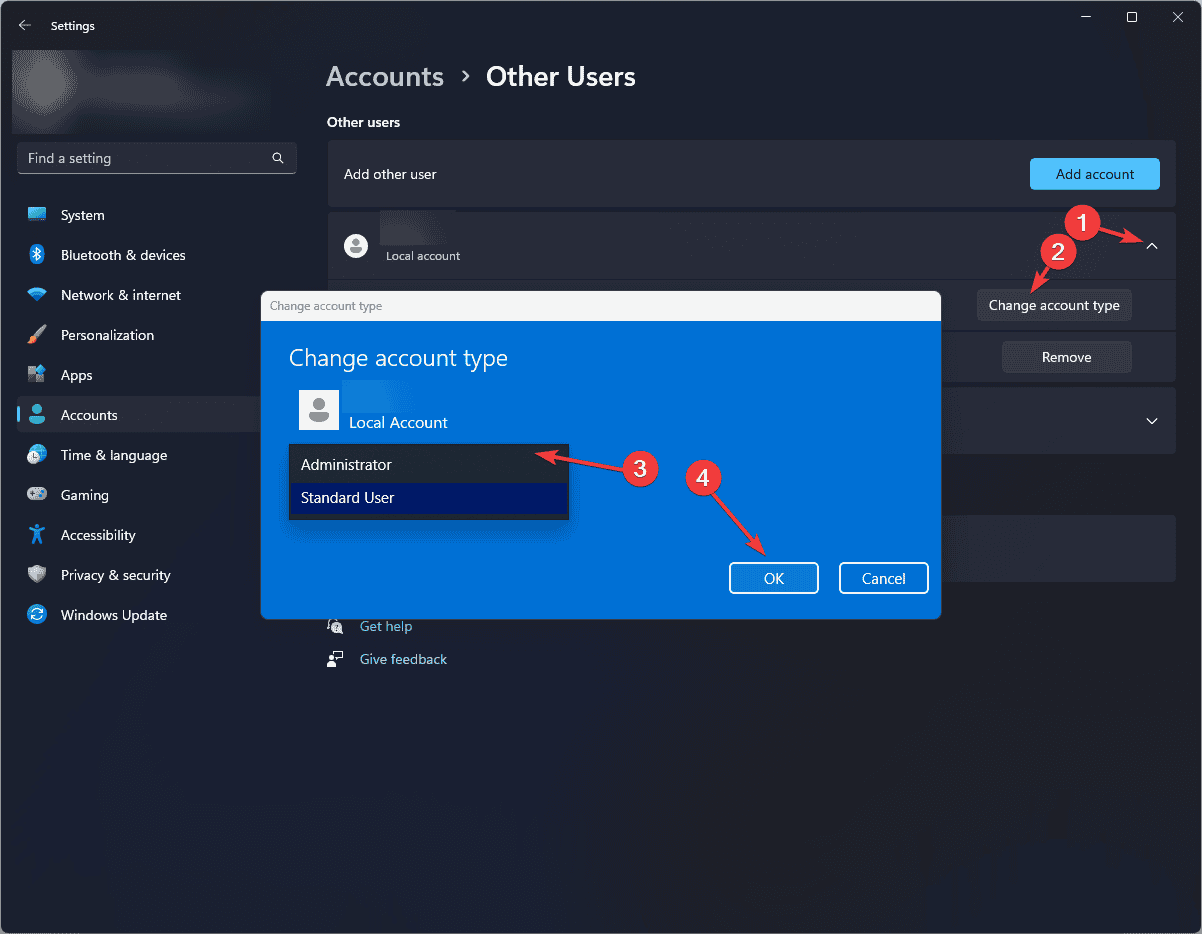
- Once done, you will the new account under Other users.
- If you want to give the account admin privileges, click Change account type and select Administrator from the drop-down.
Now log in to the new user account and initiate the RDP session using these steps:
- Click the Windows icon, then click your profile picture, then choose Sign out. Now sign in using the new account credentials.
- On the client machine, press Windows Key + R, type mstsc, and click OK to open Remote Desktop Connection.
- Enter the IP address or hostname of the server and start the connection.
- Now, enter the new username and password to log in and start the RDP session, and then check if you encounter ERROR_VC_DISCONNECTED error or if the session is working without any issues.
If the RDP on the new account works fine, this means the issues are with the original user profile. You can either delete it and create a new one or try repairing it.
In conclusion, to fix the ERROR_VC_DISCONNECTED issue, first, check the RDP settings, then make sure the session time-out settings in Group Policy Editor are set as per your requirements, update the network and graphics driver, adjust the firewall settings, repair the RDP client or create a new user profile.
Did we miss a step that helped you to fix the BSoD issue? If so, share it with our readers in the comments section below. We will add it to the list.


User forum
0 messages