Use the Filmora 12.3 Color Correction Tool to Enhance your Photos
The ultimate secret weapon to breathing life & vibrancy into your videos
Key notes
- Filmora 12.3's Color Correction Tool is a game-changer for content curators seeking to enhance their photos.
- Whether you want to create like Wes Anderson or capture Barbie’s Dreamhouse, you can easily adjust the colors, brightness, and contrast, to transform ordinary images into vibrant masterpieces.
Say goodbye to dull and lackluster images, and embrace a world where every pixel pops with captivating hues.
Whether you are a social media influencer, content creator, or simply someone who loves capturing beautiful moments, Filmora Video Editor can help you make your photos stand out from the crowd.
With Filmora Video Editor 12.3 Color Correction tool, your photos will undergo a dazzling transformation like never before.
From enhancing the richness of colors to adjusting the perfect balance of tones, this tool puts the power of professional-grade color correction right at your fingertips.
How can color correction by Filmora help enhance a video?
Color Correction by Filmora Video Editor is a powerful tool that can significantly enhance your videos in several ways:
- Corrects color balance – Allows you to adjust the color balance of your video, ensuring that the overall tones are accurate and natural.
- Enhances contrast and saturation – Helps boost your video’s contrast and saturation levels to make your visuals more vivid and impactful, adding depth and richness to your footage.
- Fine-tuning exposure – Enables you to adjust the exposure levels, bringing out more detail in dark areas or toning down excessively bright spots, resulting in a visually appealing video.
- Creating a consistent look – Lets you apply color grading and presets to your videos, ensuring a consistent look and feel throughout your footage.
- Correcting white balance – Allows you to fix white balance issues, ensuring that whites appear truly white and accurately represent colors.
The tool can transform ordinary videos into visually stunning masterpieces. It allows you to correct imperfections, enhance the overall quality, and create a cohesive and engaging visual experience for your audience.
How can I use Filmora Video Editor to brighten my videos?
1. Download & Install Filmora
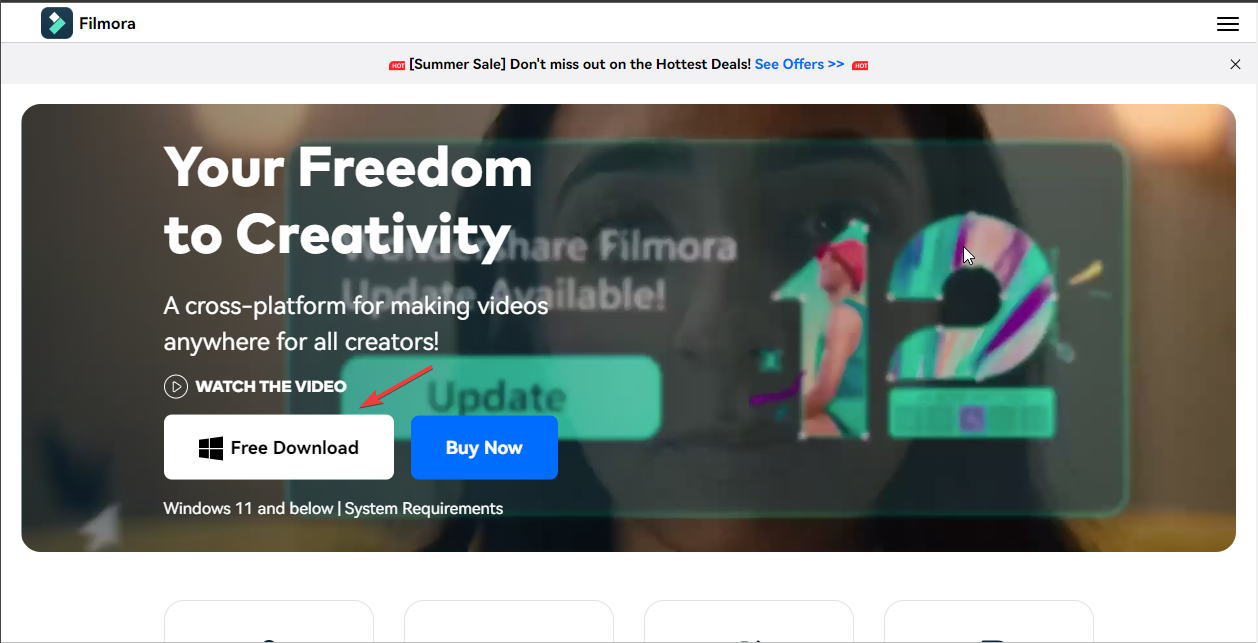
- Go to WonderShare Filmora’s official website and click Free Download.
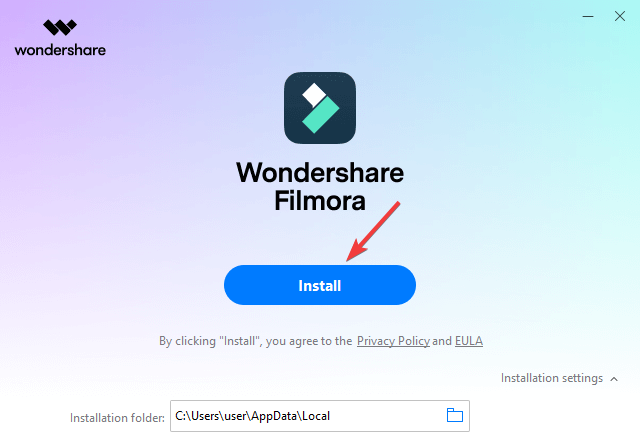
- Locate the downloaded file, and double-click it to run it.
- Click Install to initiate the installation and wait for the process to complete.
2. Use the color corrector
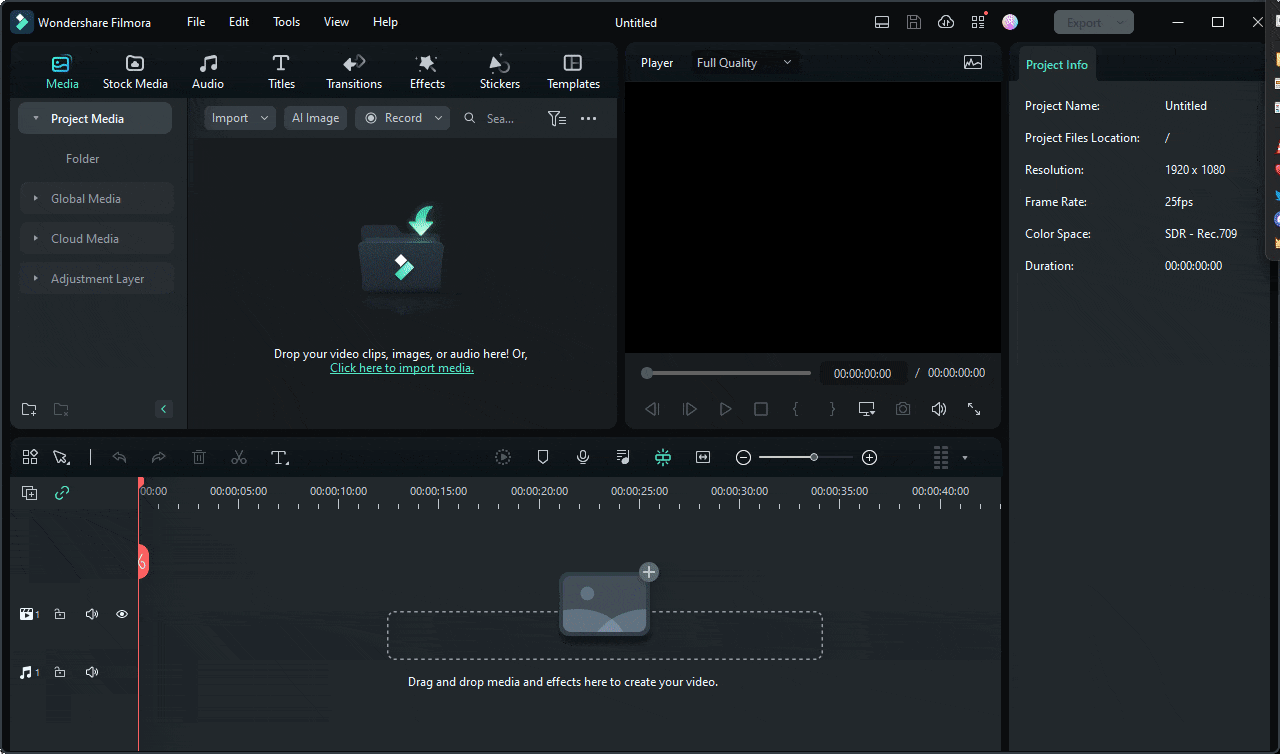
- Launch the Filmora Video Editor.
- Click on the link for Click here to import media and add a video clip, then drag and drop the clip into Filmora’s timeline.
- Double-click the clip that you want to color correct and go to the Color tab.
- You will see four modes of color correction:
- Basic – Adjust LUT, Color, Light, Vignette, Color Match
- HSL – Allows you to adjust Hue, Saturation, and Luminance
- Curves – Adjust the tonal values of the image
- Color Wheels – Allows you to adjust Highlights, Midtones, and Shadows
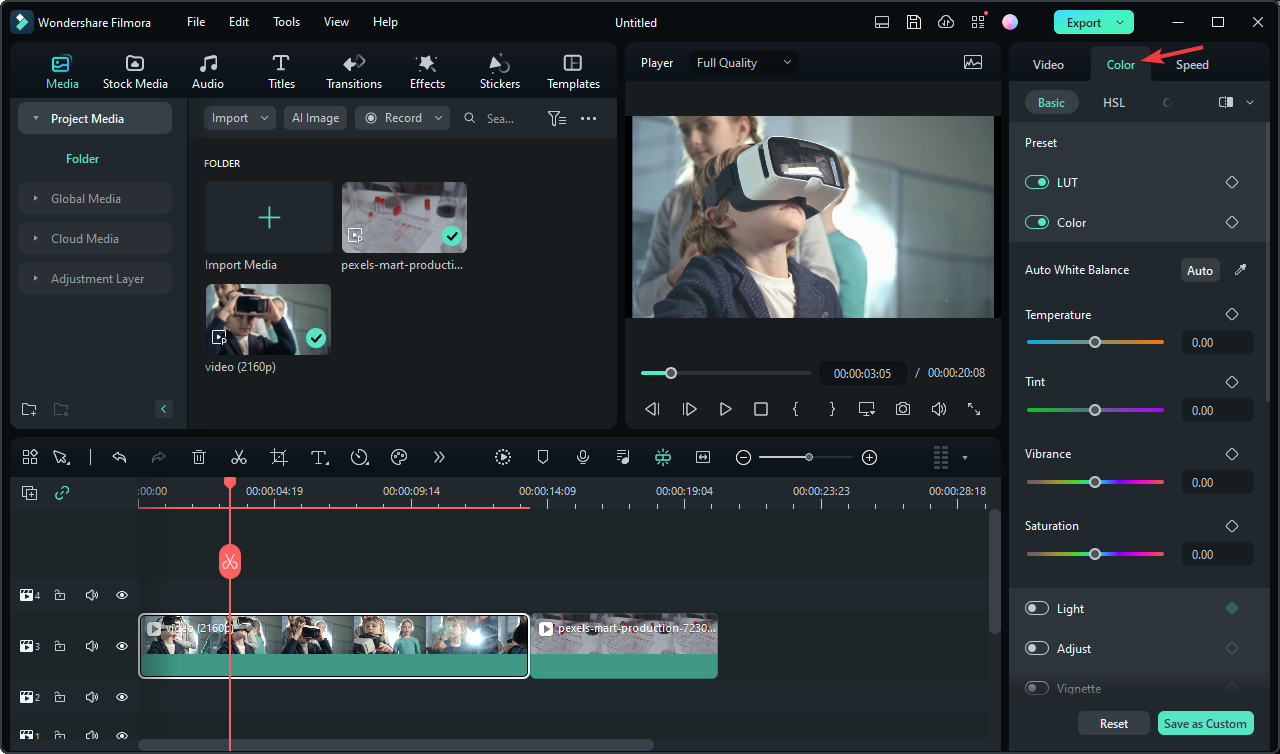
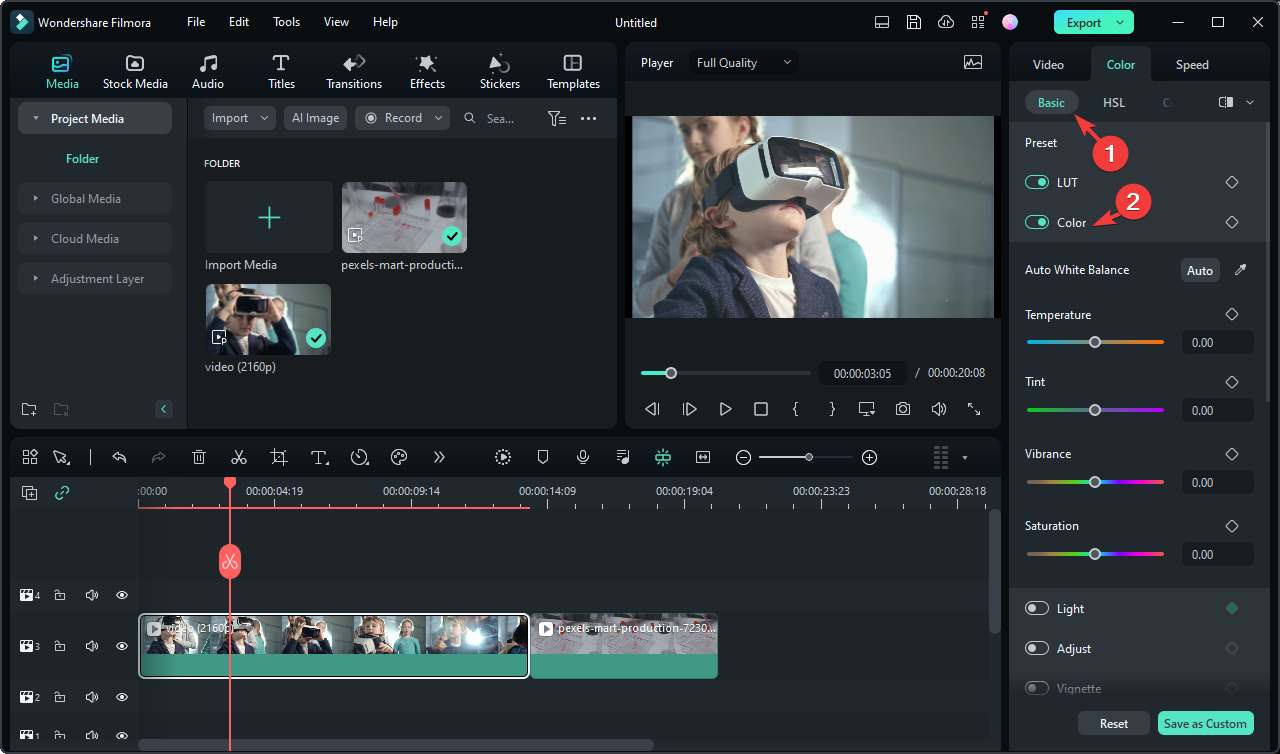
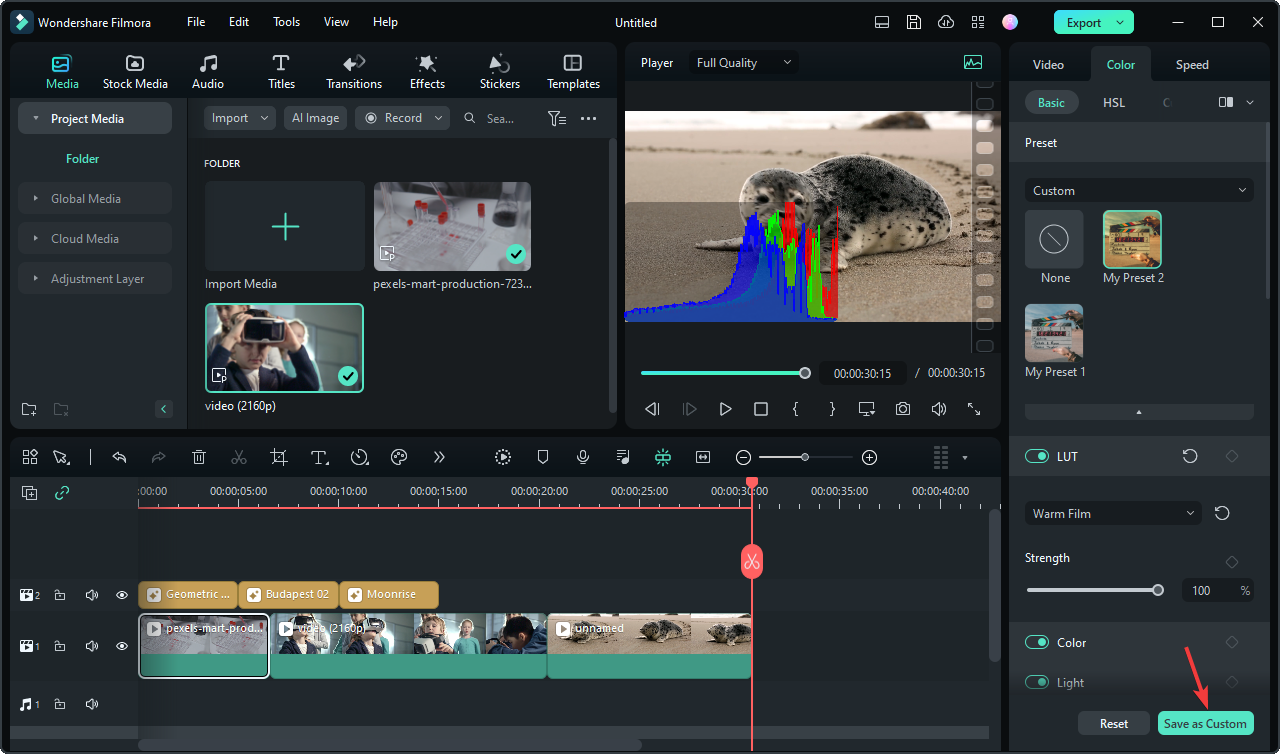
2.1 Basic mode
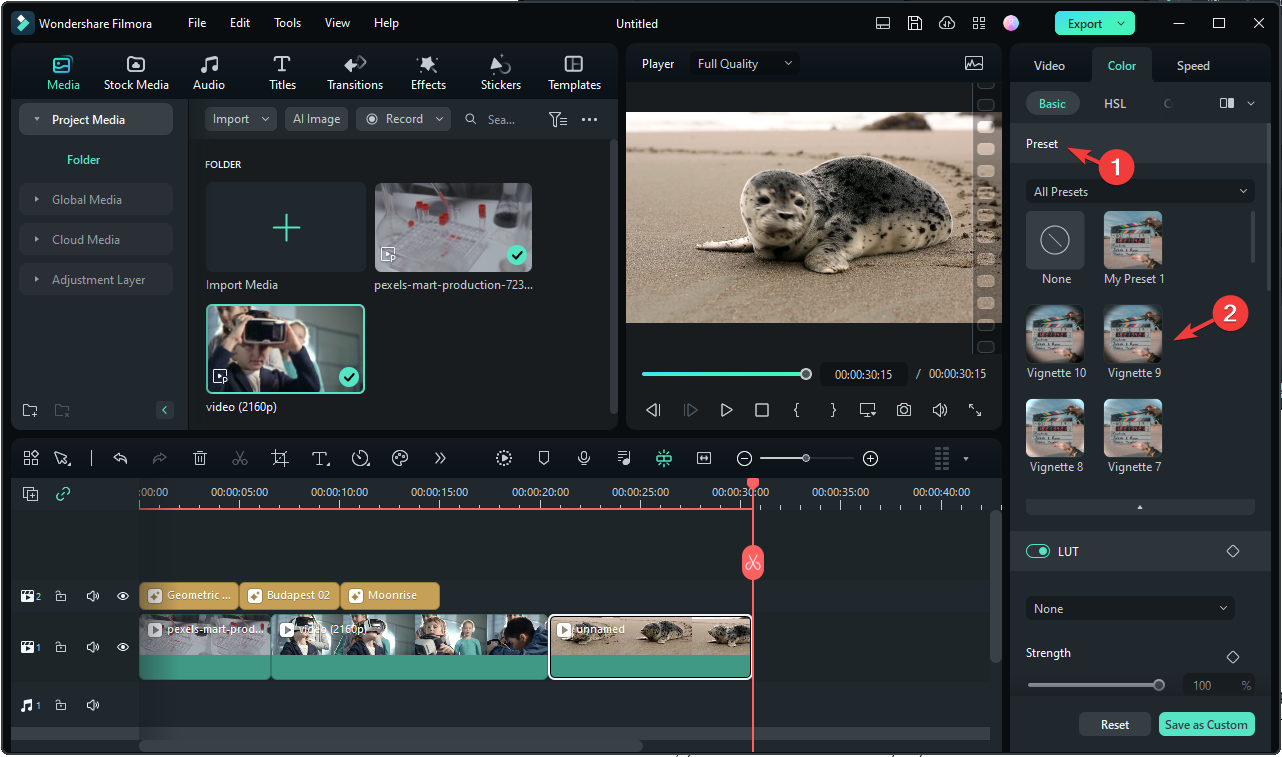
- Let’s start with the Basic mode. Under Preset, you will find over 40 color presets to choose from to add warmth or temperature to your clip and make the color correction quickly. Select a color, then drag it to the timeline to apply it to the videos.
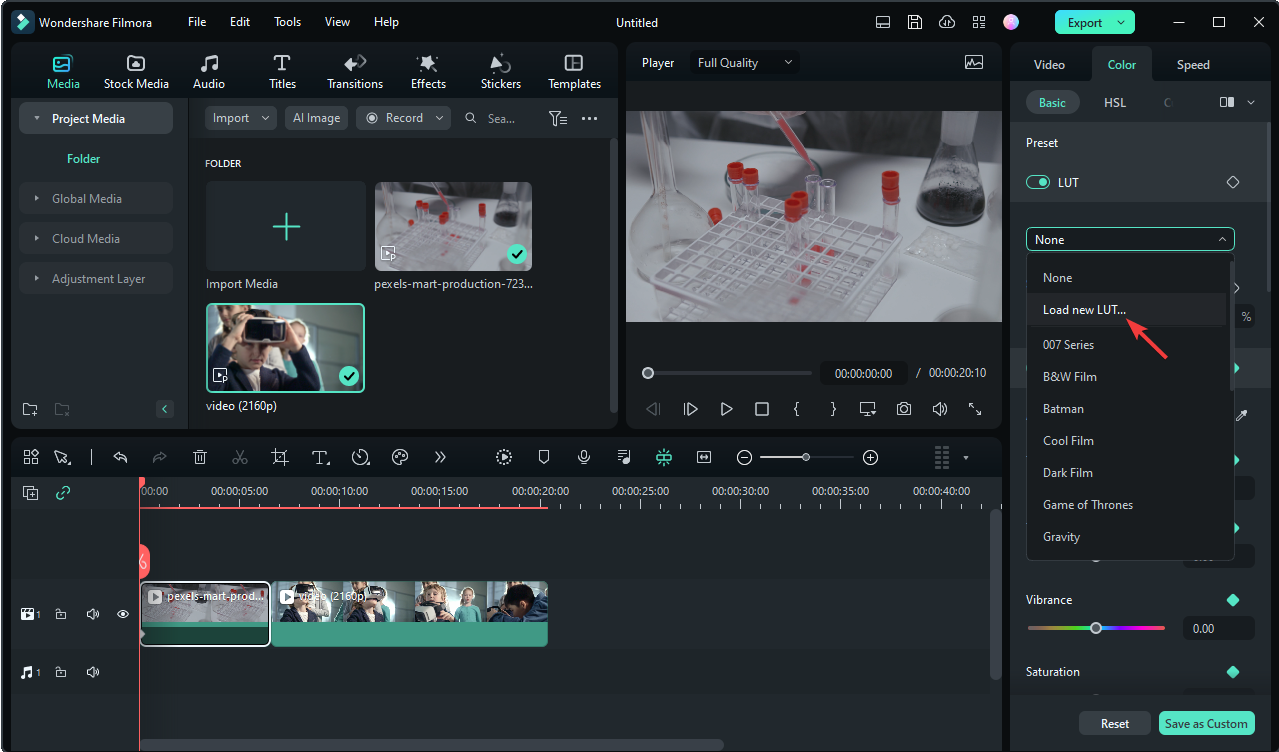
- Then comes LUT (Look-up tables); there are a handful of presets that apply a specific color grading to your video clips, giving them a mood, style, or aesthetic. Simply go to the drop-down and select the theme. With a slider, you can choose the Strength you want for the desired effect. You can also import the industry-standard 3D LUT color projects by selecting the Load new LUT option from the drop-down menu.
- Next is Color, which comes with five options; you can click the slider under them to adjust the settings and preview the results immediately.
- Auto White Balance – Adjust the color accordingly or choose the eye dropper tool to select the white part of the clip to auto-balance a color.
- Temperature – Reinforce the mood and feeling of a scene
- Tint– Add tints of different hues to the image
- Vibrance – Targets less saturated color
- Saturation – Adjust all the colors in the image
- Following Color, it is Light, which has seven options; drag the slider under them to adjust them and preview the results immediately.
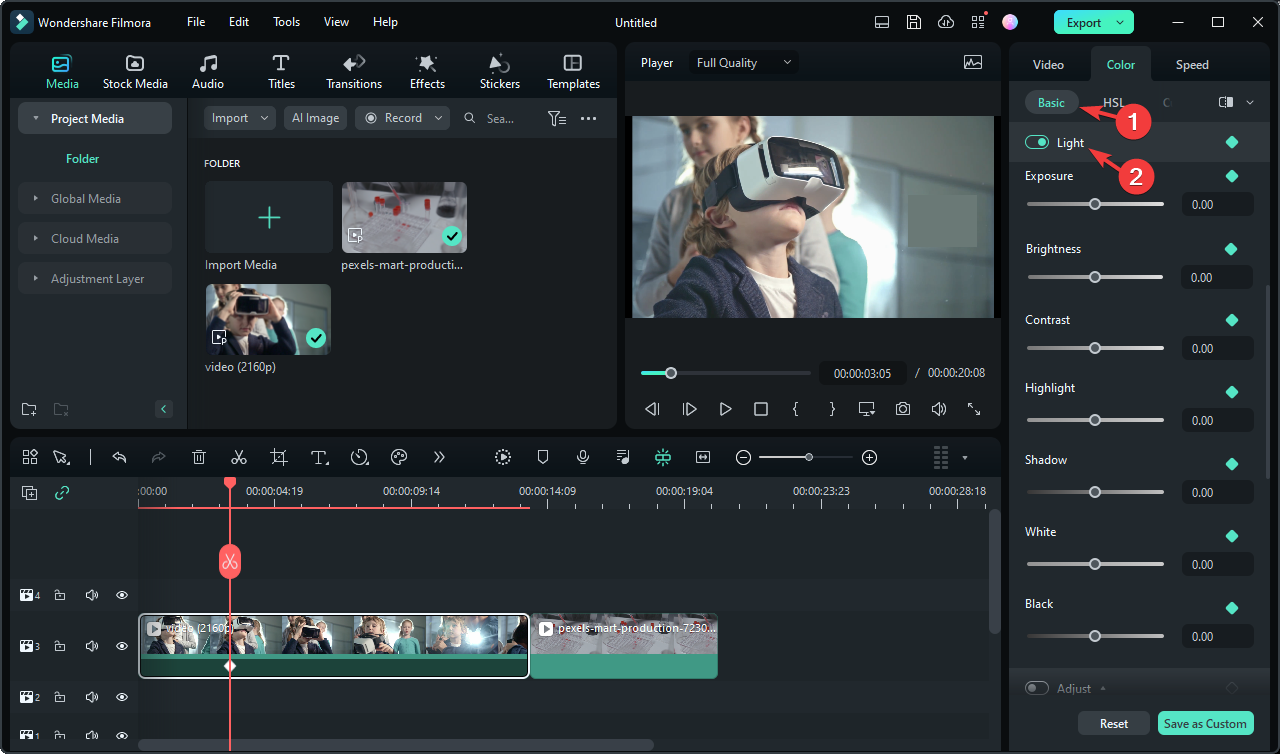
- Exposure – Lightens and darkens the color in the video, works best for over and under-exposed clips
- Brightness – Brighten or darken the overall tone of the video
- Contrast -Adjust the difference between the darkest & the lightest area
- Other four options enhance the lighting in your video by manipulating the Highlights, Shadows, Whites, and Blacks.
- Next up is Adjust, which has an option named Sharpen, used to enhance the sharpness of an image.
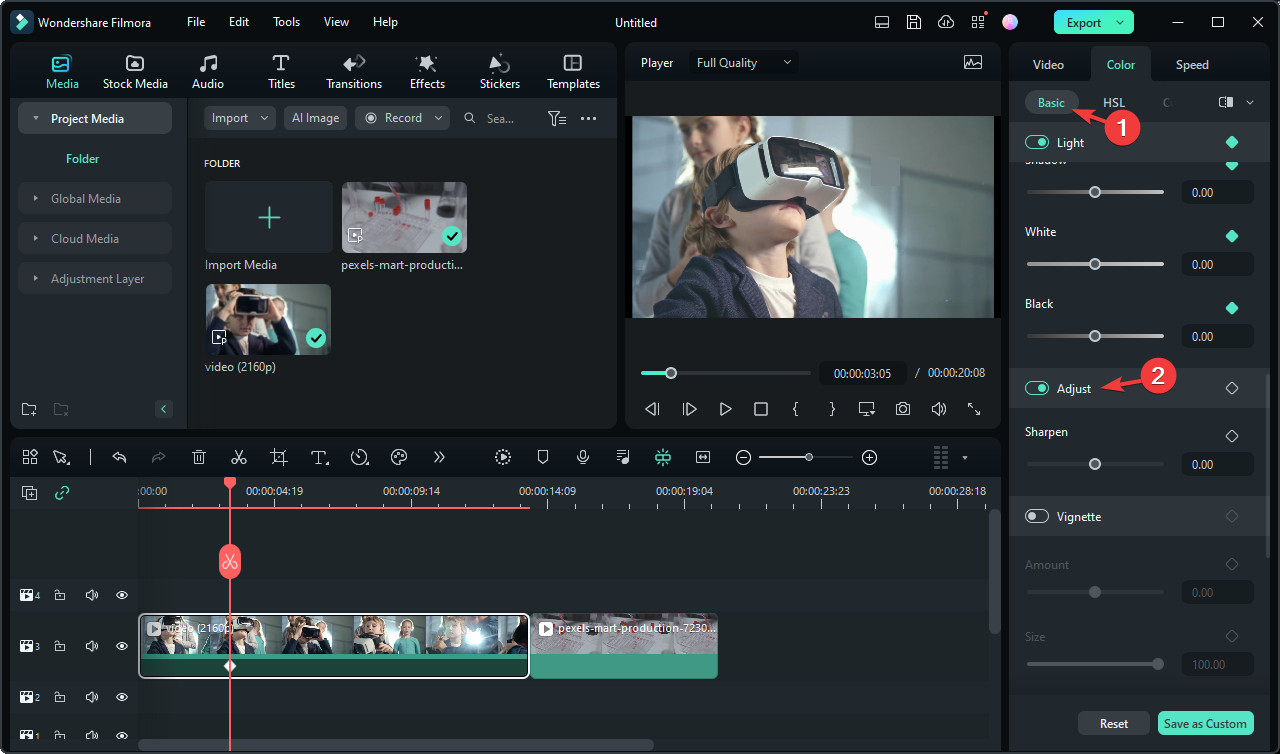
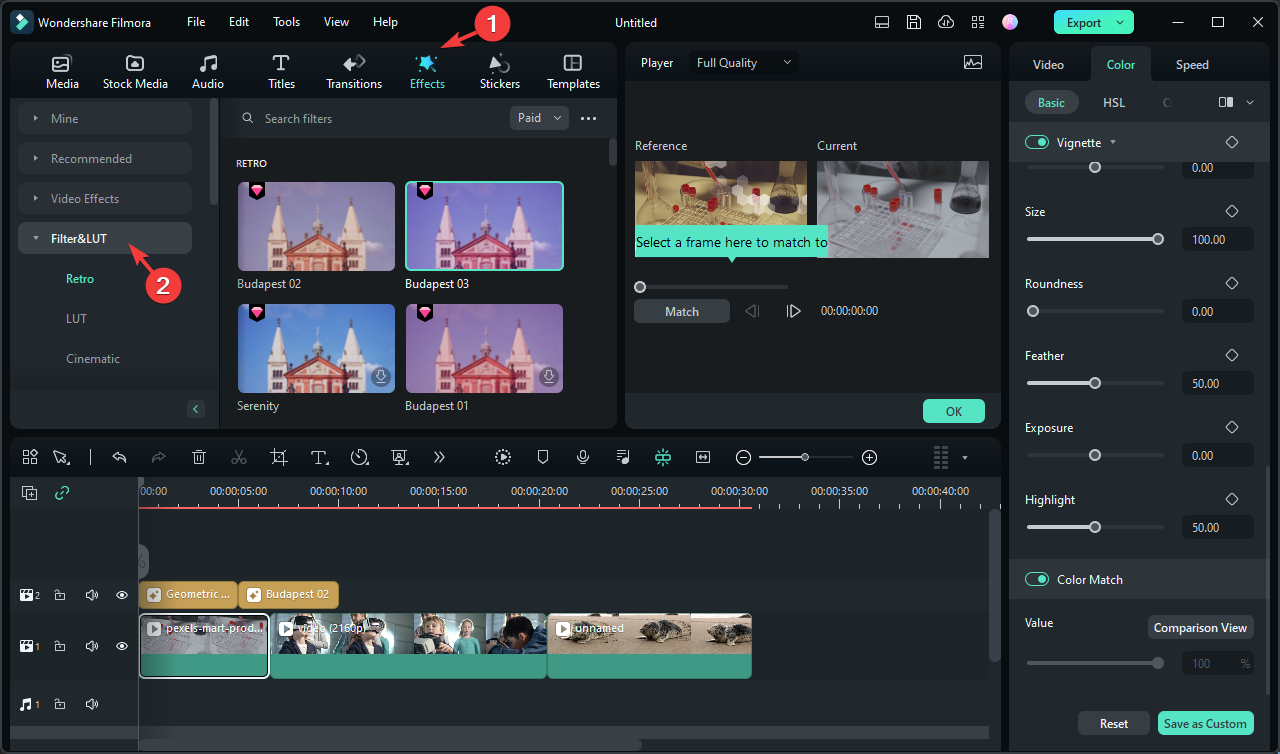
- Following Adjust, Vignette has five options; drag the slider under them to adjust accordingly.
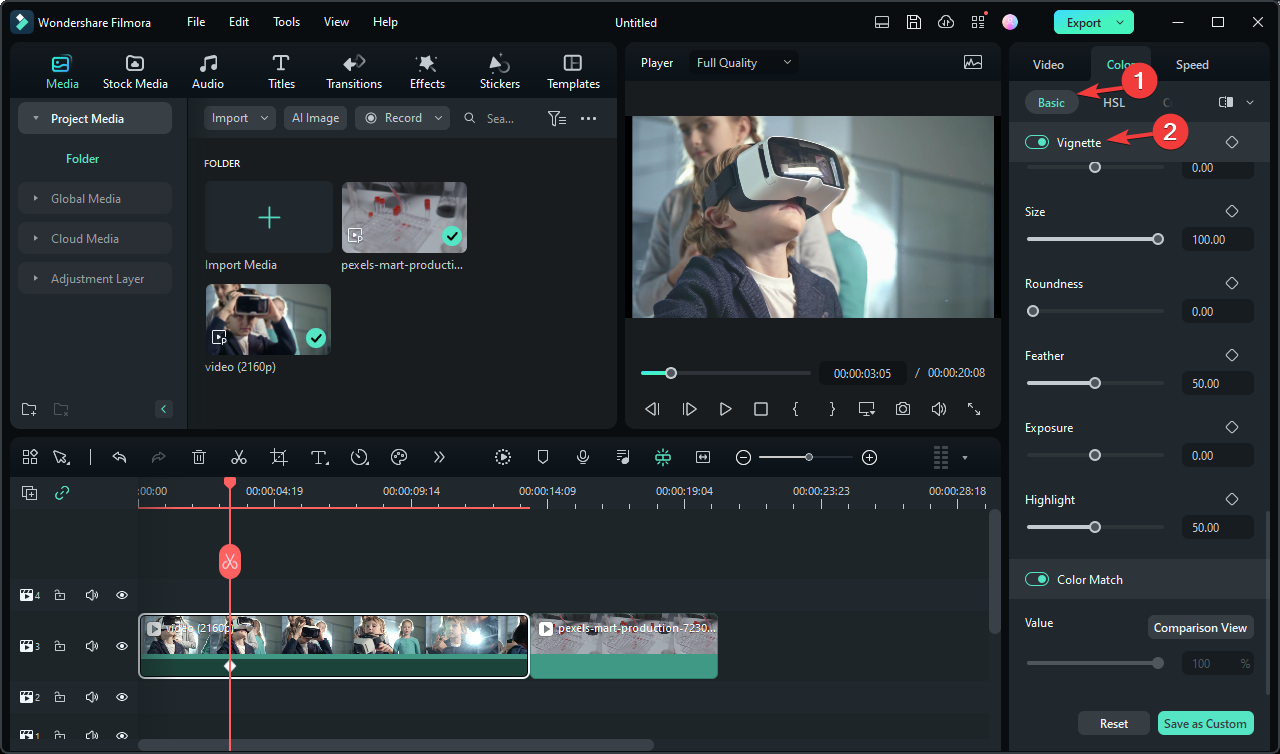
- Amount – Drag the slider to make the video’s corner darker or lighter
- Size – Increase the area of the video affected by the vignette
- Roundness -Turn the vignette’s shape closer to a circle
- Feather -Adjust the sharpness of the edges of the vignette
- Exposure – Adjust the video’s exposure
- Highlight – Choose whether the blurry edges of the vignette will be darker or brighter.
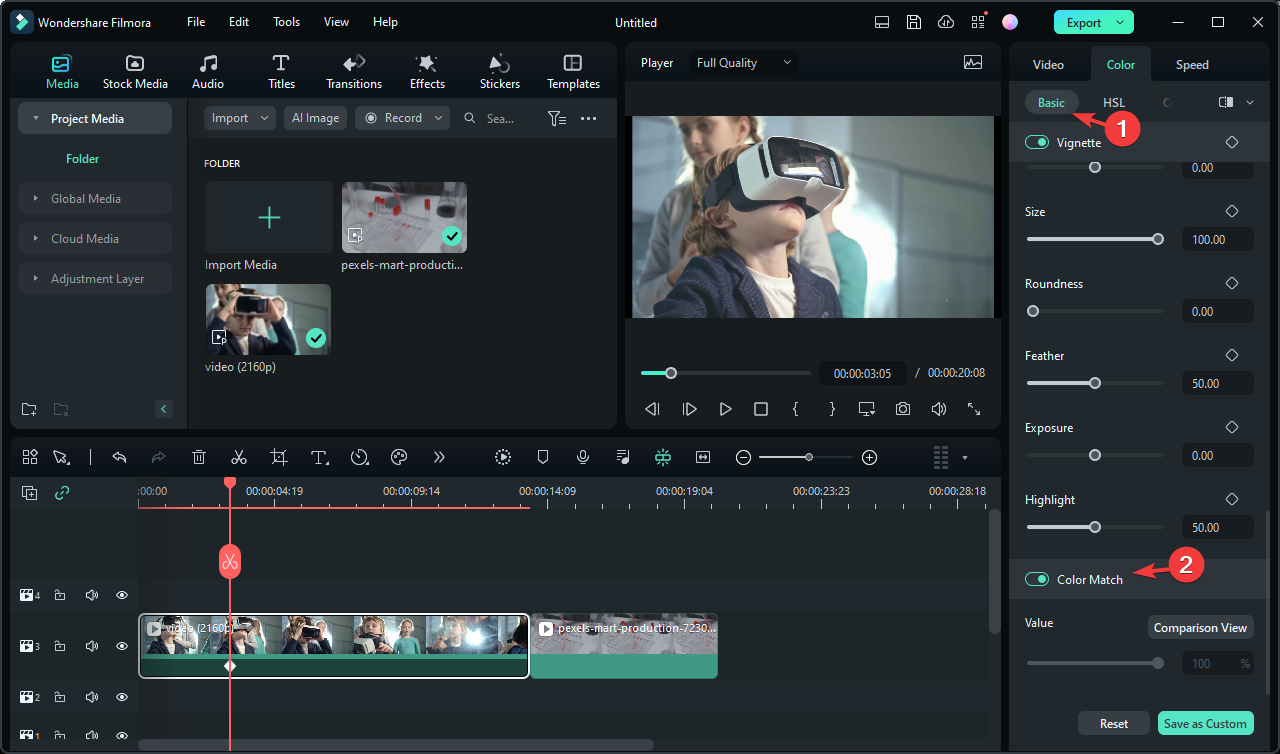
- The last one is Color Match which helps you match the color of the current clip to the reference clip.
- You can click Reset to remove the effects.
2.2 HSL mode
- Once you are in the Color tab, switch to HSL mode. HSL is a short form of Hue, Saturation, and Luminance. You can adjust individual color ranges in your video.
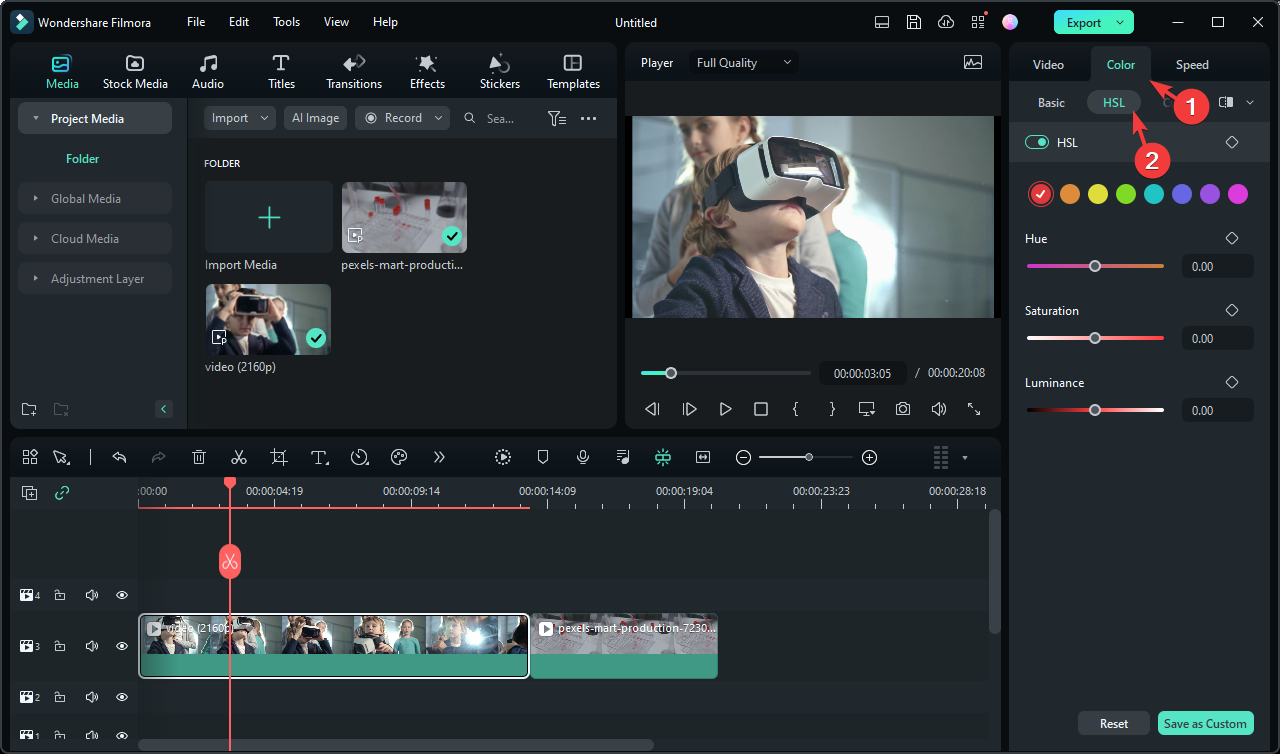
- There are three options:
- Hue – Fine-tunes the purity of a specific color of the clip
- Saturation – Changes the color vividness or purity of the color
- Luminance – Changes the brightness of the color range
- You can drag the slider from left to right to adjust them to brighten your videos.
2.3 Use Curves
- Once you are in the Color tab, switch to Curves mode. You will see the fancy graph with a diagonal line representing your image’s current tonal values.

- Click on the line to add the anchor points. Now drag the anchor points upward to compress the tonal value to increase the contrast and see the preview to understand the changes.
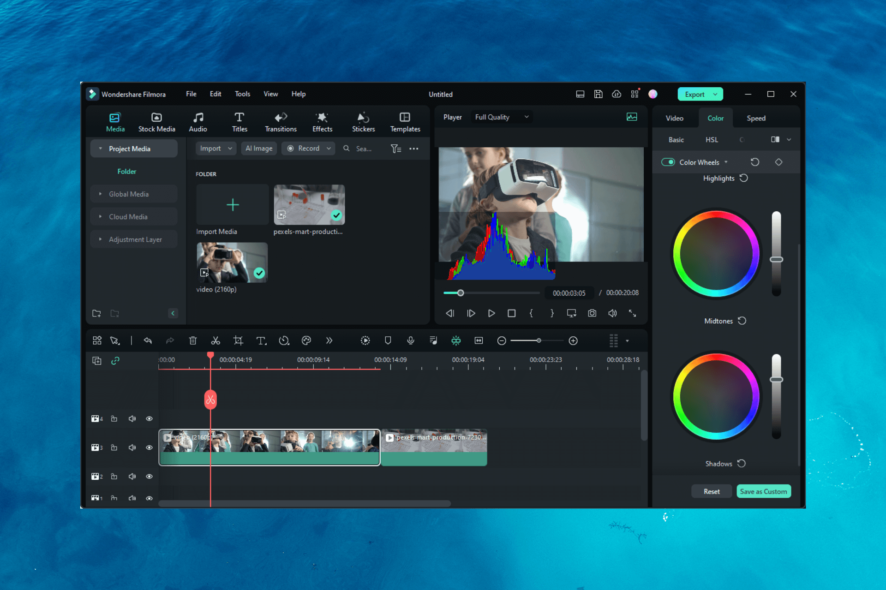
2.4 Use Color Wheels
- Once you are in the Color tab, switch to Color Wheels mode.
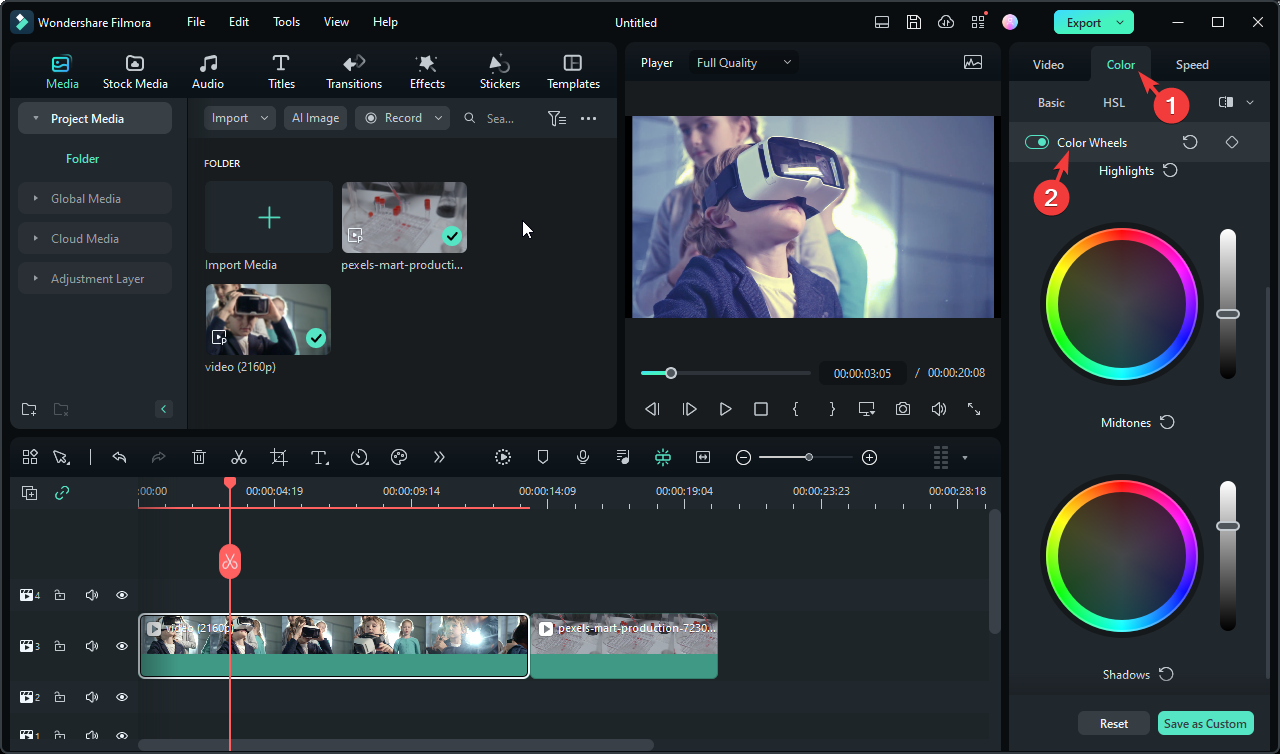
- It comes with three options:
- Highlights – Brightest part of the image helps create an over or under-exposed image
- Midtones -Works on the contrasts of the video
- Shadows – Darkens pixels in the clip, decreasing the brightness of the shadow and bringing instant depth.
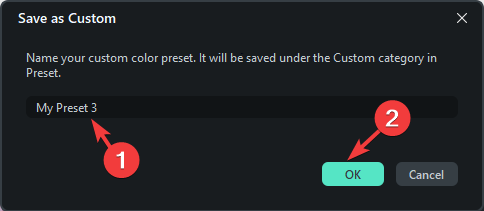
- Once you make all the changes, you can click Save as Custom to save the edits as a Preset.
- Name the Preset as per your liking, click OK, then go to the Preset option under Basic and apply it in your next video.
3. Add effects to your clip
- To add effects to your video, click Effects from the top of the screen.
- On the left side, you will see nine effects, including ones added by you and recommended. The other seven are Video Effects, Filter&LUT, Overlay, Audio Effects, NewBlue FX, Boris FX, and Filmstock.

- You can go to any of them, click the drop-down menu to choose the options under them, go to the right pane, select the one you want & click the download icon.
- Once downloaded, drag them to the timeline to apply them in the clip.
Filmora Video Editor
Transform your photos with precision and finesse – Unleash the power of the Filmora 12.3You can also click the graph-like icon to access the Histogram, then make the changes related to tone and color to analyze the changes accurately. Also, it can save the changes as presets so you can use the settings for videos in the future.
Also, you can compare the changes to the original clip with the Side-by-Side view and Split View options.
So, this is how you can use Filmora Video Editor‘s advanced color correction tool to adjust the color and create stunning visuals that will captivate and impress your audience.
If you are a content creator, investing in Filmora 12.3 will save you time and ensure your photos stand out with vibrant and visually appealing results.
Don’t miss out on the opportunity to unlock the full potential of your photos. Get Filmora Video Editor today.
If you have questions or suggestions, please mention them in the comments section below.
Read our disclosure page to find out how can you help Windows Report sustain the editorial team. Read more


Improve this guide


User forum
0 messages