4 Steps to Fix the A2 Motherboard Error Code
The motherboard A2 error code it's very easy to fix
3 min. read
Updated on
Read our disclosure page to find out how can you help Windows Report sustain the editorial team. Read more

Getting the A2 motherboard error code? It usually shows up because the system cannot identify the bootable device, such as your HDD, SSD, or USB.
Luckily, like any other system malfunction, we can easily fix the A2 boot issue and here are the troubleshooting methods that should be applied in this situation.
How to fix the A2 motherboard error code
1. Disconnect the drivers one by one
The first thing you should do is disconnect and then properly reconnect your drivers.
In this way, you can get past the motherboard A2 issue and access BIOS. First, disconnect all peripherals f and afterward disconnect all your drivers.
Finally, plug in only one driver (the SSD for example) and power on your computer. This should take you to BIOS where you can pick how to boot.
2. Reset or update CMOS / BIOS
Another way in which the A2 motherboard code problem can be fixed is by updating BIOS. Of course, initiating a rest might also address this problem.
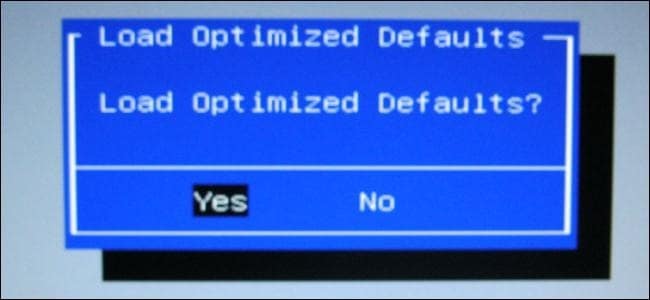
→ To reset your BIOS setting. you’ll have to long press F2 (or DEL/ ESC depending on the model). Once open, select the Reset to Default option. If resetting won’t work, you may have to update your BIOS.
→ From the main menu check if there’s an update feature and select it. If there’s no such option, you’ll have to go to your computer’s manufacturer’s website and download and install it manually.
3. Update your drivers
If the A2 motherboard error code is experienced only rarely, you should also check the drivers installed on your Windows PC. For example, a USB 3.0 driver might cause boot issues.
The easiest way is to go to Device Manager. Check peripheral drivers and make sure they’re properly installed and up to date.
4. Particular case: SATA devices
The A2 boot error can sometimes be related to SATA devices. If that is the case, then try testing it out:
- Load BIOS default settings.
- Change the SATA ports.
- Install your SATA devices one by one to verify which device this issue is related to.
- Verify your SATA cables.
- If you have access to another system, please check if the device is running properly.
Hopefully, after following the troubleshooting solutions from above your Windows 10 system is now running without problems. However, if you still experience the same A2 boot error, let us know in the comment section below.
Make sure you describe your problem in detail along with your hardware configuration. Based on these details, we can bring further solutions that may work in your particular case.


User forum
2 messages