FIX: PC uses less RAM than is physically installed
5 min. read
Updated on
Read our disclosure page to find out how can you help Windows Report sustain the editorial team Read more
Key notes
- A PC’s RAM is probably the among the first things you look at when deciding whether to buy it or not. This is understandable, since more RAM does mean more processing power.
- Unfortunately, most of the times you might notice that your PC is not using as much of the RAM as you have installed, and this guide will show you exactly what to do to fix it.
- Our library is also home to a dedicated hub for troubleshooting System Errors, so make sure to check that out as well as you may find more articles that may interest you.
- If you need more hardware-related troubleshooting guides, check out our Laptop and PC Fix page.
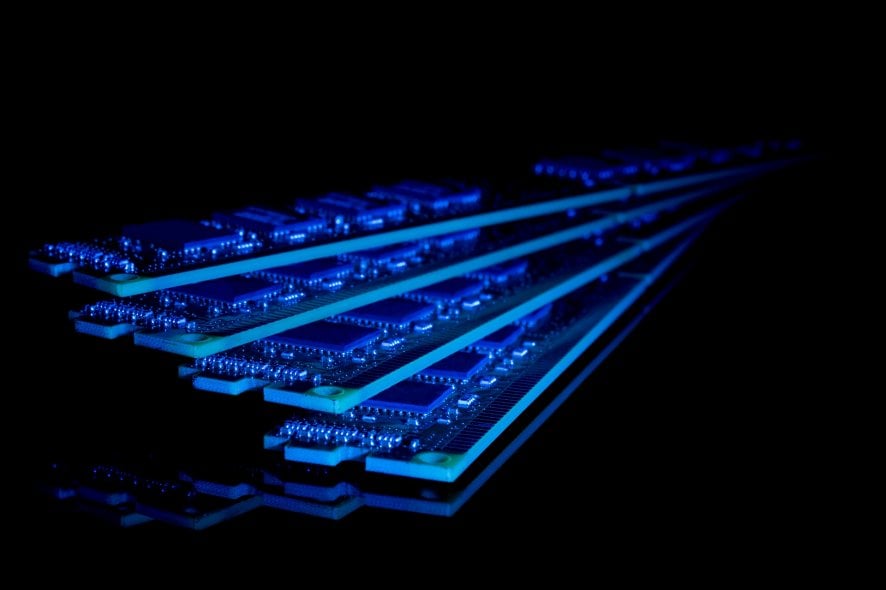
Nowadays, RAM comes in abundance since the hardware needs to closely follow the software requirements. And adding more RAM is probably the best way to get your PC go the extra mile.
However, even though some Windows 10 versions support up to 512 GB of RAM (yes, you read that right), your RAM is of no use if it’s not fully employed in the system processing. Some users reported that the difference between the installed and used RAM is enormous.
This is a grave problem and we’ll make sure to help you address it with a few workarounds. In addition, we make an effort to explain the background of this peculiar issue. If your PC runs 6GB of RAM instead of the installed 8GB, make sure to check the solutions below.
How do I use my full RAM on my Windows 10 PC?
- Explanation
- Check boot settings
- Check and update BIOS
Explanation
There are so many reasons why your installed and physical RAM are 2 different values in the system configuration. Some of the most common reasons for such occurrence are:
- Onboard integrated GPU takes some RAM and uses it as a VRAM.
- Integrated GPU’s mostly come with 256 MB of VRAM or so, and therefore it’s obvious for them to take some of that RAM plenitude in order to work in a seamless manner.
- Motherboard and BIOS are optimized for a certain RAM amount.
- If you add more RAM than it’s initially supported, your system won’t be able to ‘see’ it.
- Certain Windows versions support only limited RAM.
- Windows 10, with the 32-bit architecture, can read only up to 4GB of RAM.
When it comes to Windows 10, these are the supported RAM values for different iterations:
- Home 64 bit: 128 GB.
- Pro 32-bit: 4 GB.
- Pro 64-bit: 512 GB.
- Enterprise 32-bit: 4 GB
In addition, make sure to check your RAM placement. Remove your RAM card from the dedicated socket, try another socket, and check for changes.
On the other hand, if you’re positive about the RAM compatibility and its physical placement on the motherboard, two steps we presented below are essential for retaining your full RAM values.
1. Check boot settings
Here’s how to do it in a few easy steps:
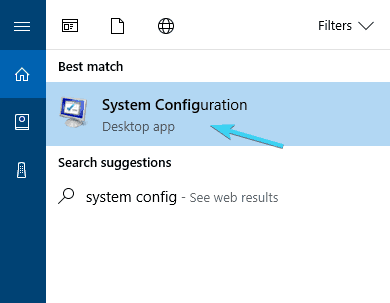
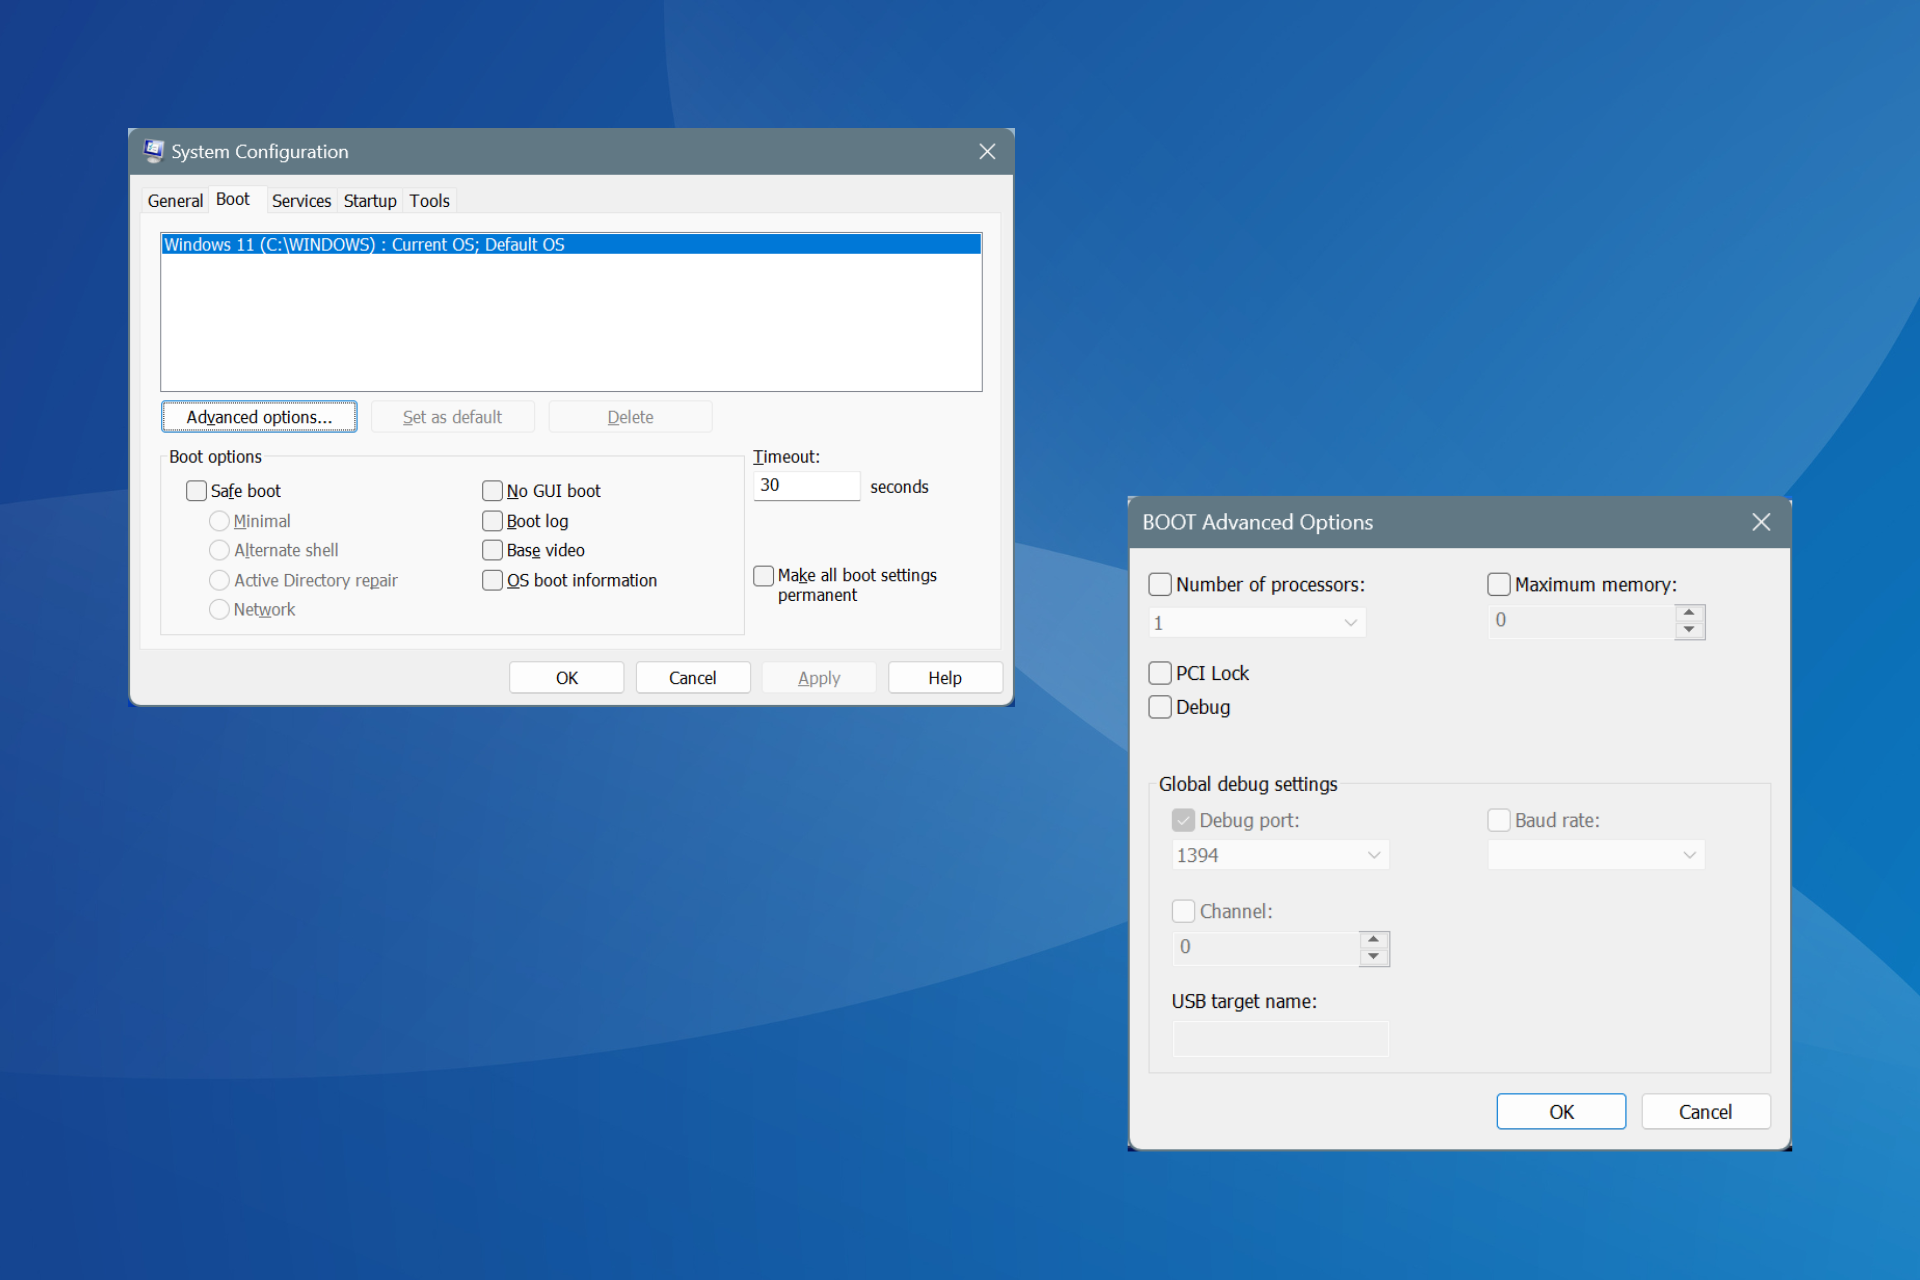
- In the Windows Search bar, type System config and open System Configuration.
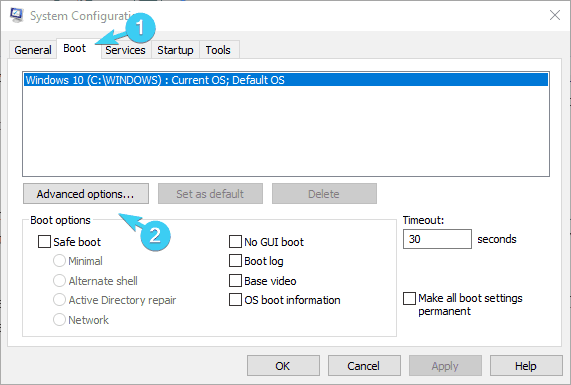
- Open the Boot tab.
- Choose Advanced options.
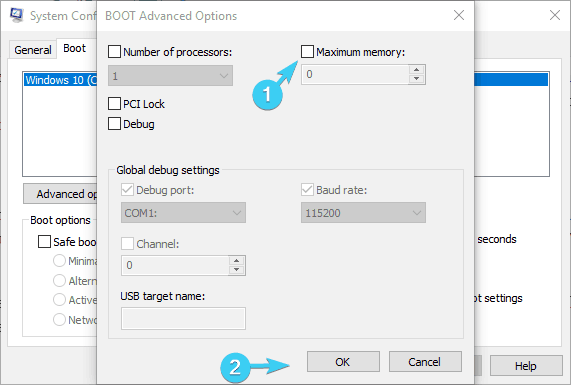
- Uncheck the Maximum memory box and click OK.
- Restart your PC for changes to take effect.
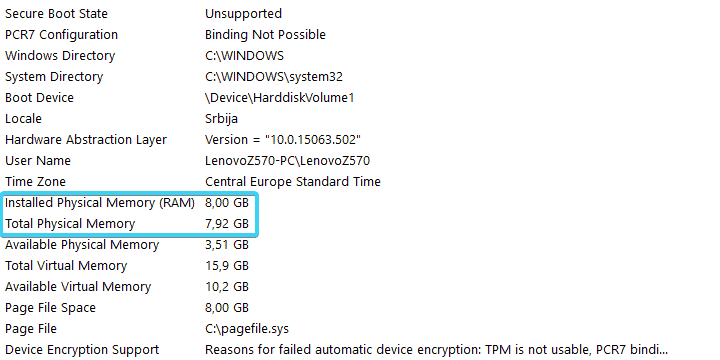
- In the Windows Search bar, type System info and open System Information.
- Under the System Summary, navigate to RAM section below and look for Installed and Physical memory.
Firstly, let’s check your boot system settings. In order to speed up the Windows startup and fully utilize the Fast Boot function, your system will use RAM extensively. And that would be just fine except the system tends to take more RAM than it’s needed.
That will, of course, affect the size of available RAM later on, when the system starts. By default, the system will take as much RAM as available. So, what we’ll need to do is to restrain the startup process and don’t let it eat on our RAM, which should resolve your problem.
On the other hand, if you still stuck with the substantial difference between the two, make sure to check the alternative solution below.
2. Check and update BIOS
- Press Windows key + I to summon the Settings app.
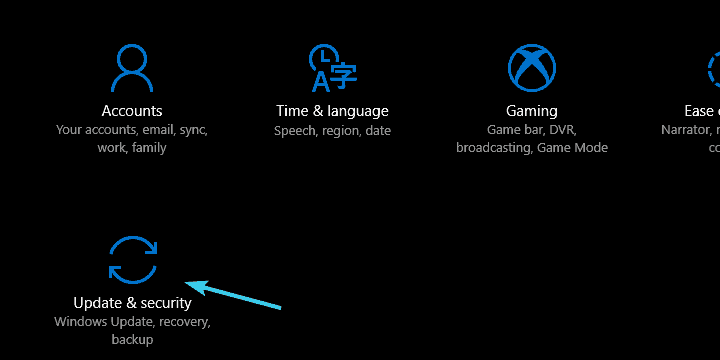
- Open Update & security section.
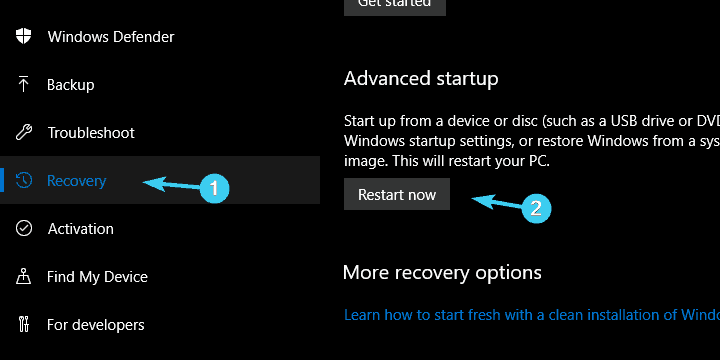
- Select Recovery from the left pane.
- Under the Advanced startup, click on the Restart Now button.
- In the Advanced startup menu, select Troubleshoot.
- Choose Advanced options.
- Select UEFI Firmware settings.
- Click Restart and your PC should boot into BIOS settings.
- Here, you should search for the following settings and set them as below:
- iGPU, Internal Graphics. or Onboard Graphics > Disabled
- Memory Map Feature > Enabled
- Render Standby > Enabled
- iGPU Memory > Auto
- Multimonitor > Disabled
- Save changes and exit the BIOS settings menu.
Even if your motherboard supports a vast amount of RAM, some UEFI/BIOS settings might limit the installed RAM to a greater or lesser extent. So, you’ll need to navigate to BIOS settings and, if needed, make some changes.
Additionally, since Windows 10 packs that Fast Boot, the boot sequence will just run past the settings and repetitive pressing of the key won’t do you any good. So, bear with us and follow the instructions closely.
Furthermore, older motherboards with the outdated firmware won’t support large amounts of RAM that are quite common nowadays.
So, it’s recommended to update your BIOS and check for the resolution. However, since this is quite a risky procedure, we advise you to take a look at this article and look for the thorough explanation before you move to updating your BIOS.
We also have a guide that explains how to make sure RAM is running at full speed, so don’t miss it.
With that, we can conclude this article. We hope that you’ll take all of your RAM with the solutions we provided above. In any case, don’t forget to share your questions or alternative solutions with us. We look forward to hearing from you.

