Windows Cannot Connect to the Printer? 6 Best Solutions
Driver issues will usually cause printer problems

Many reported that Windows could not connect to the printer, getting error messages such as windows Could not connect to the printer check the printer name and try again. This can prevent you from performing any future printing tasks.
It can be a major problem, but luckily, there are few solutions that can help you with that.
How to fix Windows cannot connect to the printer?
Before we try anything, ensure that your system is up to date to prevent any issues.
1. Check if your printer is an Unspecified Device and update the drivers
1.1 Find out if your printer is listed as an Unspecified Device
- Click the Start button, type control, and select Control Panel from the results.

- Choose Devices and Printers.

- Scroll down and see if your printer is under the Unspecified section.

1.2 Update drivers
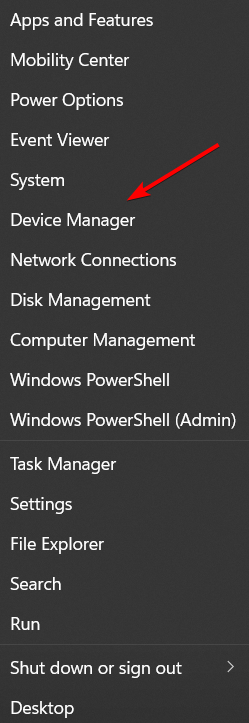
- Right-click the Start button and select Device Manager from the list.
- Expand the Printers or Printer queues, find your printer in the list, right-click it, and select Update driver. If you don’t find it in the mentioned sections, you can also look under USB controllers or LPT on your PC.

- Now select Search automatically for drivers.
- If the system finds a new driver, it will install it, and you will have to restart your PC for the changes to take effect.
Another method you can use to update your drivers is a tool such as Outbyte Driver Updater. Install it, and you’ll automatically update all outdated drivers with just a few clicks.
This method is perfect if you don’t want to search and download drivers manually, so be sure to try it out.
2. Uninstall and reinstall your printer
2.1 Uninstall the printer
- Select Start and click on Settings.
- Choose Devices.

- Click Printers & Scanners on the left pane.

- Find your printer and click on it, then select Remove device.

If you have problems with this step, we also have an article on what to do if you can’t remove the printer in Windows 10.
2.2 Reinstall the printer
- Click the Start button and select Settings.
- Choose Devices.
- Click Printers & Scanners on the left pane.
- Select Add a printer or scanner.

- If the system detects your printer, select it and go on with the installation. If not, you can click on The printer I want isn’t listed.

- Now you have plenty of options for every situation, including a network or a Bluetooth printer. In our example, we chose to Add a local printer because it’s the most common. Select the appropriate option for you and click Next.

- Next, select the port with your printer from the drop-down menu and click Next. Nowadays, printers use USB ports, which may be different in your situation. If you don’t know which one is, consult the printer documentation or contact the manufacturer for the information.

- Try to find the manufacturer and the model in the list. If there aren’t many to choose from, clicking the Windows Update button will add a lot more, but the process takes a few minutes.

- You can also click on the Have Disk button if you have the software disk that came with the printer. After you select the printer, click Next.

- Select the printer name (it’s already there, but you may change it) and click Next.

- The system will install the printer in a few seconds. You will be able to decide if you want to share the printer or not but in the end, click Next.

- You can click the Print a test page button in the last window and select Finish. Printing the page will tell you if the printer works, so we recommend using it.

 NOTE
NOTE
3. Temporarily disable your antivirus security software
- Click the Start button, type security, and click on Windows Security from the results.

- Now select Virus and threat protection.

- Scroll down and click on Manage settings under Virus & threat protection settings.

- Turn off Real-time protection.

Another option is to uninstall third-party software on your PC, such as computer cleaners or antivirus tools.
When protecting your PC – use an antivirus- temporarily disable it because you need it to prevent your computer from security threats.
Immediately after fixing the connection error, you can enable it back. However, if the antivirus is indeed causing this issue, perhaps this is a good moment to consider switching to a different one.
 Editor’s tip
4. Check Default printer settings
- Click Start and select Settings.
- Choose Devices.

- Click Printers & Scanners on the left pane.

- Scroll to Let Windows manage my default printer and uncheck the box.

5. Clear spooler files and restart spooler service
5.1 Stop the Print Spooler service
- Click Start, type services, and click on the app from the results.

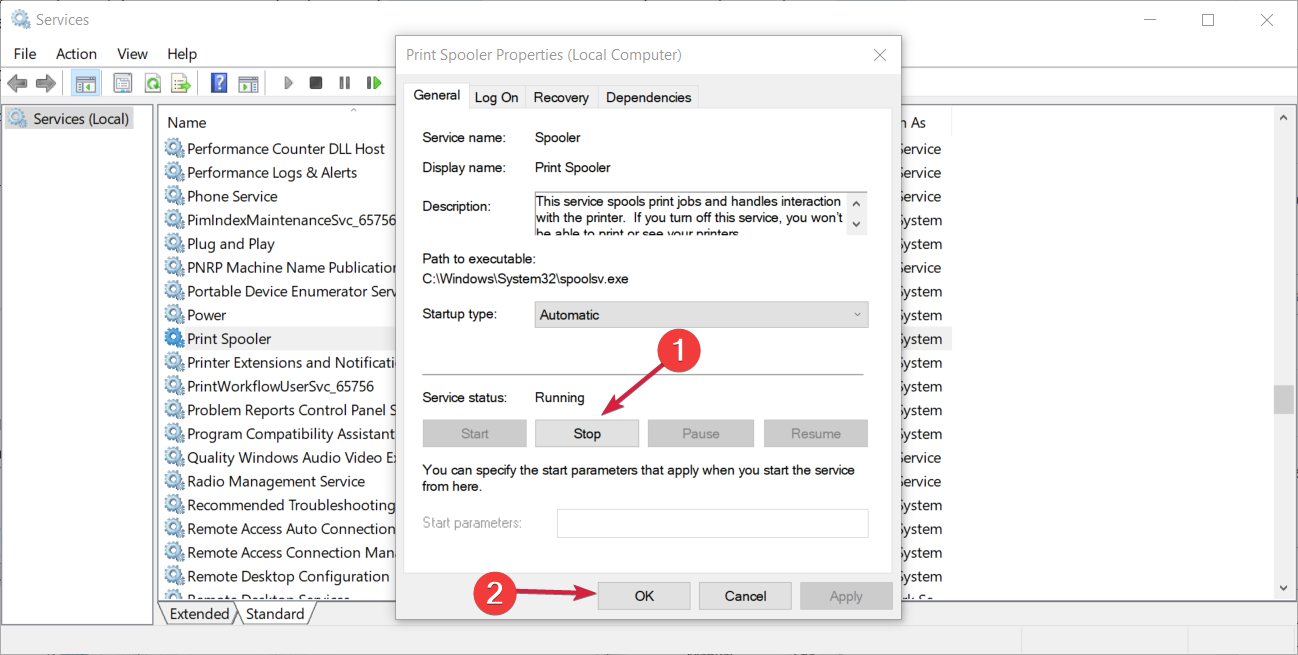
- Under Services, double-click Print Spooler.

- Select Stop, then OK.
5.2 Delete the contents of the Spool folder and restart the Print Spooler service
- Press the Windows key + E to start File Manager, then go to the following path (you will need administrative privileges to access the folder):
C:\Windows\System32\spool\PRINTERS
- Delete all the folders in the folder if you find any. In our example, you can see that the folder is empty, but it might be different in your case.

- Click the Start button, type services, and select the Services app from the results.

- Under Services, double-click Print Spooler again.

- Click Start.

- Go to the Startup Type list and select the Automatic box.

- Click Apply, then click OK.

We also have a helpful article that will guide you on what to do if the Print Spooler keeps stopping on Windows 10.
6. Use the built-in Printer troubleshooter
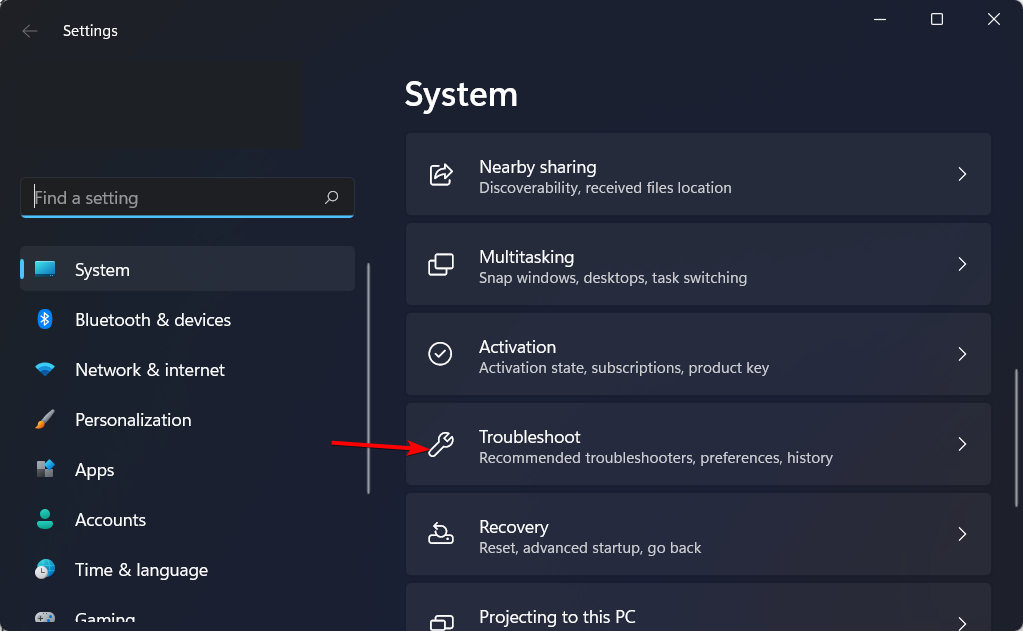
- Press Windows + I, then go down to the Troubleshoot section and click it.
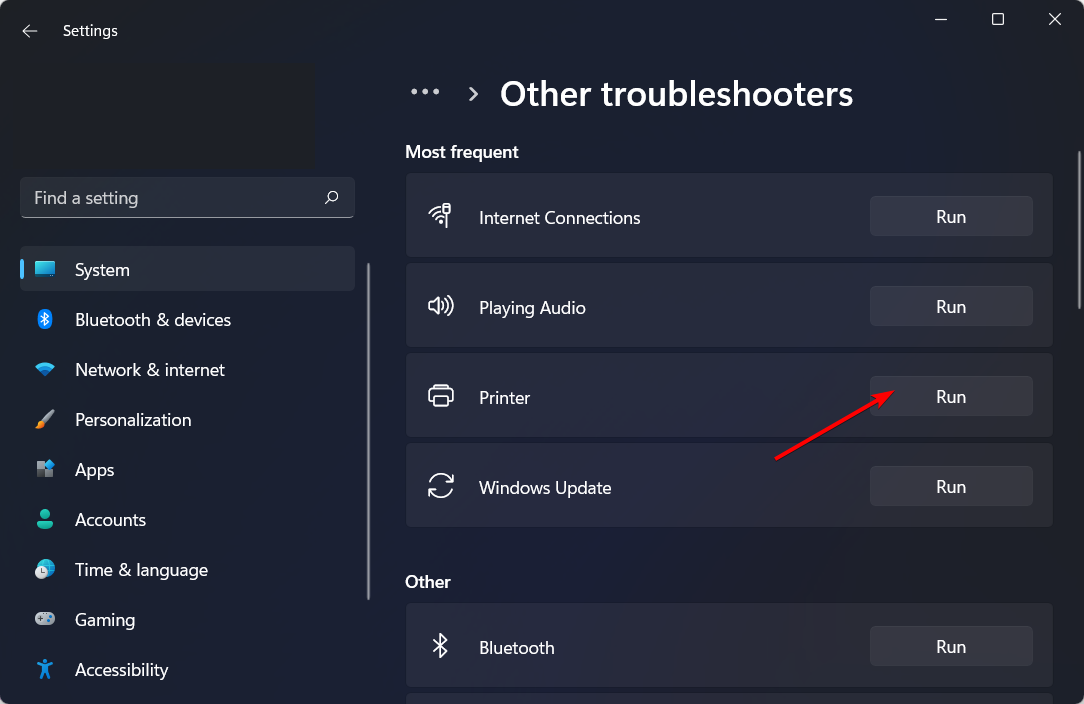
- Choose Other troubleshooters from the right side.
- Find the Printer troubleshooter and click Run next to it.
Thus, it is one of the most efficient and fast solutions you can try if you come across Windows cannot connect to the printer in Windows.
How do I know what IP address my printer is on?
- Press Windows, then type control and open the top result.
- Here, navigate to Hardware and Sound.

- Next, go to Devices and Printers.

- Right-click your printer and select Properties.

- Then look in the Web Services or Ports tab for your IP address.
How to access the printing preferences in Windows 10?
- Click the Start button and select Settings.
- Select Printers and scanners from the left pane.

- Click on your printer and select Manage.

- Now choose the Printing preferences option.

- In the next window, you can tweak the settings as you like, but remember that it may look different for your printer model and manufacturer.

If none of our solutions worked, contact your printer’s manufacturer for more troubleshooting and support based on your specific issue.
Because the main problem when it comes to such an issue is a malfunctioning driver, we also recommend consulting our guide on how to remove a corrupted printer driver.
We also have a guide on what to do if Windows can’t find the printer, so be sure to check it out for more solutions.
We also have a guide on Printer sharing not working, and a useful guide on what to do if you’re unable to install printer on Windows.
Share with us your experiences in the comments section below, and write us any questions or suggestions you might have.
Read our disclosure page to find out how can you help Windows Report sustain the editorial team. Read more


Improve this guide


User forum
0 messages