What is Fontdrvhost.exe & How to Stop its High Disk Usage
To tackle this issue, you can simply run a system file checker
3 min. read
Updated on
Read our disclosure page to find out how can you help Windows Report sustain the editorial team. Read more
Key notes
- To address the issue with fontdrvhost.exe, it may be helpful to uninstall any conflicting applications.
- You can use the Task Manager to disable this process and reduce its impact on disk usage.
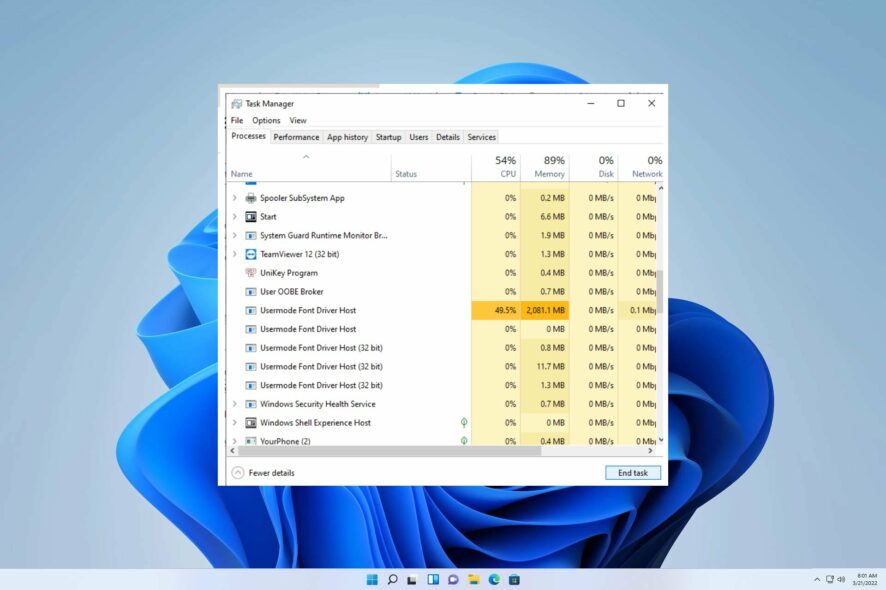
It’s not uncommon for certain Windows processes, such as fontdrvhost.exe, to occasionally take up a large amount of computer resources. Uncommonly, this behavior is normal. Programs with high resource demands, like video editors or IDEs, are often known for their insatiable appetite for system resources.
In a previous guide, we delved into deactivating the Dllhost.exe COM surrogate. Today, we find ourselves in a similar situation once more.
However, before we can address the issue at hand, we must identify its underlying cause.
What is fontdrvhost.exe?
The fontdrvhost.exe is an executable file that falls under the Usermode Font Driver Host process, a component of the Microsoft Windows Operating System Software created by the software development team at Microsoft.
When considering the significance of the fontdrvhost.exe process on a Windows Operating System, it is essential to exercise caution when attempting to delete it. In some cases, this process may be utilizing excessive CPU or GPU resources.
Additionally, if it happens to be malicious software or a virus, it could be operating in the background without your knowledge. Therefore, one must exercise vigilance before taking any action against this process.
How can I stop fontdrvhost.exe high disk usage?
1. Update Windows
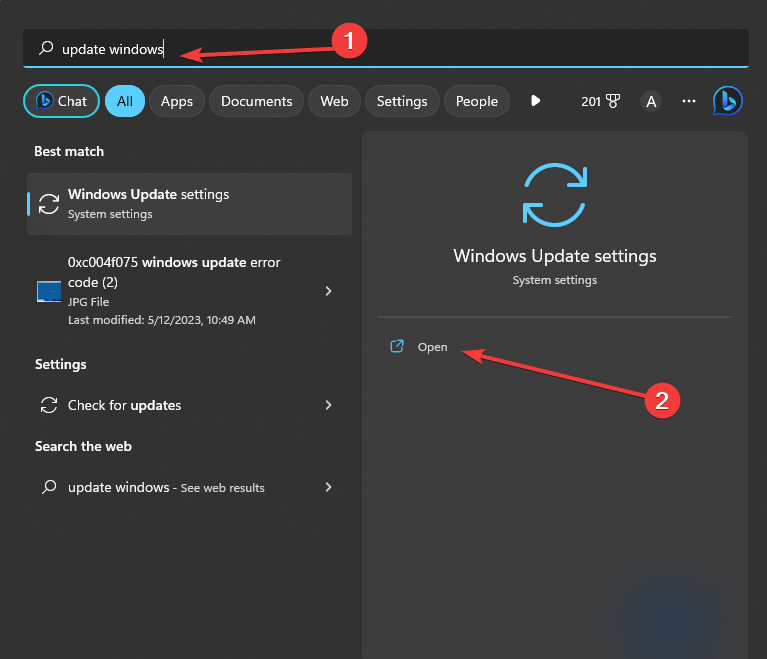
- On your home screen search, bar type update Windows and click Open.
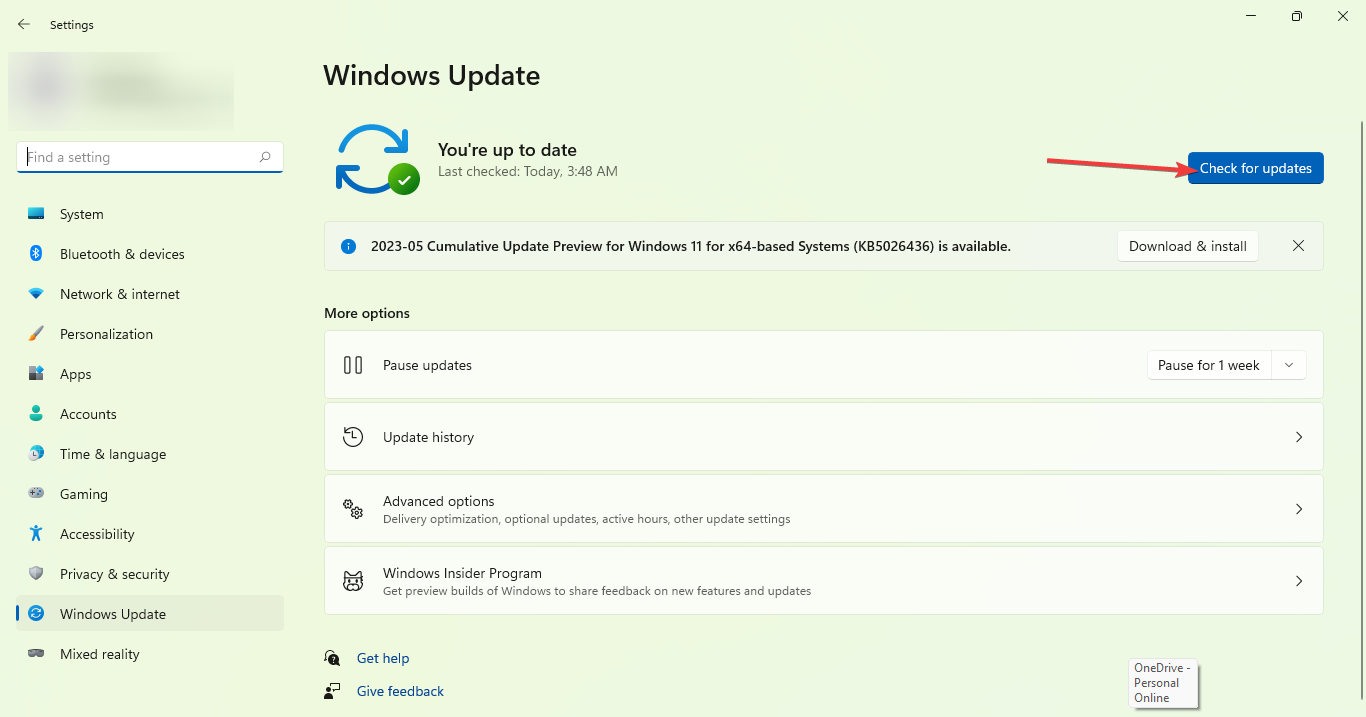
- Now click on Check for updates.
- Be patient while Windows checks and downloads available updates.
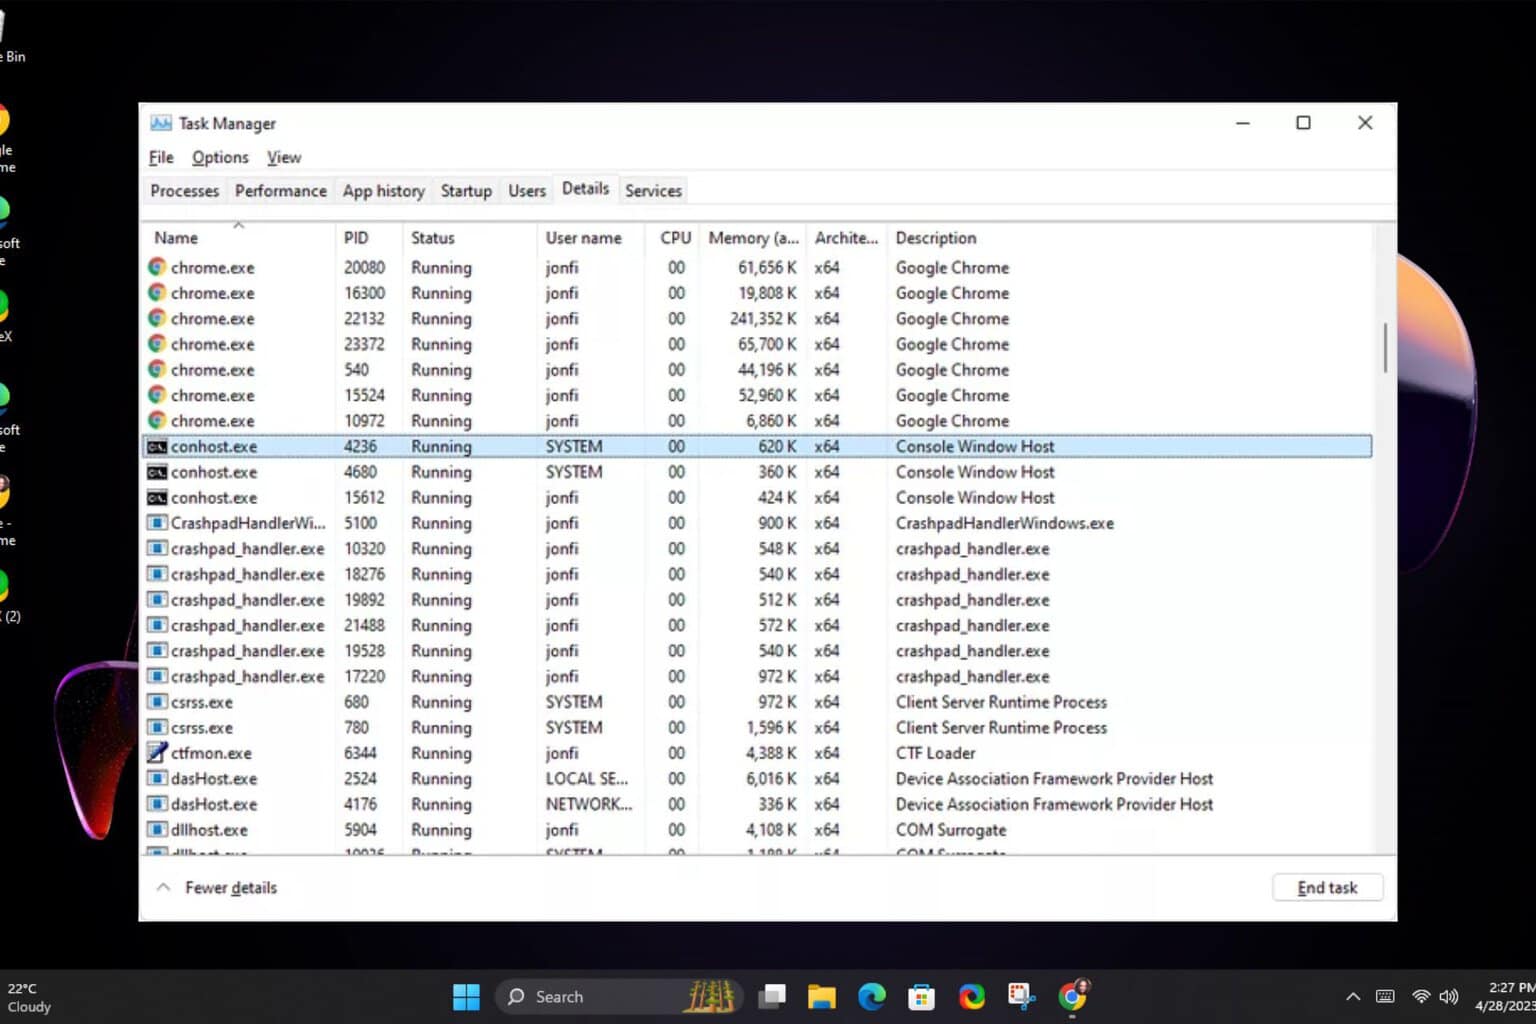
2. Disable it via Task Manager
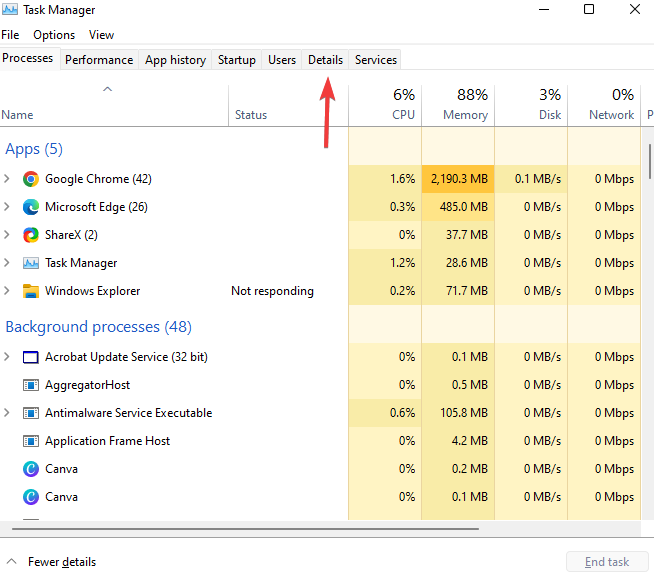
- Hold down Ctrl+Shift+Esc to launch the Task Manager.
- Switch to the Details tab.
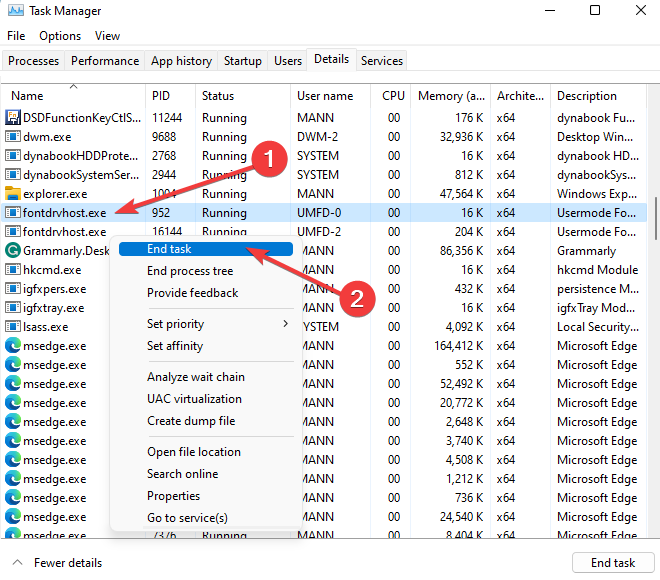
- Locate Details from the list, now choose the process and right-click and select End task.
- Lastly, reboot your PC.
3. Run the system file checker
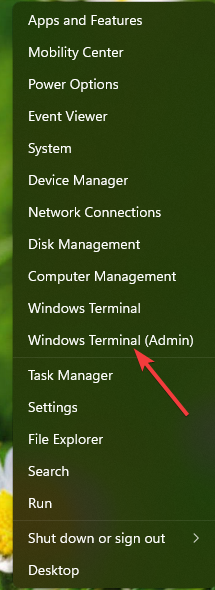
- Hold the Windows + X keys together and choose Windows PowerShell (Admin) from the list of options.
- When the UAC pops up, click Yes.
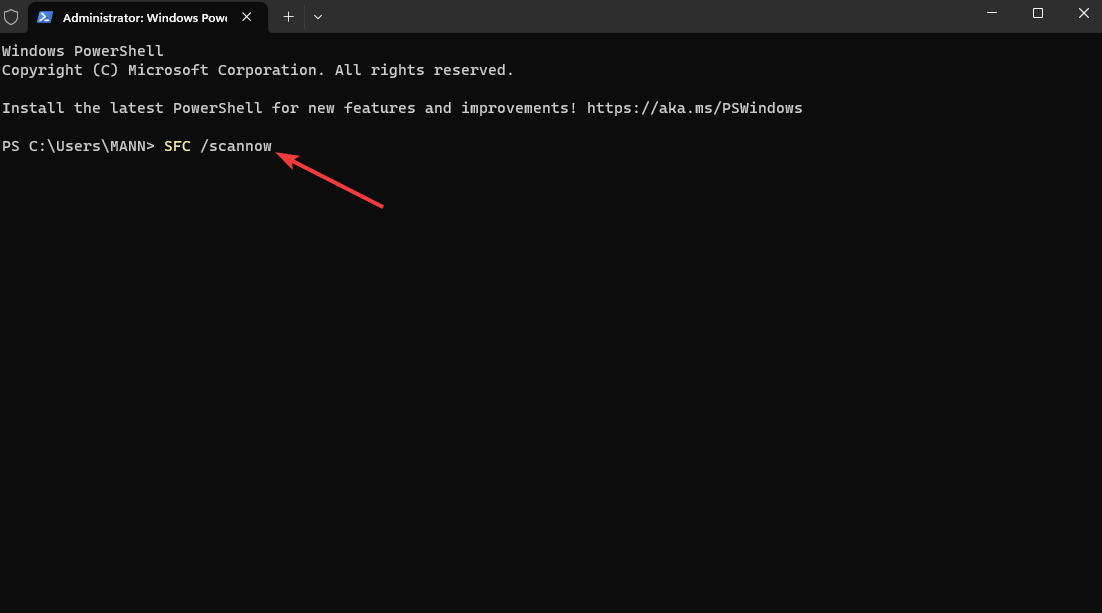
- Type the following command and press Enter:
sfc /scannow - Type the following command and press Enter:
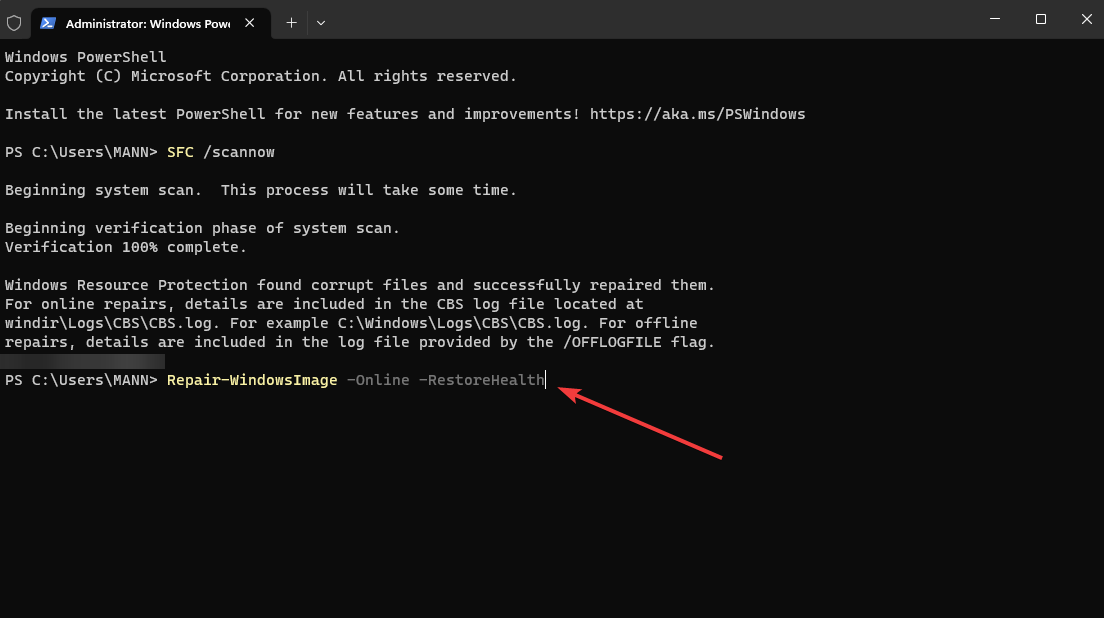
Repair-WindowsImage -Online -RestoreHealth - Finally, restart your system.
4. Uninstall conflicting software
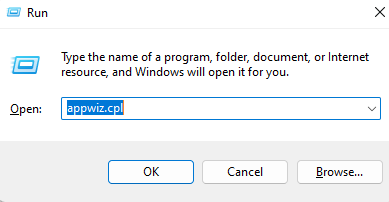
- Hold the Windows + R keys at the same time to open the Run window.
- Type appwiz.cpl and click OK.
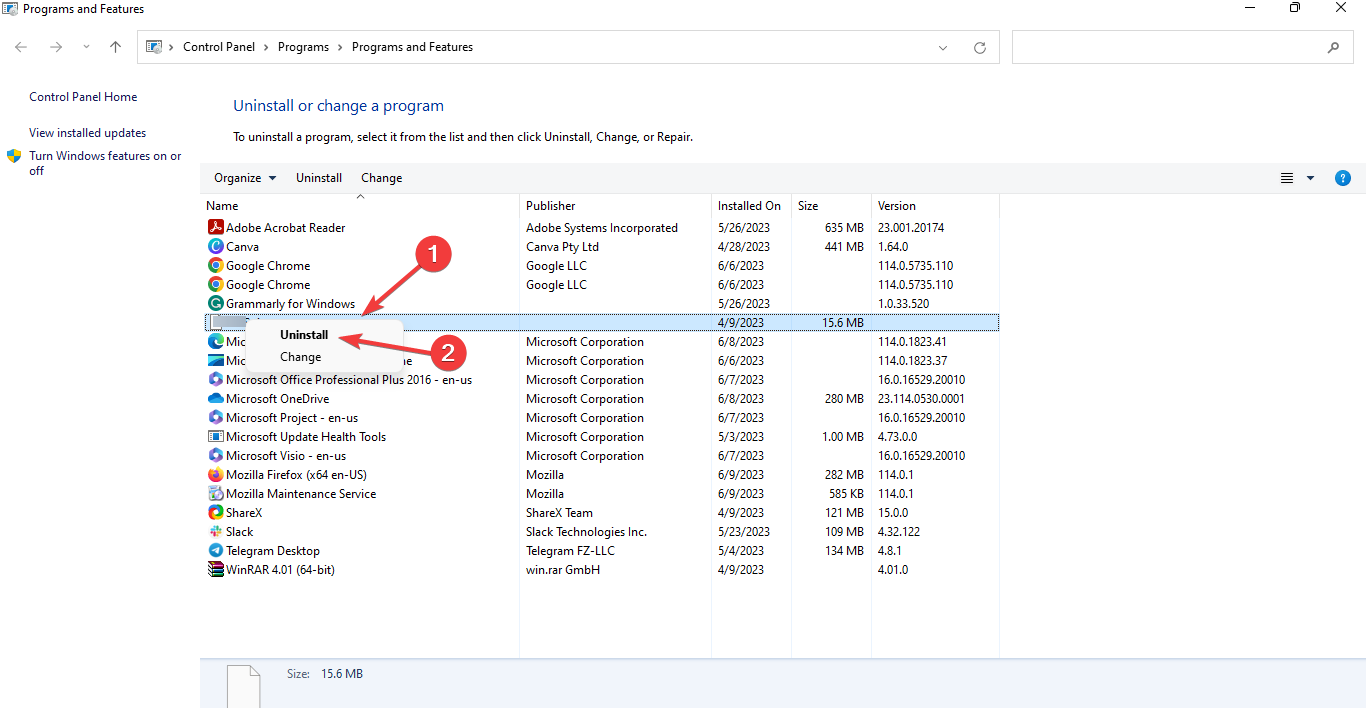
- Immediately the Programs and Features page has popped up, right-click the suspected apps and uninstall them.
- Restart your system.
We hope that our guide has provided valuable assistance in addressing your concern. Resolving this issue is not as daunting as it may initially seem.
If you encounter any additional obstacles, we suggest consulting our comprehensive guidebook on how to disable Windows 11 services. This manual offers comparable solutions to address your issue.
We value your input on this topic and are eager to hear your thoughts. Please don’t hesitate to comment below and share your feedback with us.



User forum
0 messages