How to Install GarageBand on a Windows 11 PC
GarageBand isn't available for Windows, but there's a way to run it
3 min. read
Updated on
Read our disclosure page to find out how can you help Windows Report sustain the editorial team Read more
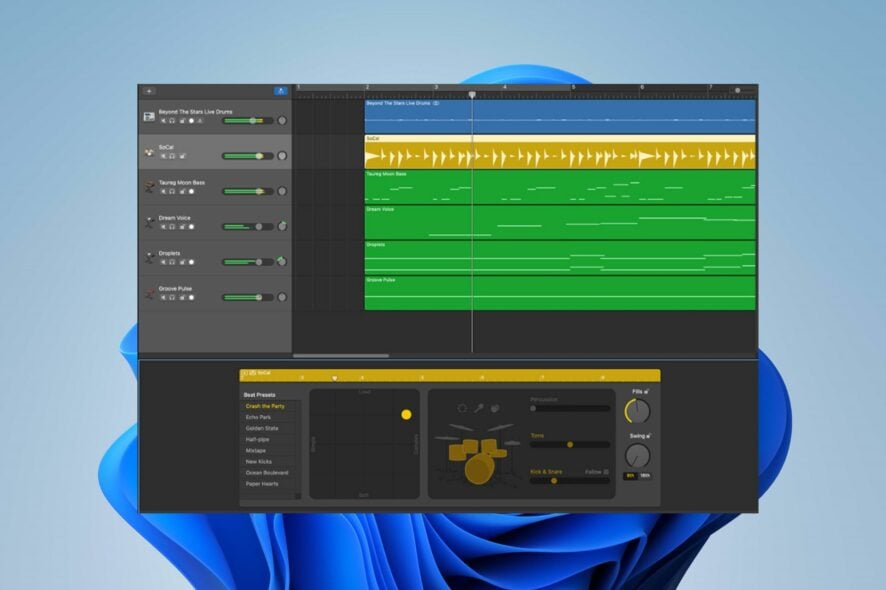
GarageBand is only available on Mac and iOS platforms. However, this guide will discuss downloading, installing, and using GarageBand for Windows 11. So, there are means available for Windows users to run GarageBand on their PCs but with a different Operating System.
How can I download, install and use GarageBand for Windows 11?
1. Create a macOS virtual machine
1.1 Download Mac OS Monterey VM
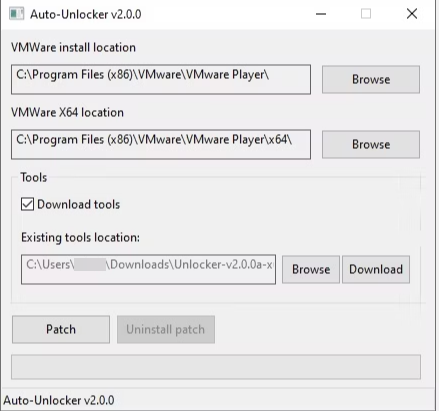
- Download Mac OS Monterey Virtual Image and the VMware Player Patch Tool. Then, extract the files from the zip folders.
- In the Unlocker folder, right-click the win-install script and click Run as Administrator. This will auto-run the patch script in the Command Prompt.
- Open VMware after this process is complete.
1.2 Create Mac OS Monterey VM with VMware
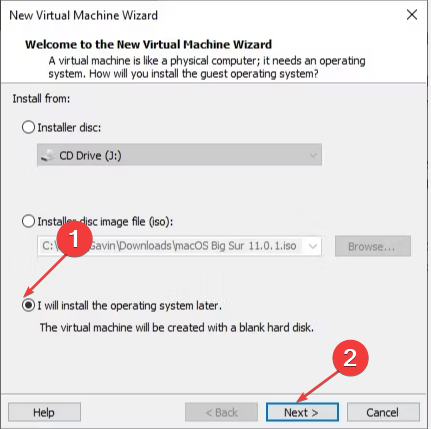
- Select Create a New Virtual Machine and choose I will install the operating system later. Then click Next.
- Choose Apple macOS X, select macOS 12, and click Next.
- Input an easy name for the macOS Monterey VM. Then, copy the file path to your Desktop folder.
- Set the disk size to a minimum of 50GB in the next window, choose Store virtual disk as a single file, and click Next.
1.3 Edit the macOS Monterey VM settings
- Right-click macOS Monterey VM on the VMware screen and select Settings.
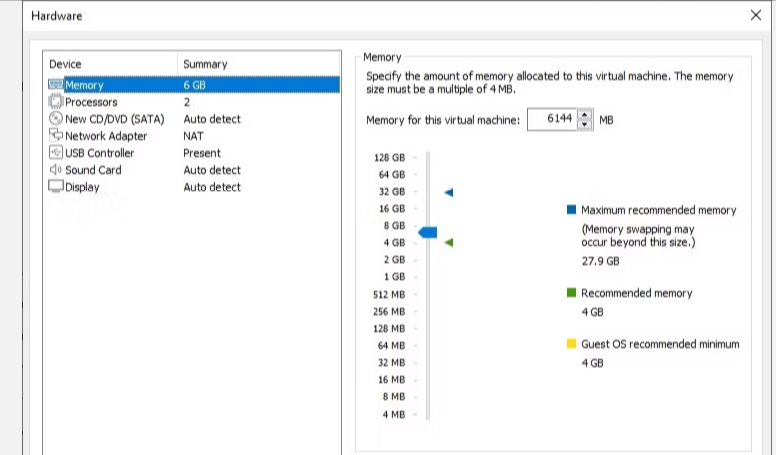
- Set the VM memory to 4GB minimum. Allocate at least 2 cores under Processors.
- Under New CD/DVD (SATA), select Use ISO image file. Then choose the macOS Monterey ISO file.
- Close the Hardware window and click Finish.
1.4 Edit the macOS Monterey VMX file for Intel/AMD hardware
- Launch the File Explorer and go to this default location:
- Find macOS Monterey.vmx, right-click it, choose Open with and select Notepad.
- Add the following lines to the bottom of the configuration file:
C:\Users\YOURNAME\Documents\Virtual Machines\YOUR MAC OS X FOLDER
For Intel:smbios.reflectHost = "TRUE" hw.model = "MacBookPro14,3" board-id = "Mac-551B86E5744E2388" smc.version = "0"
For AMD:cpuid.0.eax = “0000:0000:0000:0000:0000:0000:0000:1011” cpuid.0.ebx = “0111:0101:0110:1110:0110:0101:0100:0111” cpuid.0.ecx = “0110:1100:0110:0101:0111:0100:0110:1110” cpuid.0.edx = “0100:1001:0110:0101:0110:1110:0110:1001” cpuid.1.eax = “0000:0000:0000:0001:0000:0110:0111:0001” cpuid.1.ebx = “0000:0010:0000:0001:0000:1000:0000:0000” cpuid.1.ecx = “1000:0010:1001:1000:0010:0010:0000:0011” cpuid.1.edx = “0000:0111:1000:1011:1111:1011:1111:1111”
1.5 Configure and install the macOS Monterey VM
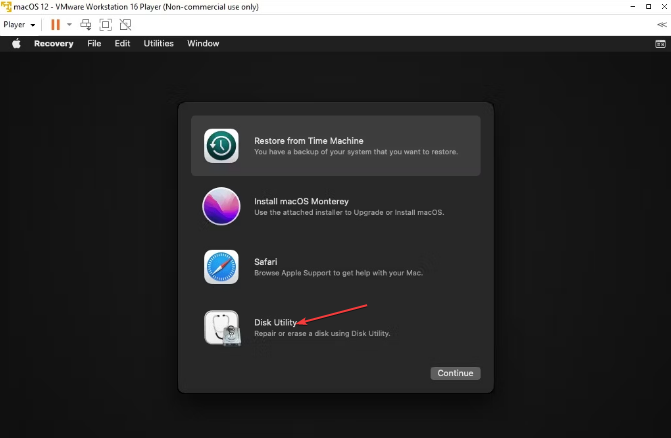
- Choose Disk Utility and select VMware Virtual SATA hard drive Media from the Internal drive column.
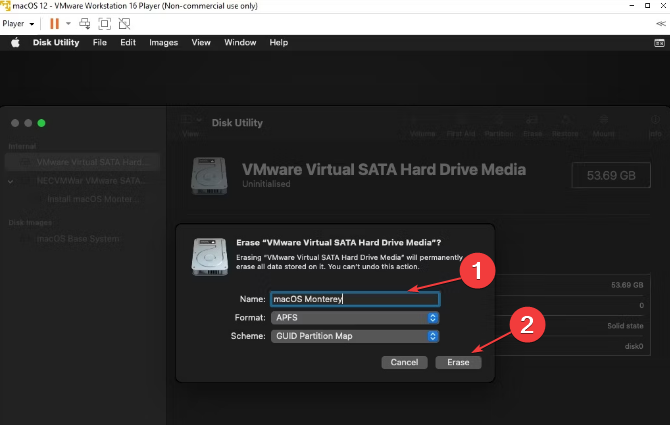
- Select Erase option, give the drive a name, set Format to APFS, and Scheme to GUID Partition Map. Then click Erase.
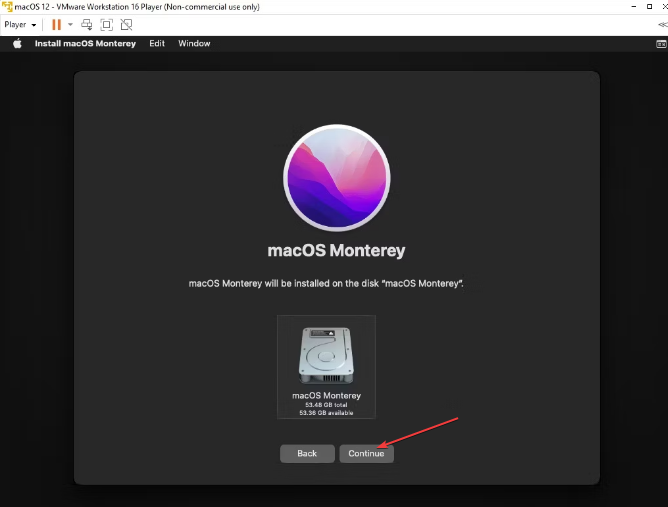
- Return to the Monterey recovery screen and select Install macOS Monterey.
- Choose the drive created in Disk Utility and click Continue.
1.6 Install VMware tools to your macOS Monterey VM
- With the macOS VM running, select Player, go to Manage, and select Install VMware Tools.
- Choose Install VMware Tools from the installation disc window. Then follow the installer prompts o complete the process. Your PC will restart after the process.
2. Install GarageBand
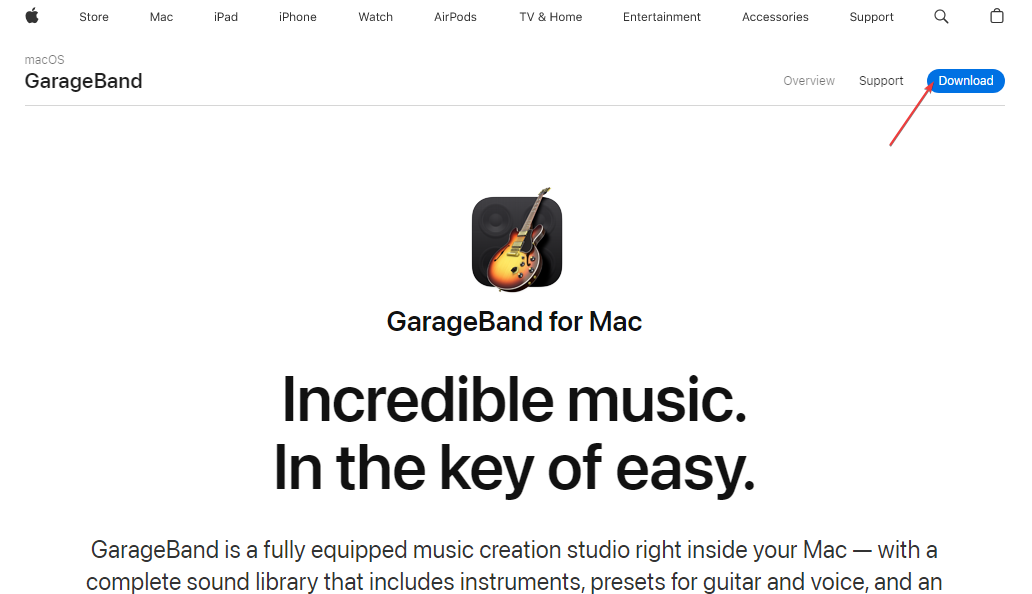
- Go to GarageBand’s official download page and click Download. It will take you to the App Store.
- Click on Get or Download button and select Install app if it prompts it.
- Input your Apple ID and password and click Sign in.
- After downloading, you will see the app in the Launchpad or Applications or Finder.
The steps above help install and boot your system into macOS Sierra. Check our article on how to dual boot Windows 11 and macOS on the same PC.
Also, you may be interested in our detailed review of the best MIDI keyboard controller for GarageBand to buy.
If you have further questions or suggestions, kindly drop them in the comments section.




User forum
0 messages