How to Dual Boot macOS and Windwos 11: Step-by-Step
Easy-to-follow steps to quickly set up things

You can dual boot Windows 11 and macOS to enjoy the best of both worlds. Many users try options like dual booting with Windows 10 or Linux, but macOS is a popular choice too.
It’s not the simplest setup, but we’ll guide you through the steps to make it happen.
How can I dual boot Windows 11 and macOS?
You can do dual booting either by installing Windows 11 on a Mac PC or by installing macOS on a Windows PC. Here’s how:
 NOTE
NOTE
Install Windows 11 on Mac with BootCamp
1. Download Windows 10 ISO and create a Windows partition
- Download Windows 10 ISO.
- Once the download is finished, go to Utilities and select Boot Camp Assistant.
- Optional: Back up your data before proceeding.
- Click on Continue.

- Click the Choose button and locate the Windows 10 ISO file that you downloaded.
- Select the desired size for the Windows partition. About 50GB should be a minimum, but if possible, make it larger.
- Now click the Install button.

- Enter your administrative password, and your Mac will restart.
NOTE
2. Install Windows 10
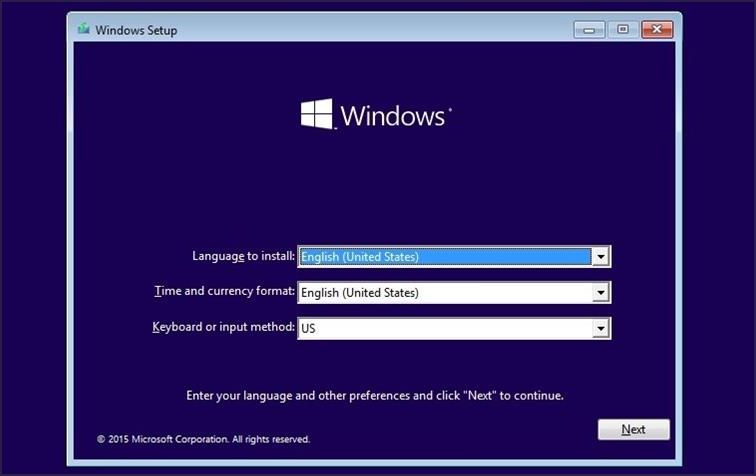
- Your Mac will now boot from the Windows 10 ISO.
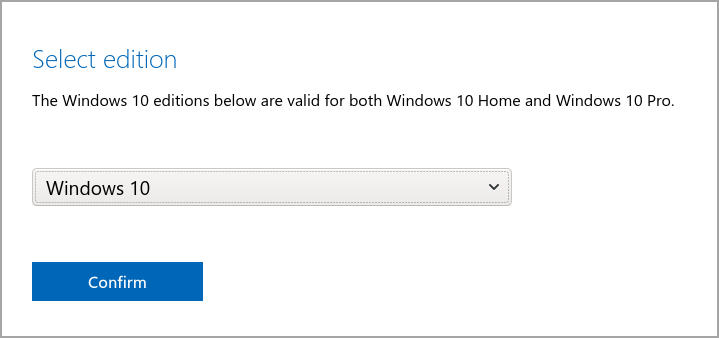
- Select the desired language and the version of Windows that you want to install.
- Follow the instruction until you reach Which type of installation do you want screen. Select Custom: Install Window only (advanced).

- Select the BOOTCAMP partition and format it if needed.

- Wait for the installation to finish.
During the installation, it’s advised to disconnect all nonessential external devices.
3. Install the necessary Windows drivers
- You’ll now boot to Windows 10 and the Boot Camp Assistant will appear.

- Click on Next to proceed. Now click Install to download the necessary Windows drivers.
- Once the drivers are downloaded, click on Finish.
4. Join the Windows Insiders Program
- Your Mac should boot back to Windows. If it doesn’t hold the Option key (Alt) during the boot and select the desired operating system.
- Navigate to Settings.
- Head to the Update & Security section.

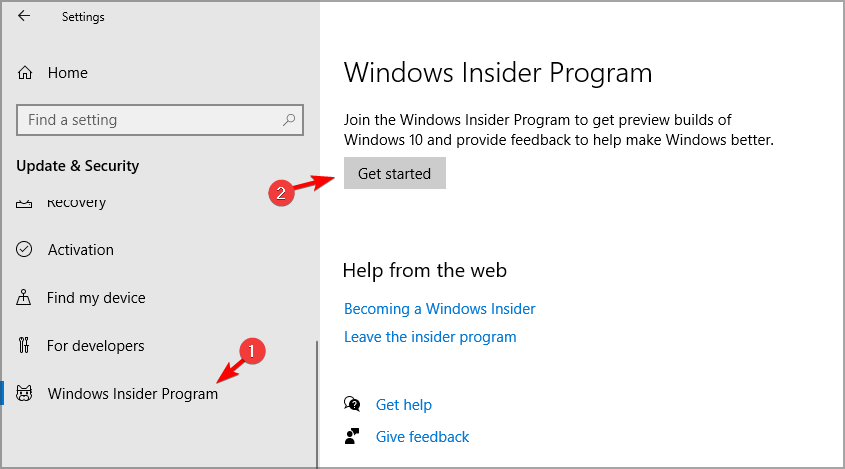
- In the left pane, select Windows Insider Program. In the right pane, click on Get started button.
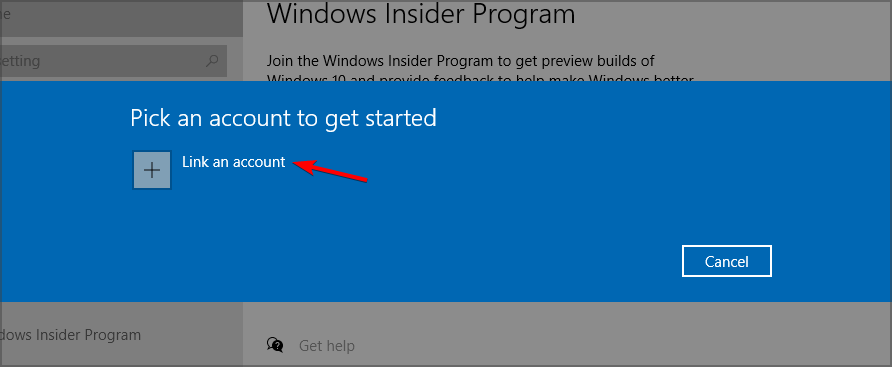
- Select Link an account and enter your Microsoft account credentials.
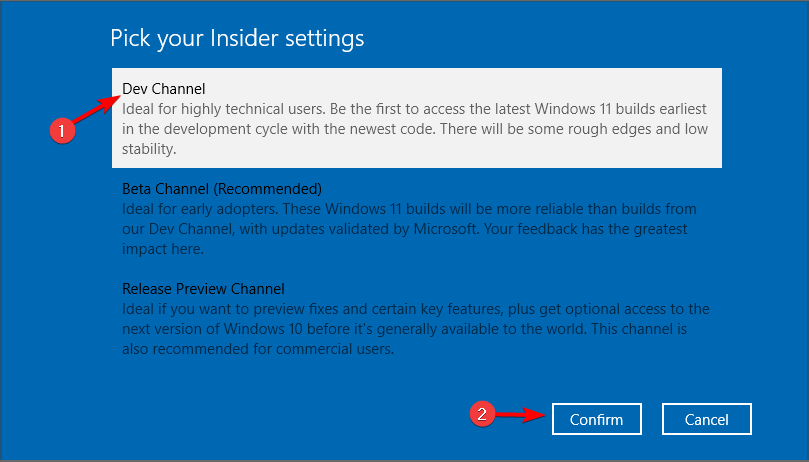
- Select Dev Channel and click on Confirm.
- Click the Restart Now button.
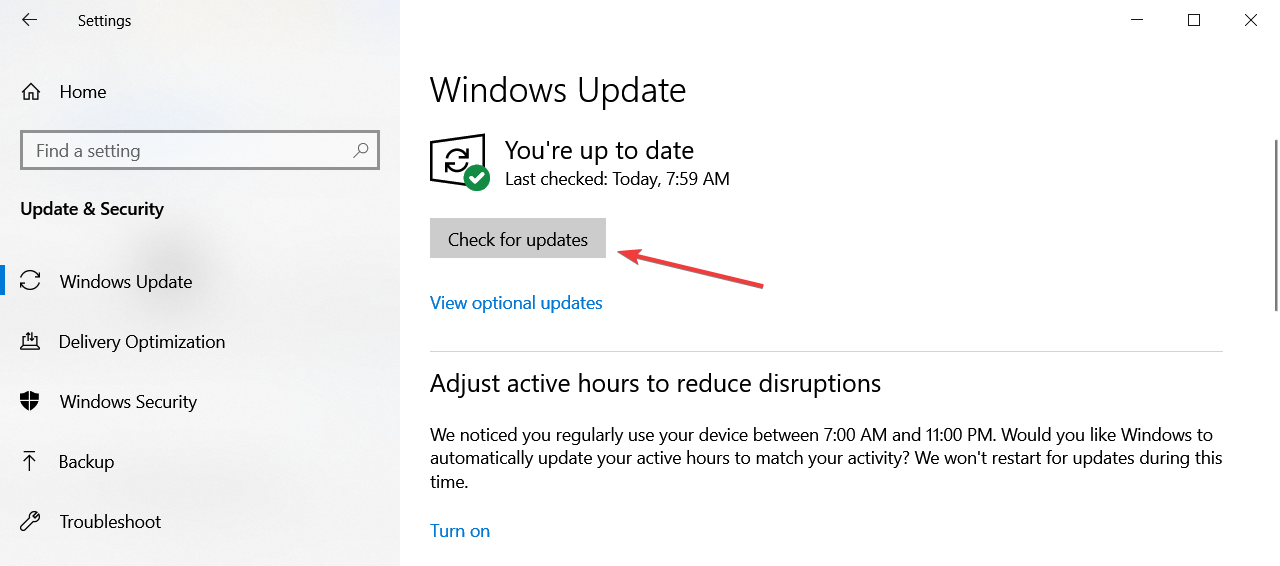
- After you boot to Windows 10 again, open the Settings app and head to the Update & Security section.
- Click the Check for updates button.
- Windows will now download Windows 11 upgrade.
- Once the upgrade is downloaded, restart your Mac and follow the instructions on the screen to upgrade to Windows 11.
After the process is finished, you’ll dual boot Windows 11 and macOS on your Mac computer without any issues. You must now realize how easy it is to dual boot Windows and macOS on PC.
Install macOS on PC after Windows 11
1. Check GPT
- Open PowerShell or Command Prompt. Type the following command and press Enter:
diskpart - When diskpart opens, execute this command:
list disk - Check if your hard drives are using GPT. If they don’t have a star in the GPT column, it means that your drives aren’t using GPT.

Before you proceed, you’ll need to convert MBR to GPT, and we have a special guide on how to convert MBR to GPT without file loss. Once your drives are using the GPT format, you can move to the next step.
2. Create the partition for macOS, format the flash drive
- Connect at least a 4GB flash drive to your PC.
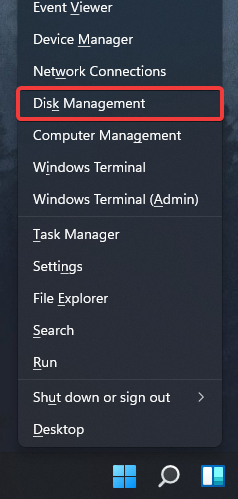
- Now press Windows Key + X and choose Disk Management from the list.
- Locate your flash drive on the list, right-click it and choose Format.
- Make sure to use the exFAT or FAT32 file system.
- Now select the partition that you want to shrink, right-click it and choose Shrink volume from the menu.
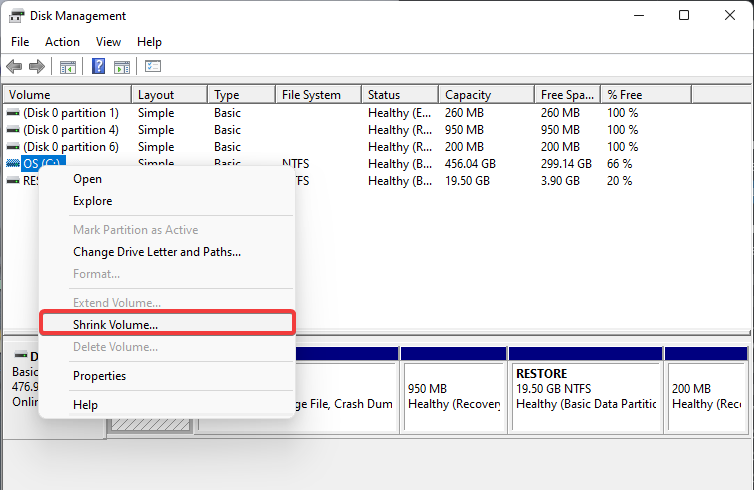
- Set the Enter the amount of space to shrink in MB to 50000 or more and click Shrink.

- Unallocated space will now appear. Right-click it and choose New Simple Volume.
- Set the Simple volume size in MB to the maximum value.
- Now set the File system to exFAT and the volume label to macOS.
- Follow the instructions on the screen to complete the process.
After you’re done, you should have the macOS partition ready on your PC.
3. Change the EFI partition
- Press Windows + X and choose PowerShell (Admin).
- Execute this command:
diskpart - Now run the following command:
list disk - Run the following command while replacing X with the number of your hard drive:
sel disk X - Now execute this command while replacing X with the number that represents the partition that you want to shrink:
sel vol X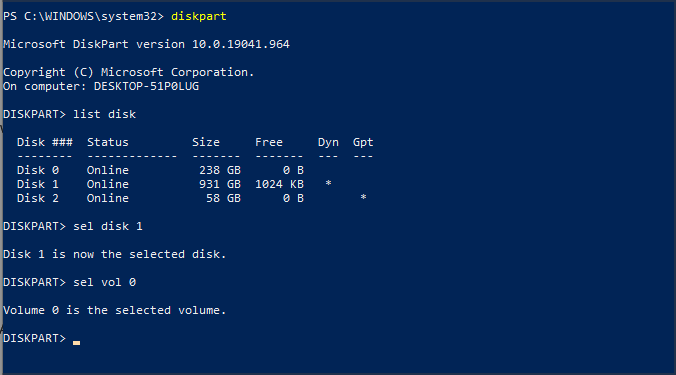
- Enter the following commands:
Shrink desired=300
Create partition efi size=200
Format quick fs=fat32 label=“system”
Assign letter z
exit - Once you’ve exited diskpart, run the following command:
bcdboot c:\windows /s z: /f ALL
4. Create macOS ISO
- Install Python.

- Download OpenCore. Be sure to use the latest version. You can use Debug or the Release version. The Release version is faster, so it might be a better choice for you.

- Extract the file to the desired location. This location is important so be sure to memorize it. On our PC we extracted it to:
C:\Users\WindowsReport\Desktop\OpenCore
- Go to the extraction directory. Now navigate to the
Utilities\macrecovery\
- Copy the folder path to the macrecovery directory. Keep in mind that this path will look different on your PC. On our PC it was:
C:\Users\WindowsReport\Desktop\OpenCore\Utilities\macrecovery\ - Open PowerShell as administrator.
- Run the following command:
cd C:\Users\WindowsReport\Desktop\OpenCore\Utilities\macrecovery\
- Now run the following command:
python macrecovery.py -b Mac-E43C1C25D4880AD6 -m 00000000000000000 download
- You’ll now begin downloading macOS BigSur. This process can take a while, so be sure to be patient and don’t interrupt it.
- Once the process is finished, two BaseSystem or RecoveryImage files should appear.
- Select BaseSystem.chunklist and BaseSystem.dmg or RecoveryImage.chunklist and BaseSystem.dmg files and copy them.
- Connect your USB flash drive, and in the root directory create a folder called com.apple.recovery.boot
- Move to the com.apple.recovery.boot directory. Paste the two BaseSystem or RecoveryImage files from Step 11.
- Go to the
C:\Users\WindowsReport\Desktop\OpenCore - Copy X64 directory. If you’re on a 32-bit system copy IA32.
- Go to the USB flash drive root directory and paste the X64 directory there.
The next part will differ greatly depending on your hardware configuration, so you’ll have to follow the instructions on your own depending on your hardware.
Luckily, a lot of useful information is available on the OpenCore GitHub page. To continue, follow the instructions for your type of hardware. Be sure to follow each of the links mentioned below:
5. Configure your BIOS
NOTE
- Access BIOS.
- Go to Advanced, and set Above 4G Decoding to Enabled.

- Navigate to the Serial Port Configuration and set Serial Port to Off.

- Go back to the Advanced section and navigate to USB Configuration. Set XHCI Hand-off to Enabled.

- Head to the Boot section and go to Boot Configuration. Set Fast Boot to Disabled.
- Now go back to Boot and go to Secure Boot. Set OS Type to Windows UEFI.

- Now go to Key Management and select Clear Secure Boot Keys.
- Save changes.
Keep in mind that some of these options might not be available or they might be on different locations on your version of BIOS.
6. Install macOS
- Restart your PC and keep pressing the boot menu key. By default, it should be F12 or F10, but it might be different on your PC.
- Select your flash drive as the boot device.

- Choose Disk Utility.

- Select All Devices.
- Locate the partition that you created for Mac and format it to APFS.

- Make sure that the format is set to Mac OS Extended (Journaled) and the Scheme is set to GUID Partition Map.
- Install macOS to that drive.
- Follow the instructions on the screen to complete the setup.
7. Boot to Mac and configure your EFI
- On macOS, open the Terminal.

- Enter diskutil list

- Locate the EFI partition named system.
- Mount it by running diskutil mount disk0sx command. Replace X with the EFI partition number.
- Now insert your macOS boot media.
- Copy BOOT and OC folders to the EFI folder.
- Open config.plist and set value non for the following:
Misc/Security/BootProtect - Restart your PC.
- Windows should now automatically start.
- Open the PowerShell as administrator.
- Run the following command:
bcdedit /set {bootmgr} path \EFI\OC\OpenCore.efi
After making these changes, you can choose between macOS and Windows when you boot. Also, remember that the same approach will help dual boot Windows 11 and macOS Monterey.
macOS system requirements for PC
To use macOS on your PC with OpenCore, you’ll need to make sure that your PC meets the hardware requirements:
- CPU: Intel or AMD CPU with SSE4.2 support
- Firmware: EFI64
- Kernel: 64-bit kexts
macOS is designed to work only with specific hardware, so it might not work properly with your custom-built PC. For more information about hardware requirements, check the OpenCore guide.
Can Secure Boot interfere with macOS?
Yes, Secure Boot can interfere with macOS. It verifies software that attempts to load during startup, and if it doesn’t recognize the macOS operating system as secure and trusted, it can block it. While this feature helps protect against rootkits and malware, you can disable Secure Boot since it’s not required for Windows 11 to run.
Although your PC needs to support Secure Boot to install Windows 11, it doesn’t need to have it enabled. Users have reported TPM 2.0 errors that can prevent the upgrade and lead to issues when dual booting.
How do I switch between Windows and Mac with Boot Camp?
Switching between Windows and Mac is pretty simple when using Boot Camp. If you’ve already booted to Windows, do the following:
- Click the Boot Camp icon in the system tray.
- Now choose the Restart in macOS option from the menu.

Once your Mac restarts, you’ll boot to the macOS.
To change the operating system during the boot, do the following:
- Restart your Mac.
- Now press and hold the Option (or Alt) key as your Mac restarts.
- You’ll be presented with a list of startup volumes.

- Select the desired volume to boot to the appropriate operating system.
As you can see, switching between operating systems with Boot Camp is incredibly simple, and it can be done in a matter of seconds.
Is it better to dual boot on Mac or PC?
macOS has built-in dual boot support with the Boot Camp software, which makes dual-booting simpler and free from any issues.
Dual-booting macOS and Windows on a PC is not as simple, and macOS isn’t intended to run on PC hardware, so dual-booting can be harder to set up, and you might encounter various boot issues.
You can also use these methods to run GarageBand for Windows 10, so you might want to give them a try.
Remember, you can similarly triple boot Windows 11, Windows 7, and Linux.
Have you ever used dual boot or tried running macOS on your PC? Let us know in the comments below.
Read our disclosure page to find out how can you help Windows Report sustain the editorial team. Read more


Improve this guide


User forum
2 messages