Windows 10 HomeGroup Missing: Get It Back in No Time
Check our expert solution to get things up and running
3 min. read
Updated on
Read our disclosure page to find out how can you help Windows Report sustain the editorial team. Read more
Key notes
- HomeGroup, though not widely popular, had a fair share of users confused when it went missing in Windows 10.
- HomeGroup allowed users to seamlessly share files and printers with other users on the network.
- If it's missing, there are ways to get back the sharing functionality by modifying the network settings and running critical services.
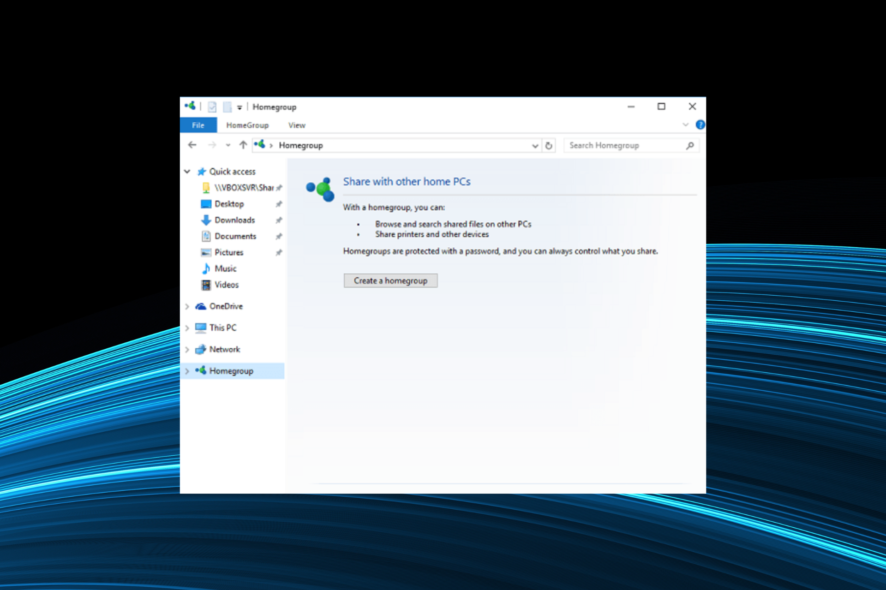
HomeGroup was a feature released by Microsoft, first with Windows 7, which further made its way to Windows 10 as well. But for many, HomeGroup in Windows 10 is now missing.
This presents a significant problem, especially for those who had HomeGroup set up and relied on it for printer and file sharing. So, let’s find out why HomeGroup is missing in Windows 10 and how you can get things up and running.
Why can’t I find HomeGroup in Windows 10?
Microsoft removed HomeGroup from Windows 10, starting with Version 1803. The reason, there are several other viable and secure alternatives. The functionality can be performed using OneDrive or the Share function found in Windows.
However, it didn’t go down well with the users who relied on the HomeGroup feature, and with it missing in Windows 10, they had to look for ways that suited their requirements. But before you do that, try our solution.
What can I do HomeGroup is missing in Windows 10?
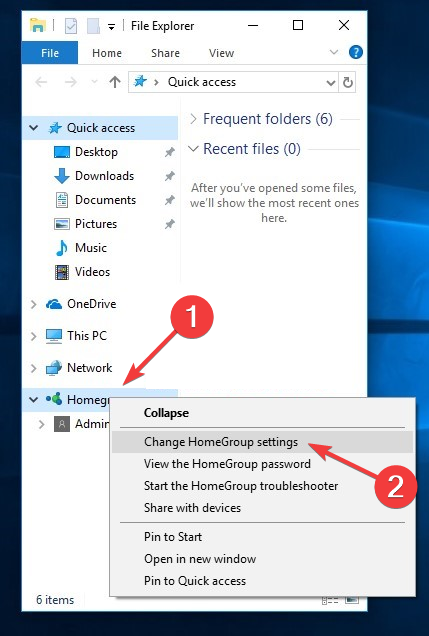
- Open This PC, check the left pane if the Homegroup is available, right-click on it, and choose Change HomeGroup settings.
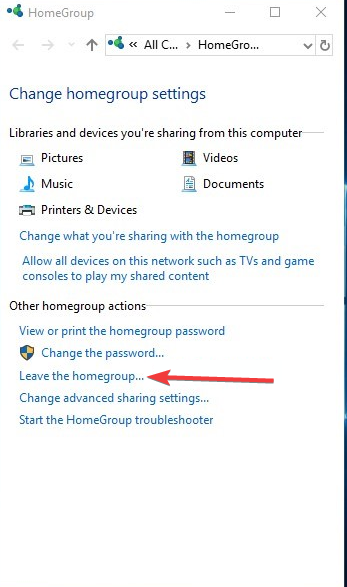
- Click Leave the homegroup and save the changes.
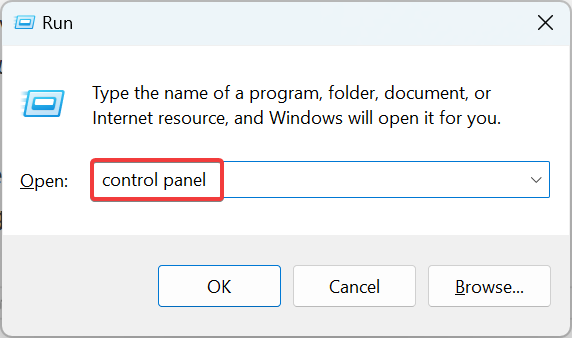
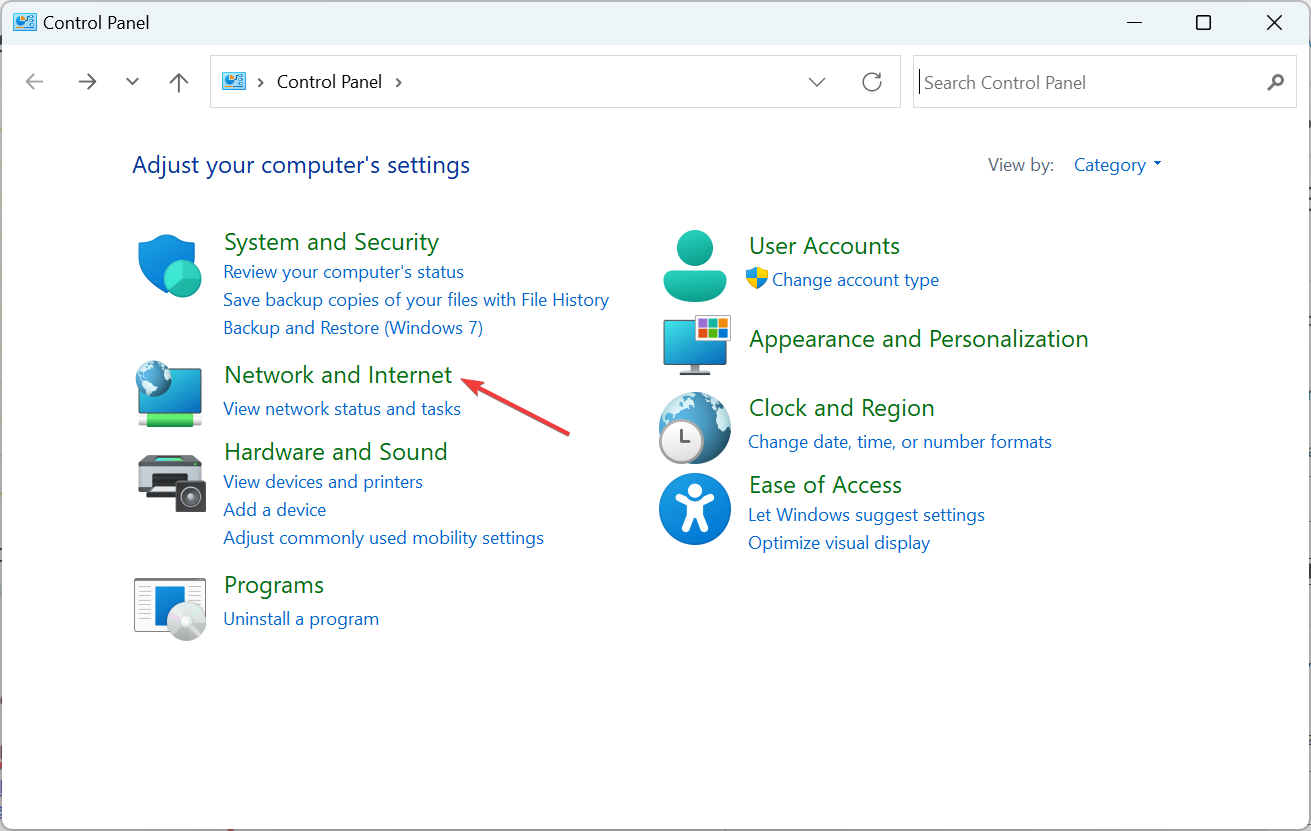
- Now, press Windows + R to open Run, type Control Panel, and hit Enter.
- Click on Network and Internet.
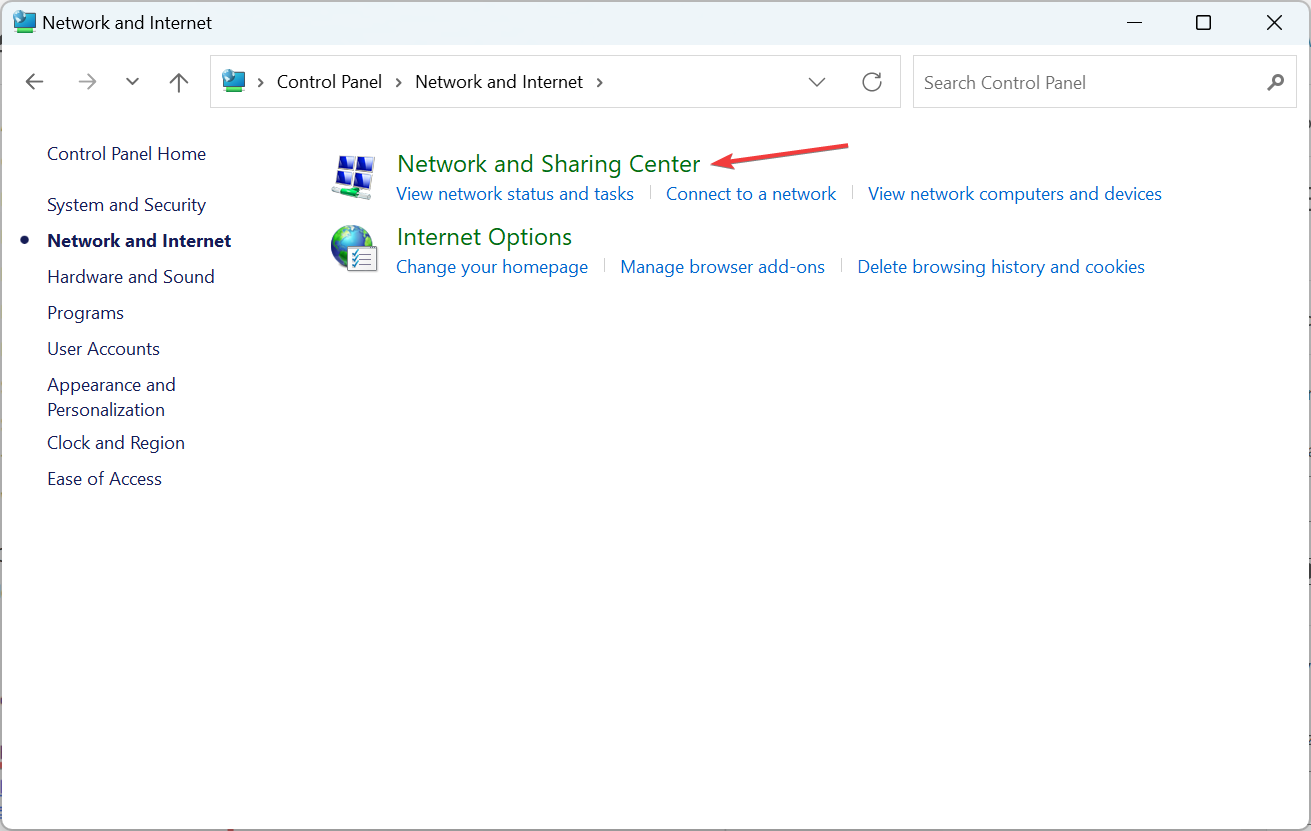
- Choose Network and Sharing Center.
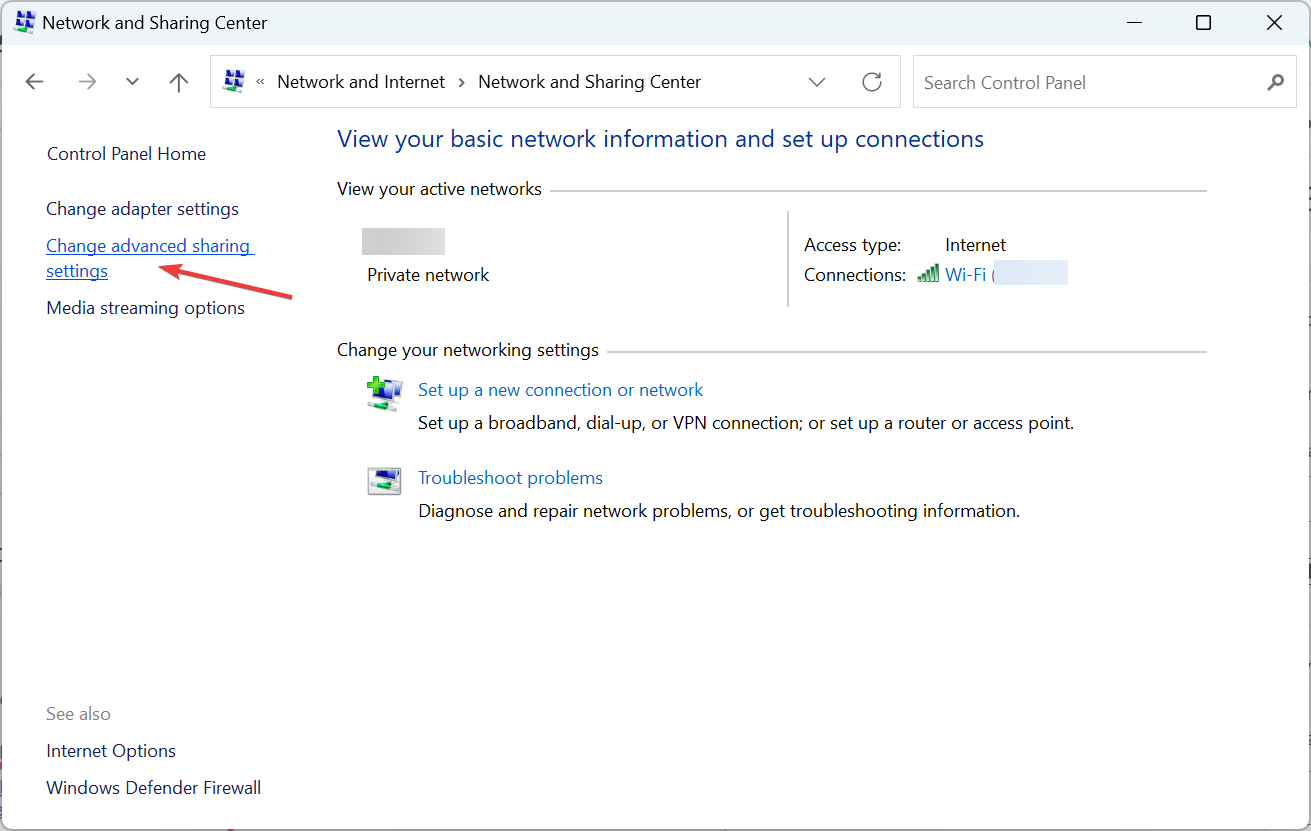
- Next, click on Change advanced sharing settings on the left.
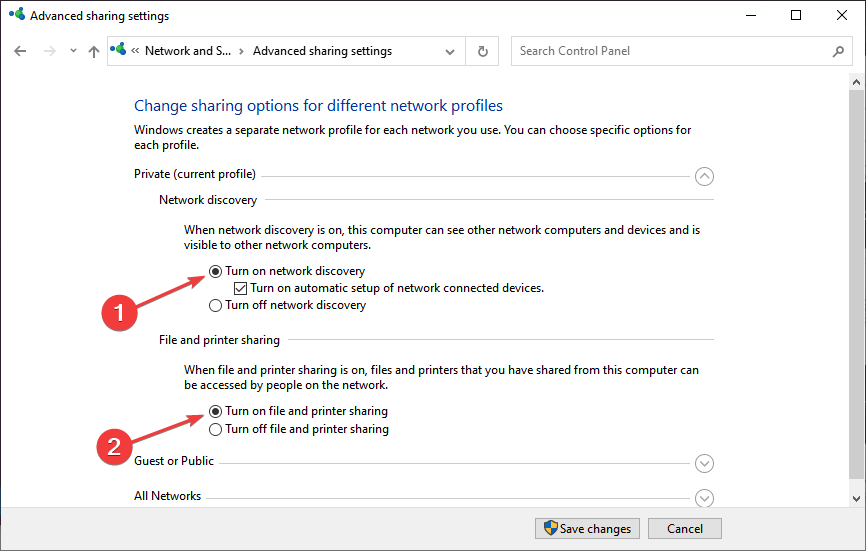
- Now, enable the Turn on network discovery and Turn on file and printer sharing options.
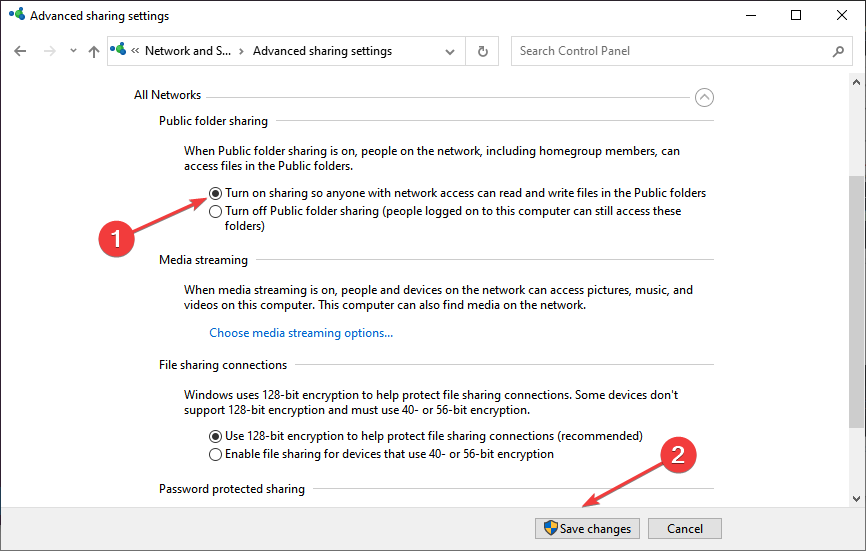
- Scroll down, expand All Networks, enable Turn on sharing so anyone with network access can read and write files in the Public folders, and then click on Save changes.
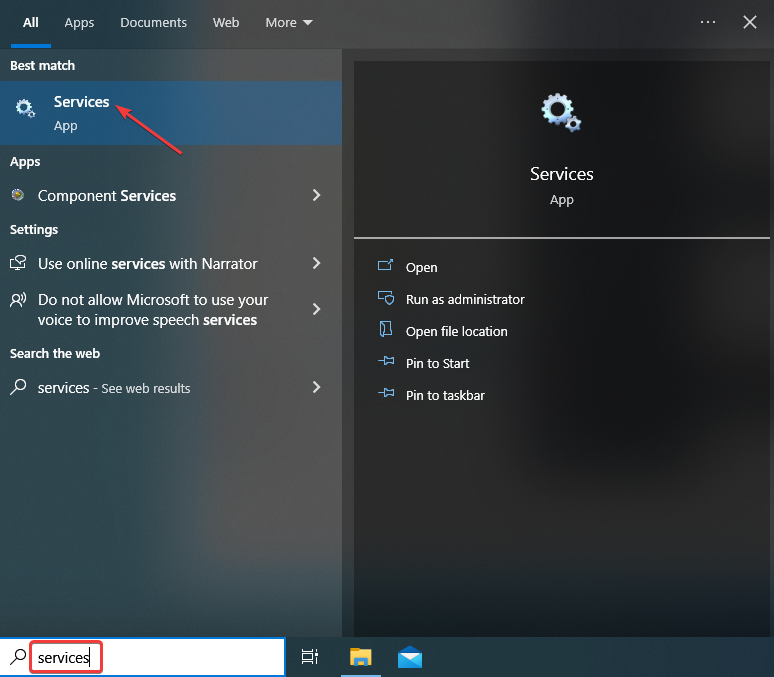
- Press Windows + S to open Search, type Services, and click on the relevant search result.
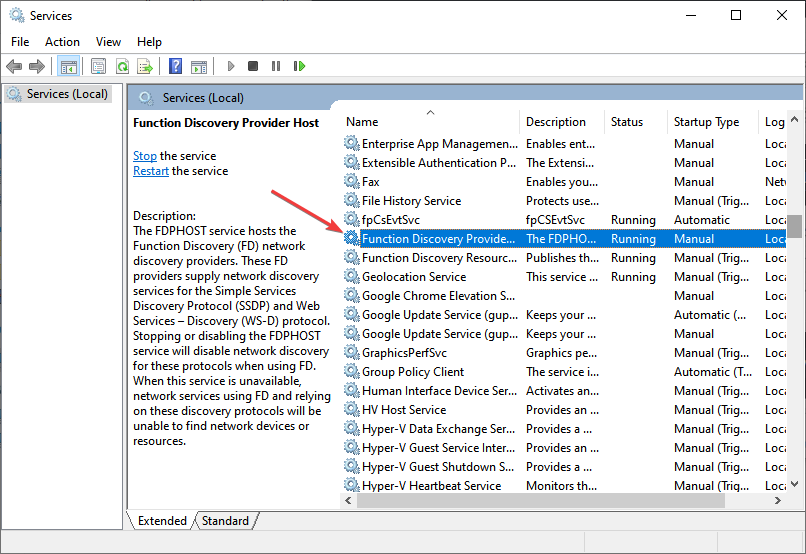
- Double-click on the Function Discovery Provider Host entry here to open its Properties.
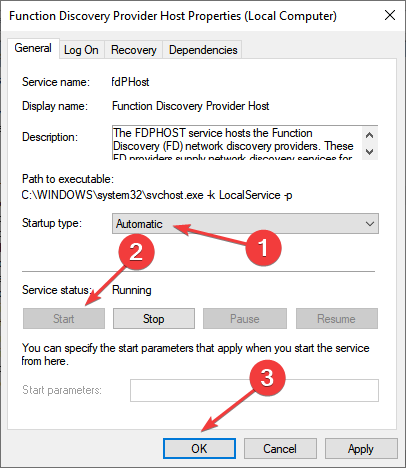
- Choose Automatic from the Startup type dropdown menu, click on the Start button, and then on OK to save the changes.
- Similarly, get the following services running as well:
- Function Discovery Resource Publication
- SSDP Discovery
- UPnP Device Host
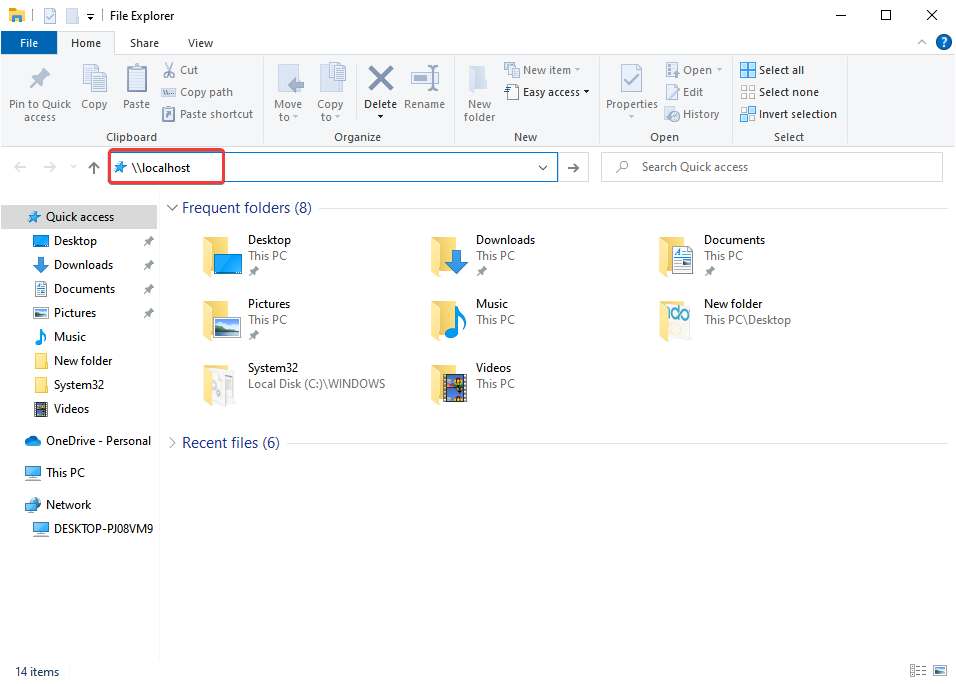
- Finally, press Windows + E to open File Explorer, paste the following path in the address bar, and hit Enter:
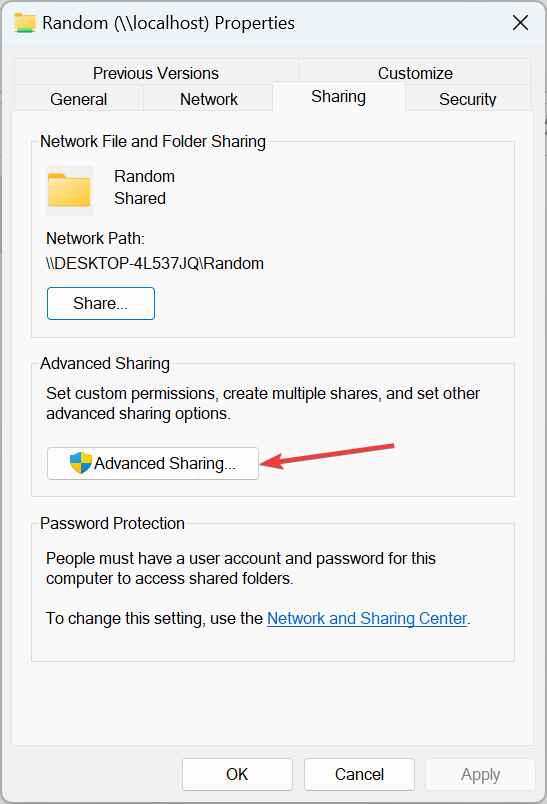
\\localhost - Create a folder here, right-click on it, and choose Properties.
- Now, go to the Sharing tab, and click on Advanced Sharing.
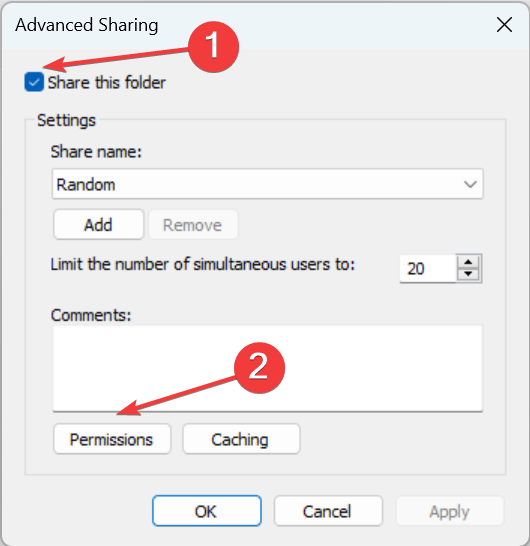
- Tick the checkbox for Share this folder, and then click on Permissions.
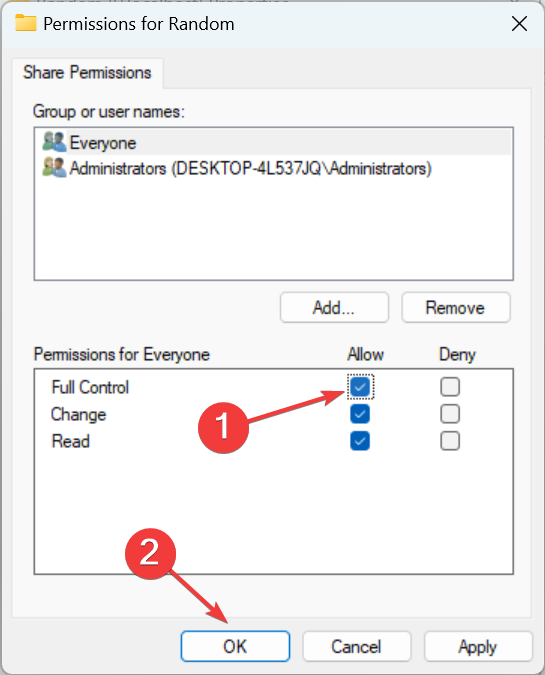
- Make sure to provide Full control and click OK to save the changes.
- Remember that this method isn’t the safest, so you might want to adjust your settings and only share files with specific users.
That’s it! With this method, you should be able to reactivate the HomeGroup sharing capabilities on Windows 10 in case it’s missing. Remember to follow the steps in the listed sequence to avoid running into issues.
And do not forget to check the simplified steps to share data using OneDrive. Besides, find out the best software for remote printing.
Do tell us your thoughts on Microsoft shelving the HomeGroup feature in Windows 10 and the information presented in our guide.





User forum
9 messages