Gmail Spell Check not Working? Fix it with These Solutions
Simple yet effective fixes to get spell check working again
3 min. read
Updated on
Read our disclosure page to find out how can you help Windows Report sustain the editorial team Read more
Key notes
- If Gmail spell check is not working, it might be because the feature is disabled.
- You can get the feature working again by enabling spell checker for Chrome.
Gmail is one of the most popular email service providers and offers several features for professionals to compose better emails without using any third-party plugins. That said, several Gmail users have reported Gmail spell check feature is not working while composing emails.
Gmail’s spell check feature is a handy tool that catches any spelling errors and saves you from embarrassing situations when sending professional emails. Now if your Gmail spell checker is not working, it is possible that you have disabled it.
Follow the steps in this article to fix Gmail if it is not checking spelling while composing emails. This is a browser-independent process, so you should be able to use it irrespective of the browser you are using.
How can I fix Gmail spell checker if it’s not working?
1. Enable Gmail spell checker
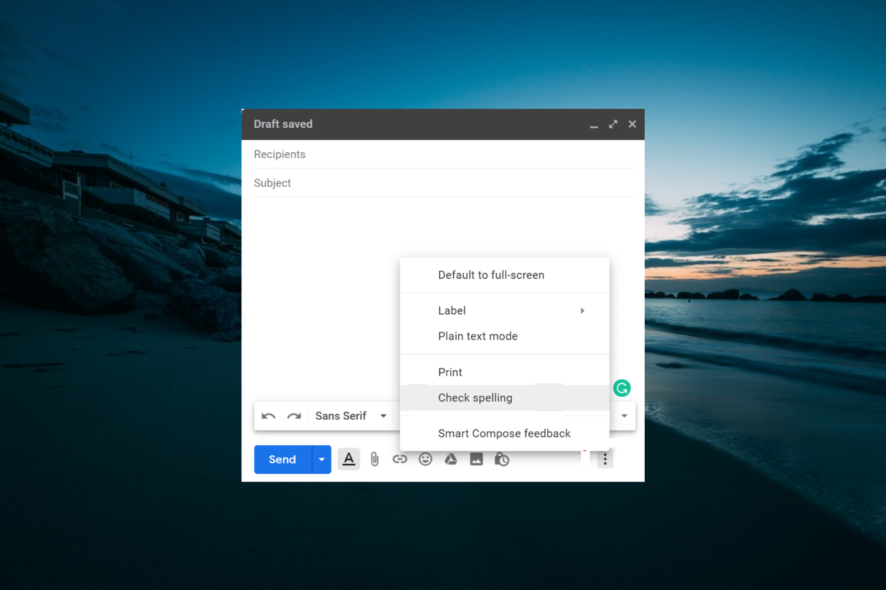
- Login to your Gmail account and click on Compose (+) button to compose a new email.
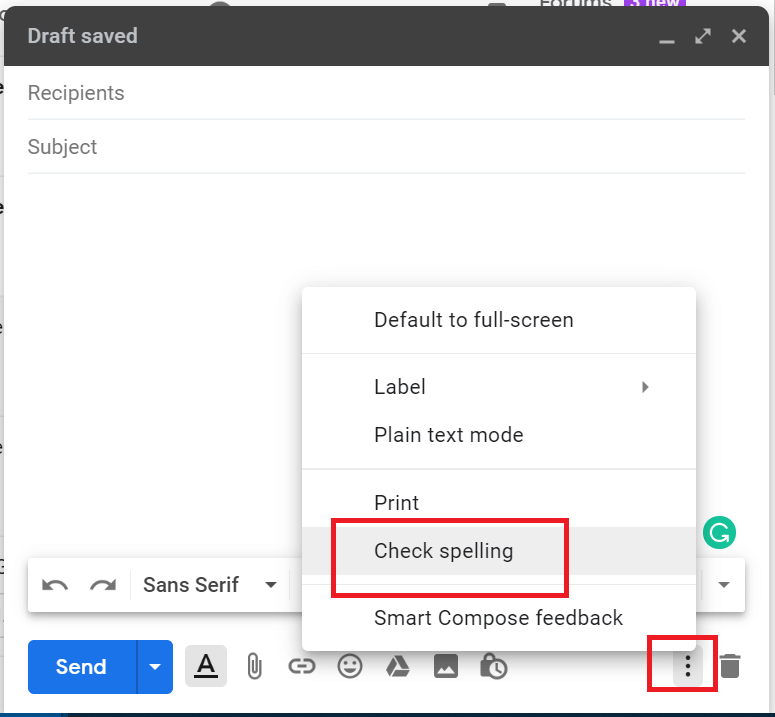
- In the New Message window, click on the three dots (bottom right side).
- Select the Check Spelling option.
- This will enable the spell checker for your Gmail account.
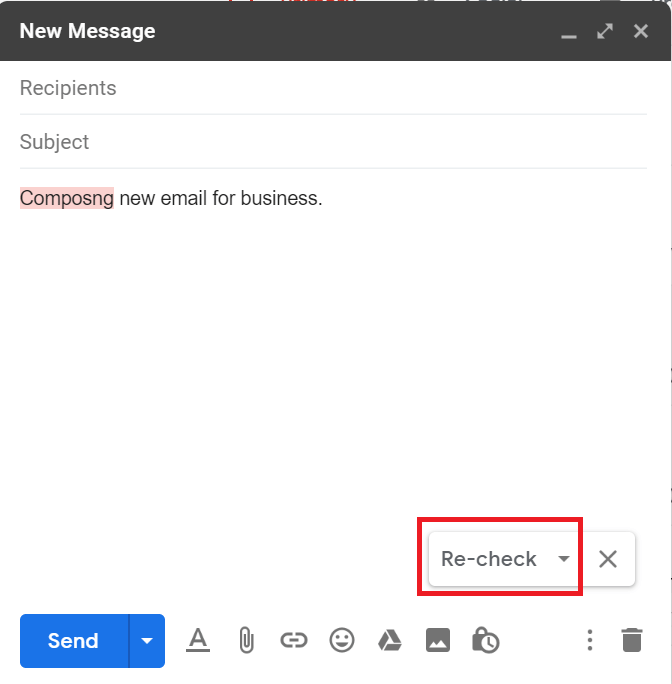
- The spell checker will detect and highlight the misspelled word. To correct the word, click on the highlighted word and select the right word.
- Click on Re-Check option to run the spell checker after composing the email.
- To change the language, click the small drop-down menu beside Re-check. Here you can select your prefered language for spell check.
- Compose a new email and check if the Gmail not checking spelling error is resolved.
If Gmail is not spell checking, it might be because you have disabled the feature. So make sure you activate it again.
2. Enable spell checker for Chrome
- If you want to have a spell checker for all the web pages, you visit, including social media pages, enable spell checker for Google Chrome. Microsoft Edge, by default, has the spell checker enabled.
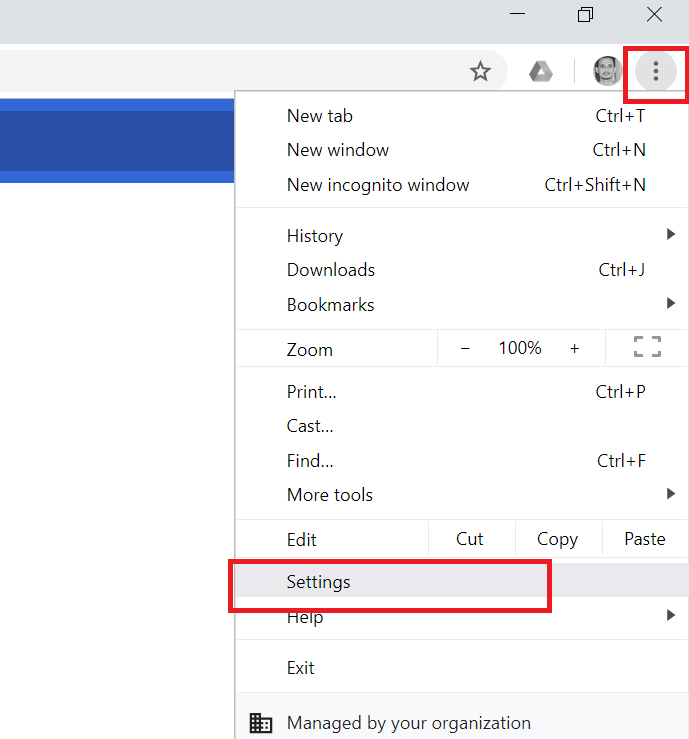
- Open Google Chrome and click on the Menu icon ( Three dots, upper right corner).
- Select Settings from the options.
- Scroll down and click on Advanced to get more settings.
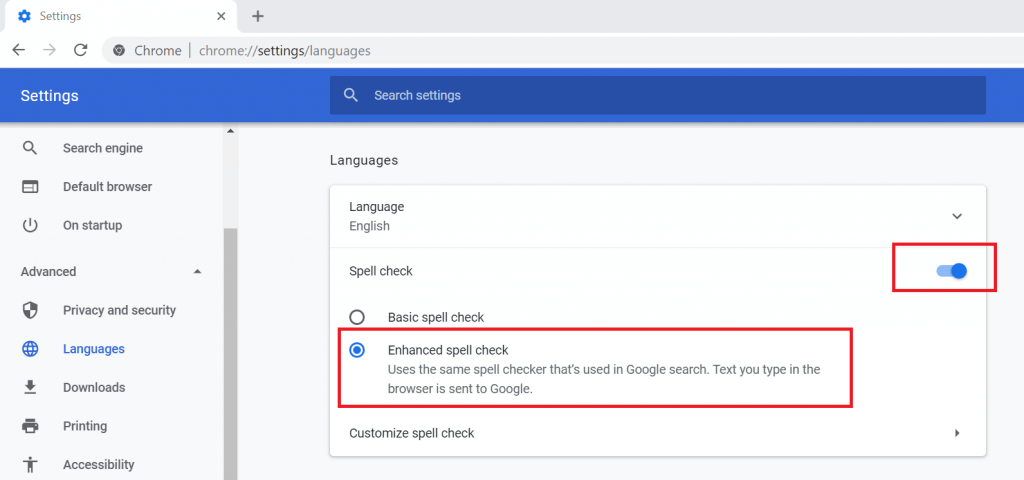
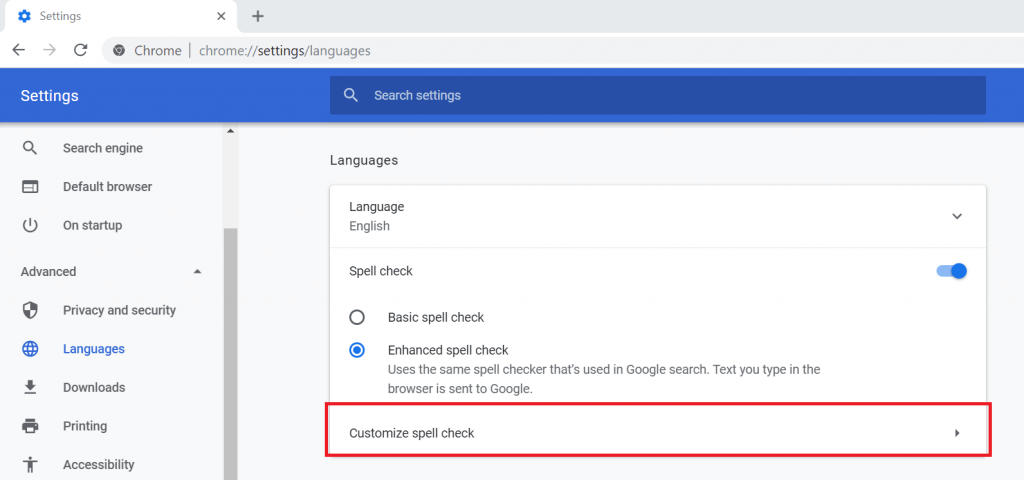
- Scroll down to Languages section.
- Toggle the switch to enable Spell Check.
- Select the Enhanced spell check option. The basic spell check option offers fewer features.
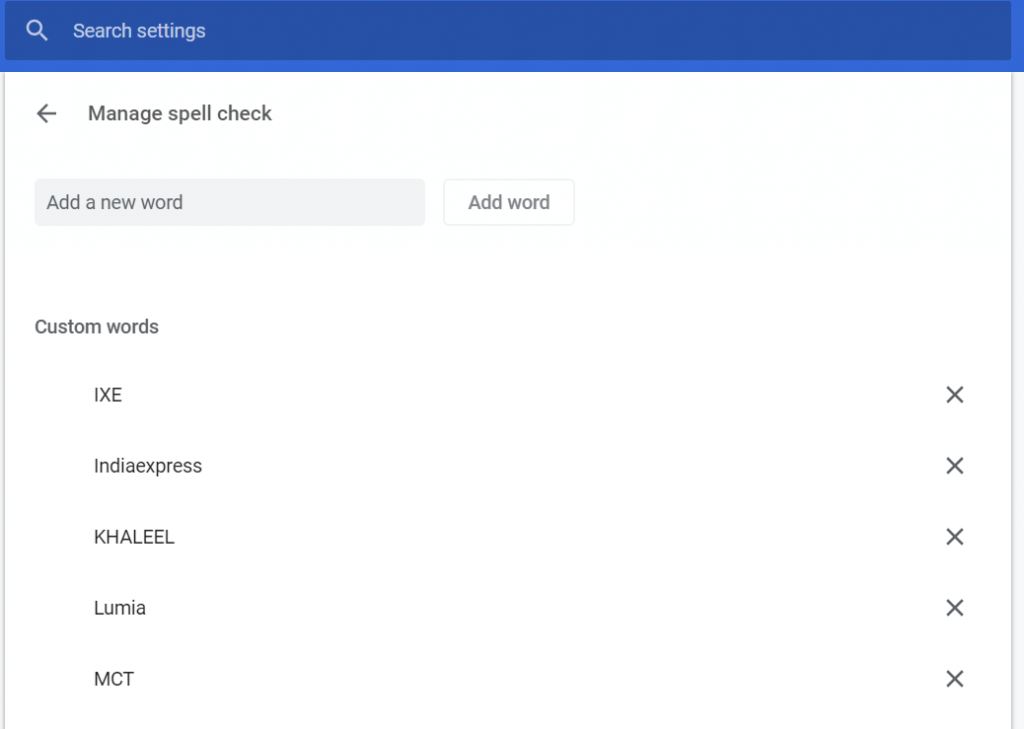
- Next, click on Customize spell check option.
- Here you can enter any words that you want the spell checker to ignore while checking for spelling errors.
- Relaunch the Chrome browser, and the spell-checker feature should be working on all websites now.
Another solution to try if Gmail autocorrect is not working is to enable the spell checker for Chrome. This will make the feature work on all pages you visit.
In this article, we have listed two ways to get the Gmail spell check feature working again. Follow the steps, and you can fix the Gmail not checking spelling while composing emails.
If you are dealing with system encountered problems on Gmail, check our guide to fix it.
Feel free to let us know if you were able to fix the issue in the comments below.

