This is how you can fix HDR games issues on Windows 10/11
4 min. read
Updated on
Read our disclosure page to find out how can you help Windows Report sustain the editorial team. Read more

The fact is that HDR has been available on TVs a few years before it was introduced on computer monitors. This was because Windows didn’t support the HDR display technology until May 2018.
So now Windows users can now enjoy the advantages that HDR has to offer which include the color depth and accuracy.
Now many individuals are faced with the HDR games bug on their computers. So, to get this fixed, first check out this.
Steps to fix HDR game issues on PCs
1. Confirm that your computer supports HDR
Windows is very selective when it comes to devices that it permits to show HDR contents on. HDR options won’t display for individuals using 20ft HDMI 1.4 cables, it can only work through DisplayPort 1.4 or HDMI 2.0a cables.
For your benefit, here is a list of requirements that an external display will need to meet up to before displaying HDR contents on Windows 10:
- The PC must permit HDR10 and DisplayPort 1.4 or HDMI 2.0 or even higher ones. Better still, display devices that are DisplayHDR certified are recommended.
- Windows 10 computer needs to have a good graphics card that permits PlayReady 3.0 hardware digital rights management. Note that this is for protected HDR content. The graphics card should be AMD Radeon RX 400 series or higher versions, Intel UHD Graphics 600 series or higher models or NVIDIA GeForce 1000 series or anyone higher than that. Graphics card that supports hardware-accelerated 10-bit video decoding for HDR video codecs is highly recommended.
- The needed codecs installed for 10-bit video must be available on the Windows 10 computer such as VP9 codecs or HEVC.
- Have the recent WDDM 2.4 drivers installed on the PC. For the latest drivers, you can get to Windows Update on your settings or you can get it on from your computer manufacturer’s website.
2. Activate HDR on Windows 10
Before you can do this, make sure that your PC meets up all the listed requirements and you must have updated to the latest Fall Creator Update.
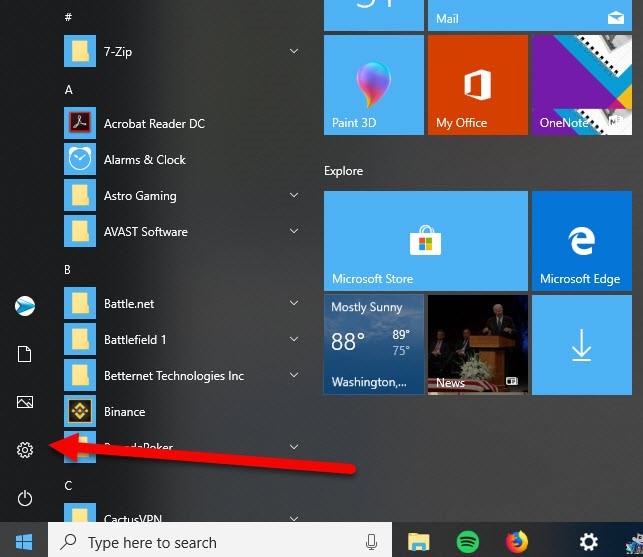
If these are settled then you are good to continue the process. Now, to activate HDR on your Windows 10, open up your start menu and ho to the Setting app:
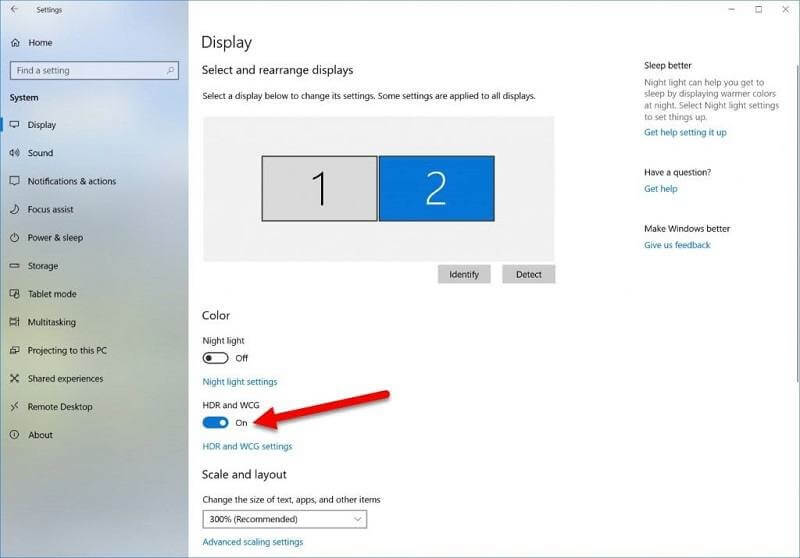
Now click on ‘Display’ and you would find a toggle just below the Night Light option which reads ‘HDR and WGC’
Now you can turn on the HDR on your screen display. Note that any non-HDR content will be displayed as faded or washed out on the color spectrum because of this action.
This is because Windows will automatically reset the whole color profile of your computer to recognize HDR content and this implies that any other content not configured for HDR such a web browser, emails and the rest will display grayish or darker than normal.
To get this back to normal you can go back and click on the link for HDR and WCG settings option under the toggle, just as displayed above.
You can make use of the SDR Content slider to set the color palette and brightness for non-HDR content.
This could help a bit, but the fact is, it might be difficult to get a non-HDR content to display fine on your Windows screen after you must have enabled HDR.
However, to resolve this permanently, only turn on the HDR toggle if you want to do anything pertaining to HDR content or play a game that has HDR color gamut and when you are done and wants to browse, turn off the toggle for a better experience.
We hope this would help you a great deal.
RELATED GUIDES TO CHECK OUT:


User forum
0 messages