How to Fix Amdihk64.DLL Not Signed
Clean install of AMD driver can help you fix the issue quickly
6 min. read
Updated on
Read our disclosure page to find out how can you help Windows Report sustain the editorial team. Read more
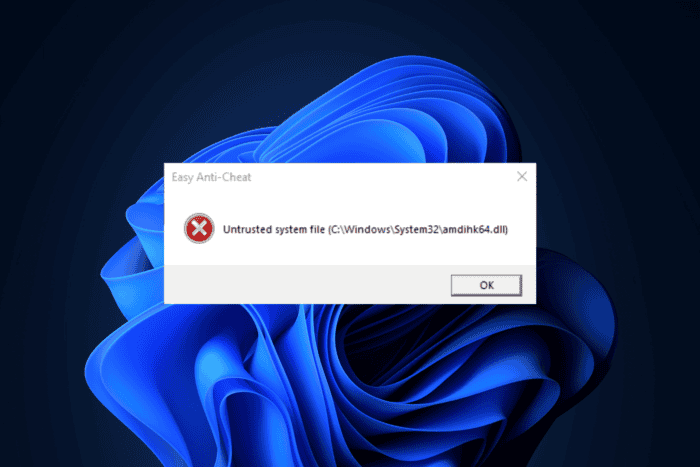
Many of our readers have reported facing the Amdihk64.DLL Not Signed issue while playing games like Apex Legends with AMD drivers on the computer. The issue usually occurs if the DLL file is missing, system files are damaged, GPU drivers are corrupted
What is Amdihk64.DLL?
Amdihk64.dll is associated with AMD’s drivers and software, usually related to graphics cards. It plays a vital role in supporting various functions related to graphics processing, including performance enhancements and rendering for AMD GPUs.
The DLL file is part of the AMD driver package, including the software that allows the operating system to communicate with the graphics hardware.
How can I fix the Amdihk64.DLL not signed error?
1. Use a third-party DLL fixer tool
One of the easiest ways to get the DLL file and get rid of the error is to copy the DLL file (C:\Windows\System32\) from another computer with the same version of Windows. Then, paste it into the affected computer at the exact location.
However, if you are unsure about the file location or device you are using, we recommend using a third-party DLL fixer tool as it can help you restore the DLL file and fix the problem. To use it, download & install the app, then run it to recover DLL files on your device.
2. Clean install the AMD driver
 NOTE
NOTE
Uninstall existing driver
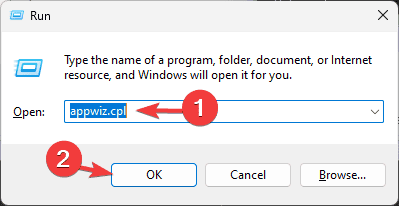
- Press Windows + R to open the Run window.
- Type appwiz.cpl and click OK to open the Programs and Features window.
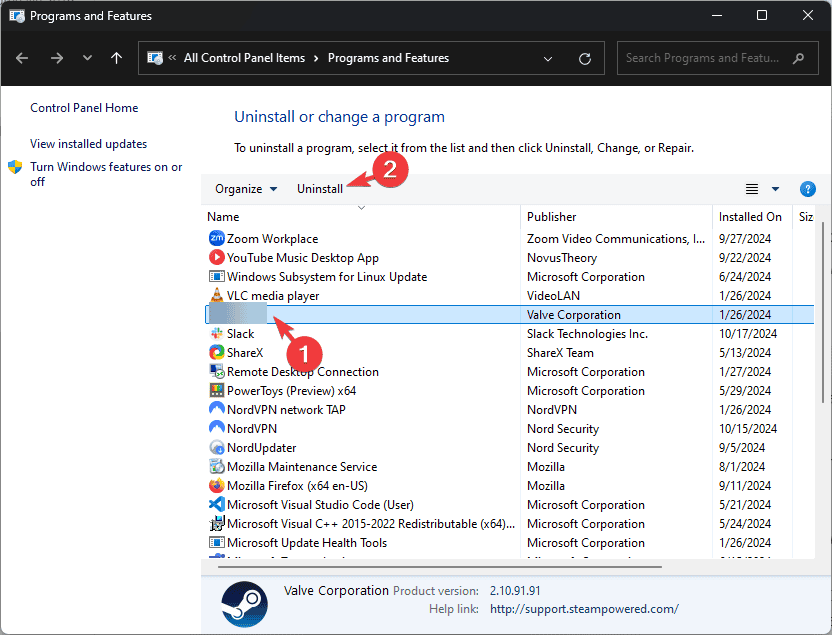
- Look for AMD software in the list of apps, select it, and click the Uninstall button at the top of the menu.
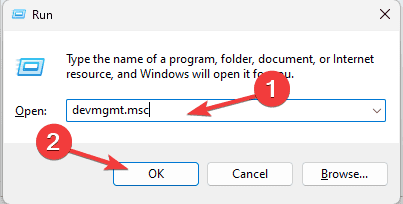
- Next, open the Run window again, type devmgmt.msc, and click OK to open the Device Manager app.
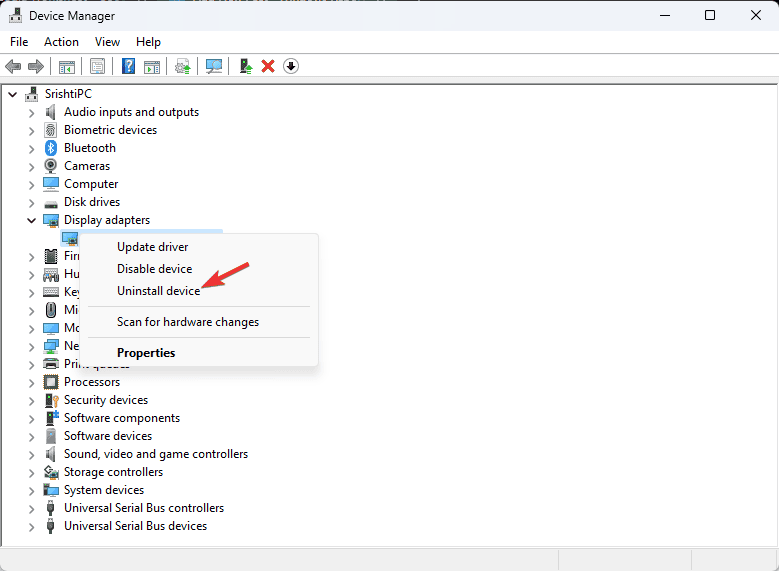
- Locate the Display adapters category, click it to expand, right-click the AMD driver, and select Uninstall device from the context menu.
- Click Uninstall again to confirm.
Download Radeon Software Adrenalin 2019 Edition 19.7.1 or later
- Visit the AMD Drivers and Support page.
- Enter the graphics card model and other details to access a page with drivers related to your selected model. Click Previous Drivers, then choose your Operating system.
- You will see the latest driver on the following page, then click Download.
- Once downloaded, double-click the .exe file to initiate the installation.
- Select Custom Install, then place a checkmark next to Perform a clean installation.
- Follow the on-screen prompts to complete the process.
- Once installed, right-click on the desktop and choose AMD Radeon Settings or Radeon Software. Then, go to the System tab to ensure the latest version is installed.
3. Reregister the DLL file
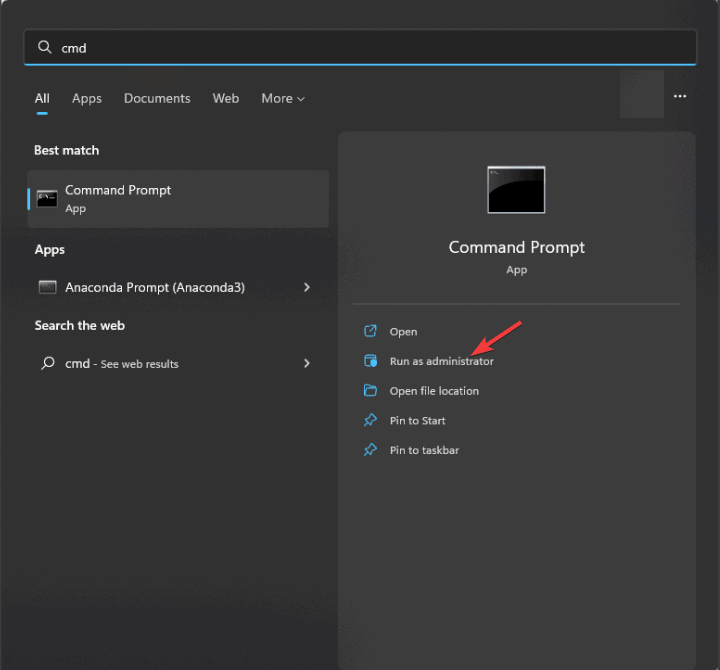
- Press the Windows key, type cmd in the search box, and click Run as administrator to open Command Prompt with admin rights.
- Copy & paste the following command to reregister the Amdihk64.dll and press Enter:
regsvr32 Amdihk64.dll - Click OK when prompted and reboot your computer.
If the DLL file is already in the system, you will still face the error; you can try registering it again, as this can refresh file registration within the Windows system and resolve the missing DLL file problem.
4. Run SFC & DISM scans
- Press the Windows key, type cmd in the search box, and click Run as administrator to launch Command Prompt with elevated rights.
- Click Yes on the UAC prompt.
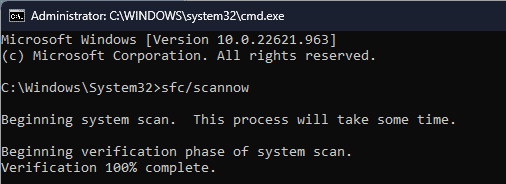
- Type the following command to restore/repair the Windows system files and hit Enter:
sfc/scannow - Wait for the scan to execute, copy & paste the following command to scan the Windows image for corruption and repair it using the Windows Update, and press Enter:
Dism /Online /Cleanup-Image /RestoreHealth - Once the scan is complete, restart your computer to let the changes take effect.
Read more about this topic
- Mfc120.dll is Missing in Windows: 7 Ways to Download the DLL
- How to Fix ERROR_WAIT_NO_CHILDREN 128 (0x80)
- Dism Host Servicing Process: 7 Ways to Reduce High CPU Usage
- Libgcc_s_dw2-1.dll Was Not Found: How to Get it Back
5. Perform a System Restore
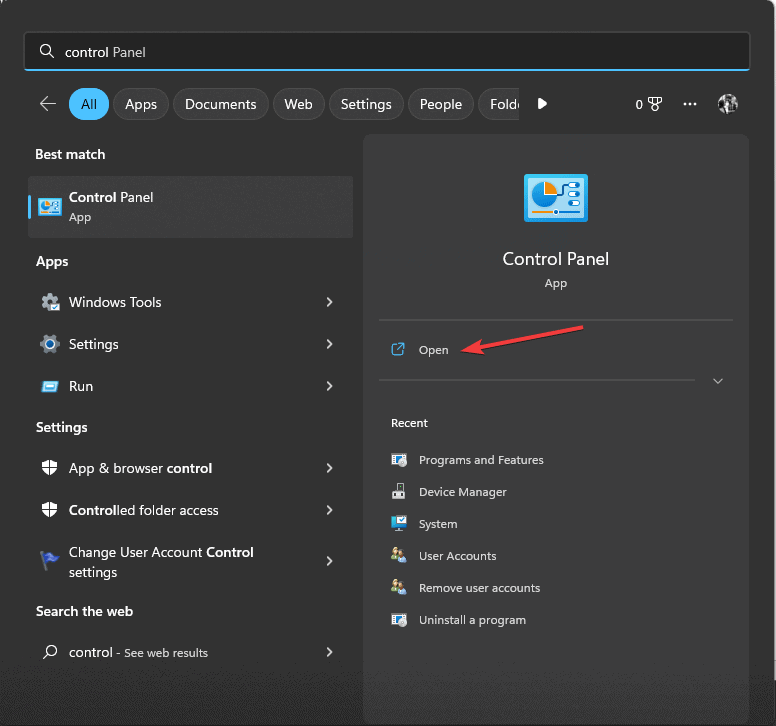
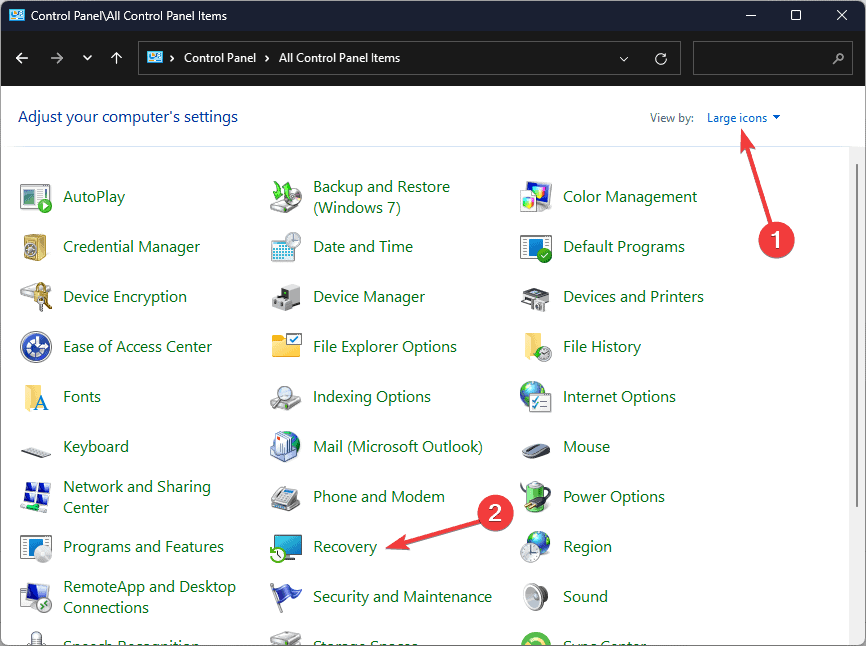
- Press the Windows key, type control panel in the search box, and click Open.
- Choose Large icons for View by and click Recovery.
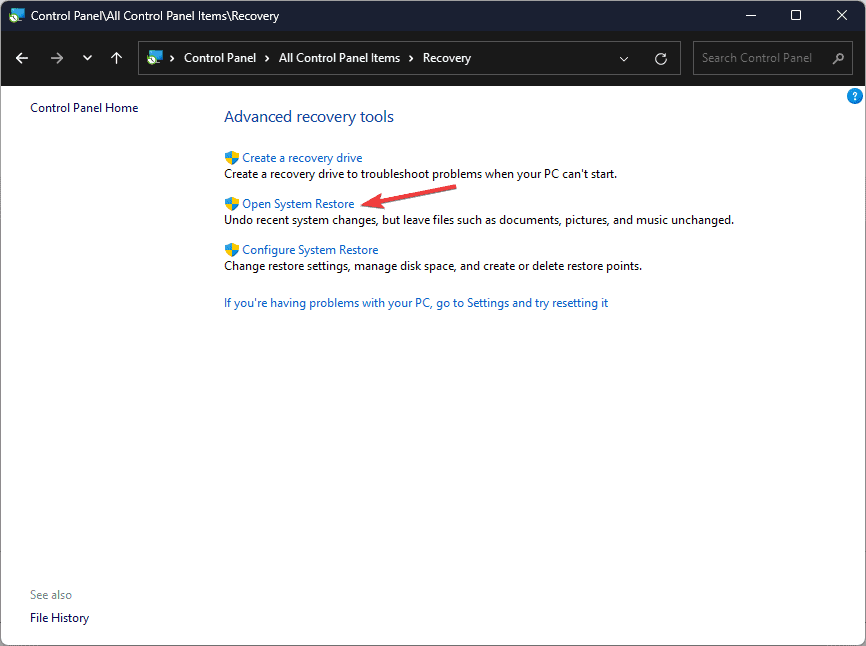
- Click the Open System Restore link.
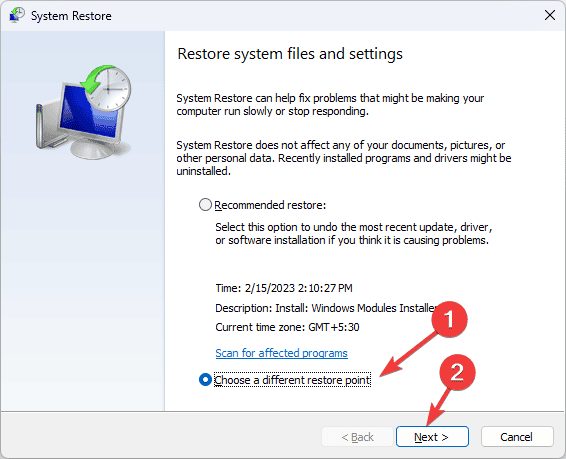
- Select Choose a different restore point on the System Restore window, then click Next.
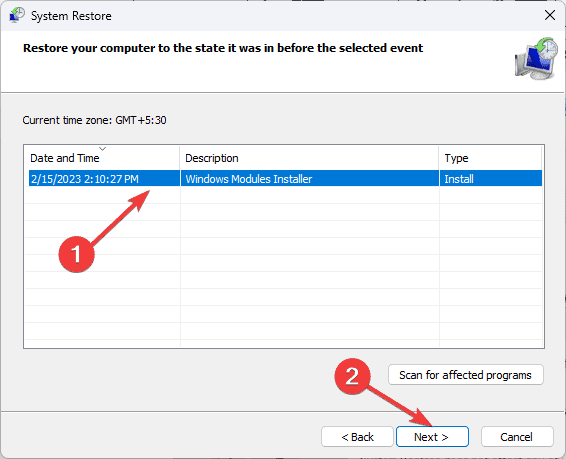
- From your computer’s list of available restore points, choose the restore point created before encountering the missing DLL error and click Next.
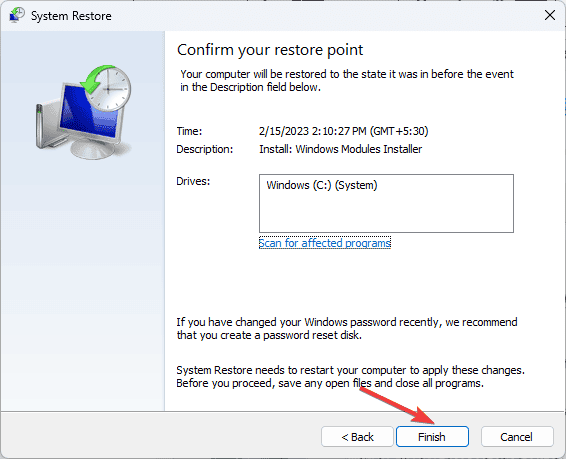
- Click Finish.
Your device will restart, and Windows will try restoring the system settings to the chosen version. If you see the System Restore didn’t complete the error successfully message, it could be due to conflicting programs or a driver error. We recommend you check out this detailed guide for solutions.
6. Download the DLL file from a third-party website
 NOTE
NOTE
- Click the DLL-FILES website to access the Amdihk64.DLL page, then click Download.
- Double-click the downloaded folder, then locate and copy the .dll file.
- Go to this path and paste the DLL file. Don’t forget to replace C with the system drive letter of your device if it is not C for you:
C:\Windows\System32\ - Reboot your computer to save the changes.
This is how you can fix the Amdihk64.DLL not signed error. However, if you face the same issue due to any other DLL file, this guide can help you quickly recover it.
If you want to learn more about the causes of missing DLL files on Windows, we have a separate guide. You can also fix a similar issue with the wowarmhw.dll missing error guide.
Before you go, don’t forget to check out our latest guide on what to do if IEShims.dll is missing from your computer. We also have a new guide on Gwrks64.dll, so don’t miss it to learn more about DLL files.
If you have any suggestions or questions about this DLL issue, feel free to mention them in the comments section below.


User forum
0 messages