HP Laserjet p1102w Not Printing: How to Fix it
Discover the solutions that worked for others!
![]() 4 min. read
4 min. read
![]() Updated on
Updated on
Share this article
Improve this guide
Read our disclosure page to find out how can you help Windows Report sustain the editorial team. Read more
Key notes
- When HP LaserJet p1102w is not printing, it's often the connection to blame.
- A quick fix involves restarting both the PC and the printer and reconnecting the cable.
- For many users, reinstalling the software from scratch did the trick!
If you use a USB connection from your laptop to the printer, one of the things to watch out for is if the cable is misconnected because the printer may not work or offer all the available features. This is often the reason HP LaserJet p1102w is not printing
The advantage of using the USB connection or cable is that it offers the ability to connect many different devices like printers, cameras, scanners, and drives with one common connection, besides being more reliable. But if things don’t work out, here’s how you can fix it!
What can I do if HP LaserJet p1102w is not printing?
Before we move to the slightly complex solutions, try these quick ones first:
- Ensure the cable is properly plugged in at both ends when using a wired connection. Also, look for any damages.
- Disconnect any non-critical peripherals from the PC.
- Check for any warning signs for the printer in the Device Manager. In case you find any, reinstall the driver.
- Head to the manufacturer’s website and manually install the driver.
If none work, head to the fixes listed next.
1. Perform a clean install
- Unplug the USB cable from the printer.
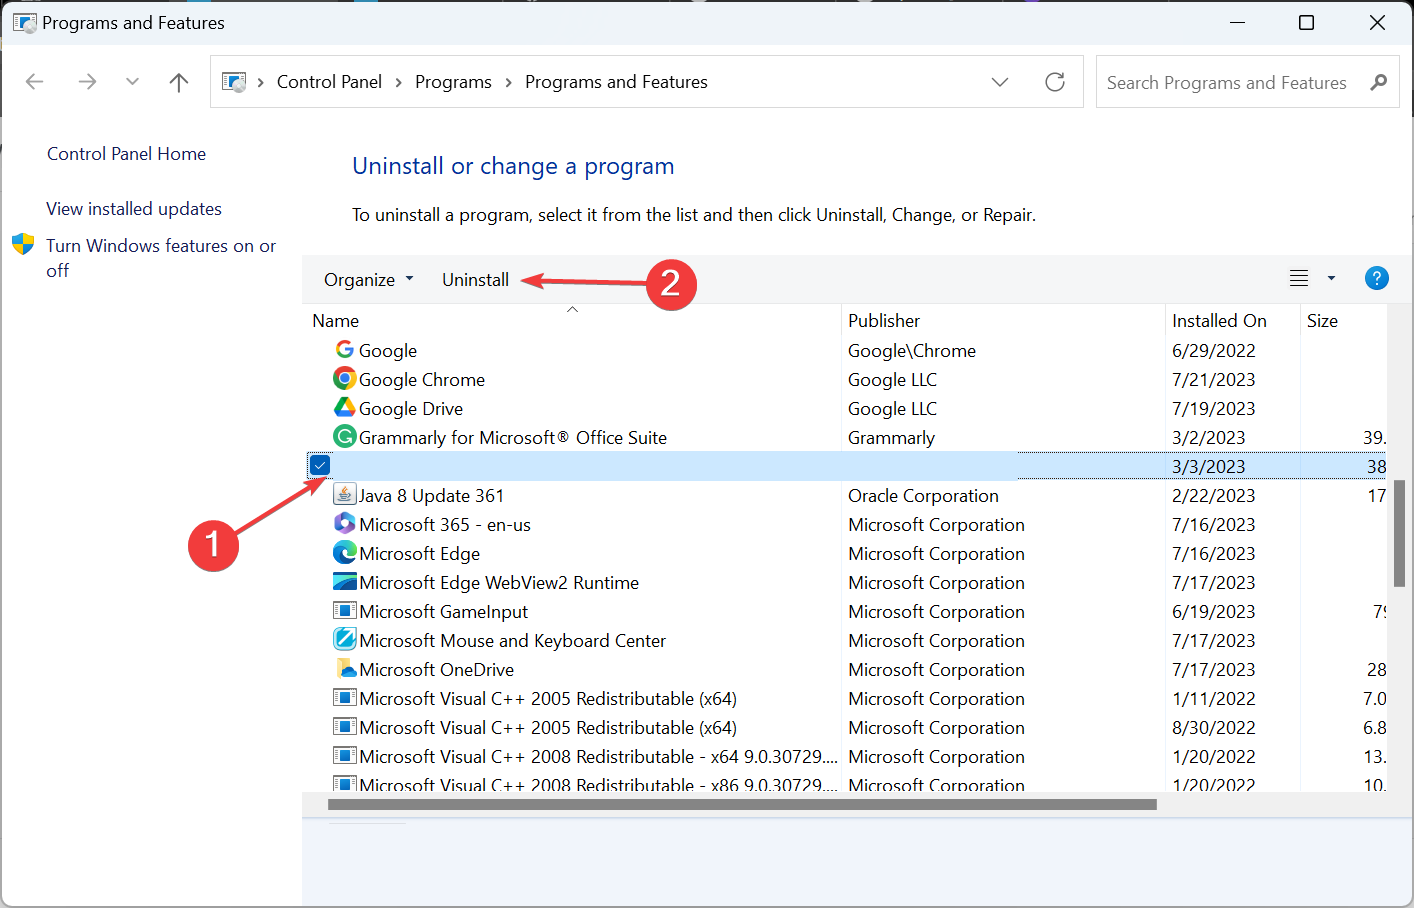
- Right-click the Start button, and select Programs and features.
- Select all the HP LaserJet printer entries individually and click Uninstall.

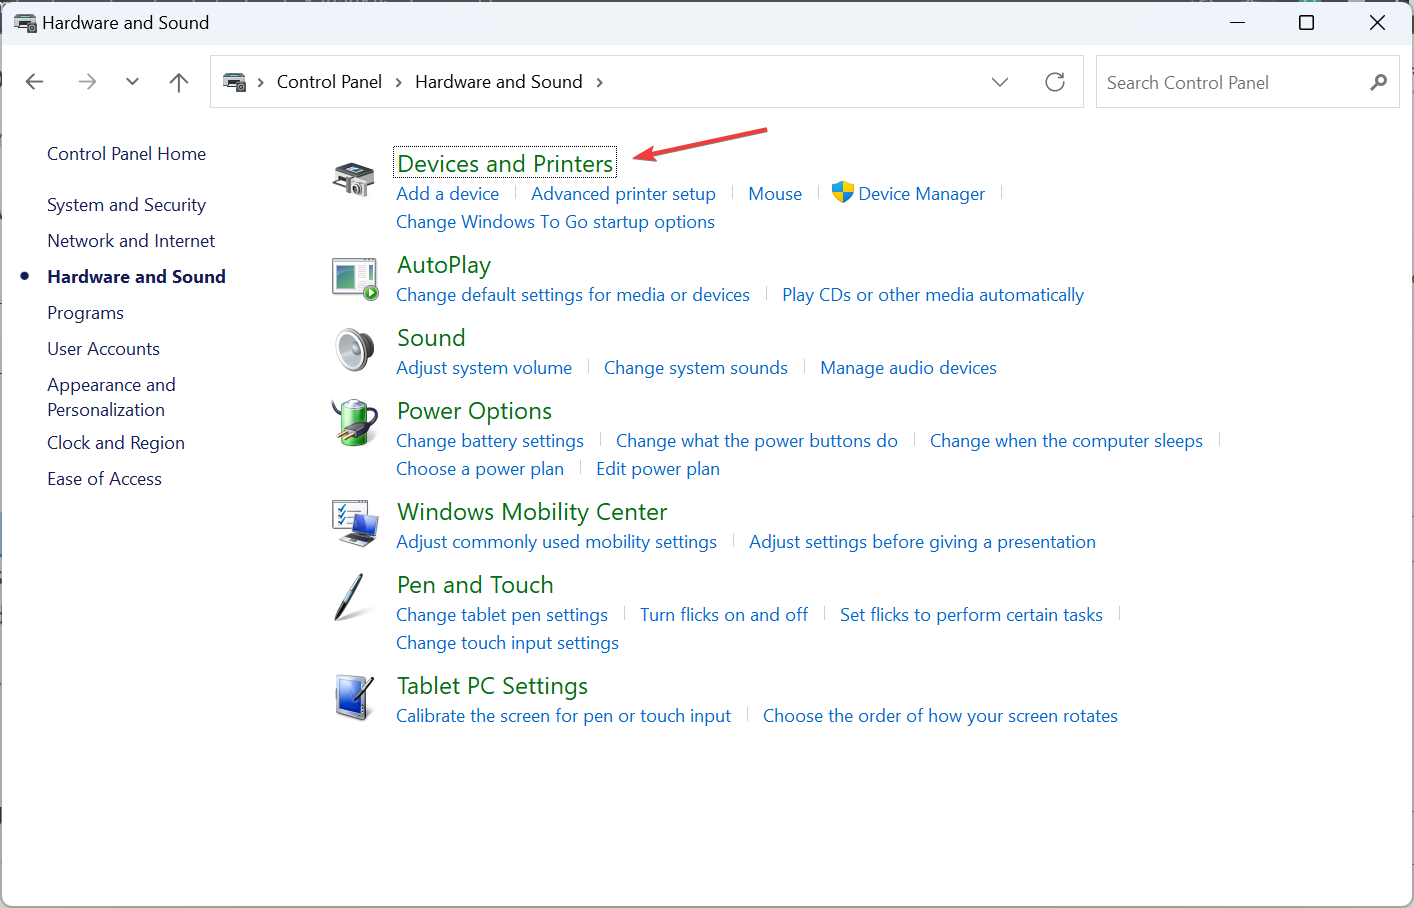
- Open the Control Panel, and click Hardware and Sound
- Select Devices and printers – select all the printer entries and remove the device.
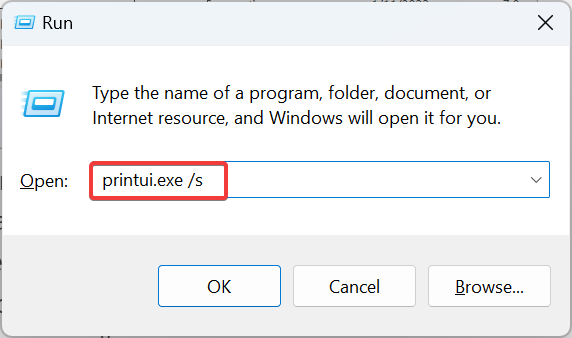
- Press Windows + R to open Run, type printui.exe /s, and hit Enter.

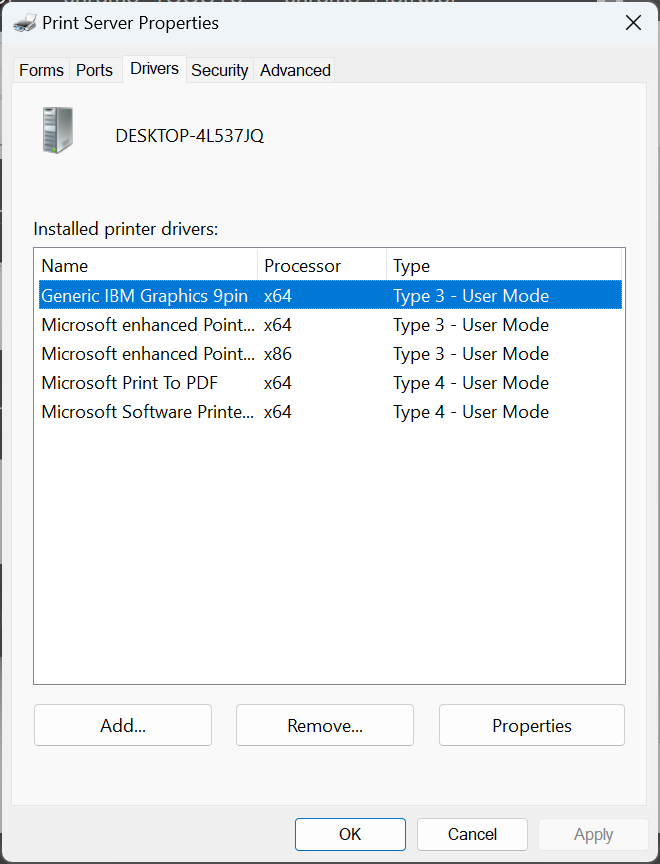
- In the Print Server Properties window, go to Drivers, and then remove any entry there as well.

- Press Windows + E to open File Explorer, and navigate the following path:
C:\ProgramData - Go to the Hewlett Packard folder, and remove any printer-related folders & files, then restart the computer.
- Finally, install the printer software from the CD or the official website, and reconnect the printer.
If the HP LaserJet p1102w is not printing on Mac or Windows, you need to perform a reinstall of the software.
2. Reset the printing system
- Launch the Control Panel and select Hardware and Sound.
- Select Devices and Printers.
- Click on Printers.
- Right-click on your printer in the list and select Reset printing system, then click OK to confirm.
- Give admin permissions where necessary and click OK to begin the system reset process.
- Click the + sign, select your printer, and click on Add.
This HP LaserJet p1102w not printing with USB issue could occur if the printer is not configured properly on the network. Try resetting the printing system, but beware that this will remove any existing print queue and reset customized driver settings.
3. Set the USB connection as the default printer
- Open the Control Panel, and click on Hardware and Sound.
- Click on Devices and Printers.
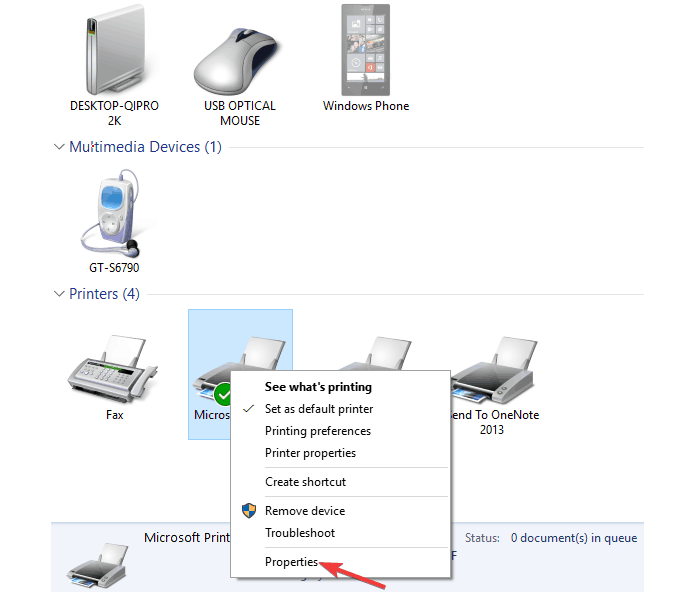
- Right-click the printer and select Properties.

- Select Ports. The port with the USB should be set as the default printer.
- Right-click the icon and select Set as default printer.
- Once done, restart the computer for the changes to apply.
Try and print a text document, not a Windows test page, and see the HP LaserJet p1102w is now printing properly when connected via USB on Windows 10.
4. Use HP Print and Scan Doctor
This is a free tool to diagnose and resolve printing and scanning issues on your HP LaserJet p1102w printer. You can download HP Print and Scan Doctor and run it to quickly and automatically perform several troubleshooting tasks.
You can use the HP Print and Scan Doctor to test the status of the printer spooler, print queue, device manager, and device conflicts.
5. Perform a system restore
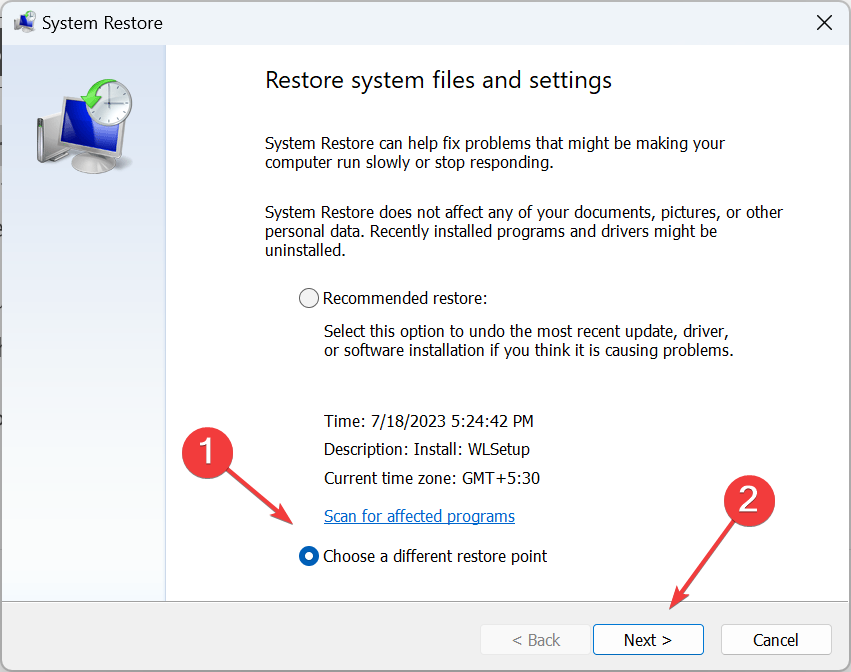
- Press Windows + R to open Run, type rstrui.exe, and hit click OK.
- Select Choose a different restore point, and click Next.

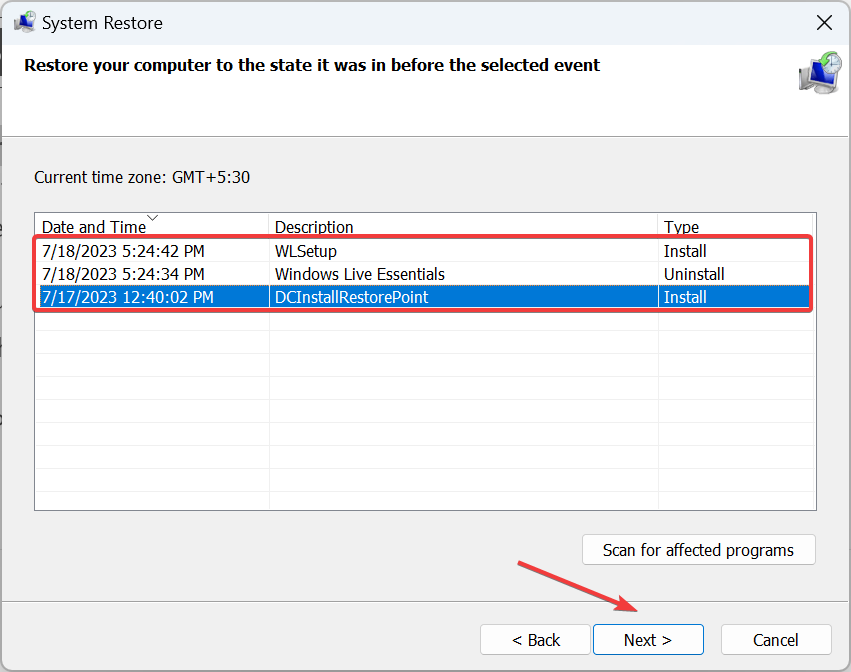
- Pick another restore point from the list and click Next.
- Click on Finish to start the process.
If the USB device had worked previously and then became unworkable, try using System Restore to revert to a time before when the USB device failed. And this should fix things when HP LaserJet p1102w is not printing.
Before you leave, discover the best printer management software and get one today for seamless task execution and operations.
Did any of these solutions help? Let us know by leaving a comment in the section below.


User forum
0 messages