Icons Overlapping on Windows 11: How to Fix It in 8 Steps
You can use the Search and Index troubleshooter to fix it
4 min. read
Updated on
Read our disclosure page to find out how can you help Windows Report sustain the editorial team. Read more
Key notes
- The issue could occur if you change your screen resolution or third-party software interference.
- This guide will cover all the available solutions to fix the issue.
You are not alone if you see the icons overlapping on your Windows 11 desktop. Unfortunately, this makes accessing the files and shortcuts difficult, which is frustrating.
This guide will discuss all available solutions to fix the issue and ensure your desktop icons are organized.
What causes the icons to overlap on Windows 11?
There could be several reasons for icons to overlap; some of the common ones are mentioned here:
- Screen resolution – If you have changed the screen resolution, it can cause the icons to overlap. You need to check the screen resolution to fix it.
- Different resolutions on monitors – If you use multiple monitors with different resolutions, you can face this overlapping icon problem.
- Third-party software – If any third-party software is interfering with the display of icons, you may face this issue.
What can I do to fix the icons overlapping issue on Windows 11?
Before moving to the troubleshooting steps, make sure you go through the preliminary checks:
- Uninstall any newly installed third-party software.
- Restart your computer.
1. Display Snap
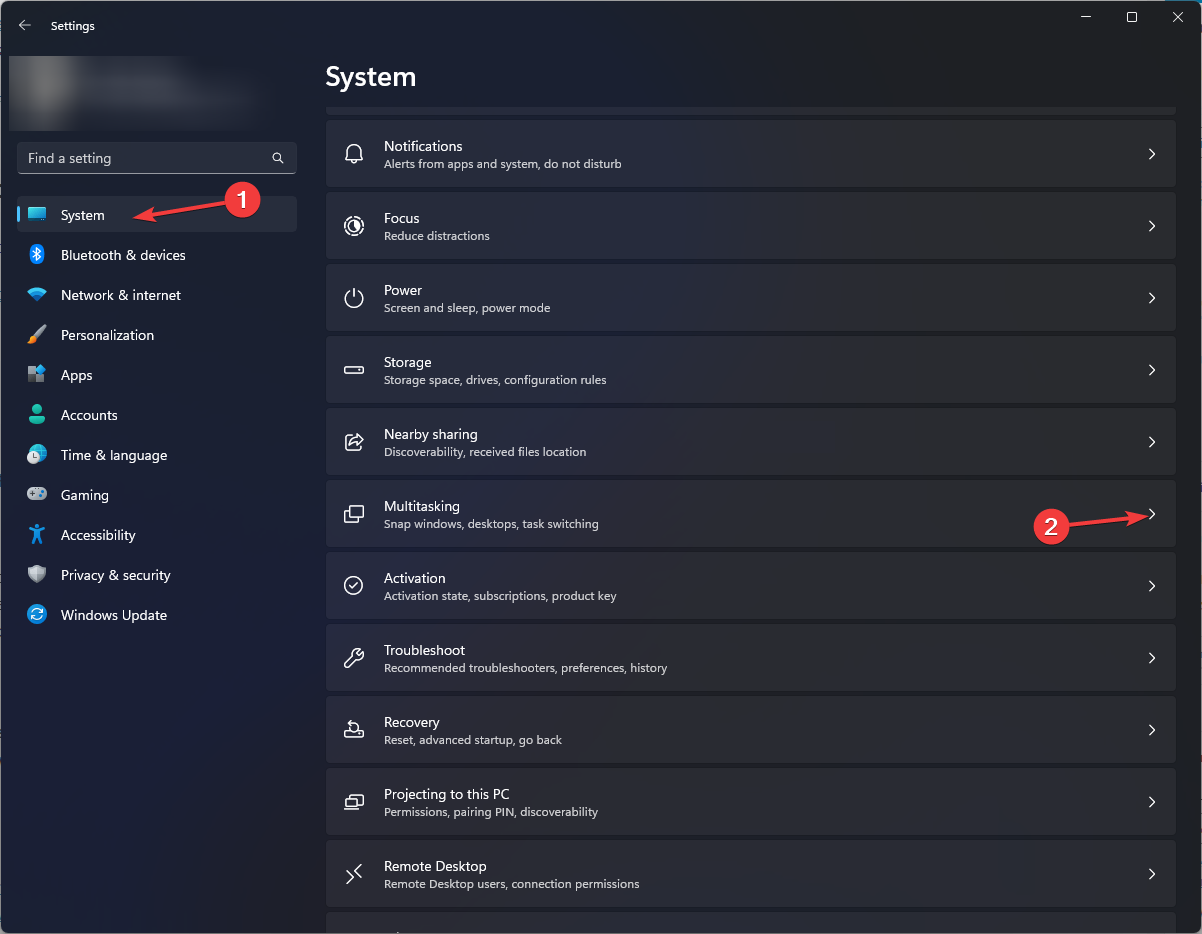
- Press Windows + I to open Settings.
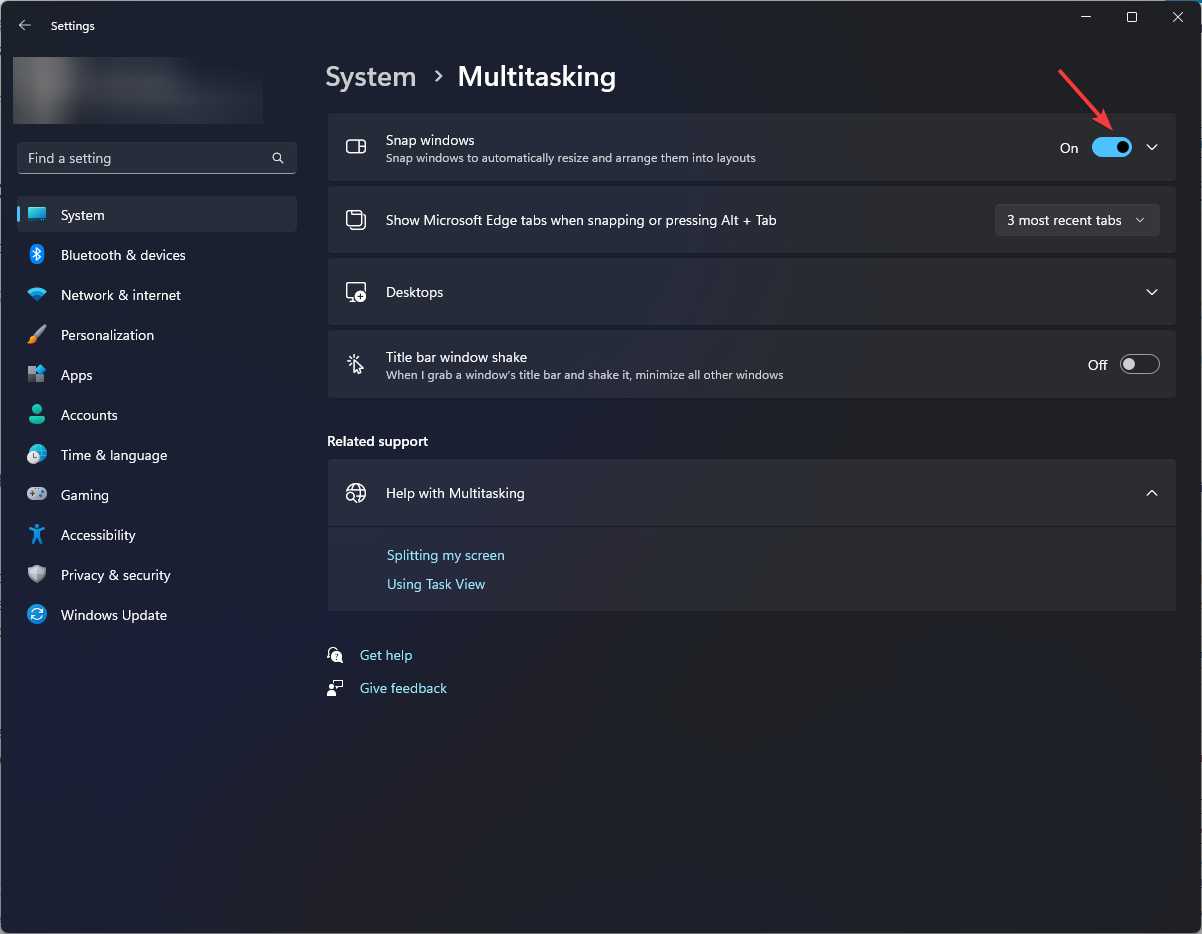
- Go to System, then click Multitasking.
- Locate and toggle Off the switch under Snap.
2. Change the icon size
- Right-click on the empty space on the desktop and select View.
- Select Large icons or Medium icons to increase the size of icons.
- If the icons still overlap, select Small icons to reduce their size.
3. Use the Registry Editor
3.1 Change the desktop icon’s horizontal spacing
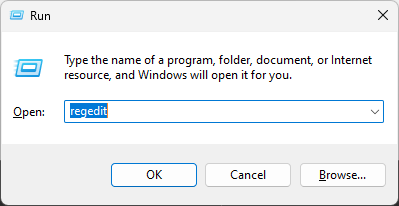
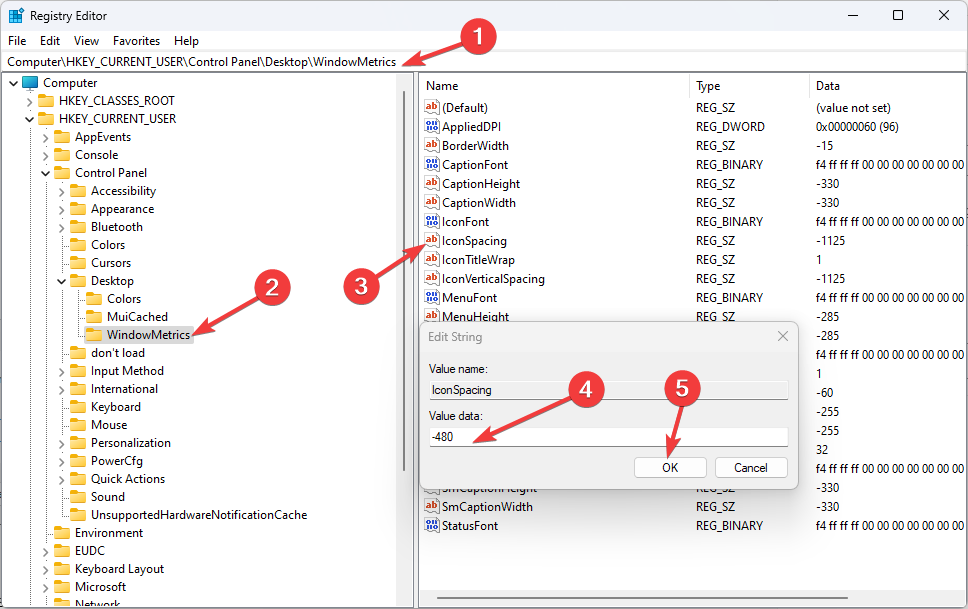
- Press the Windows + R to open the Run window.
- Type Regedit and click OK to open Registry Editor.
- Click Yes on the UAC prompt.
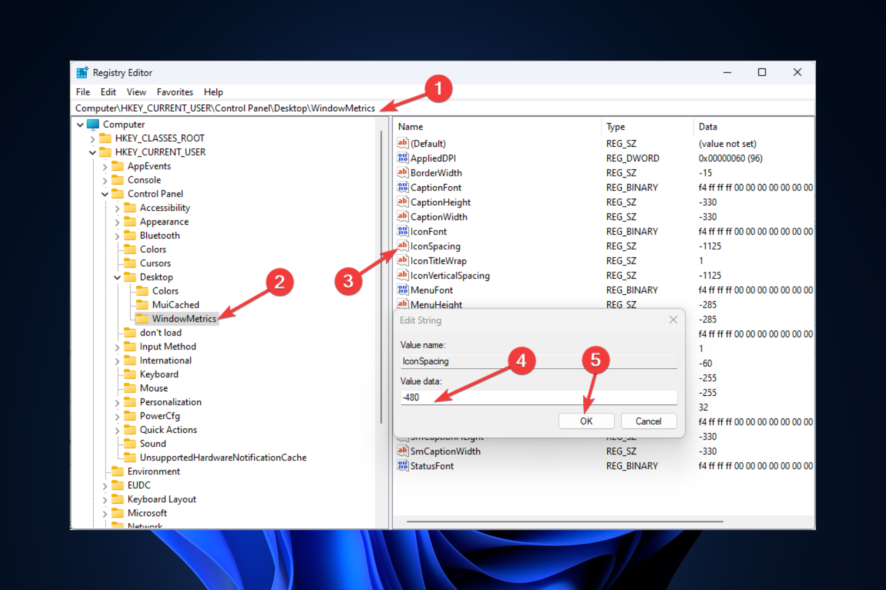
- Follow this path:
Computer\HKEY_CURRENT_USER\Control Panel\Desktop\WindowMetrics - Double-click IconSpacing to modify it. Type the value between -480 to -2730 and click OK.
3.2 Change the desktop icon’s vertical spacing
- Press the Windows + R to open the Run console.
- Type Regedit and hit Enter OK to open Registry Editor.
- Click Yes on the UAC prompt.
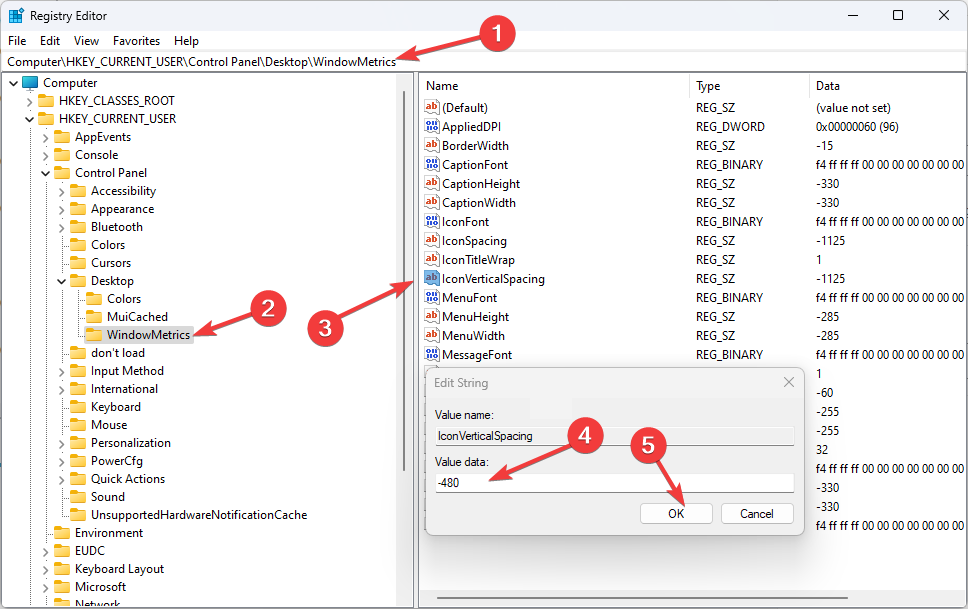
- Follow this path:
Computer\HKEY_CURRENT_USER\Control Panel\Desktop\WindowMetrics - Double-click on IconVerticalSpacing to modify, change the value between -480 to -2730, and click OK.
- Close Registry Editor and restart your computer. You might have to repeat the steps a few times until you see the desktop icons you like them.
4. Restart the Windows Explorer
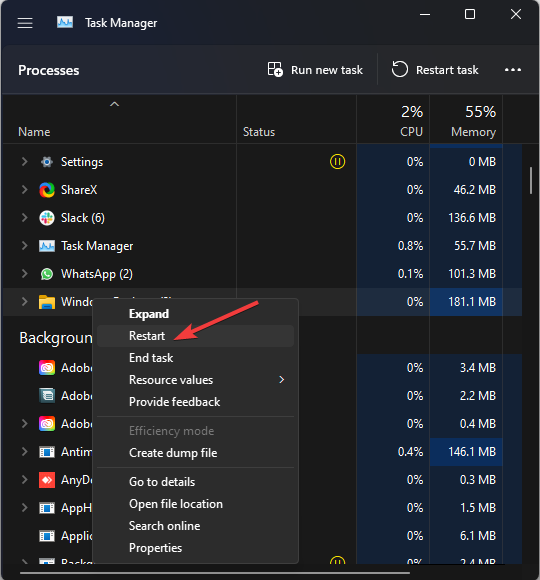
- Press Ctrl + Shift + Esc to open the Task Manager.
- Now go to the Processes tab, locate Windows Explorer, and right-click on it.
- Select Restart.
5. Run the troubleshooter
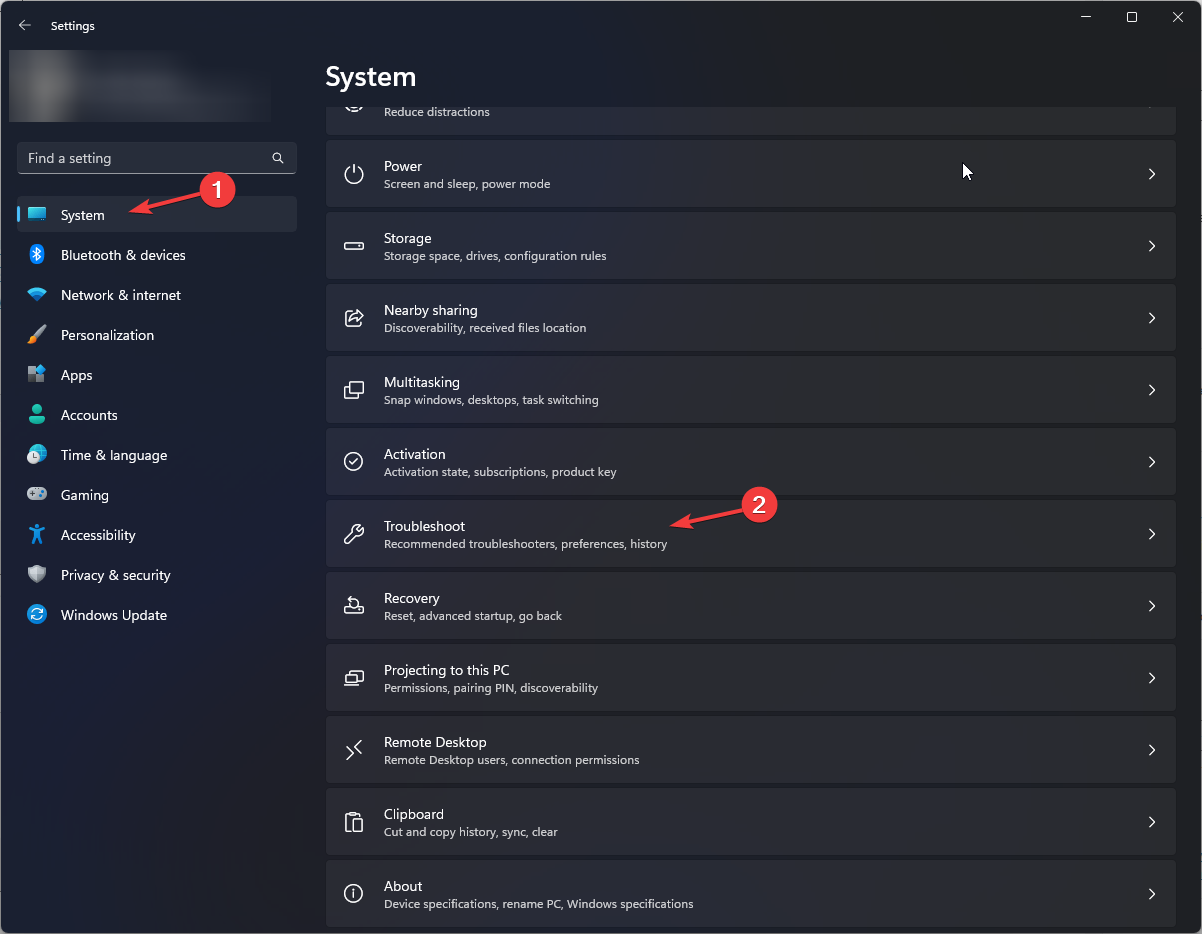
- Press Windows + I to open Settings.
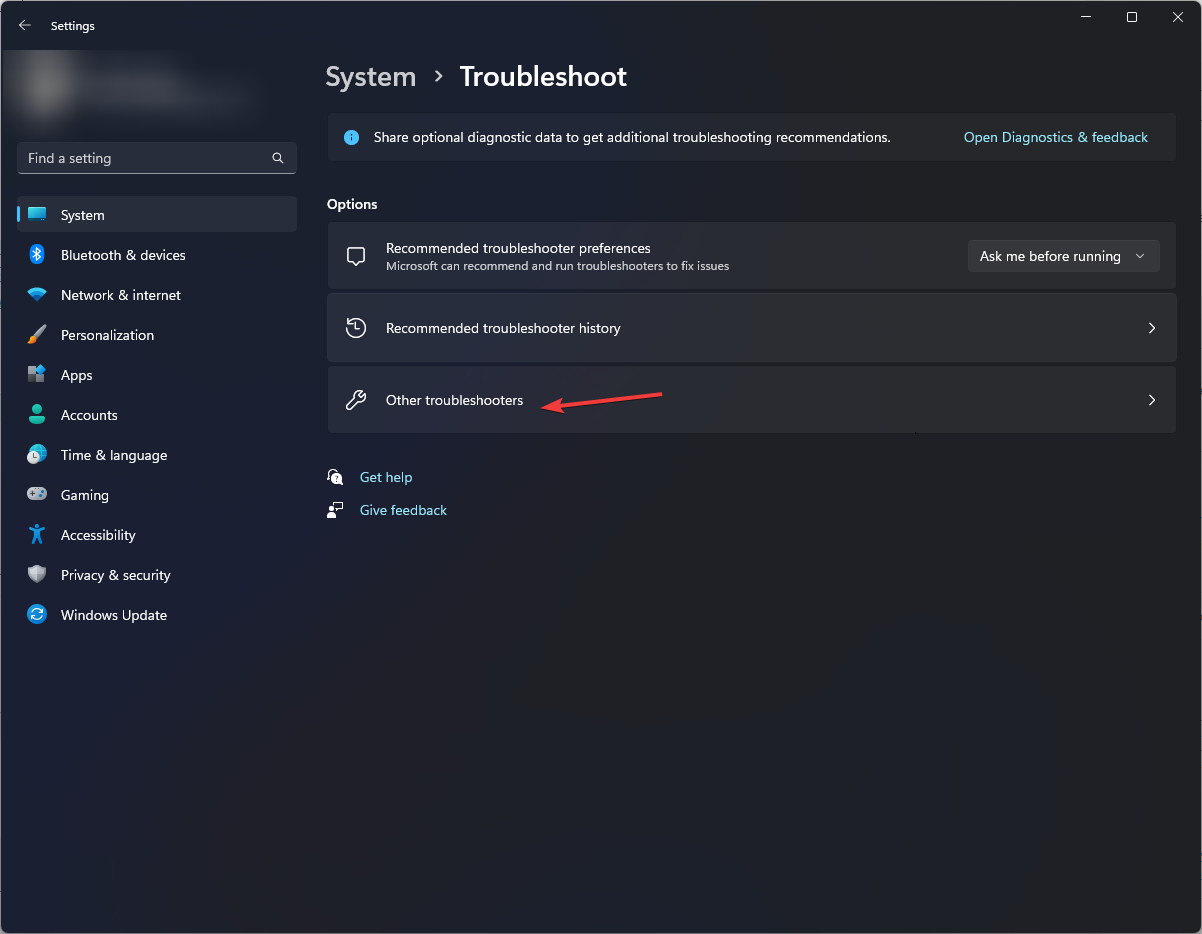
- Go to System, and click Troubleshoot.
- Now click Other troubleshooters.
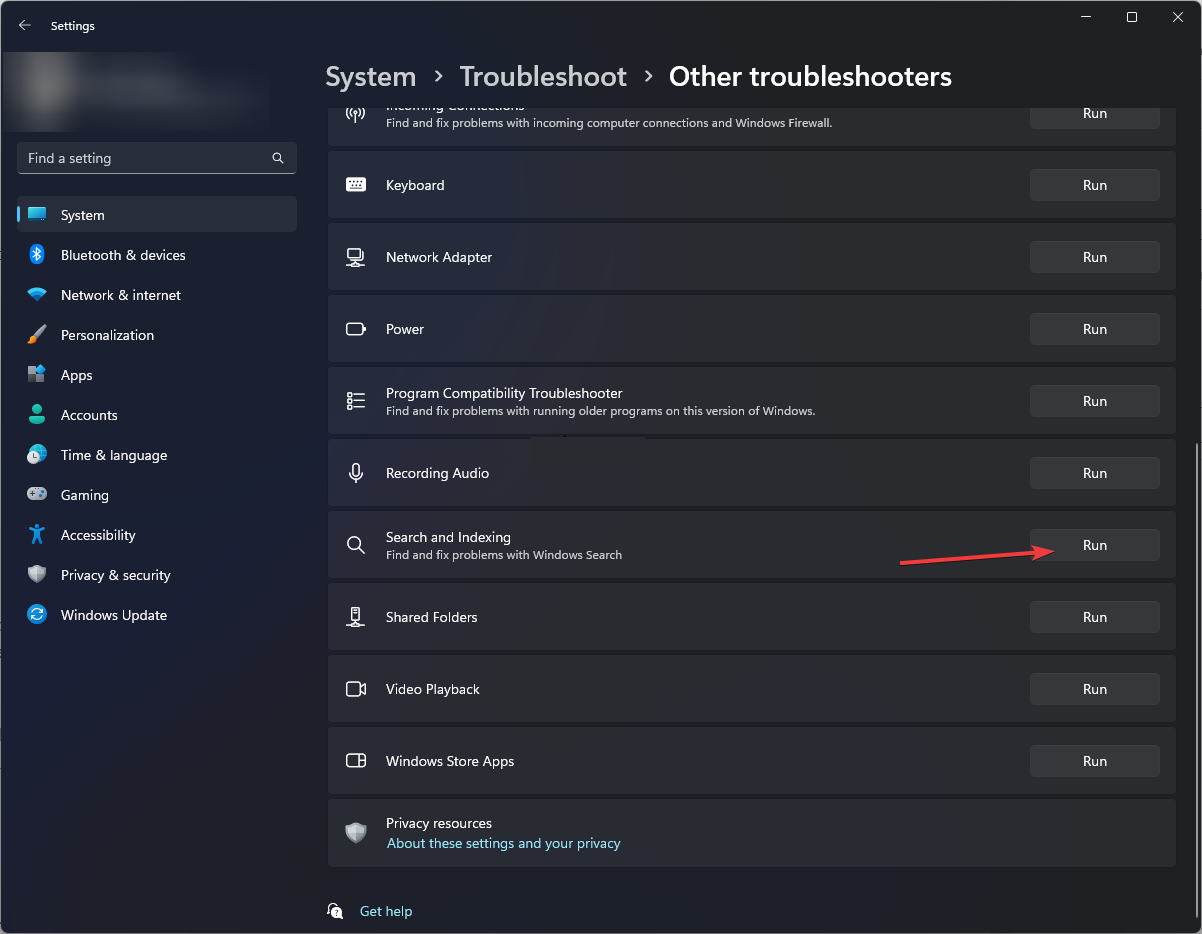
- Scroll the list and look for Search and Indexing troubleshooter.
- Click Run and follow the onscreen prompts to complete the process.
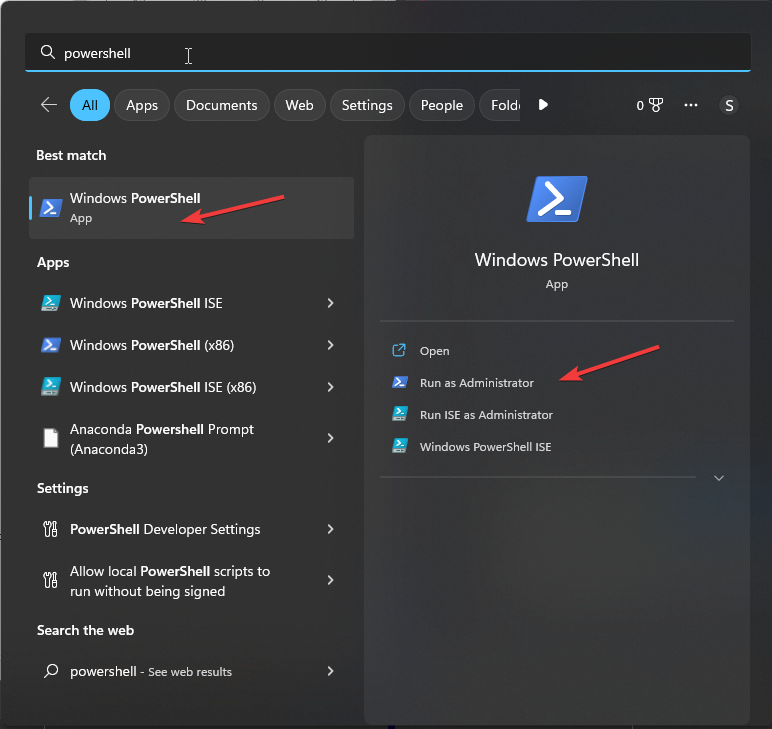
- Once the process is complete, press the Windows key, type PowerShell and click Run as administrator.
- Copy and paste the following command and press Enter:
Get-AppxPackage Microsoft.Windows.ShellExperienceHost | Foreach {Add-AppxPackage -DisableDevelopmentMode -Register "$($_.InstallLocation)\AppXManifest.xml"} - Restart your computer.
6. Enable align icons to the grid
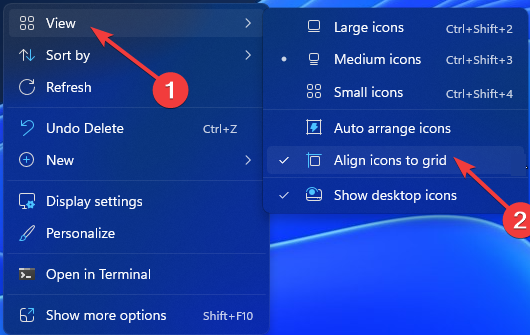
- Right-click on the empty space on your desktop.
- Select View and click Align icons to the grid to turn it on or off.
7. Restore your PC using System Restore Point
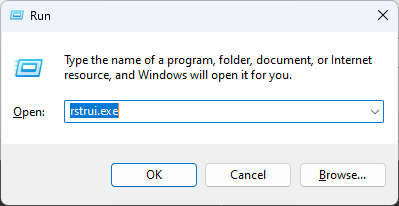
- Press Windows + R to open the Run window.
- Type rstrui.exe and press Enter to open the System Restore window.
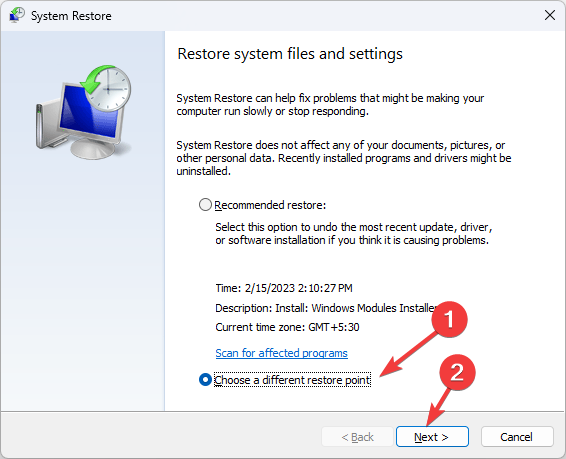
- On the System Restore window, click the radio button beside Choose the different restore point and click Next.
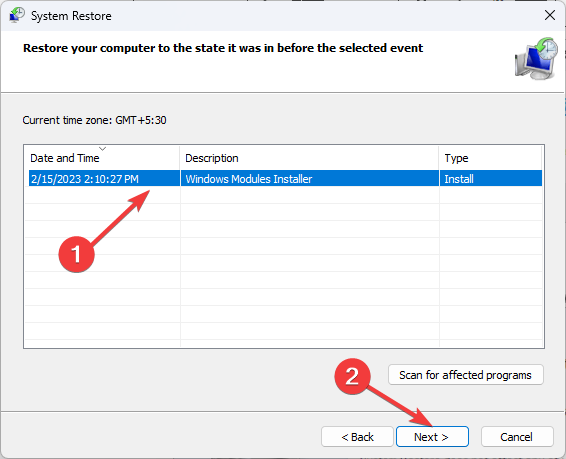
- Choose the restore point and click Next.
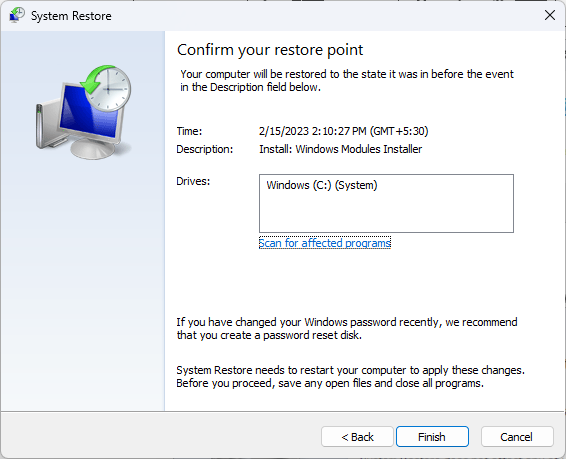
- Now on the next screen, click Finish. Your Windows will now restore to the preferred point.
8. Use a third-party tool
The Desktop Icon Spacing is a lightweight application that will help you with icon spacing on your Windows 11 computer. The best part about the Desktop Icon Spacing tool is that it is free and does not require any activation.
- Download the Desktop Icon Spacing tool.
- Launch the tool. You will see two sliders, i.e., Horizontal and Vertical.
- To adjust, move the sliders for any of the two as per the icon spacing you need.
- Place a checkmark next to All data saved, and All other windows closed options.
- Select Apply. The File Explorer will restart automatically, and you can see the changes made.
So, these are the steps you need to follow to fix icons overlapping on Windows 11. Try them and let us know what worked in the comments section below.

User forum
0 messages